Advertisement
Quick Links
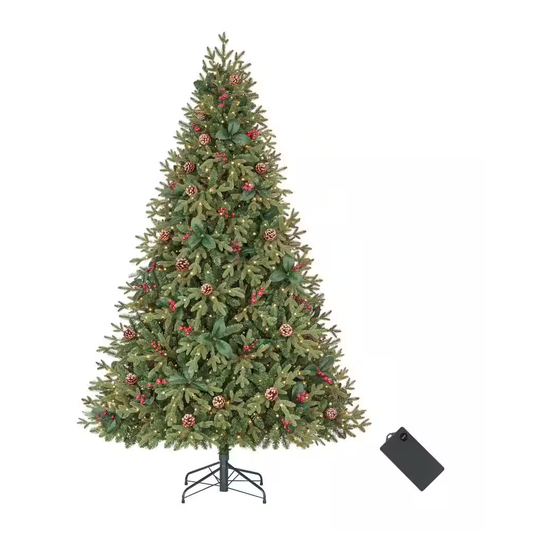
HARDWARE INCLUDED
Tree stand
Safety Information
IMPORTANT SAFETY INSTRUCTIONS
When using electrical products, basic precautions should always be followed, including the following:
READ AND FOLLOW ALL SAFETY INSTRUCTIONS
1. Do not use seasonal products outdoors unless marked suitable for indoor and outdoor use. When products are used in outdoor applications, connect
the product to a Ground Fault Circuit Interrupting (GFCI) outlet. If one is not provided, contact a quali ed electrician for proper installation.
2. This seasonal product is not intended for permanent installation or use.
3. Do not mount or place the product near gas or electric heaters, replaces, candles, or other similar sources of heat.
4. Do not secure the wiring of the product with staples or nails, or place on sharp hooks or nails.
5. Do not let lamps rest on the supply cord or on any wire.
6. Unplug the product when leaving the house, when retiring for the night, or if left unattended.
7. This is an electric product and not a toy! To avoid risk of re, burns, personal injury and electric shock it should not be played with or placed where
small children can reach it.
8. Do not use this product for other than its intended use.
9. Do not hang ornaments or other objects from cord, wire, or light string.
10. Do not close doors or windows on the product or extensions cords as this may damage the wire insulation.
11. Do not cover the product with cloth, paper, or any material that is not a part of the product when in use.
12. The lamps of this product are not replaceable. Do not attempt to change or modify the lamps.
13. Read and follow all instructions that are on the product or provide with the product.
SAVE THESE INSTRUCTIONS
Installation & Operation
1
ASSEMBLING THE TREE STAND
Step 1. Choose a location near a wall outlet.
Step 2. Pull apart the legs of the stand so that they are snapped into an
X-shape, place the tree stand on a level surface.
Step 3. To close the stand, press the metal button and fold the legs together.
2
ASSEMBLING THE TREE
This tree comes with Quick Set
Step 1. Remove the protective caps from the tree bottom and insert the pole into the tree stand.
Note: Do not step on the tree stand legs during the setup.
This may deform the tree stand and may result in an unbalanced tree.
Step 2. Continue by inserting the upper tree section(s) to the lower section(s) until inserting the
tree top.
Step 3. Shape the branches to your preference by working from the bottom to the top. When
adjusting the branches, ensure that no wires are tangled around them.
Step 4. Shape the tree from the bottom to the top. Start with the branches farthest from the
pole – fan out in a star shape, and continue until the entire tree is shaped.
Top view
Step 5. When nished shaping the branches, slightly upsweep all branch tips for a uniform look.
Use and Care Guide
Christmas Tree
Tree base
Tree center
(label 1)
(labels 2)
feature --- Set up and light up your tree in minutes!
®
Side view
Tree top
Remote Control
Please contact 1-855-HD-HOLIDAY (1-855-434-6543) for further assistance.
Item #1011184420
Model #24PG90132
2
1
HOMEDEPOT.COM
Advertisement

Subscribe to Our Youtube Channel
Related Manuals for Home Accents Holiday 24PG90132


Summary of Contents for Home Accents Holiday 24PG90132
- Page 1 Use and Care Guide Item #1011184420 Christmas Tree Model #24PG90132 HARDWARE INCLUDED Tree base Tree center Tree stand (label 1) (labels 2) Tree top Remote Control Safety Information IMPORTANT SAFETY INSTRUCTIONS When using electrical products, basic precautions should always be followed, including the following: READ AND FOLLOW ALL SAFETY INSTRUCTIONS 1.
- Page 2 TURNING ON THE TREE Step 1. Connect the light strings of the tree together and plug the adapter into a wall outlet. Step 2. Check for loose connection between light string plugs and the power cord. Step 3. lf the tree comes with a foot pedal, step on the On/0ff button. NOTE: If some bulbs do not light up or icker, search for any loose plugs.
- Page 3 Contact the Customer Service Team at 1-855-HDHOLIDAY (1-855-434-6543) or visit www.HomeDepot.com. Questions, problems, missing parts? Before returning to the store, call [HOME ACCENTS HOLIDAY] Customer Service 8 a.m. - 7 p.m., EST, Monday - Friday, 9 a.m. - 6 p.m., EST, Saturday HOMEDEPOT.COM...
- Page 4 FCC Notices: WARNING: Changes or modi cations to this unit not expressly approved by the party responsible for compliance could void the users authority to operate the equipment. NOTE: This equipment has been tested and found to comply with the limits for a Class B digital device, pursuant to Part 15 of the FCC Rules. These limits are designed to provide reasonable protection against harmful interference in a residential installation.
Need help?
Do you have a question about the 24PG90132 and is the answer not in the manual?
Questions and answers