Table of Contents
Advertisement
Available languages
Available languages
Quick Links
Advertisement
Table of Contents

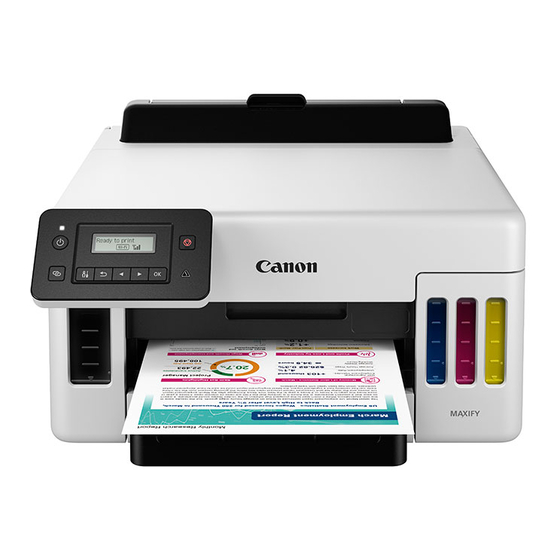
Related Manuals for Canon MAXIFY GX5010


Summary of Contents for Canon MAXIFY GX5010
- Page 1 Getting Started Guía de inicio Para Começar Read Safety and Important Information (addendum) first. Lea primero Información de seguridad e información importante (apéndice). Leia Informações Importantes e Sobre Segurança (adendo) primeiro.
- Page 2 Installing the Printer ........................page 1 Instalación de la impresora ....................página 1 Instalando a impressora ...................... página 1 Connecting to a Computer, Smartphone or Tablet ..........page 6 Conexión con un ordenador, teléfono inteligente o tableta ....... página 6 Conectando a um computador, smartphone ou tablet .........
-
Page 3: Setting Up The Printer
Setting Up the Printer For Setup, visit the URL https://ij.start.canon or scan the code with your mobile device • Follow the instructions below if you do not have an internet connection. 1. Box Contents Close the top cover. • If you lift the top cover slightly and release it, it will •... - Page 4 Setting Up the Printer Open the ink tank cover and tank cap on the left When the following screen appears, use the [ of the printer. and ] buttons to select a language, and then press the OK button. Important If an error appears on the screen, see "If an error message (support code) appears on the screen"...
- Page 5 Slowly stand the ink bottle upside down and Close the ink tank cover securely. push down to pour the ink. • If the ink does not pour, gently remove the ink bottle and try again. Repeat steps 2 through 8 to pour all ink into the corresponding ink tanks on the right.
- Page 6 Setting Up the Printer 5. Loading Paper Load Letter or A4 sized plain paper. • Place the paper against the front paper guide, and align the right paper guide to the width of the paper. Use the [ and ] buttons to select Yes, and then press the OK button.
- Page 7 Follow the on-screen instructions, and then press the OK button. • The alignment process prints out one double sided sheet. Wait without touching the paper until the screen in step 8 appears. Follow the on-screen instructions, and then press the OK button. If an error message (support code) appears on the screen Support code...
-
Page 8: Connecting To A Computer
Smartphone smartphone Connecting to a Computer If you are using multiple computers, perform these steps on each computer. Click Start, and then select Access the Canon website from your Connecting to a Computer/ computer. Smartphone. • The following steps are for Windows users. -
Page 9: Connecting To A Smartphone
If you are using multiple smartphones, perform these steps on each smartphone. Install the "Canon PRINT Inkjet/SELPHY" app on your smartphone. • Search for "Canon PRINT" in App Store, or Google Play. • Access the Canon website to download the app. -
Page 10: Loading Paper
Loading Paper Open the rear tray cover and extend the paper Slide the right-hand side paper guide to the far support. right. Load several sheets of paper with the print side facing up and slide the side paper guide against the edge of the paper stack. -
Page 11: Instalación De La Impresora
Instalación de la impresora Para la configuración, visite la URL https://ij.start.canon o bien escanee el código con su dispositivo móvil • Siga las instrucciones que se proporcionan a continuación si no tiene conexión a Internet. 1. Contenido de la caja Cierre la cubierta superior. - Page 12 Instalación de la impresora Si aparece la siguiente pantalla, use los botones Abra la cubierta del depósito de tinta y la tapa [ y ] para seleccionar el idioma y pulse el del depósito a la izquierda de la impresora. botón OK.
- Page 13 Coloque lentamente el frasco de tinta boca Cierre la cubierta del depósito de tinta abajo y empuje hacia abajo para verter la tinta. firmemente. • Si la tinta no se vierte, retire suavemente el frasco de tinta e inténtelo de nuevo. Repita los pasos del 2 al 8 para verter toda la tinta en los depósitos de tinta correspondientes de la derecha.
- Page 14 Instalación de la impresora 5. Carga del papel Cargue papel Carta o papel normal de tamaño A4. • Coloque el papel delante de la guía del papel frontal y alinee la guía del papel derecha con el ancho del papel. Use los botones [ y ] para seleccionar Sí...
- Page 15 Siga las instrucciones en pantalla y luego pulse el botón OK. • El proceso de alineación imprime una hoja de doble cara. Espere sin tocar el papel hasta que aparezca la pantalla del paso 8. Siga las instrucciones en pantalla y luego pulse el botón OK.
- Page 16 Teléfono inteligente teléfono inteligente Conectar al ordenador Si utiliza varios ordenadores, realice estos pasos en cada ordenador. Haga clic en Iniciar y, a continuación, Acceda al sitio web de Canon desde el seleccione Conexión con un ordenador. ordenador/teléfono inteligente. •...
- Page 17 6-b. Conexión con un teléfono inteligente Conexión con un teléfono inteligente Si utiliza varios teléfonos inteligentes, realice estos pasos en cada teléfono inteligente. Instale la aplicación "Canon PRINT Inkjet/SELPHY" en su teléfono inteligente. • Busque "Canon PRINT" en App Store o Google Play.
-
Page 18: Carga De Papel
Carga de papel Abra la cubierta de la bandeja posterior Deslice la guía del papel del lado derecho y extienda el soporte del papel. totalmente hacia la derecha. Cargue varias hojas de papel con la cara de impresión hacia arriba y deslice la guía del papel lateral contra el borde de las hojas de papel. -
Page 19: Configurando A Impressora
Configurando a impressora Para configurar, visite a URL https://ij.start.canon ou digitalize o código com seu dispositivo celular • Siga as instruções abaixo se você não tiver uma conexão com a internet. 1. Conteúdo da caixa Feche a tampa superior. •... - Page 20 Configurando a impressora Quando a tela a seguir for exibida, use os Abra a tampa do cartucho de tinta e a tampa do botões [ e ] para selecionar um idioma e, cartucho à esquerda da impressora. em seguida, pressione o botão OK. Importante Se um erro aparecer na tela, consulte "Se uma mensagem de erro aparecer (código de suporte) na tela"...
- Page 21 Levante lentamente a garrafa de tinta de cabeça Feche a tampa do cartucho de tinta com firmeza. para baixo e empurre para baixo para despejar a tinta. • Se a tinta não for despejada, remova lentamente a garrafa de tinta e tente novamente. Repita as etapas de 2 a 8 para colocar toda a tinta nos cartuchos de tinta correspondentes à...
- Page 22 Configurando a impressora 5. Colocando papel Coloque papel comum A4 ou Letter. • Coloque o papel na guia do papel frontal e alinhe a guia do papel direita com a largura do papel. Use os botões [ e ] para selecionar Sim (Yes) e pressione o botão OK.
- Page 23 Siga as instruções na tela e pressione o botão OK. • O processo de alinhamento imprime uma folha frente e verso. Aguarde sem tocar no papel até que a tela na etapa 8 seja exibida. Siga as instruções na tela e pressione o botão OK. Se uma mensagem de erro aparecer (código de suporte) na tela Prossiga para a página seguinte.
-
Page 24: Conectando A Um Computador
Conectando a um Computador Se você estiver usando vários computadores, execute estas etapas em cada computador. Clique em Iniciar e, em seguida, Acesse o site Canon do seu selecione Conectar a um computador. Computador/Smartphone. • As etapas a seguir são para usuários do Windows. - Page 25 Se você estiver usando vários smartphones, execute estas etapas em cada smartphone. Instale o aplicativo "Canon PRINT Inkjet/SELPHY" no seu smartphone. • Procure por "Canon PRINT" na App Store, ou Google Play. • Acesse o site Canon para fazer o download do aplicativo.
- Page 26 Colocando papel Abra a tampa da bandeja traseira e estenda Deslize a guia do papel da direita até o suporte de papel. a extremidade direita. Coloque várias folhas de papel com o lado a ser impresso virado para cima e deslize a guia do papel lateral em direção à...
- Page 27 Trademarks • Windows is a trademark or registered trademark of Microsoft Corporation in the U.S. and/or other countries. • App Store is a trademark of Apple Inc., registered in the U.S. and other countries. • Google Play is a registered trademark of Google LLC.. Marcas comerciales •...
- Page 28 Access Online Manual Acceso al Manual en línea Acesse o Manual On-line From your browser Desde su navegador Do seu navegador QT6-4461-V01 XXXXXXXX © CANON INC. 2021 PRINTED IN XXXXXXXX...
Need help?
Do you have a question about the MAXIFY GX5010 and is the answer not in the manual?
Questions and answers