
Related Manuals for Comfee CRD12L1B1BPGCA


Summary of Contents for Comfee CRD12L1B1BPGCA
- Page 1 RICE COOKER User Manual CRD12L1B1BPGCA IMPORTANT NOTE: For your safety and continued enjoyment of this product, always read the user manual carefully before using.
-
Page 2: Table Of Contents
CONTENT IMPORTANT SAFEGUARDS PRODUCT OVERVIEW SPECIFICATIONS QUICK START GUIDE OPERATION INSTRUCTIONS CLEANING AND MAINTENANCE TROUBLESHOOTING SERVICE AND SUPPORT... -
Page 3: Important Safeguards
IMPORTANT SAFEGUARDS CAUTION When using electrical appliances, basic safety prcautions should always be followed including the following: • Read all instructions. • Do not touch hot surfaces. Use handles or knobs. • To protect against electrical shock, do not immerse cord, plugs, or appliance in water or other liquid. - Page 4 IMPORTANT SAFEGUARDS • Extreme caution must be used when moving an appliance containing hot oil or other hot liquids. into the wall outlet. • Do not use appliance for purposes other than its intended use. • CAUTION: Risk of Electric Shock. Cook only in removable container (Inner pot provided with the product) •...
-
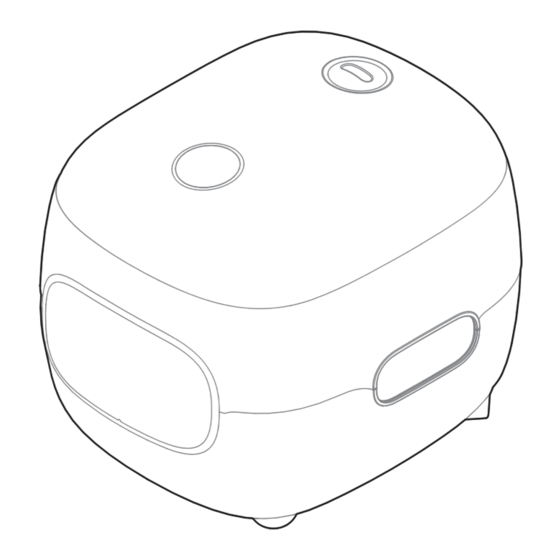
Page 5: Product Overview
IMPORTANT SAFEGUARDS cord over edge of counter, never use outlet below counter, and never use with an extension cord. Cord: • DO NOT IMMERSE IN WATER. HOUSEHOLD USE ONLY SAVE THESE INSTRUCTIONS PRODUCT OVERVIEW COMPONENT NAME Inner pot Upper lid Removable lid Cooker body Socket... -
Page 6: Specifications
SPECIFICATIONS TECHNICAL DATA OF THE PRODUCT Product Model Voltage Frequency Power Capacity CRD12L1B1BPGCA 120V~ 60Hz 300W 1.2L NOTE All the pictures in this manual are for explanation purpose only. Any discrepancy between the real object and the illustration in the drawing shall be subject to the real subject. -
Page 7: Quick Start Guide
Reservation 1. Prepare rice and water 2. Close the cover of the rice pot and select Place the rinsed rice into the inner pot functions, such as “QUICKRICE”. and choose the appropriate water level according to the rice amount. QUICK RICE 3. - Page 8 QUICK START GUIDE Gentle Reminder: 1. The time displayed under pre-set timer mode is the length of time from the start to the completion of cooking; 2. The pre-set time is suggested not for more than 12 hours, otherwise the rice may smell bad;...
-
Page 9: Operation Instructions
OPERATION INSTRUCTIONS OPERATION PART Decoration Decoration Display Screen DELAY START MENU Button Button START/CANCEL Button INSTRUCTIONS FOR USE 1. Use the measuring cup provided with the product to measure the rice. Correct If it is higher or lower 1 cup of rice can cook about 2 bowls The rice should than the rim, the of rice (the diameter of the bowl rim is... - Page 10 OPERATION INSTRUCTIONS QUICK RICE COOKING STEPS 1. Measure and wash rice Use the measuring cup provided with the product to measure the rice and rinse the rice thoroughly. 2. Add water Add water according to the rice water level in the picture on the right (taking long grain rice as an example) 3.
-
Page 11: Function Description
OPERATION INSTRUCTIONS INSTRUCTIONS FOR USE 1 measuring cup of rice can be cooked Take cooking 2 cups of rice as an into 2 bowls of steamed rice, and the example, put the washed rice into the diameter of the bowl is about 11.5 cm. inner pot and add water to the corresponding scale line 2 (The water level line shall be subject to the actual... - Page 12 OPERATION INSTRUCTIONS BROWN RICE Measure the rice in the measuring cup supplied with the product and wash the rice well. NOTE The cooking time will vary depending on the amount of rice. Close the rice cooker lid and press the "...
- Page 13 OPERATION INSTRUCTIONS OATMEAL 1. Measure Oats Measure oats using the provided Measure the water using the provided measuring cup and place them in the measuring cup and add it to the inner inner pot (Maximum quantity is 0.75 pot (Reference, 0.75 cup of oats cup).
- Page 14 OPERATION INSTRUCTIONS SOUP Wash the ingredients, cut them into Add water according to personal pieces and put in the inner pot. preference, not exceeding the highest scale line. Close the rice cooker lid and press the " " button. Select the “SOUP” function and press the “START/CANCEL”...
- Page 15 OPERATION INSTRUCTIONS Close the lid, press the “ ” key and select CAKE (50 minutes by default), and then press START/CANCEL. The sounds, and the cooker automatically enters the KEEP WARM mode. CAKE STEW Wash the ingredients, cut them into Add water according to personal pieces and put in the inner pot.
- Page 16 OPERATION INSTRUCTIONS START/CANCEL 1. During the cooking process, press the START/CANCEL button to cancel the cooking process and enter standby mode. Gentle Reminder: 1. After cooking, it will automatically trigger the heat preservation function; 2. During the process of warm keeping, the product will be heated to maintain the temperature above 65 degrees Celsius;...
- Page 17 OPERATION INSTRUCTIONS THE USE OF WATER LEVEL LINES Rice: When adding water, for QUICK RICE, BROWN RICE, the water level line depends on the water level line scale of the rice. Maximum rice amount Minimum rice amount 2 cups 0.5 cup Oatmeal: Add water according to personal preference.
-
Page 18: Cleaning And Maintenance
CLEANING AND MAINTENANCE Please disconnect the power supply before cleaning and maintenance COVER DISASSEMBLY AND CLEANING 1. Pull the middle silicone gripper outward to remove the cover 2. Clean the cover and dry it 3. Install the cover back to its original position. COVER AND SEALING RING INSTALLATION 1. - Page 19 CLEANING AND MAINTENANCE CLEANING COOKER BODY Use a dry rag to clean the water, rice grains and other debris on the water channel and electric heating plate. Water channel INNER POT CLEANING Dry the bottom and outer surface of the inner pot with a rag. Do not use steel wool to clean the inner pot to avoid scratching the coating.
-
Page 20: Troubleshooting
TROUBLESHOOTING Operation of your appliance can lead to errors and malfunctions. The following tables contain possible causes and notes for resolving an error message or malfunction. It is recommended to read the tables carefully below in order to save your time and money that may cost for calling to the service center. - Page 21 TROUBLESHOOTING Abnormal Possible Solutions or state display Reason Main thermistor (bottom Light on sensor) open circuit Main thermistor (bottom Light on sensor) short circuit Pull out and re-connect the Top lid sensor (handle power cord, the display still Light on thermistor) open circuit shows same message, please send the cooker to your local...
-
Page 22: Service And Support
SERVICE AND SUPPORT 1 YEAR LIMITED WARRANTY This is the only express warranty for this product and is in lieu of any other warranty or condition. This product is warranted to be (1) year from the date of original purchase. During this period, your exclusive remedy is repair or replacement of this product or any component found to be defective, at our option;... - Page 23 SERVICE AND SUPPORT In the Event of a warranty period claim, question, comments or if service is required for this product, please contact us at the following: Customer Service Management Office: Markham ON, L3R 5B4 Toll Free: 1-888-365-2230 Amazon Store: https://www.feelcomfee.com/ca E-mail: Canadasupport@comfeeappliance.com...
-
Page 25: Cuiseurà Riz
CUISEUR À RIZ Manuel de l’utilisateur CRD12L1B1BPGCA REMARQUE IMPORTANTE : pour votre sécurité et pour que vous puissiez continuer à profiter de cet appareil, lisez toujours attentivement le manuel de l'utilisateur avant de l'utiliser. - Page 26 CATALOGUE IMPORTANTES CONSIGNES DE SÉCURITÉ VUE D’ENSEMBLE DE L'APPAREIL SPÉCIFICATIONS GUIDE DE DÉMARRAGE RAPIDE INSTRUCTIONS D'UTILISATION NETTOYAGE ET ENTRETIEN DÉPANNAGE SERVICE ET ASSISTANCE...
-
Page 27: Importantes Consignes De Sécurité
IMPORTANTES CONSIGNES DE SÉCURITÉ ATTENTION Lors de l'utilisation d'appareils électriques, il convient de toujours respecter les mesures de sécurité de base, notamment les suivantes : • Lire toutes les instructions. • Ne pas toucher les surfaces chaudes. Utiliser les poignées ou les boutons. •... - Page 28 IMPORTANTES CONSIGNES DE SÉCURITÉ • Il convient d'être extrêmement prudent lors du déplacement d'un appareil contenant de l'huile chaude ou d'autres liquides chauds. • Commencer toujours par brancher la fiche sur l'appareil, puis brancher le cordon sur la prise murale. Pour débrancher l'appareil, mettre n'importe quelle commande sur «...
-
Page 29: Vue D'ensemble De L'appareil
IMPORTANTES CONSIGNES DE SÉCURITÉ de graves brûlures. Tenir l'appareil et le cordon hors de portée des enfants. Ne jamais faire glisser le cordon sur le bord du comptoir, ne jamais utiliser une prise de courant située sous le comptoir et ne jamais utiliser une rallonge. -
Page 30: Spécifications
SPÉCIFICATIONS DONNÉES TECHNIQUES DE L'APPAREIL Modèle de l'appareil Tension Fréquence Alimentation Capacité CRD12L1B1BPGCA 120V~ 60Hz 300W 1,2L REMARQUE Toutes les images de ce manuel sont fournies à titre d'explication uniquement. Toute différence entre l'objet réel et l'illustration du dessin sera soumise à l'objet réel. Retirer les... -
Page 31: Guide De Démarrage Rapide
GUIDE DE DÉMARRAGE RAPIDE Programmation Par exemple : programmer la fin de la cuisson dans 8 heures. 1. Préparer le riz et l'eau 2. Fermer le couvercle du cuiseur à riz et Placer le riz rincé dans le récipient intérieur sélectionner la fonction comme «... - Page 32 GUIDE DE DÉMARRAGE RAPIDE Rappel : 1. La durée affichée en mode minuterie préréglée correspond au temps écoulé entre le début et la fin de la cuisson. 2. Il est conseillé de ne pas dépasser 12 heures, sinon le riz risque de sentir mauvais. 3.
-
Page 33: Instructions D'utilisation
INSTRUCTIONS D'UTILISATION FONCTIONNEMENT Décoration Décoration RIZ RAPIDE RIZ BRUN GRUAU SOUPE GATEAU RAGOÛT AFFICHAGE DÉMARRAGE MENU DIFFÉRÉ DEMARRER Bouton DEMAR- ANNULER RER/ ANNULER MODE D’EMPLOI Rapport riz-eau 1. Utiliser la tasse à mesurer fournie avec l'appareil pour mesurer le riz. Correct Le riz doit S'il est plus haut ou 1 tasse de riz permet de cuire environ... - Page 34 INSTRUCTIONS D'UTILISATION ÉTAPES DE CUISSON RAPIDE DU RIZ 1. Mesurer et laver le riz Utiliser la tasse graduée fournie avec l'appareil pour mesurer le riz et le rincer soigneusement. 2. Ajouter de l'eau Ajouter de l'eau en fonction du niveau d'eau du riz dans l'illustration ci-dessous (en prenant le riz à...
- Page 35 INSTRUCTIONS D'UTILISATION INSTRUCTIONS D'UTILISATION Rapport riz-eau 1. Méthode de mesure du riz 2. Mettre le riz et l'eau 1 tasse à mesurer de riz permet de Prenons l'exemple de la cuisson de 2 cuire environ 2 bols de riz vapeur, tasses de riz.
- Page 36 INSTRUCTIONS D'UTILISATION RIZ BRUN 1. Mesurer et laver le riz 2. Ajouter de l’eau Ajouter de l'eau en se référant au Mesurer le riz dans la tasse à rapport riz-eau et à la ligne de niveau mesurer fournie avec l'appareil d'eau;...
- Page 37 INSTRUCTIONS D'UTILISATION GRUAU 1. Mesurer le gruau 2. Ajouter de l’eau Mesurer le gruau dans la tasse à Mesurer l'eau à l'aide de la tasse à mesurer fournie et le verser dans le mesurer fournir et l’ajouter au récipient récipient intérieur (la quantité intérieur (pour référence : 0,75 tasse de maximale est de 0,75 tasse).
- Page 38 INSTRUCTIONS D'UTILISATION SOUPE 1. Préparer les ingrédients 2. Ajouter de l’eau Laver les ingrédients, les couper en Ajouter de l'eau selon les préférences morceaux et les mettre dans le personnelles, sans dépasser la ligne récipient intérieur. graduée la plus élevée. 3.
- Page 39 INSTRUCTIONS D'UTILISATION 3. Cuisson Fermer le couvercle, appuyer sur la touche “ ” et sélectionner GATEAU (50 minutes par défaut), puis appuyer sur DEMARRER/ANNULER. La cuisson est terminée lorsqu'un bip sonore retentit et que l'appareil passe automatique- ment en mode MAINTIEN AU CHAUD. DEMARRER GATEAU ANNULER...
- Page 40 INSTRUCTIONS D'UTILISATION DEMARRER/ANNULER 1. Pendant la cuisson, appuyer sur la touche DEMARRER/ANNULER pour annuler la cuisson et passer en mode veille. Rappel: 1. Après la cuisson, la fonction de conservation de la chaleur se déclenche automatique- ment. 2. Pendant le processus de maintien au chaud, l'appareil chauffera pour maintenir la température au-dessus de 65 degrés Celsius.
- Page 41 INSTRUCTIONS D'UTILISATION UTILISATION DE LIGNES DE NIVEAU D'EAU Riz blanc Riz : lors de l'ajout d'eau, pour le RIZ RAPIDE et le RIZ BRUN, la ligne de niveau d'eau dépend de l'échelle de la ligne de niveau d'eau du riz. Quantité...
-
Page 42: Nettoyage Et Entretien
NETTOYAGE ET ENTRETIEN Merci de débrancher l'alimentation électrique avant de procéder au nettoyage et à l'entretien. DÉMONTAGE ET NETTOYAGE DU COUVERCLE 1. Tirer la pince en silicone du milieu vers l'extérieur pour retirer le couvercle 2. Nettoyer le couvercle et le sécher 3. - Page 43 NETTOYAGE ET ENTRETIEN NETTOYAGE DE L’UNITÉ PRINCIPALE DU CUISEUR Utiliser un chiffon sec pour nettoyer l'eau, les grains de riz et les autres débris sur le canal d'eau et la plaque chauffante électrique. Canal d'eau NETTOYAGE DU RÉCIPIENT INTÉRIEUR Sécher le fond et la surface extérieure du récipient intérieur à l’aide d’un chiffon. Ne pas utiliser de laine d'acier pour nettoyer le récipient intérieur afin d'éviter de rayer le revêtement.
-
Page 44: Dépannage
DÉPANNAGE L'utilisation de votre appareil peut entraîner des pannes et des dysfonctionnements. Les tableaux suivants contiennent les causes possibles et des conseils pour résoudre un message d'erreur ou remédier à un dysfonctionnement. Il est recommandé de lire attentivement les tableaux ci-dessous afin d'économiser le temps et l'argent que pourrait coûter un appel au centre de service. - Page 45 DÉPANNAGE Indicateur Affichage Raison Solutions ou état anormal possible Témoin Thermistance principale allumé (capteur inférieur) circuit ouvert Court-circuit de Témoin thermistance principale allumé (capteur inférieur) Débrancher et rebrancher le Capteur du couvercle Témoin cordon d'alimentation, si l'écran supérieur (thermistance de allumé...
-
Page 46: Service Et Assistance
SERVICE ET ASSISTANCE GARANTIE LIMITÉE DE 1 AN Il s'agit de la seule garantie expresse pour cet appareil et elle remplace toute autre garantie ou condition. Cet appareil est garanti contre tout défaut de matériau et de fabrication pendant une période d'un (1) an à compter de la date de l'achat initial. - Page 47 SERVICE ET ASSISTANCE En cas de réclamation pendant la période de garantie, de question, de commentaire ou si un service est nécessaire pour cet appareil, veuillez nous contacter à l'adresse suivante : Service à la clientèle : Markham ON, L3R 5B4 Sans frais: 1-888-365-2230 Boutique Amazon : Https ://www.feelcomfee.com/ca...
Need help?
Do you have a question about the CRD12L1B1BPGCA and is the answer not in the manual?
Questions and answers