
Related Manuals for Comfee CRD20L1B1BPH


Summary of Contents for Comfee CRD20L1B1BPH
- Page 1 RICE COOKER User Manual CRD20L1B1BPH IMPORTANT NOTE: For your safety and continued enjoyment of this product, always read the user manual carefully before using.
-
Page 2: Table Of Contents
CONTENT IMPORTANT SAFEGUARDS PRODUCT OVERVIEW SPECIFICATIONS QUICK START GUIDE OPERATION INSTRUCTIONS CLEANING AND MAINTENANCE TROUBLESHOOTING SERVICE AND SUPPORT... -
Page 3: Important Safeguards
IMPORTANT SAFEGUARDS CAUTION • When using electrical appliances, basic safety prcautions should always be followed including the following: • Read all instructions. • Do not touch hot surfaces. Use handles or knobs. • To protect against electrical shock, do not immerse cord, plugs, or appliance in water or other liquid. - Page 4 IMPORTANT SAFEGUARDS • Always attach plug to appliance first, then plug cord into the wall outlet. To disconnect, turn any control to “off”, then remove plug from wall outlet. • Do not use appliance for purposes other than its intended use. •...
- Page 5 IMPORTANT SAFEGUARDS WARNING • WARNING: Spilled food can cause serious burns. Keep appliance and cord away from children. Never drape cord over edge of counter, never use outlet below counter, and never use with an extension cord. Cord: • DO NOT IMMERSE IN WATER. HOUSEHOLD USE ONLY SAVE THESE INSTRUCTIONS...
-
Page 6: Product Overview
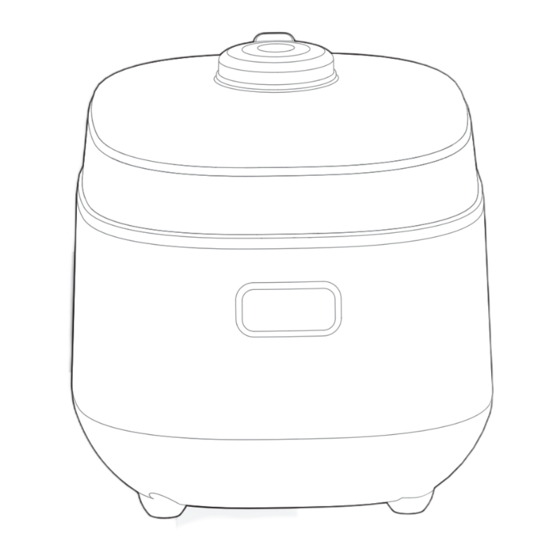
PRODUCT OVERVIEW COMPONENT NAME Upper lid Steam valve Cover plate assembly Steamer Cooker body Socket Inner pot PARTS LIST Rice spoon × 1 Soup spoon × 1 Measurement cup × 1 Power cord × 1 Manual × 1... -
Page 7: Specifications
TECHNICAL DATA OF THE PRODUCT Product Model Voltage Frequency Power Capacity CRD20L1B1BPH 120V~ 60Hz 350W NOTE All the pictures in this manual are for explanation purpose only. Any discrepancy between the real object and the illustration in the drawing shall be subject to the real subject. -
Page 8: Quick Start Guide
QUICK START GUIDE Reservation For example: Make an appointment to finish cooking in 8 hours. 1. Prepare rice and water 2. After closing the lid, select Quick Rice or Place the rinsed rice into the inner pot other functions by using the Quick Rice and choose the appropriate water level or MENU button. - Page 9 QUICK START GUIDE Gentle Reminder: 1. The time displayed under pre-set timer mode is the length of time from the start to the completion of cooking; 2. To avoid an unpleasant odor in the rice, it is advisable not to set the pre-set timer for more than 12 hours."...
-
Page 10: Operation Instructions
OPERATION INSTRUCTIONS OPERATION PART Display Screen START Button DELAY START Button MENU Button INSTRUCTIONS FOR USE Rice-water Ratio 1. Use the measuring cup provided with the product to measure the rice. Correct If it is higher or lower 1 cup of rice can cook about 2 bowls The rice should than the rim, the of rice (the diameter of the bowl rim is... - Page 11 OPERATION INSTRUCTIONS QUICK RICE COOKING STEPS 1. Measure and wash rice Use the measuring cup provided with the product to measure the rice and rinse the rice thoroughly. 2. Add water Add water according to the rice water level in the picture on the right (taking long grain rice as an example) 3.
- Page 12 OPERATION INSTRUCTIONS INSTRUCTIONS FOR USE Rice-water Ratio 1. Rice measuring method 2. Put in the rice and water 1 measuring cup of rice can be cooked Take cooking 2 cups of rice as an into 2 bowls of steamed rice, and the example, put the washed rice into the diameter of the bowl is about 11.5 cm.
- Page 13 OPERATION INSTRUCTIONS BROWN 1. Measure and wash rice 2. Add water Measure the rice in the measuring cup Add water with reference to the water supplied with the product and wash the level of the RICE on the right. rice well. NOTE The cooking time will vary depending on the amount of rice.
- Page 14 OPERATION INSTRUCTIONS PORRIDGE 1. Measure and wash rice 2. Add water Measure the rice in the measuring cup Add water with reference to the water supplied with the product and wash the level of the Porridge on the right. rice well. 3.
- Page 15 OPERATION INSTRUCTIONS GRAINS 1. Measure and wash rice 2. Add water Measure the rice in the measuring cup Add water with reference to the water supplied with the product and wash the level of the RICE on the right. rice well. NOTE The cooking time will vary depending on the amount of rice.
- Page 16 OPERATION INSTRUCTIONS MIXED 1. Measure and wash rice 2. Add water Measure the rice in the measuring cup Add water with reference to the water supplied with the product and wash the level of the RICE on the right. rice well. Mix the ingredients (such as spare ribs) and the appropriate amount of ingredi- ents (such as scallions, ginger, garlic,...
- Page 17 OPERATION INSTRUCTIONS STEAM 1. Add water 2. Cook Add water with reference to the STEAM Put the food in the steamer, then put water level. the steamer into the inner pot, close the lid, press the MENU button and select STEAM (30 minutes by default), and finally press the “START”...
- Page 18 OPERATION INSTRUCTIONS STEW 1. Prepare the ingredients 2. Add water Wash the ingredients (ribs, corn, Add water according to personal carrots), cut into small pieces and place preference, not exceeding the highest in the inner pot. scale line. 3. Press the “MENU” button to select the “STEW”...
- Page 19 OPERATION INSTRUCTIONS KEEP WARM/CANCEL 1. During the cooking process, press the KEEP WARM/CANCEL button to cancel the cooking process and enter standby mode. Gentle Reminder: 1. After cooking, it will automatically trigger the heat preservation function; 2. During the process of warm keeping, the product will be heated to maintain the temperature above 149 degrees Fahrenheit;...
- Page 20 OPERATION INSTRUCTIONS THE USE OF WATER LEVEL LINES Rice: When adding water, for QUICK RICE, BROWN, the water level line depends on the water level line scale of the rice. Maximum rice amount Minimum rice amount 4 cups 0.5 cup Porridge: Refer to the Porridge water line when adding water.
-
Page 21: Cleaning And Maintenance
CLEANING AND MAINTENANCE Please disconnect the power supply before cleaning and maintenance REMOVE THE COVER After cleaning and drying, Press the white button in the reinstall it in place. direction of the arrow to remove the cover. (the cover will tilt forward) Step 1 第一步... - Page 22 CLEANING AND MAINTENANCE CLEAN COOKER BODY Wipe with a clean soft cloth Note: After cleaning the inside of the cooker, be sure to dry it. Avoid turning on the power when there is water. CLEAN INNER POT/STEAMER Soak in clean water for 10 minutes to allow the remaining rice to fully absorb water and then rinse Note: Do not use steel wool to clean the inner pot to avoid scratching the coating.
-
Page 23: Troubleshooting
TROUBLESHOOTING Operation of your appliance can lead to errors and malfunctions. The following tables contain possible causes and notes for resolving an error message or malfunction. It is recommended to read the tables carefully below in order to save your time and money that may cost for calling to the service center. - Page 24 TROUBLESHOOTING Indicat Abnormal Possible Solutions or state display Reason Main thermistor (bottom Light on sensor) open circuit Main thermistor (bottom Light on sensor) short circuit Pull out and re-connect the Top lid sensor (handle power cord, the display still Light on thermistor) open circuit shows same message, please Top lid sensor (handle...
-
Page 25: Service And Support
SERVICE AND SUPPORT 1 YEAR LIMITED WARRANTY This is the only express warranty for this product and is in lieu of any other warranty or condition. This product is warranted to be free from defects in material and workmanship for a period of one (1) year from the date of original purchase. - Page 26 In the Event of a warranty period claim, question, comments or if service is required for this product, please contact us at the following: Customer Service Management Office: Parsippany, NJ 07054 Toll Free: 1-866-646-4332 Amazon Store: https://www.amazon.com/comfee Tel: 866-646-4332 E-mail: officialservice@comfeeappliance.com Made in China...
Need help?
Do you have a question about the CRD20L1B1BPH and is the answer not in the manual?
Questions and answers
Where do you install the electrical cord
The electrical cord for the Comfee CRD20L1B1BPH should be installed into the socket on the cooker body.
This answer is automatically generated