
Related Manuals for Radioddity GD-168


Summary of Contents for Radioddity GD-168
- Page 1 Radioddity GD-168 Digital DMR and Analog UHF/VHF Amateur Radio Transceiver Operating Manual DIGITAL MOBILE RADIO ASSOCIATION...
- Page 2 » When you use CPS (computer program software) to program the radio, start by reading the factory software data, and then rewrite this data with your frequency etc., to a new saved code plug, otherwise errors may occur. » The CPS allows you to program the frequency, channel type, power etc.
-
Page 3: Table Of Contents
CONTENTS 1.UNPACKING AND CHECKING THE EQUIPMENT ......1 1.1 Supplied Accessories ..............1 1.2 Standard Accessories ..............2 2.BATTERY INFORMATION .............. 3 2.1 Charging the Battery Pack ............3 2.2 Charger Supplied ............... 3 2.3 Use Caution with the Li-ion Battery ..........3 2.4 How to Charge ................ - Page 4 5.10 Making a Call ................. 15 5.11 Monitor ................... 15 5.12 Emergency Alarm ..............15 5.13 Battery Voltage Test ............... 15 6. ADVANCED FEATURES ............. 16 6.1 Access Advanced Features for Private Call ......16 6.2 Set up Advanced Features for Private Call ......16 7.MAIN MENU FUNCTIONS ............
-
Page 5: Unpacking And Checking The Equipment
1. UNPACKING AND CHECKING THE EQUIPMENT Unpack the radio carefully. We recommend that you identify the items listed in the following table before discarding the packing materials. If any items are missing or have been damaged during shipment, please contact the carrier or the dealers immediately. -
Page 6: Standard Accessories
1. UNPACKING AND CHECKING THE EQUIPMENT 1.2 Standard Accessories Li-ion Battery Pack Li-ion Battery Pack 12cm Antenna 38cm Antenna QB-56L(1800mAh) QB-56HL(2500mAh) TX-0311 TX-0313 TYPE C Cable AC Adaptor Charger QT-0046 NA01 (5V/2A) QBC-56L (Program and Charge) Instruction Manual Belt Clip WWZZ-0029 Digital DMR and Analog UHF/VHF Two Way Radio... -
Page 7: Battery Information
2.3 Use Caution with the Li-ion Battery Do not short the battery terminals or throw the battery into a fire. Never attempt to remove the casing from the battery pack, as Radioddity cannot held responsible for any accident caused by modifying the battery. -
Page 8: How To Charge
2. BATTERY INFORMATION 2.4 How to Charge The radio uses a USB-C cable for charging, the USB-C cable can be inserted into the USB-C port on radio for directly charging to the battery. The USB-C cable can also be inserted into the USB-C port on desktop charger. The standard 5V/2A USB-C adapter is used, it is common adapter on the market. -
Page 9: How To Store The Battery
2. BATTERY INFORMATION . LED Indicator: STATUS Waiting(No Battery) None Precharge Green Light Charging Red Light Fully Charged Green Light » Trouble means battery too warm, battery short-circuited or charger short-circuited. 2.5 How to Store the Battery If the battery needs to be stored, keep it in status of 80% discharged. It should be kept in low temperature and dry environment. -
Page 10: Preparation
3. PREPARATION 3.1 Installing / Removing the Battery Match the two top grooves of the battery pack with the corresponding guides on the back of the radio and then push it. To remove the battery pack, slide the release latch at the bottom away the battery and remove the pack from the transceiver. -
Page 11: Installing / Removing The Belt Clip
3. PREPARATION 3.3 Installing / Removing the Belt Clip Installing the Belt Clip: Place the belt clip above the corresponding holes on the back of the radio, and screw it into place clockwise with the two supplied screws. Removing the Belt Clip: Unscrew counter-clockwise to remove the belt clip. 3.4 Installing the Additional Speaker/Microphone (Optional) Pry open the rubber MIC-Headset jack cover and then insert the Speaker / Microphone plug into the double jack. -
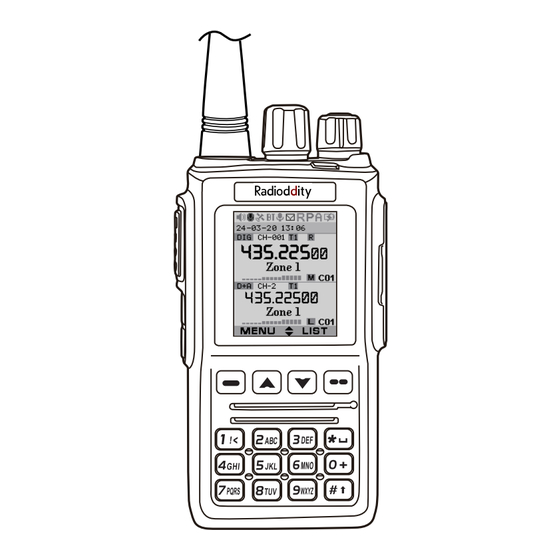
Page 12: Radio Overview
4. RADIO OVERVIEW Channel Switch Antenna POWER/VOL LED Status Indicator Exit Key Menu key Speaker PTT Button Speaker/Mic Jacks [PF1] Key TYPE C (Program and charge) [PF2] Key Digital DMR and Analog UHF/VHF Two Way Radio... -
Page 13: Lcd
4. RADIO OVERVIEW 4.1 LCD Roaming Bluetooth Recording BT PTT Auto Power Off Dig Monitor Inbox Battery TX Power Color Code 4.2 Status Indications The top LED will help you to identify the current radio status. LED Indication Status Flashes Red Low battery voltage Constant Red Transmitting... -
Page 14: Programmed Key
4. RADIO OVERVIEW 4.3 Programmed Key It is possible to set different functions for [PF1], [PF2] keys. Method 1: In radio Menu Settings Radio Set PF1, PF2. Method 2: In PC software Public Optional Setting Key function. No Function Volt Check the current battery capacity voltage Tx Power Switch the power between super high, high, middle and low power. - Page 15 4. RADIO OVERVIEW In digital channel, press the key to access the last call and press PTT LastCall Reply to call back. Switch ChType Switch the channel type(Analog, Digital, Ana+Dgi, Dgi+Ana) When the radio receives a call and the suspension time is on, press the Ranging key programmed as"...
-
Page 16: Hot Key Setting For Pf1, Pf2
4. RADIO OVERVIEW GPS Roam Enable / disable the GPS roaming function. (optional) WX Alarm Enable / disable the weather alarm function. SQ Level Set the squelch level. 4.4 Hot Key Setting for PF1, PF2 Enter radio Menu-Settings-Radio Set-PF1, PF2, sub menu. Users can choose settings for Hot Keys 1-6. -
Page 17: Basic Operations
5. BASIC OPERATIONS 5.1 Power on the Radio Turn on the radio by turning the [Power/Volume] switch clockwise till a click is heard, and the LCD displays will show a start-up message, and you will hear a beep after 7 seconds. 5.2 Adjust Volume Rotate the [Power/Volume] knob to adjust the volume. -
Page 18: New Channel
5. BASIC OPERATIONS Same Color Code: The radio can transmit only if the channel is free and the color code matches. 5.7 New channel Press (Menu) to enter main Menu. Select "Settings". Select "Chan Set". Select "New Chan". Input the channel number by keypad, press Select a zone from zone list, then Confirm To Save. -
Page 19: Making A Call
5. BASIC OPERATIONS 5.10 Making a Call Method 1: from the Channel switch. Turn the channel switch to choose a programmed channel. Method 2: from the Talk Group. Turn the channel switch to choose a programmed channel; Press (exit) key to enter the TG List, press the key to choose a Method 3: from the keypad. -
Page 20: Advanced Features
6. ADVANCED FEATURES 6.1 Access Advanced Features for Private Calling Method 1: To Access a Private Call from the Contact list Press the (Exit) key to enter the Talk Group, press the key to a private DMR call ID name. Press Select to View Contact, press Select to see the contact information. - Page 21 6. ADVANCED FEATURES 6.2.5 Kill Select Kill, and it will send out a kill signaling to the target radio which will be killed (No display, no operation) when receiving the signaling and it will send back a kill successful message to the transmit radio. 6.2.6 Wake Select Wake, and it will send out a wake-up signaling to the killed radio and the target radio will return to standby when it receives this signaling and send...
-
Page 22: Main Menu Functions
DMR ID as a new contact. 7.4 Zone 7.4.1 Select a Zone A Zone is a group of channels grouped together. GD-168 DMR radio has 250 Zones. A Zone can have the maximum of 160 analog and/or digital channels. -
Page 23: Scan
7. MAIN MENU FUNCTIONS 7.4.2 Add Zone Press (Menu) to enter main Menu. Select "Zone". Select "Add Zone". 1. Select "Edit name" Input zone name by keypad, press key to delete. After edit the right name, press 2. Select "Edit Chan" Select "Add Chan"... -
Page 24: Roaming
7. MAIN MENU FUNCTIONS Edit Scan List Name Store List Delete Channel from Scan List Select "Channel X", then select "Delete CH" to remove it from scan list. 7.5.3 Add Scan List Press (Menu) to enter the main Menu. Select "SCAN". Select "Scan List". -
Page 25: Settings
7. MAIN MENU FUNCTIONS Start Roaming: Fixed Time: Starts timed roaming Out of Range: The roaming will be started when the radio cannot find a repeater - "The repeater is out of range" icon will appear 3 times, then the radio will perform roaming one time, and return to roaming being off automatically. - Page 26 7. MAIN MENU FUNCTIONS MIC Sound (10) It will allow you set up the microphone audio pitch. Normal: Low pitch. Enhance: High pitch. SMS Prompt (11) Different prompt options when receiving a new message. Call Ring (12) Different prompt options when receiving a new call. DigiMic Level (13) Digital mic level selection.
- Page 27 When the time is reached, the radio will auto exit the menu. Start Display Picture: The radio will display an Radioddity picture when powered on. Character: The radio will display the characters set up in PC software when powered on.
- Page 28 7. MAIN MENU FUNCTIONS Main Ch (14) Channel A: The upper displayed channel will be set to become the main channel. Channel B: The lower displayed channel will be set to become the main channel. Sub Ch Off (15) Sub Channel On: Turns on the sub channel, and the radio will display both channel. Sub Channel Off: Turns off the sub channel, and the radio will display the main channel only.
- Page 29 7. MAIN MENU FUNCTIONS With the "TOT Predict" function activated (On), 5 seconds before the TOT expiring, a beep sound is preventing that soon the transmitting mode will be interrupted. TxPow AGC (Automatic Level Control) With the "TxPow AGC" function activated (On), while receiving extremely strong signal, the TX power will automatically reduce the level of the TX Power proportionally to the strength of the RX signal.
- Page 30 7. MAIN MENU FUNCTIONS FM Radio (13) Turn on or off the FM radio. FM Radio Moni (14) Radio Mon On: When FM radio is used, you can still receive or transmit on the channel. Radio Mon Off: When FM radio is used, the radio will not permit a transmission or reception.
-
Page 31: Chan Set
7. MAIN MENU FUNCTIONS Tail eliminate is valid for simplex radio to radio only. At the end of the analog call, the radio will beep 'chap' noise when detect there is no signal, and then turn the audio off. In order to avoid hearing the noise, you can set this function for the analog channels without signaling. - Page 32 7. MAIN MENU FUNCTIONS Chan Set (Digital Channel) New Chan Allows to create a new channel and save the set up to the new channel. a. Select "New Chan Delete Chan Allows to delete the current channel. a. Select "Delete Chan",the radio will remind "Delete? " Note: After deleting one channel, the radio will move to the next channel.
- Page 33 7. MAIN MENU FUNCTIONS Channel Free: Allow transmit when the channel is free Different CC: Allow transmit when receive matched signal but different color code. Same CC: Allow transmit when receive matched signal and same color code. TX Prohibit (12) TX ON: Will allow transmit on the current channel.
- Page 34 7. MAIN MENU FUNCTIONS otherwise, the radio will start its alarm and send the alarm on the channel when reaching its preset response time. CH Ranging (20) In standby, if the call contact type for a channel is "Private call", The radio will automatically start ranging function when turned to this channel.
- Page 35 7. MAIN MENU FUNCTIONS Slot Suit (26) Turn on Slot suit, the radio will receive calling from both slot, and will be able to call back in the corresponding slot. Chan Set (Available in Analog Channel only) When the channel type is analog, it will automatically hide the digital menu, The below listed menus are for analog channel only, unlisted menus are are the same as the digital channel, please refer to Chan Set (Digital Channel).
- Page 36 7. MAIN MENU FUNCTIONS Other radios at the same frequency will receive only the distorted noises. Busy Lock (19) Always: Always allows transmissions RL: Will not allow transmit when receiving matched carrier but unmatched CTCSS/DCS. BU: Will not allow transmit when receiving matched carrier. OWN ID (21) When the analog channel set up with 5Tone or DTMF, you can check the radio...
-
Page 37: Device Info
7. MAIN MENU FUNCTIONS 7.7.3 Device Info Show the Radio ID, Radio name, serial number, model name, frequency range, firmware version, radio data version, latest program date, picture version, language version etc. 7.8 Record The voice record is designed for security use purpose. Each call will hours recording in DMR or analog mode. -
Page 38: Gps Positioning Function(Optional With Installed Gps)
7. MAIN MENU FUNCTIONS Press the programmed Record key, and the radio will start the recording, and speak into the microphone. Select Record Play, and the radio will play the record. Select Record Send, and the radio will display Contact list or Manual Dial. Select Contact list to choose a contact, and press select to send the Record. -
Page 39: Satellite
7. MAIN MENU FUNCTIONS 7.9.5 Send GPS Information When the GPS is positioning successfully, the GPS icon shows a red color. Follow the above step to check the GPS info, press the edit key to Text edit. info will be saved as a draft message. Choose Send and it will display Contact list or Manual Dial. - Page 40 7. MAIN MENU FUNCTIONS Signal Path: Set the WIDE format signal path. TX Text 7.11.3 Digi APRS PTT Upload: Set the PTT transmit method. Off: Not transmit APRS. On: Transmit DMR APRS when release the PTT. Report Channel: Allow user to select a channel to transmit the DMR APRS, Upload Slot: Allow user to select a slot to transmit the DMR APRS .
-
Page 41: Digital Monitor
7. MAIN MENU FUNCTIONS 7.12 Digital Monitor key to choose Digi Press (Menu) key to enter main menu, press Moni function. Press Select to enter Digi Moni menu, press key to choose a sub menu. On/Off Off: Turn off Digital Monitor Single Slot: Monitor the current Slot Double Slot: Monitor Slot 1 and Slot 2 DigiMoni Cc... -
Page 42: Reset
8. RESET Then power it on while holding the [PTT] and the [PF1] button below the PTT at the same time. The radio will start up with a note on the display – “Are you sure you want to initialize radio?” Press Exit to exit the reset and power on the radio. -
Page 43: Trouble Shooting Guide
9. TROUBLE SHOOTING GUIDE Problems Solutions A. Battery pack may not be installed properly. Remove the battery pack The radio cannot be switched on or no display after being and install it again. switched on. B. Battery power may be insufficient. Recharge or replace the battery pack. -
Page 44: Programming Guide
In addition, after you Multiple Radio ID’s The GD-168 radio will allow multiple DMR Radio ID numbers to be used with the radio. This feature will allow one radio to be used for example as a Commercial Radio with its own DMR ID, and at the same time also be used as an Amateur radio with another DMR ID. -
Page 45: Worldwide Amateur Contact Database
10. PROGRAMMING GUIDE Worldwide Amateur Contact Database The GD-168 DMR radios contain a separate database memory for importing and displaying Amateur DMR individual IDs, call sign and user name in comma-delimited format (.csv) Please reference in the programming guide for import and export database operations detailed. -
Page 46: On-Line Service And Support
11. ON-LINE SERVICE AND SUPPORT The Radioddity website provides additional information about obtaining service or support for the Radioddity line of two-way radios and accessories. Visit: www.radioddity.com Warning Notes Every effort has been made to ensure that the information in this document is complete, accurate, and up to-date. -
Page 47: Safety
Grasp the handheld by its base (not the antenna) when you need to place or remove it. parts of the body, while transmitting. Radioddity radios will perform best, if you speak 2-4 inches away from the microphone and the radio is vertical explosive atmosphere. - Page 48 This could result in short circuiting the battery. supplied battery charger (AC adapter). If you are not sure, check with your authorized Radioddity dealer. or place anything on it as this could result in a damaged charger power cord.
-
Page 49: Technical Specifications
12. TECHNICAL SPECIFICATIONS General US: 136-174MHz, 400-480MHz Frequency Range Channel Capacity 4000 channels Channel Spacing 25KHz (Wide Band) ,12.5KHz (Narrow Band) Phase-locked Step 5KHz, 6.25KHz Operating Voltage 7.4V DC ±20% Frequency Stability ±1.5ppm Operating Temperature -20 ~ +55 Size 103.5×53.5×35.5mm (with battery pack) Weight 224g (with battery pack) Receiving Part... -
Page 50: Disposal Of Your Electronic And Electric Equipment
European Users should note that operation of this unit in Transmit mode requires the operator to have a valid Amateur Radio Licence from their respective Countries Amateur Radio Licencing Authority for the Frequencies and Transmitter Power levels that this Radio transmits on. Failure to comply may be unlawful and liable for prosecution. - Page 51 IMPORTANT NOTICE TO THE ENDUSERS: The European version of these devices is intended for amateur radio use only. It operates on the following bands: VHF = 144-146 MHz UHF = 430-440 MHz The operator must have the appropriate licence. Any manipulation of the aforementioned frequency bands is prohibited.
Need help?
Do you have a question about the GD-168 and is the answer not in the manual?
Questions and answers
Since some satellites times are off even ith correct info is their a way to turn on transmit when the satellite is up? I have hear satellites, but it won't let me transmit if the prediction says the satellite is not up. Someone on your staff did a test on times and keps and info and found out the same thing I have and others , some satellites times are off. Is their also going to be updated firmware to correct this. Thanks Rob KB6JFL I bought this radio for sats only and can't even use it due to these issues. and still paying on it.
The Radioddity GD-168 uses a satellite prediction feature to estimate when a satellite will be overhead. It displays satellite pass details such as time until pass and elevation angle. If the timing prediction is incorrect, the user can still manually select passes using the navigation buttons to find usable ones. The available context does not mention any firmware update to fix inaccurate satellite timing predictions.
Therefore:
- The radio can be manually configured by selecting different satellite passes using the up/down and side buttons.
- No firmware update is mentioned to address prediction timing errors.
This answer is automatically generated
@Mr. Anderson
@Mr. Anderson Yes I am not a rookie at Satellites, I use a Retevis RTS with GD-77 firmware on it and it works great on all Satellites, your Statement was about as useless as the radio in my case, it can't be used for what I as wanting. Thanks for your Generic comment. Like I said I had someone from Your Company say he found the same problems, I am still paying for this radio I can't use. I will let others know as well. I could use it for DMR but I don't have a hotspot and would it would probably be the same results. so useless buying I guess I have a small brick.