
Related Manuals for Radioddity Xiegu X6100


Summary of Contents for Radioddity Xiegu X6100
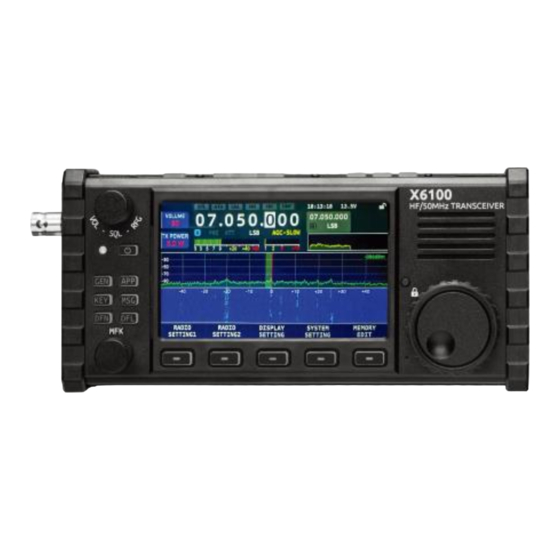
- Page 1 X6100 SDR HF-TRANSCEIVER 1.8 – 28 MHz and 50 MHz Radioddity Extended manual for Xiegu X6100 V1.0, January 19 2024 V1.0 © Radioddity 2024 page 1/132...
-
Page 2: Table Of Contents
Operating controls and connections of the Xiegu X6100 ....16 Controls on the front of the Xiegu X6100 ............16 Operating controls on the top of the Xiegu X6100 ........... 18 Connections on the left-hand side of the Xiegu X6100 ........19 Connections on the right-hand side of the Xiegu X6100 ........ - Page 3 Radioddity Extended manual for Xiegu X6100 v1.0 Using VFO-A and VFO-B (A/B / A=B) ..............30 Preamplifier/attenuator (PRE / ATT) ..............30 Automatic antenna tuner / tuning (ATU / TUNE) ..........31 Using the station memory (V/M / M V) ............32 ➔...
- Page 4 Radioddity Extended manual for Xiegu X6100 v1.0 10.1.4 SYSTEM SETTING ..................46 10.1.4.1 TIME SETTING ..........................46 10.1.4.2 SYSTEM INFO ........................... 48 10.1.4.3 FIRMWARE UPGRADE ........................49 10.1.4.4 WLAN ..............................50 10.1.4.5 BLUETOOTH ............................. 52 10.1.4.6 WFSERVER ............................53 10.1.4.7 FACTORY RESET ..........................
- Page 5 Updating the Xiegu X6100 firmware ........... 73 11.1 Preparing the microSD/flash memory card ............73 11.1.1 Writing the Xiegu X6100 firmware to the microSD/flash card ....73 11.2 Updating the Xiegu X6100 operating system (APP) .......... 77 11.3 Updating the baseband firmware of the Xiegu X6100 (BASE) ......78 Firmware release notes ................
- Page 6 Certifications ..................125 18.1 CE certificate for Xiegu X6100................125 18.2 FCC part 90 approval for Xiegu X6100 ............. 126 Common issues and their solution ............ 127 Where to find further information? ..........131 20.1 Radioddity support area ..................131 20.2...
-
Page 7: About Radioddity
About Radioddity ‘You, our friend and customer, are our focus” At Radioddity, our customers are important to us. As a customer, your time and money are important to you. When you buy radios online, you face a dilemma: buy from a reputable website at a high price, or try to save money by choosing a retailer that may not offer quality goods, service or advice. - Page 8 Parameter names as displayed on the screen of the Xiegu X6100 are written in bold italics. The 5 buttons immediately below the LCD, labeled only with a ‘---’, are referred to as softkeys.
-
Page 9: Revision History Of This Document
If you miss an aspect in this document or believe that something has been described incorrectly or misleadingly, please give us feedback via our central e-mail address support@radioddity.com. We will do our best to make the next version of this document even better for you. -
Page 10: Product Safety And Radio Frequency Exposure
Extended manual for Xiegu X6100 v1.0 3 Product safety and radio frequency exposure Before using the Xiegu X6100, please read this extended manual carefully. It contains important instructions for the safe and proper use of the radio as well as operating... -
Page 11: Electromagnetic Interference
Radioddity Extended manual for Xiegu X6100 v1.0 16. Do not use the device in areas, vehicles or airplanes where this is prohibited. Do not use the device while driving or operating technical equipment. 17. Do not use the device at filling stations or in places where flammable gases are present or in the vicinity of potentially explosive atmospheres. -
Page 12: Notes On The Battery Included
Radioddity Extended manual for Xiegu X6100 v1.0 Notes on the battery included This device contains a lithium-ion battery. Improper use may result in hazards such as smoke, fire or battery breakage. The battery pack is installed in the rear panel of the device. Do not knock •... -
Page 13: Maintenance And Care
Radioddity Extended manual for Xiegu X6100 v1.0 4 Maintenance and care To ensure the best performance and extend the service life, you should familiarize yourself with the following maintenance and care measures. Maintenance Please do not scratch or puncture the device with hard or sharp objects. -
Page 14: General Information
Extended manual for Xiegu X6100 v1.0 5 General information The Xiegu X6100 is an ultra-portable short-wave transceiver that adopts the high- performing SDR software radio platform architecture with powerful baseband and RF units, transmitting and receiving separated dual-channel structure and 24bit sampling which with a large dynamic range RF front-end unit, can obtain extremely high radio transmitting and receiving indicators. -
Page 15: What Is Included In The Scope Of Delivery
6 What is included in the scope of delivery? Thank you for purchasing a Xiegu X6100 from Radioddity. We recommend that you first check the delivery list below and keep the packaging for later storage. If anything is missing or damaged, please contact your dealer immediately. -
Page 16: Operating Controls And Connections Of The Xiegu X6100
7 Operating controls and connections of the Xiegu X6100 The Xiegu X6100 has a large number of controls and connections. These are located on the front, on both sides and on the top of the radio. Controls on the front of the Xiegu X6100... - Page 17 • The indicator lights up green after powering on. • When the Xiegu X6100 is in transmission mode, Status LED the indicator light turns red. • When the Xiegu X6100 is switched off with the battery pack being charged, it flashes green. V1.0 © Radioddity 2024...
-
Page 18: Operating Controls On The Top Of The Xiegu X6100
Radioddity Extended manual for Xiegu X6100 v1.0 Operating controls on the top of the Xiegu X6100 name function Push To Talk button on the device housing AM / FM Switch to select AM/FM mode (AM, NFM) Switch to select CW mode (CW, CWR) -
Page 19: Connections On The Left-Hand Side Of The Xiegu X6100
Radioddity Extended manual for Xiegu X6100 v1.0 Connections on the left-hand side of the Xiegu X6100 name function BNC socket, 50Ω, for antenna connection I/Q OUT IQ signal output, 3.5 mm TRS Connection for external power supply, plug type 5525 DC IN (5.5mm external: - ;... -
Page 20: Connections On The Right-Hand Side Of The Xiegu X6100
Radioddity Extended manual for Xiegu X6100 v1.0 Connections on the right-hand side of the Xiegu X6100 name function CARD Slot for microSD/TF memory card USB-C Port (Slave) (Xiegu X6100 acts as device) HOST USB-C Port (Host) (Xiegu X6100 acts as server/host) External loudspeaker/headphone interface. -
Page 21: Operating Controls Located On The Xiegu Hand-Held Microphone
Radioddity Extended manual for Xiegu X6100 v1.0 Operating controls located on the Xiegu hand-held microphone name function LOCK Lock all keys to protect from accidental change. PTT (Push to talk) button Button for increasing/decreasing the operating / frequency or for selecting a memory channel... -
Page 22: Electrical Connection Diagrams For The Xiegu X6100
• The use of jack plugs with specifications other than those mentioned may damage the jack socket. • When the Xiegu X6100 is switched on, the radio may switch to transmit mode when you plug in or unplug the jack plug. -
Page 23: Charging The Battery Pack
5.5/2.5 mm hollow plug of the output connector into the DC IN socket on the left-hand side of the Xiegu X6100 to charge the internal battery pack (the internal charge controller should have been switched on in the ‘RADIO SETTING1’... - Page 24 Xiegu X6100 and cannot be used for transmitting, as there is a risk of damaging the device. The DC connector on the left side of the Xiegu X6100 must not be connected to a voltage higher than 15V DC under any circumstances. Doing so may result in serious damage to the device.
-
Page 25: Screen Display
Radioddity Extended manual for Xiegu X6100 v1.0 8 Screen display Depending on the firmware version used, the display of the main screen may differ slightly from the following explanations. name function The status of the SPL, ATU, VSQL, NB, NR and DNF Status 1 switches are displayed in this area. - Page 26 Radioddity Extended manual for Xiegu X6100 v1.0 name function The status is displayed in this area, including control Status 2 lock/USB connection/Bluetooth/WLAN/battery/volume/ WFSERVER. VFO-B Display of VFO-B frequency Status 3 The PRE/ATT/Mode/AGC status is displayed in this area. The S value and the standing wave ratio are displayed...
-
Page 27: Basic Operation
Radioddity Extended manual for Xiegu X6100 v1.0 9 Basic operation Turning the Xiegu X6100 on/off 1. Press the power button for 1 second to turn on the radio. 2. Press the power button again for 1 second to turn off the radio. -
Page 28: Selecting The Operating Frequency Band And Operating Mode
1. Turn the large knob to set the frequency. Turn the knob clockwise to increase the operating frequency and counterclockwise to decrease the operating frequency. 2. Press the [FST] button on the top of the Xiegu X6100 to change the frequency step width between 1 kHz, 100 Hz and 10 Hz. V1.0 ©... -
Page 29: Setting The Rf Gain And Squelch Level
Radioddity Extended manual for Xiegu X6100 v1.0 3. Then use the large rotary knob to change the operating frequency which will jump in the set frequency step width. 4. To set the operating frequency directly on the hand-held microphone, press the [F-INP/ENT] button on the hand-held microphone (bottom right). -
Page 30: Using Vfo-A And Vfo-B (A/B / A=B)
The attenuator can reduce the interference caused by strong signals on the reception characteristics. 1. Briefly press the [PRE] button on the top of the Xiegu X6100. The PRE label will then appear in the ‘Status 3’ field to indicate that the preamplifier has been switched on. -
Page 31: Automatic Antenna Tuner / Tuning (Atu / Tune)
‘Status 3’ field is then grayed out to indicate that the preamplifier is switched off. 3. However, if you press and hold the [PRE] button on the Xiegu X6100, the label ATT will appear in the ‘Status 3’ field to indicate that the attenuator has been switched on. -
Page 32: Using The Station Memory (V/M / M➔V)
(M1...M200) or the assigned name and the stored frequency are shown on the display. The selected memory location can be changed using the [] and [] buttons on the top of the Xiegu X6100 as well as the [] and [] buttons on the hand-held microphone. -
Page 33: Automatic Gain Control / Split-Frequency Operation (Agc / Spl)
Depending on the operating mode, select the appropriate gain control to achieve the best possible reception quality. Briefly press the [AGC] button on the top of the Xiegu X6100 to select from the various AGC modes. The following modes are available:... - Page 34 VFOs can be used completely independently of each other and you can switch between the two VFOs by briefly pressing the A/B button on the top of the Xiegu X6100. The operational VFO is displayed as the main VFO frequency. Split frequency operation can also be activated/deactivated via the ‘RADIO SETTINGS2’...
-
Page 35: Frequency Step Width / Menu (Fst / Menu)
1. Press the [PTT] talk button on the hand-held microphone to start the transmission. Please speak into the hand-held microphone in a normal voice. 2. During the transmission process, the status LED on the Xiegu X6100 lights up red, as does the status LED on the hand-held microphone. -
Page 36: Using The Built-In Ptt Button For Sending
9.14 Using the built-in PTT button for sending The Xiegu X6100 has a [PTT] button on the top of the radio and a built-in microphone (bottom left, next to the large rotary knob). This makes it possible to use the radio on SSB outdoors without the need for a hand microphone. -
Page 37: Operating Lock / Display Backlight
Radioddity Extended manual for Xiegu X6100 v1.0 9.15 Operating lock / display backlight The large rotary knob can be locked to prevent accidental adjustment of the set operating frequency. The backlight intensity of the LCD also uses this button and brightness can be set at 10 different levels. -
Page 38: Multifunction Menus
Radioddity Extended manual for Xiegu X6100 v1.0 10 Multifunction menus You can directly access the corresponding menus for general functions using the 6 function buttons on the left-hand side of the control panel. After selecting a menu, the possible options appear at the bottom of the LCD as softkeys. Once you have selected a softkey, turn the multifunction knob to set the corresponding parameter value. -
Page 39: Radio Setting1
Radioddity Extended manual for Xiegu X6100 v1.0 10.1.1 RADIO SETTING1 Briefly press the [RADIO SETTING1] softkey to call up the corresponding submenu. You can now change the parameters as described below. The corresponding functions for modifying the parameters are displayed directly above the softkeys in the lower section of the LCD. -
Page 40: Agc Hang
10.1.1.4 TX POWER The output power of the Xiegu X6100 can be set between 0.1W and 10W via this parameter. Please note that output powers above 5W are only possible if the Xiegu X6100 is being powered by an external power supply. The plug-in charger is not suitable as an external power supply, but only for charging the built-in battery. -
Page 41: Line In Lv
The function of the [PTT] button can be defined here. In the ‘NORMAL’ position, the Xiegu X6100 always goes into transmit mode as long as the [PTT] talk button is held down. In the ‘TOGGLE’ position, on the other hand, each press of the [PTT] talk button switches back and forth between transmit and receive mode. -
Page 42: S/P Mode
Extended manual for Xiegu X6100 v1.0 10.1.1.13 S/P MODE This parameter defines what is connected to the S/P output (on the right-hand side of the Xiegu X6100). Possible values are ‘SPEAKER’ for connecting a loudspeaker and ‘EAR PHONE’ for connecting headphones. Default: SPEAKER Note: At present the option does not work as it should. -
Page 43: Sple
When split frequency operation is switched off, the two VFOs can be used completely separately and it is possible to switch between the two VFOs by briefly pressing the [A/B] button on the top of the Xiegu X6100. The selected VFO is displayed as the main VFO frequency. -
Page 44: Handle F2
Radioddity Extended manual for Xiegu X6100 v1.0 10.1.2.5 HANDLE F2 This parameter is used to specify which function is to be activated/deactivated when the [F2] button on the hand-held microphone is pressed. You can choose from the following functions: Option... -
Page 45: Fft Pk Hold
Radioddity Extended manual for Xiegu X6100 v1.0 10.1.3.4 FFT PK HOLD This option can be activated to hold and hence make the peak signal values in the spectrum display visible. Possible values are ‘ON’ and ‘OFF’. Default: ON 10.1.3.5 WF REF By setting a waterfall reference level for the spectrum display, it is possible to differentiate between strong and weak signals. -
Page 46: System Setting
10.1.4.1 TIME SETTING The Xiegu X6100 has a built-in real-time clock. The clock can be set via an Internet time server using the NTP protocol or manually on the Xiegu X6100. An offset to UTC is also possible. - Page 47 Radioddity Extended manual for Xiegu X6100 v1.0 The function of the softkeys is as follows: Softkey function NTP UPDATE Synchronization of date and time via NTP protocol CANCEL Cancel. Previously made changes are lost. Apply all previously made changes Pressing the softkey labelled ‘NTP UPDATE’ triggers synchronization of the date and time using the NTP protocol.
-
Page 48: System Info
BASE (Main part of the radio). Please note that the version numbers and release dates of APP and BASE are generally not identical. Please only use firmware updates that have been published on the Radioddity support pages for the Xiegu X6100. The display may look like this, for example:... -
Page 49: Firmware Upgrade
FIRMWARE UPGRADE This function will normally complete the procedure for updating the firmware of the Xiegu X6100 as described in detail in chapter 11 starting on page 73, which provides the file needed for this upgrade of the radio's operating software. -
Page 50: Wlan
10.1.4.4 WLAN To use the WLAN support of the Xiegu X6100, the WLAN must first be activated. To do this, first select the ‘WIFI Switch’ parameter and then activate it using the ‘EDIT’ softkey. The softkeys function as follows:... - Page 51 (commercial) network. As soon as you have made all the settings, press the ‘CONNECT’ softkey to connect the Xiegu X6100 to your local Wi-Fi. After a few seconds, it will have logged into the local Wi-Fi.
-
Page 52: Bluetooth
10.1.4.5 BLUETOOTH To be able to use Bluetooth with the Xiegu X6100, the Bluetooth support of the Xiegu X6100 must first be activated. To do this, press the softkey labeled ‘ON’ in the Bluetooth submenu. You can then search for neighboring Bluetooth devices by triggering the ‘SCAN’... -
Page 53: Wfserver
Since firmware version v1.1.7 as of August 25th 2023 and baseband version V1.1.6 as of March 7th 2023, the Xiegu X6100 also supports wfview, a PC based remote control application. The activation of the wfserver in the X6100 and the required installation of the wfview PC application is described in detail in chapter 13 starting on page 83. -
Page 54: Factory Reset
10.1.4.7 FACTORY RESET Almost all settings of the Xiegu X6100 can be reset by selecting the ‘FACTORY RESET’ function. As soon as you select the submenu, a security prompt appears and warns you that any personal settings or data will be lost during the reset process. -
Page 55: Memory Edit
10.1.5 MEMORY EDIT The Xiegu X6100 allows you to permanently store up to 200 channels in the device. Briefly press the softkey labeled ‘MEMORY EDIT’ to call up the corresponding submenu. You can view the individual settings of each of the 200 memory locations and, if required, assign the currently selected VFO frequency to one of them. -
Page 56: Tag
Radioddity Extended manual for Xiegu X6100 v1.0 10.1.5.1 Settings previously stored in a memory location can be given a name using the ‘TAG’ function. As soon as you press the softkey labeled ‘TAG’ after selecting the corresponding memory location, an on-screen keyboard is displayed. -
Page 57: Mark
Radioddity Extended manual for Xiegu X6100 v1.0 10.1.5.2 MARK One of the memory locations occupied by settings can be specially marked with an additional house. To do this, first select the corresponding memory location and then press the softkey labeled ‘MARK’. -
Page 58: Save Vfo
Radioddity Extended manual for Xiegu X6100 v1.0 In practice, however, the available 200 memory locations should be sufficient. 10.1.5.4 SAVE VFO The 'SAVE VFO' function is used to save the current frequency and operating mode in an empty channel. To avoid accidentally overwriting already occupied memory locations, this function is only available for empty memory locations. -
Page 59: The App Function
Radioddity Extended manual for Xiegu X6100 v1.0 10.2 The APP function The APP (Application) function currently contains 3 submenus, MODEM, SWR SCAN and VOICE CALL and can be called up by pressing the [APP] button. The function of the softkeys is as follows:... -
Page 60: Fc/Tone
Radioddity Extended manual for Xiegu X6100 v1.0 10.2.1.3 FC/TONE By default, the carrier signal/side tone is preset to a frequency of 1000 Hz Hz for BPSK & RTTY, 800 for CW. By turning the MFK rotary knob, the frequency can be freely selected in 1 Hz steps between 500 Hz and 2500 Hz. -
Page 61: Afc
Radioddity Extended manual for Xiegu X6100 v1.0 10.2.1.6 Automatic Frequency Control can be switched ON and OFF with this function. For the reception of digital modulated bandpass signals with carrier modulation, a quadrature demodulator is generally used for carrier demodulation to extract the zero IF signal. -
Page 62: Exit
'SPAN' parameter, press the softkey labeled 'SWR SCAN'. The transmitter of the Xiegu X6100 is then activated and the frequency range (SPAN) around the previously set frequency of the VFO is scanned at the set speed (SPEED) until the softkey labeled 'EXIT' is pressed. -
Page 63: Voice Call
10.2.3 VOICE CALL Recurring transmissions such as a 'CQ call' can be permanently stored on the Xiegu X6100 as a voice message. Five different messages can be stored. 10.2.3.1 VOICE MSG 1…5 By pressing one of the softkeys labeled 'VOICE MSG', the corresponding pre- recorded voice message (see MSG Function in section 10.4 starting on page 65) is... -
Page 64: Key Speed
Default: 15 WPM 10.3.3 IAMBIC The Xiegu X6100 supports both IAMBIC-A and IAMBIC-B. This requires a so-called paddle in which one of the two wings is responsible for the delivery of dahs/strokes and the other for the delivery of DITs/dots. -
Page 65: Di/Da Ratio
Radioddity Extended manual for Xiegu X6100 v1.0 10.3.7 DI/DA RATIO The ratio between DIT/dot and DA/dash can be freely selected in steps of 0.1 between 2.5 and 4.5. Default: 3.0 10.3.8 CW TRAINER The CW trainer is switched ON or OFF here. -
Page 66: Msg 1
Radioddity Extended manual for Xiegu X6100 v1.0 10.4.1 MSG 1…5 (Text) A text that has already been saved is shown on the LCD as soon as the corresponding softkey is pressed. The following editing options are then available via the softkeys:... -
Page 67: Msg 1
Radioddity Extended manual for Xiegu X6100 v1.0 When the on-screen keyboard is selected, the following options are available via the softkeys: Softkey function It is currently possible to enter letters. Pressing the softkey ABCabc switches to entering numbers and special characters. -
Page 68: The Dfn Function
10.5 The DFN function The Xiegu X6100 has digital filters for suppressing audio interference. Briefly press the [DFN] button to call up the corresponding submenu. You can now change the parameters described below. The assignment of the softkeys is displayed as usual in the lower area of the LCD. -
Page 69: Nr Depth
Radioddity Extended manual for Xiegu X6100 v1.0 10.5.1 This parameter can be used to switch the noise reduction function ON or OFF. When noise reduction is switched on (indicated by the NR in the 'Status1' field), the otherwise audible background noise is significantly lower. -
Page 70: Dnf
Radioddity Extended manual for Xiegu X6100 v1.0 10.5.5 NB LEVEL The pulse depth (suppression level) can be set with this parameter in the range 0...100. Default: 10 10.5.6 DNF (Digital Noise Filter) refers to the digital noise filter contained in the Xiegu X6100. -
Page 71: The Dfl Function
10.6 The DFL function The Xiegu X6100 has 3 adjustable audio filters. Briefly press the [DFL] button to call up the corresponding submenu. You can now change the parameters described below. The assignment of the softkeys is displayed as usual in the lower area of the LCD. -
Page 72: Filter1
Radioddity Extended manual for Xiegu X6100 v1.0 Switching between the low-pass filter shown in blue and the high-pass filter shown in red is done by pressing the MFK rotary knob. 10.6.1 FILTER1…3 On delivery, the 3 filters differ in their upper and lower cut-off frequencies and the resulting bandwidth. -
Page 73: Updating The Xiegu X6100 Firmware
Then use the updated system to update the baseband firmware (BASE). Note: The Xiegu X6100 must be connected to a stable 13.8V power supply during the entire update process in order to update the firmware. 11.1 Preparing the microSD/flash memory card You will need: 1. - Page 74 Radioddity Extended manual for Xiegu X6100 v1.0 Insert an empty microSD/flash memory card (with adapter if needed) into the slot of your PC's read/write device. Then start the program 'Rufus' by double-clicking on the corresponding exe file (you will usually find this in the 'Tools' subdirectory of the update archive).
- Page 75 Radioddity Extended manual for Xiegu X6100 v1.0 First check that the inserted microSD/flash card has also been recognized by the operating system. Also check whether the correct start type has been selected. Next click on the button using the left mouse button and navigate to the directory in which you previously unpacked the update archive and there to the corresponding subdirectory of the firmware image file.
- Page 76 Radioddity Extended manual for Xiegu X6100 v1.0 10. Now click on the button to start the process of writing to the microSD/ flash memory card. 11. A security prompt appears first. This must be acknowledged by clicking on 12. The selected firmware is now written to the microSD memory card. The progress is displayed via a corresponding status bar.
-
Page 77: Updating The Xiegu X6100 Operating System (App)
11.2 Updating the Xiegu X6100 operating system (APP) Make sure that the Xiegu X6100 is completely switched off for at least 30 seconds before inserting the microSD/flash memory card you have just prepared into the corresponding slot on the right-hand side of the Xiegu X6100. The 8 contact fingers of the microSD/flash memory card must point towards the LCD display. -
Page 78: Updating The Baseband Firmware Of The Xiegu X6100 (Base)
(BASE) must now be updated. Note: The Xiegu X6100 must be connected to a stable 13.8V power supply during the entire update process in order to update the firmware. First switch on the Xiegu X6100 as usual using the power button Then press the following buttons in succession: [GEN] →... - Page 79 Radioddity Extended manual for Xiegu X6100 v1.0 Now select 'FIRMWARE UPGRADE' using the MFK rotary knob (bottom left next to the LCD) and confirm your selection by briefly pressing the MFK rotary knob. Now a list of possible baseband firmware versions appears under the heading 'Firmware upgrade'.
- Page 80 • Press the softkey labeled 'QUIT' after completing the update process to exit the submenu again. Now switch off the Xiegu X6100 using the power button and then switch it on again. To check whether the baseband firmware update was successful, press the following buttons in succession [GEN] →...
- Page 81 11. The LCD now shows both, the version of the operating system (APP) and the version of the baseband firmware (BASE). This completes the update process. For older firmware versions of the Xiegu X6100, please visit our support area at https://radioddity.com/pages/xiegu-download V1.0 ©...
-
Page 82: Firmware Release Notes
'Don't fix it if it's not broken'! This cannot be emphasized often enough. To update the Xiegu X6100, only use the firmware that you can find on our support pages. Before carrying out an update, make sure that the firmware is still available for download on our support page. -
Page 83: Use Of Wfview
Xiegu X6100 has the advantage that weak Wi-Fi signals and the resulting packet loss are avoided. 13.2 Required connectivity settings WFVIEW is required to access the WFSERVER of the Xiegu X6100 via LAN or WLAN. 13.2.1 Installing WFVIEW WFVIEW is so-called open source software. It is licensed under GNU/GPL V3. You can find the software for various target platforms on the https://wfview.org/... -
Page 84: Unpacking The Wfview Download Archive
Radioddity Extended manual for Xiegu X6100 v1.0 based Windows versions are currently available. The screenshots in the rest of this document were created using x64 version 1.64 on a Windows 11-based PC. 13.2.1.2 Unpacking the WFVIEW download archive Unpack the download archive in a folder of your choice. As a rule, only the executable installation file is included. - Page 85 Radioddity Extended manual for Xiegu X6100 v1.0 After clicking on you will be asked to specify the installation location. Simply leave it at the suggested installation location and click on again. You can now select the components to be installed.
- Page 86 Radioddity Extended manual for Xiegu X6100 v1.0 Again, use the default settings and click on as usual. You will then be asked to accept the wfview license agreement. You can only continue if you tick 'I accept the license'. You can then click on again.
- Page 87 Radioddity Extended manual for Xiegu X6100 v1.0 Again, leave the default setting and click on . This was the last required setting. As soon as you now click on , WFVIEW will be installed on your computer. Your operating system may ask you for confirmation beforehand.
-
Page 88: Preparing Xiegu X6100 For Wi-Fi Access
13.3 Preparing Xiegu X6100 for Wi-Fi access To use wfview, the WLAN of the Xiegu X6100 must be switched on and configured accordingly. Details on this can be found in the section 10.1.4.4 starting on page 13.4... - Page 89 You will now see the various WFSERVER setting parameters. Please leave the settings at their default values. You can change the settings later if necessary. Briefly press the softkey labeled 'START' to start WFSERVER on your Xiegu X6100. V1.0 © Radioddity 2024...
-
Page 90: Starting Wfview On The Computer
Radioddity Extended manual for Xiegu X6100 v1.0 After about half a minute, the WFSERVER is started. Then press 'EXIT' to return to the submenu. Press 'EXIT' again to return to the main screen. After the start, the blue WF symbol appears to the left of the supply voltage display. - Page 91 Radioddity Extended manual for Xiegu X6100 v1.0 Click on to confirm that you wish to read the error. Then click on 'Settings' in the application to call up the menu for the WFVIEW settings. V1.0 © Radioddity 2024 page 91/132...
- Page 92 Select 'Network' under 'Radio Access as the connection type for pairing the Xiegu X6100. Please set the parameters for 'Network Connected Radios' as follows: Hostname: Enter the IP address of the Xiegu X6100 here (in the example • this was 192.168.2.199).
- Page 93 (connect to radio) to establish the communication link between WFVIEW (on your computer) and WFSERVER (on your Xiegu X6100). You will notice that now, regardless of the volume setting on the Xiegu X6100, the received signal is also played back on your PC loudspeaker.
-
Page 94: Connecting Accessories
Extended manual for Xiegu X6100 v1.0 14 Connecting accessories A wide range of accessories can be connected to the Xiegu X6100. 14.1 Accessories for the Xiegu X6100 Radioddity does offer a wide range of further accessories that do add value, power and more comfort to your Xiegu X6100. - Page 95 Radioddity Extended manual for Xiegu X6100 v1.0 Part Picture Xiegu VG4 40m/20m/15m/10m 4-band Vertical Antenna • For 4 frequency bands: 7/14/21/28MHz (40m/20m/15m/10m) • Axial length: about 7.8m | 25.6ft • Radial length: about 2.7m | 8.8ft • Maximum power handling: 1000W PEP (CW500W, RTTY300W) •...
- Page 96 • 3,9m / 153” RG58-A/U cable with PL-259/SL16-K connector at its • Comes with adapter SO-239 to BNC-m (to fit the Xiegu X6100) Radioddity RA-M5 Antenna Magnet Mount • For car roof mount of PL-259 verticals (such as the HF-008) and static mobile operation •...
- Page 97 Radioddity Extended manual for Xiegu X6100 v1.0 Part Picture Raddy Multi-function Backpack measures: 30 cm x 16 cm x 36 cm / 11,8” x 6,3” x 14,2” volume: 15 dm³ / 0.53 ft³ weight: 800g / 1.8 pound perfectly matches to the...
- Page 98 Radioddity Extended manual for Xiegu X6100 v1.0 Part Picture Radioddity X6100-H1 Protective bracket Xiegu X6100 Spare-Parts Kit • 1 x X6100 EC11 encoder • 1 x TF self-elastic deck • 1 x Fast-blow fuse(4A/63V/I2t=3.2~4.2) • 1 x X6100 side plastic frame •...
- Page 99 Radioddity Extended manual for Xiegu X6100 v1.0 Part Picture Xiegu DH100 100W Portable Power Station • Capacity: 24000mAh, 88.8Wh • Dimensions (LWH): 155mm x 110mm x 110mm (6.1” x 4.3” x 4.3'') • Weight: 1.03 kg (2.3 lbs) • Built-in Battery: Lithium-ion Batteries •...
-
Page 100: Connecting The Xiegu Hand-Held Microphone
The L4001 cable has a 4-pin 3.5mm TRRS jack plug on the end plugged into the Xiegu X6100 and a miniDIN 8 connector plug on the end that is plugged into the Xiegu XPA125B. The assignment of the cable cores is as follows:... - Page 101 XPA125B input sockets and add an antenna cable (with adapter if needed) to the SO239 output socket on the XPA125B. After the Xiegu X6100 is connected to the Xiegu XPA125B via the L4001 cable, an output power of up to 100 W PEP can be achieved.
-
Page 102: Tuning The Xiegu Xpa125B Antenna Tuner
SSB transmission. To adjust the Xiegu XPA125B to the current settings of the Xiegu X6100, proceed as follows: • On the Xiegu X6100, select the frequency band on which you want to work. • Make sure that the frequency band of the Xiegu XPA125B is the same as the one set on the Xiegu X6100. - Page 103 Radioddity Extended manual for Xiegu X6100 v1.0 • Switch off the automatic antenna tuner of the Xiegu X6100 (if necessary). • Now press the [PTT] talk button on the microphone of the Xiegu X6100. V1.0 © Radioddity 2024 page 103/132...
- Page 104 Extended manual for Xiegu X6100 v1.0 • Make sure that the Xiegu X6100 is not operated in split mode unless it is operated on the same band for transmitting and receiving. • Now press and hold the ATU button on the Xiegu XPA125B ATU to start an antenna adjustment •...
-
Page 105: Connecting The Xiegu X6100 To A Computer (Dev)
The virtual port labeled SERIAL-B is used for digital operating modes such as FT8 via WSJT-X and for CAT control. The Xiegu X6100 also provides both a USB audio input and output for the PC: These two audio 'devices' are also used by programs such as WSJT-X. An additional sound card is therefore not required for digital operating modes from the PC. -
Page 106: Connecting Usb Accessories To The Xiegu X6100 (Host)
(e.g., frequency, mode) or to control the radio during data transmission. For the Xiegu X6100, the PC-radio serial communication is carried out between the Xiegu X6100 DEV port and the PC via a USB cable. No extra interface hardware is needed. - Page 107 Radioddity Extended manual for Xiegu X6100 v1.0 Table 1 (part 2 of 5) Sub- Rigs data description (Note 1 ) Get AF level (Rx volume, return form, 0x01 0~100% map to 0000~0255, same X6100,G90 below) values are in BCD code...
- Page 108 Radioddity Extended manual for Xiegu X6100 v1.0 Table 1 (part 3 of 5) Sub- Rigs data description (Note 1 ) 0x01 Get SQL Gate,00=Close,01=Open 0x02 Get S-Meter, 0000~0255 BCD code Get Power-Meter, 0000~0255 BCD 0x11 code Get SWR-Meter, 0000~0255 BCD...
- Page 109 Radioddity Extended manual for Xiegu X6100 v1.0 Table 1 (part 4 of 5) Sub- Rigs data description (Note 1 ) 0x01 Get band stacking register, See Table X6100 0x03 Get IF filter width, See Table 2-5 0x00,0x62 (2 0x05 Get LOCK status...
- Page 110 Radioddity Extended manual for Xiegu X6100 v1.0 Table 1 (part 5 of 5) Sub- Rigs data description (Note 1 ) D0~D3 (4 Set/Get VFO mode and filter bytes) VFO index 0: Foreground VFO other: Background VFO Operating mode, See Table 2-2...
- Page 111 Radioddity Extended manual for Xiegu X6100 v1.0 Table 2-4 (part 1 of 2) Get band stacking register data format, D0~D1 (2 bytes) D0: Band index Value HAM Band Description 160m 80/75m D1: Spectrum Display Format Value Description 0x02 Center mode...
- Page 112 Radioddity Extended manual for Xiegu X6100 v1.0 Table 2-4 (part 2 of 2) Set band stacking register respond data format, D0~D39 (40 bytes) OFFSET BYTE Description Data mode switch Duplex and Tone setting Digital squelch setting Repeater tone frequency setting...
-
Page 113: Digital Modes And Cat-Control
Radioddity Extended manual for Xiegu X6100 v1.0 16 Digital modes and CAT-control 16.1 Software for digital modes As amateur radio operators like to experiment with new technology as well as adapt existing industry standards to the amateur radio world, new modes of radio operation pop up every once in a while. -
Page 114: Wsjt
Radioddity Extended manual for Xiegu X6100 v1.0 16.1.3 WSJT This Weak-signal transmission method invented by Joe Taylor (K1JT) or WSJT-X as its current version, is rather a group of transmission protocols and free amateur radio software for communication using weak signals. - Page 115 Radioddity Extended manual for Xiegu X6100 v1.0 Within the ‘General’ tab you set your callsign, grid locator and IARU region. You may want to alter the ‘Tx watchdog’ value that does define the time at which WSJT-X gives up in case it could not successfully manage a QSO.
- Page 116 Radioddity Extended manual for Xiegu X6100 v1.0 Within the ‘Radio’ tab you select your radio. V1.0 © Radioddity 2024 page 116/132...
- Page 117 Radioddity Extended manual for Xiegu X6100 v1.0 And not to forget the ‘Audio’ tab that is used to define the input and output signals used from your PC. If all is setup correctly you should be able to decode digital signals. In order to make a QSO with another station you have to manually enable TX by clicking the ‘Enable TX’...
-
Page 118: Fldigi
Radioddity Extended manual for Xiegu X6100 v1.0 16.1.5 FLdigi Fast Light digital Modem Application, pronounced ‘F L digi’ and abbreviated as FLdigi, is a cross-platform modem program that supports most of the peer-to- peer (live keyboard) digital modes used on the amateur radio bands. -
Page 119: Dimension 4
Radioddity Extended manual for Xiegu X6100 v1.0 16.1.6 Dimension 4 The successful operation of HF digital modes depends upon exact TX timing which is derived from the internal clock of your PC. Normally a PC would update its internal clock once a day. That is not sufficient for the described digital modes. -
Page 120: Gridtracker
There are quite a few programs out there that may be used with your Xiegu X6100. Some of them do support the Xiegu X6100 out of the box, others need to be set for G90 as those radio shares most of their command set for CI-V CAT control with the Xiegu X6100. - Page 121 Extended manual for Xiegu X6100 v1.0 Xiegu X6100. You then need to define the Transceiver settings to be used with flrig. In order to do so, select the ‘Config’ button in the top line of flrig, then move your mouse to ’Setup’ and over to ’Transceiver’. Then click on your left mouse button to select that option.
- Page 122 Whenever the Xiegu X6100 has not been implemented yet within a CAT control software you´d like to use, you may often select ‘flrig’ as radio and use the software with flrig as the connection bridge to your Xiegu X6100. This is a huge advantage of flrig.
-
Page 123: Technical Data
Radioddity Extended manual for Xiegu X6100 v1.0 17 Technical data Xiegu reserves the right to change the following technical data at any time and without further notice. General receiving: 0.5MHz~30MHz / 50.00~54MHz Frequency range 1.8~2.0MHz / 3.5~3.9*MHz 7.0~7.2*MHz / 10.1~10.15MHz 14.0~14.35MHz / 18.068~18.168MHz... - Page 124 • The above technical data are typical values and are subject to change without notice. • The operating frequency range of the Xiegu X6100 varies depending on the version of the device. Ask your local dealer for details. • When using the Xiegu X6100, please comply with the legal requirements applicable in your country.
-
Page 125: Certifications
Extended manual for Xiegu X6100 v1.0 18 Certifications The Xiegu X6100 is certified according to FCC Rule Part 15B. It may also be sold in the European Community as it is compliant with European regulations. This is attested by the following certificates. -
Page 126: Fcc Part 90 Approval For Xiegu X6100
Radioddity Extended manual for Xiegu X6100 v1.0 18.2 FCC part 90 approval for Xiegu X6100 Below you will find a copy of the FCC Rule Part 15B approval for the Xiegu X6100. V1.0 © Radioddity 2024 page 126/132... -
Page 127: Common Issues And Their Solution
3.4 amps at an output voltage of 13.8V DC. The Xiegu X6100 works from 9 to 15 volts DC, whereby the current consumption increases at a lower voltage than 13.8 VDC and is reduced at more than 13.8 VDC (up to a maximum of 15... - Page 128 Radioddity Extended manual for Xiegu X6100 v1.0 Issue Solution When should the charging The charger should be used when the radio is function be switched off? switched off. The battery management system (BMS) starts with a constant current charge, which is indicated by a flashing green LED. If the...
- Page 129 Why is there a black sticker Below the sticker there is a recess in the metal on the left side of the Xiegu side panel as the Bluetooth/Wi-Fi antenna of the X6100? Xiegu X6100 is located directly behind it. V1.0 © Radioddity 2024 page 129/132...
- Page 130 Plug in the supplied power supply to power the UPGRADE button, the Xiegu Xiegu X6100 during upgrade process. When X6100 powers down and the upgrading the firmware of the Xiegu X6100, it screen goes blank. needs to be connected to the power supply to complete the process.
-
Page 131: Where To Find Further Information
On the Internet you will find a variety of sources with information about the Xiegu X6100. When watching videos make sure that the Xiegu X6100 in the video is at the same firmware level as yours (features can change and bugs may be fixed between firmware versions). - Page 132 We would like to thank all Radioddity customers for their constructive feedback. If you find an error in the firmware of the Xiegu X6100 or in this documentation, or if you miss a function that you would have expected, or even if a detail has not been described to the expected extent, please feel free to write a message to support@radioddity.com.
Need help?
Do you have a question about the Xiegu X6100 and is the answer not in the manual?
Questions and answers