Table of Contents
Advertisement
Available languages
Available languages
Quick Links
A P R O U D H E R I T A G E O F E X P E R I E N C E & Q U A L I T Y
FRENCH DOOR REFRIGERATOR
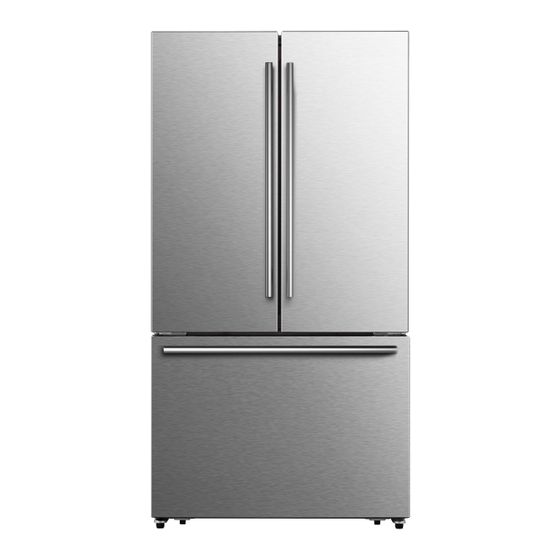
BR2660IFDRSS
USER MANUAL and
INSTALLATION INSTRUCTIONS
IMPORTANT SAFETY INSTRUCTIONS
Carefully read the important information regarding installation, safety and maintenance.
Keep these instructions for future reference.
T H E
L E G A C Y
C O M P A N I E S
W E S T O N ,
F L
U S A
3 3 3 3 1
W W W . V I N O T E M P . C O M
Advertisement
Chapters
Table of Contents

Related Manuals for Brama BR2660IFDRSS


Summary of Contents for Brama BR2660IFDRSS
- Page 1 A P R O U D H E R I T A G E O F E X P E R I E N C E & Q U A L I T Y FRENCH DOOR REFRIGERATOR BR2660IFDRSS USER MANUAL and...
-
Page 2: Table Of Contents
........................21 Disposal of the appliance ....................23 Brief Introduction Thank you for your choosing BRAMA. Kitchen areas in shops, offices and other We are sure you will find your new working environments. refrigerator a pleasure to use. Before you... -
Page 3: Important Safety Instructions
Important Safety Instructions General safety and daily use Don’t place items on top of the appliance as this could cause injury should they fall off. It is important to use your appliance safely. We recommend that you follow the Never allow children to play with the guidelines below. - Page 4 If the fitted plug is not suitable for your To avoid eye injury, do not look directly socket outlets, it should be cut off and into the LED light located in the refrigerator carefully disposed of. To avoid a compartment. If it is not functioning possible shock hazard, do not insert the correctly, consult a qualified, registered discarded plug into a socket.
-
Page 5: Installing Your New Appliance
Installing Your New Appliance Before using the appliance for the first time, you should be informed of the following tips. 1/2 " WARNING For proper installation, this refrigerator must be placed on a level surface of hard material that is the same height 70"... -
Page 6: Door Removal
Leveling of appliance Door Removal For sufficient leveling and air circulating In case your home access door is too in the lower rear section of the narrow for the refrigerator to pass appliance, the bottom feet may need through, remove the refrigerator doors to be adjusted. - Page 7 T H E L E G A C Y C O M P A N I E S W E S T O N , U S A 3 3 3 3 1 W W W . V I N O T E M P . C O M...
- Page 8 Use both hands to open the door more Take out the ice storage box (H) by than 90°. Lift it up and take it off. lifting it up in the direction of the arrow. Take out the upper freezer drawer (G) by lifting it up from the rail system.
-
Page 9: Connecting To The Water Supply Line
What you need to have before you start Pull out the freezer door and lift it up in the direction of the arrow. 1. Power drill and 1/4’’ drill bit. 2. 1/2’’ or adjustable wrench. 3. Flatblade and Philips head screwdrivers. Saddle-type one 1/4”... - Page 10 6. Turn the water on and check 3. Connect 1/4’’ extension tubing to shutoff for leakage. valve outlet. Saddle-Type Compression Nut Shutoff Valve 1/4” Extension tubing Packing Nut Outllet Valve Ferrule(sleeve) CAUTION! Flush the tubing. Turn the main water supply on and flush out the tubing until Check to see if leaks occur at the the water is clear.
- Page 11 Connect Water Line to Refrigerator Note: IMPROTANT: If you turn the refrigerator Use only the new tubing supplied with on before the water is connected, turn the refrigerator. Old tubing should not off the ice maker. be used. You may need to purchase below After connected to the water supply line, please open the water valve to flush the items to complete this connection.
- Page 12 Freezer Upper Drawer Refrigerator LED Light Door Bins Water Filter Ice storage box (inside) Mullion Air Channel Water dispenser (inside) Freezer Lower Drawer Glass Shelf Crisper Cover Hinge Cover Foldable-Shelf Crisper Drawer Control panel Full-width Pantry Adjustable bottom feet Mullion Guide Block Ice Maker (inside) Note: Due to unceasing modification of our products, your refrigerator may be slightly different...
-
Page 13: Display Controls
Display Controls Your product has one control panel which is installed on the top cover. Use your appliance according to the following control guidelines. When the appliance is powered on for 47°F - 46°F - 45°F - 44°F - 43°F - 42°F - 41°F the first time, the backlighting of the 35°F - 36°F -... -
Page 14: Water Filter
3 seconds, and a buzzer sounds. your refrigerator or the BRAMA after-sales The temperature setting reverts back to service system. the previous setting. -
Page 15: Using Your Appliance
Using your Appliance This section tells you how to use most of the useful features. We recommend that you read through them carefully before using the appliance. Changing the water filter Note: To drink the freshest and cleanest water To change the water filter easily, shut off from your refrigerator, change the filter the water supply valve. - Page 16 1- 5. If leaks persist, discontinue use and call 2 Using your fridge compartment BRAMA customer service.. The refrigerator compartment is suitable Removing any residual matter inside the for storage of vegetables and fruit. Food...
-
Page 17: Glass Shelves
Door baskets The refrigerator compartment is also provided with a foldable shelf. It can be folded as required. The refrigerator compartment is provided To fold the shelf, hold the removable with six door baskets, which are suitable glass(R) and lift it up slightly, then push it for the storage of canned liquid, bottled slightly in the direction of the arrow. -
Page 18: Cleaning And Care
Following installation, allow 24 hours to produce the first batch of ice. Discard the first three batches of ice produced. Allow 2 to 3 days to fill the ice storage container. If the ice in the ice container clumps, break up ice using a plastic utensil and discard. -
Page 19: Replacing The Led Light
Although this appliance automatically CAUTION! defrosts, a layer of frost may occur on the freezer compartment’s interior walls if Only after the door seals are the freezer door is opened frequently or completely dry should the kept open too long. If the frost is too appliance be powered on. -
Page 20: Helpful Hints And Tips
Helpful Hints and Tips Energy Saving Tips Milk bottles: Should have a lid and be stored in the We recommend that you follow the tips door racks. below to save energy. Hints for freezing Try to avoid keeping the door open for long periods in order to conserve energy. -
Page 21: Trouble Shooting
Trouble shooting If you experience a problem with your appliance or are concerned that the appliance is not functioing correctly, you can carry out some easy checks before calling for service, please see below. WARNING 1.Don’t try to repair the appliance yourself. If the problem persists after you have made the checks mentioned below, contact a qualified electrician, authorized service technician or the shop where you purchased the product. - Page 22 The temperature outside the appliance is high. The motor runs Doors are kept open too long or too often. continuously After first installing the appliance or if it has been switched off for a long time. Check that the air outlets are not blocked by food and A layer of frost ensure food is placed within the appliance to allow sufficient occurs in the...
-
Page 23: Disposal Of The Appliance
Disposal of the Appliance DANGER It is prohibited to dispose of this appliance as household waste. Packaging materials Packaging materials with the recycle symbol are recyclable. Dispose of the packaging into a suitable waste collection container to recycle it. Before disposal of the appliance 1. - Page 24 For two years from the date of purchase by the original owner, BRAMA products will, at its option, repair or replace any part of the product which proves to be defective in material or workmanship under normal use.
-
Page 25: Service & Important Notice
SERVICE & IMPORTANT NOTICE Upon receipt and inspection of unit, the supply cord must be replaced if it is damaged. Contact our customer service at 1-954-686-4441. The manufacturer has a policy of continuous improvement on its products and reserves the right to change materials and specifications without notice. - Page 26 Español ORGULLO HERENCIA DE EXPERIENCIA Y CALIDAD Cocinas independientes de combustible dual BR2660IFDRSS MANUAL DEL USUARIO y INSTRUCCIONES DE INSTALACIÓN INSTRUCCIONES DE SEGURIDAD IMPORTANTES Lea atentamente la información importante sobre instalación, seguridad y mantenimiento. Guarde estas instrucciones para referencia futura.
- Page 27 Usar seu aparelho.......................15 Limpieza y cuidado......................18 Sugerencias y consejos útiles....................20 Resolución de problemas....................21 Eliminación del aparato....................23 Introducción breve Gracias elegir BRAMA Estamos Cocinas en tiendas, oficinas y otros seguros de que disfrutará utilizar el nuevo ambientes de trabajo. refrigerador. recomendamos leer Hoteles, moteles y otro tipo residencial.
-
Page 28: Instrucciones Importantes De Seguridad
Instrucciones importantes de seguridad Seguridad general y uso No coloque objetos sobre el aparato, ya que podrían provocar lesiones en diario caso de caída. Es importante utilizar el Nunca permita que los niños jueguen electrodoméstico de forma segura. con el aparato colgándose o Se recomienda seguir estas pautas. - Page 29 Si el conector no es apto para su Para evitar lesiones en la vista, no mire tomacorriente, debe cortarlo y directamente a la luz LED ubicada en el eliminarlo cuidadosamente. Para compartimiento del refrigerador. Si no evitar posibles descargas eléctricas, funciona correctamente, consulte con no coloque el conector que ya un electricista cualificado y certificado o...
-
Page 30: Instalar El Nuevo Aparato
Instalar el nuevo aparato Antes de utilizar el aparato por primera vez, debe leer los siguientes 1/2” consejos. ADVERTENCIA Para realizar una instalación adecuada, se debe colocar la nevera sobre una superficie nivelada de material duro que 70” esté a la misma altura que el resto del suelo. - Page 31 Estabilización del aparato Retirada de las puertas Para um nivelamento suficiente e Si la puerta de acceso a su hogar es demasiado estrecha para que pase circulação de ar na parte inferior el refrigerador, retire las puertas y los traseira do aparelho, os pés precisam de ser ajustados.
- Page 32 Instalación de tiradores de puertas y cajones LOCALICE Y RETIRE LOS TIRADORES Y LA BOLSA DE POLIETILENO DE LAS PIEZAS DEL INTERIOR DEL REFRIGERADOR. Afloje los tornillos de fijación de los soportes de uno de los tiradores. Coloque el tirador sobre los dos pasadores en la cara de una puerta.
- Page 33 Para quitar el recipiente (H) para almacenar hielo, levántelo quítela. siguiendo la dirección de la flecha. Retire el cajón superior del sistema de rieles. 4. Retire las 4 tuercas de cabeza (5/32”,4mm). Retire las bisagras de la puerta inferior izquierda y Retire el cajón inferior del congelador (C) levantándolo.
- Page 34 2. Llave de 1/2” o llave inglesa. Válvula de cierre de 1 Virola tipo montura uno y 1/4” 1 Acoplador 2 Pinza congelador después de trasladar el aparato a su Puede encontrar estos artículos en orden contrario. Conectar la tubería de suministro de agua electrodoméstico es el dispenser de Primero, cierre el suministro de agua...
- Page 35 3. Conecte el tubo de extensión de 1/4” 6. Abra el agua y compruebe si hay fugas. a la salida de la válvula de cierre. Tuerca de Tipo de Sillín Tipo de Sillín compresión Tubo de extensión de Tuerca de 1/4”...
- Page 36 Conexión de la tubería de agua Nota: al refrigerador Utilice solamente la tubería nueva IMPROTANTE: Si enciende el suministrada con el refrigerador. No refrigerador antes de conectar el se debe utilizar la tubería vieja. agua, apague la máquina de hacer Después de conectar la línea de hielo.
-
Page 37: Descripción Del Aparato
Descripción del aparato Cajón superior del Compartimentos de la puerta Luz LED del refrigerador congelador Recipiente para Parteluz Filtro de agua hielo (adentro) Dispenser de agua (adentro) Canal de aire Cajón inferior del congelador Cubierta del recipiente para Estantes de vidrio Cobertor de la bisagra verduras Estantería plegable... -
Page 38: Controles De La Pantalla
Controles de la pantalla El producto dispone de un panel de control en la cubierta superior del refrigerador. Utilice el aparato siguiendo estas pautas de control. Cuando se encienda el aparato por 47°F - 46°F - 45°F - 44°F - 43°F - 42°F - 41°F primera vez, la retroiluminación de los 35°F - 36°F -... -
Page 39: Filtro De Agua
La configuración de la temperatura donde compró el refrigerador o en el vuelve a la configuración anterior. sistema de servicio de post venta de BRAMA. Modo demo (Indicador de Antes de eso, compruebe que el filtro movimiento de temperatura nuevo sea del mismo tipo que viene... -
Page 40: Usar Seu Aparelho
Usar seu aparelho Esta sección explica cómo utilizar la mayoría de funciones útiles. Se recomienda leerla detenidamente antes de utilizar el aparato. Obtención del agua fría El dispenser de agua está ubicado en el lado izquierdo de la heladera. Abra las puertas del refrigerador y presione el botón del dispenser de agua para 2. - Page 41 ósmosis inversa. Para centro de atención al cliente de solucionarlo, quite el filtro de agua. BRAMA. Uso del compartimiento del Quite cualquier contenido residual refrigerador dentro de la línea de agua después...
-
Page 42: Estantes De Vidrio
Canastos de la puerta El compartimiento del refrigerador también cuenta con un estante plegable. Se puede plegar según sus El compartimiento del refrigerador necesidades. cuenta con seis canastos en la puerta, Para plegar el estante, sostenga el los cuales son ideales para almacenar vidrio extraíble (R) y levántelo líquidos enlatados, botellas y alimentos suavemente. -
Page 43: Limpieza Y Cuidado
Siguiendo la instalación, deje que pasen 24 horas para producir la primer tanda de hielo. Elimine las primeras tres tandas de hielo. Deje que pasen de 2 a 3 días para llenar el recipiente de almacenamiento de hielo. Si el hielo en el recipiente se aglomera, rompa el hielo utilizando un utensilio de plástico y elimínelo. - Page 44 Limpieza del sello de las puertas Aunque esta unidad se descongela automáticamente, puede producirse Procure mantener limpio el sello de las una capa de escarcha en las paredes puertas. Los alimentos y bebidas interiores del congelador si la puerta del pegajosos pueden hacer que los sellos se congelador se abre con frecuencia o se enganchen en el armario y se rompan al...
-
Page 45: Sugerencias Y Consejos Útiles
Sugerencias y consejos útiles Consejos de ahorro de energía Botellas de leche: Deben tener una tapa y se pueden almacenar en los estantes de la puerta. Se recomienda seguir estos consejos para ahorrar energía. Sugerencias de congelación Procure evitar mantener la puerta abierta durante mucho rato para Cuando lo encienda por primera vez o lo ahorrar energía. -
Page 46: Resolución De Problemas
Resolución de problemas Si experimenta problemas con el aparato o le preocupa que no funcione correctamente, puede realizar algunas comprobaciones sencillas antes de llamar al servicio de mantenimiento, consulte a continuación. ADVERTENCIA 1. No intente reparar el aparato usted mismo. Si el problema persiste después de haber realizado las comprobaciones que se mencionan a continuación, póngase en contacto con un electricista cualificado, con un técnico de servicio autorizado o con la tienda donde compró... - Page 47 La temperatura exterior del aparato es demasiado elevada. El motor Las puertas han estado abiertas demasiado rato o se abren funciona muy a menudo. Después de instalar por primera vez el aparato o si ha continuamente estado desconectado por un largo periodo de tiempo. Compruebe que las salidas de aire no estén bloqueadas con Hay una capa alimentos y asegúrese de que la comida esté...
-
Page 48: Eliminación Del Aparato
Eliminación del aparato PELIGRO Está prohibido eliminar este aparato con los residuos domésticos. Materiales de embalaje Los materiales de embalaje con el símbolo de reciclaje son reciclables. Arroje el embalaje al contenedor de recogida de residuos adecuado para reciclarlo. Antes de eliminación del aparato 1. - Page 49 COBERTURA: GARANTÍA LIMITADA DE DOS AÑOS BRAMA Products garantiza que el producto está libre de defectos en materiales y / o mano de obra durante un período de veinticuatro (24) meses desde la fecha de compra por el propietario original. El tiempo mencionado arriba comienza a ejecutarse a partir de la fecha de compra, y no se puede detener, estar sujeto a derechos, extender o suspender por cualquier motivo no ser que se describe en detalle en el documento de garantía.
- Page 50 SERVICIO Y AVISO IMPORTANTE Al recibir e inspeccionar la unidad, se debe reemplazar el cable de alimentación si está dañado. Comuníquese con nuestro servicio al cliente al 1-954-686-4441. El fabricante tiene una política de mejora continua en sus productos y se reserva el derecho de cambiar materiales y especificaciones sin previo aviso.
Need help?
Do you have a question about the BR2660IFDRSS and is the answer not in the manual?
Questions and answers