Electrolux EWW13 Series User Manual
Hide thumbs
Also See for EWW13 Series:
- User manual (50 pages) ,
- User manual (50 pages) ,
- User manual (50 pages)
Table of Contents
Advertisement
Quick Links
Advertisement
Table of Contents

Related Manuals for Electrolux EWW13 Series


Summary of Contents for Electrolux EWW13 Series
- Page 1 USER MANUAL WASHER-DRYER EWW13******...
- Page 2 Welcome to Electrolux! Thank you for choosing our appliance. Get usage advice, brochures, troubleshooter, service information, buy accessories & spare parts, online product registration: www.electrolux.com CUSTOMER CARE AND SERVICE We recommend the use of original spare parts. When contacting Service, ensure that you have the following data available.
-
Page 3: Table Of Contents
CONTENTS 1. SAFETY INFORMATION ...........4 2. -
Page 4: Safety Information
1. SAFETY INFORMATION 1.1 Conditions Of Use This appliance is intended to be used in household and similar applications such as: • staff kitchen areas in shops, offices and other working environment; • farm houses; • by clients in hotels motels, and other residential type environments;... -
Page 5: Child Safety
1.2 Child Safety • This machine is not intended for use by children or infirm persons without supervision. • The children should be supervised to ensure that they do not play with the appliance. • The packaging components (e.g. plastic film, polystyrene) can be dangerous to children-danger of suffocation! Keep them out of children’s reach. - Page 6 1.4 Installation • Never use the machine if the power supply cable, the control panel, the • This appliance is heavy. Care should working surface, or when the base is be taken when moving it. damaged; and where the inside of the machine is accessible.
-
Page 7: Electrical Connection
To minimize the risk of fire in a washer- is specifically recommended by the manufacturer of the fabric softener or dryer, the following should be observed: product. • Items that have been spotted or • Undergarments that contain metal soaked with vegetable or cooking oil reinforcements should not be placed constitute a fire hazard and should not in a washer-dryer. -
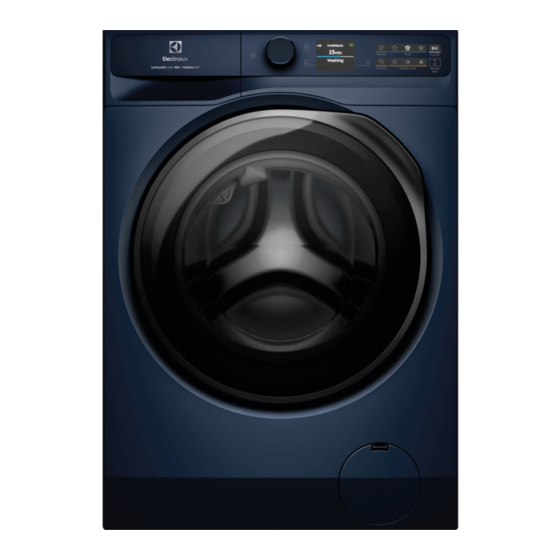
Page 8: Product Description
2. PRODUCT DESCRIPTION 2.1 Special features • The Wi-Fi connection and Remote Start enable you to start a cycle, to Your new machine meets all modern interact with your washing machine requirements for effective treatment and to check the washing cycle status of laundry with low water, energy and in remote control. - Page 9 2.2.1 Detergent Dispenser (AutoDose 2.2.4 Level Adjustment feet Tanks and Manual Compartments) For details about using Detergent dispenser with AutoDose tanks and manual compartments refer to section 9.2 2.2.5 Transit Bolt (when remove) 2.2.2 Door (when open) Rating Label Drum Lifter Stainless Steel...
-
Page 10: Technical Data
3. TECHNICAL DATA Dimensions (Height / Width / Depth) 850 x 600 x 659 mm Power supply (Voltage / Frequency) 220 - 240 V~/ 50 Hz Total power absorbed Wash 2100 W / Dry 1500 W Water supply pressure (Maximum / Minimum) 0.8 MPa / 0.05 MPa Maximum Spin Speed 1400 rpm... - Page 11 4.2 Positioning WARNING! Before proceeding with installation, read the safety information, and dimension preferred. 600 mm 659 mm 575 mm 850 mm 930 mm ENGLISH 11...
- Page 12 20 mm 20 mm CAUTION! When installing the product make sure the levelling feet is not pressing on the power cord. When the machine is levelled, try to rock it from corner to corner. If it does rock, adjust the legs again wall until it is levelled and does not rock.
-
Page 13: Water Inlet
4.3 Water Inlet Connect the water inlet hose to a tap Max. Max. with 3/4” BSP thread. Use the hose 117 cm 91 cm supplied with the machine. DO NOT USE OLD HOSES. The inlet hose must not be lengthened. If it is too short and you do not wish to move the tap, you will have to purchase a new, longer hose specially designed for... - Page 14 Max. 90 cm Min. 60 cm • In a sink, drain pipe branch. This branch must be above the trap so that the bend is at least 60 cm above the ground. Max. Max. Push the drain hose onto the spigot 41 cm 88 cm and secure with a clip, ensure a loop...
-
Page 15: Control Panel And Smartselect
5. CONTROL PANEL AND SMARTSELECT 5.1 Control Panel Description 5.2 SmartSelect Programme selector knob Menu touch key SmartSelect is a new and unique feature that allows the user to select the Display correct washing settings based on the SmartSelect washing touch key soil level of the fabrics, taking care of the garments and enhancing the user •... - Page 16 5.4 Dual timer interface 2. Wash & Dry A new way to visualize and manage washing and drying cycles, giving precise feedback about cycle time and helping you to plan and decide which setting to apply. Independent presentation of washing (in white) and drying (in amber) only for few seconds, landing to total washing+drying cycle time.
-
Page 17: Dial And Buttons
6. DIAL AND BUTTONS 6.1 On/Off Press and hold briefly this button for a few seconds to activate or deactivate the appliance. A dedicated jingle sound while switching the appliance on or off, lights and display switches on and Start/ Pause button led pulse. - Page 18 • To go back to the main list, turn the 6.4 Right/Left soft key dial to the left to the Back to main list position and press the left soft key next to Back indication. The two soft keys buttons are located on the right and the left of the display.
-
Page 19: Remote Start
6.5 Start/Pause It can reduce wrinkles and light odours and will refresh clothes that does not need a wash. Tap the Start/Pause button to start, 2. Light pause the appliance or interrupt a This option is recommended for very running programme. lightly soiled clothing, without visible stains. -
Page 20: Dryness Level
This option is used to select desired 2. Cupboard dry drying time in programmes where time It is the default drying level selected drying is available. for most programme, and it is indicated for items to be stored. You can adjust the time by pressing the right soft key next to to increase... -
Page 21: Water Hardness
Rotate the knob to select the right Water Hardness level and tap on the right soft key confirm the default setting. The display suggests to set the proper water hardness level to improve the Tap on the left soft key to return washing results. -
Page 22: The Autodose Technology (Autodosing)
9. THE AUTODOSE TECHNOLOGY (AUTODOSING) Read this chapter carefully. In some programmes, AutoDose is deactivated (the indicators and/or are not displayed and the 9.1 Introduction display shows OFF) because there are Right detergent and fabric softener garments requiring special detergents dosage takes better care of the laundry or treatments. - Page 23 you may need to change the factory setting. Read in the paragraph 'AutoDose configuration mode' how to change the basic setting, but before: 1. Identifying the water hardness level. Check the water hardness level in your area. The levels are generally indicated as: soft, medium and hard.
-
Page 24: Water Hardness Levels
Water hardness levels Water hardness range Levels ˚f ˚d ˚e mmol/l Soft < 15 < 8 < 10 < 1.4 < 140 Medium 15-25 8-14 0-17 1.5-2.5 150-250 Hard > 15 > 14 > 17 > 2.5 > 250 French degrees German degrees English degrees Factory setting, able to satisfy most of the use... - Page 25 9.5 AutoDose - Setup Linked mode If Linked Detergent is not available for a certain programme, the display To make this option available on will show "AutoDose OFF" and pressing the control panel, this function must be the AutoDose key will generate an error enabled in our app.
- Page 26 3. Gently pour only liquid detergent in 6. Gently close the detergent dispenser, till click engagement. the AutoDose detergent tank . Fill up to the maximum indicated level 9.7 AutoDose low level indication 4. Gently pour only liquid softener in the Do not refill the AutoDose tanks AutoDose fabric softener tank .
- Page 27 Some notifications have actionable 9.8 Switching from AutoDose to choices, like the tank refill that takes you manual dosing to the AutoDose guide. The display show clearly if is required the It is possible to disable AutoDose refill for detergent or softener. function for one or both tanks by pressing related button symbol.
- Page 28 9.9 Manual filling the detergent 3. If desired, pour the fabric softener in and additives the compartment You may need to use a different detergent or fabric softener than the ones used in the AutoDose tanks. First, make sure that the AutoDose tanks are disabled and then pour the detergent and/or other treatments in the manual compartments.
-
Page 29: Programmes
To restart the programme, ensure the If you press the Start/Pause button, a drawer is properly closed and press specific popup view is showed indicating Start/Pause button. to close the drawer. Then the display returns to the previous paused state. This will happen even if the user turned AutoDose off. - Page 30 Max. Max. Load Programme; (Dry Clothes) Spin Temperature Type of load and soil level speed range Wash (rpm) Sanitise; 1400 White cotton items. This high-performance wash programme combined with steam 60°C vapour, removes more than 99,99% of bacteria and viruses keeping the temperature above 60°C throughout the washing phase;...
- Page 31 Programme Options ...
- Page 32 10.2 More Programmes Max. Max. Load (Dry Programme; Clothes) Spin Temperature Type of load and soil level speed range Wash (rpm) Easy Iron; 4 kg Reduces creases for easier ironing. Cold to 60°C Tub Clean; Removes build-up and odours from drum. 60°C Work Wear;...
- Page 33 When you set a washing programme and enter the Menu , the display shows the available options. Child Lock and Finish In are selectable with all programmes. Programme Options ...
- Page 34 10.3 Woolmark Apparel Care - Blue Dryness Level Type of fabric Load Cotton and linen up to Cupboard Dry (bathrobes, bath Max. Suitable for items towels, etc.) to put away with- out ironing Synthetics and up to mixed fabrics 3 kg ( jumpers, blouses, underwear, household linen)
-
Page 35: Wi-Fi Connectivity Setup
Wi-Fi network and account, and accept the Terms and to link it to a mobile devices. Conditions and Electrolux’s Privacy Policy in the app to use the connected By this functionality you can receive features of the laundry appliance. - Page 36 1. Go to the App Store/Play Store, Connecting your appliance download and install our app on your smart device. Before proceeding with next steps, be sure that our app has been downloaded and configured and you smart device connected to your home network.
-
Page 37: Over-The-Air Update
After confi rming the reset the display shows 11.4 Wi-Fi Always On the message "Network is reset" and the Wi- Fi is set off . The Wi-Fi Always On function is available in our app. This function keeps the appliance 11.3 Over-the-air update connected to the network even when the appliance is turned off. -
Page 38: Hygienic Care
12.3 Prewash 12.5 Hygienic Care Use this option to add a pre-wash phase Select this option to add approximately at 30 °C before the washing phase. 30 minutes of tumbling in vapour after the rinse cycle. The indicator of this option This option is recommended for heavily will be on. -
Page 39: Child Lock
• If you want to decrease time tap the left soft key next to , the duration will be reduced by one hour with each tap. • Once you have selected the desired timer wait 3 seconds and you will be redirected to the home screen where at the top of the display you will be able to see the countdown. - Page 40 • You can activate this option by tapping the right soft key (The screen back to the selected programme with the child lock icon appear.) • After you have activated the options soft keys and the touch screen are deactivated. It is possible to turn the appliance off by means of the On/Off button.
-
Page 41: Settings
• Confirm the row by tapping the right How to access the favourites cycle soft key To access the favourites from • After two seconds, the display will programmes list rotate the dial to the left. show the selected cycle as a favourite recognizable by a heart at the top of If the fields are occupied the first the screen. - Page 42 13.7 Save last used 13.4 Water Hardness With this setting you can change the Save the last used by enable. Water Hardness level. To activate/deactivate the option: To modify the level: • Tap the right soft key and the • Tap the right soft key next to or left relevant indicator will turn ON /OFF.
-
Page 43: Daily Use - Washing Only
• AutoDose: guide about detergent and 13.10 Display Brightness softener. With this setting you can change the • Wi-Fi: information about the on Display Brightness. boarding. To modify the level: Go back to the previous view by • Tap the left soft key next to tapping the left soft key indicator to decrease brightness. -
Page 44: Setting A Programme
14.4 Setting a programme You can also: 1. Tap on the left soft key to change The Cottons is the default proposed the Temperature programme when the appliance is 2. Tap on the right soft key to change turned on. the Spin speed. - Page 45 14.6 Using detergent and other 14.9 Cancelling a running treatments programme If both AutoDose tanks are enabled 1. Press the On/Off button to cancel (ON) in the set programme, detergent the programme and to deactivate the and fabric softener are automatically appliance.
-
Page 46: End Of The Programme
14.11 End of the programme 14.13 Stand-by function When the programme has finished, the The Stand-by function automatically appliance stops automatically. The deactivates the appliance to reduce the acoustic signals operate (if they are energy consumption when: active). The display shows Done, the •... -
Page 47: Daily Use - Washing & Drying
15. DAILY USE - WASHING & DRYING In the display the door locked WARNING! indicator comes on. Refer to Safety chapters. The display also shows the remaining programme time. This appliance is an automatic washer dryer. 15.2 Washing and Drying - Automatic levels 15.1 Complete Wash &... -
Page 48: At The End Of The Drying Programme
2. Press button Start/Pause to start the programme. In the display the door locked indicator comes on. The display also shows the remaining programme time. 15.4 At the end of the drying programme The anti-crease phase is recommended to reduces creasing. •... -
Page 49: Daily Use - Drying Only
16. DAILY USE - DRYING ONLY The indicators illuminate accordingly: WARNING! a. Iron dry : for cotton items; Refer to Safety chapters. b. Cupboard dry : for cotton and synthetic items; c. Extra dry : for cotton items. This appliance is an automatic washer dryer. - Page 50 The anti-crease phase is 2. Press button Start/Pause to start recommended to reduces creasing. the programme. • The display indicates that the anti- In the display appears the indicator of crease phase is done and items could the Start/Pause to finish the drying be removed.
-
Page 51: Hints And Tips
17. HINTS AND TIPS 17.1 Sorting The Laundry • Wash bras, pantyhose and other delicates in Follow the wash code symbols on each a mesh laundry bag, garment label and the manufacturer’s which you can washing instructions. Sort the laundry purchase from your as follows: whites, coloureds, synthetics, supermarket. -
Page 52: Removing Stains
17.5 Removing Stains 17.6 Detergents Type and Quantity Stubborn stains may not be removed by Low suds detergent is required for this just water and detergent. It is therefore machine to prevent over suds problems, advisable to treat them prior to washing. unsatisfactory washing result and harm to the machine. -
Page 53: Saving Tips
Use the correct quantity of water washing. softener. Follow the instructions that you find on the packaging of the product./or www. 17.7 Saving tips electrolux.com Let the SmartSelect function guide 17.9 Prepare the drying cycle you to save energy and water. Light and Normal options can be used the most of the time. -
Page 54: Garment Labels
17.11 Garment Labels 17.14 General Tips When you dry the laundry, obey Refer to the "Time Dry suggested" table the indications on the labels of the to find the average drying times. manufacturers: Experience will help you to dry the •... -
Page 55: International Wash Code Symbols
18. INTERNATIONAL WASH CODE SYMBOLS These symbols appear on fabric labels, in order to help you choose the best way to treat your laundry. Energetic wash Max. wash Max. wash Max. wash Max. wash DO NOT temperature temperature temperature temperature Hand wash wash at all 95 °C... -
Page 56: Care And Cleaning
19. CARE AND CLEANING This could generate bad odours and WARNING! mildew. You must DISCONNECT the appliance To eliminate these deposits and from the electricity supply, before hygienize the inner part of the appliance, you can carry out any cleaning or run a maintenance wash at least once a maintenance work. - Page 57 19.6 Cleaning The Detergent 3. Press the catch on the back as indicated in the picture and lift up the Dispenser and The Autodose top cover to open. Tanks CAUTION! If you change detergent type as brand, concentration, and thickness, then it is suggested to clean the detergent drawer.
- Page 58 5. Turn the dispenser up side down and open the bottom cover as indicated in the picture. 6. Make sure that all detergent residue is removed from the conveyor. Use only soft damp clothes. 7. Put bottom cover back to its position by aligning its holes on drawer hooks as indicated in the picture.
-
Page 59: Cleaning The Drain Pump
19.7 Cleaning The Drain Pump Disconnect the mains plug from the mains socket. Regularly examine the drain pump and make sure that it is clean. Clean the drain pump if: • The appliance does not drain the water. • The drum cannot turn. 9. - Page 60 2. Place a suitable water container Turn the filter counter-clockwise to below the recess of the drain pump to remove it. collect the water that flows out. Press the two levers and pull forward the drainage duct to let the water flow out.
-
Page 61: Cleaning The Water Inlet Filter
6. Make sure that the impeller of the pump can turn. If this does not occur, contact the service centre. 9. Close the drain pump door. 19.8 Cleaning The Water Inlet Filter 7. Clean the filter under the water tap. If your water is very hard or contains traces of lime deposit, the water inlet filter may become clogged. - Page 62 4. Remove the inlet hose behind the appliance. Install the valve filter back to the housing. 5. Use a suitable tool pulling filter from the valve (e.g. long nose pliers) as picture. 6. Install the inlet hose again. Make sure that the couplings are tight to prevent leakages.
-
Page 63: Emergency Drain
19.9 Emergency Drain If the appliance cannot drain the water, carry out the same procedure, described in 'Cleaning the drain pump' paragraph. If necessary, clean the pump. When you drain the water with the emergency drain procedure, you must activate the drain system again: 1. -
Page 64: Troubleshooting
20. TROUBLESHOOTING 20.1 Possible Failures Certain problems are due to lack of simple maintenance or oversights, which can be solved easily without calling out an engineer. Before contacting your local Service Centre, please check troubleshooting below. Once the problem has been eliminated, press the Start/Pause button to restart the programme. - Page 65 Malfunction Possible cause Solution The drain hose is squashed or Check the drain hose connection. kinked. The drain pump is clogged. Clean the drain filter. Machine does not empty and/or does The option "Rinse Hold" has been Press Start/Pause touch key to not spin: selected.
- Page 66 Malfunction Possible cause Solution There is very little laundry in the Load more laundry. drum. Machine vibrates or is Unstable floors e.g. wooden Refer to relevant paragraph in noisy: floors. "Positioning" section. Detergent over dose. Reduce the detergent quantity or use another one.
- Page 67 Malfunction Possible cause Solution The "Time Dry" or the "Dryness Select the drying time or the Level" degree has not been dryness level degree. selected. The water tap is not turned on. Open the water tap. Machine does The drain filter is clogged. Clean the drain filter.
-
Page 68: Emergency Door Opening
20.2 Emergency Door Opening In case of power failure or appliance failure, the appliance door remains locked. The wash programme continues when power is restored. If the door remains locked in case of failure, it is possible to open it using the emergency unlock feature. -
Page 69: Environment Concerns
21. ENVIRONMENT CONCERNS 21.1 Packaging Materials 21.3 Ecological Hints The materials marked with the symbol To save water, energy and to help are recyclable. protect the environment, we recommend that you follow these tips: >PE<=polyethylene • Normally soiled laundry may be >PS<=polystyrene washed without pre-washing in order >PP<=polypropylene. - Page 70 G0044217-001-A28643801...
Need help?
Do you have a question about the EWW13 Series and is the answer not in the manual?
Questions and answers