
Related Manuals for Proline GR90S


Summary of Contents for Proline GR90S
- Page 1 GR90S AIR CONDITIONER CLIMATISEUR AIRCONDITIONER CONDIZIONATORE D'ARIA AIRE ACONDICIONADO KLIMATIZAČNÍ ZAŘÍZENÍ KLIMATIZAČNÉ ZARIADENIE KLİMA CİHAZI...
- Page 3 MODEL GR90S MOBILE AIR CONDITIONER INSTRUCTION MANUAL...
-
Page 4: Electrical Connection (Uk Only)
ELECTRICAL CONNECTION (UK ONLY) For your safety please read the following information. Warning: This appliance must be earthed. The appliance must be connected to a 220-240 volts 50 cycle AC supply by means of a three pin socket, suitably earthed. The appliance is supplied with a moulded 13 amp 3 pin mains plug fitted with a 13 amp fuse. - Page 5 WARNINGS: • Only use in the upright position on a flat level surface and at least 50cm from the wall or any objects. This appliance is not intended for use by persons (including children) with reduced physical, sensory or mental capabilities, or lack of experience and knowledge, unless they have been given supervision or instructions concerning use of the appliance by a person responsible for their safety.
-
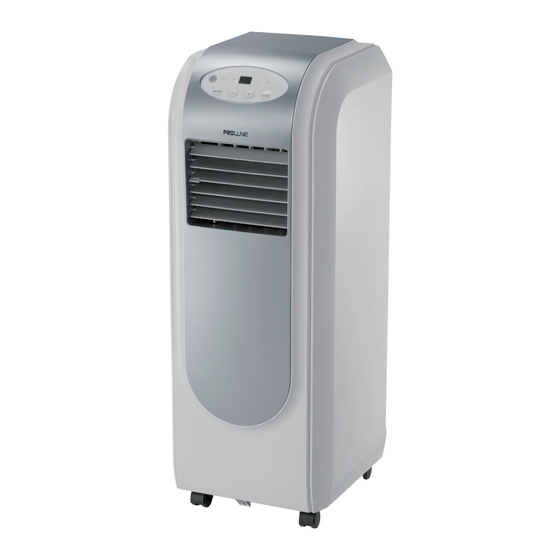
Page 6: Identification Of Parts
IDENTIFICATION OF PARTS Front View Horizontal louvers Vertical Louvers Castors (4) Rear View Remote control box Filters Upper air inlet Exhaust air outlet Lower air inlet... -
Page 7: Control Panel
CONTROL PANEL Display Remote control receiver Buttons: MODE + / - : Temperature / timer setting ON/OFF: Turn the unit on or off. Indicator lights: Full water Cool mode Dehumidification mode Fan mode... -
Page 8: Remote Control Operation
OPERATION The functions can be performed by pressing the buttons either on the control panel of the unit or on the remote. REMOTE CONTROL OPERATION ON/OFF button MODE: Press the button repeatedly to select the desired operating mode. AUTO COOL DEHUMIFICATION Remark: When AUTO mode is selected, the temperature will not be displayed. -
Page 9: Lock Function
Press the button to activate the sleep function and the arrow on the remote display will point to In COOL and DEHUMIDIFICATION modes, the setting temperature will increase by 1 degree after 1 hour and increase a further 1 degree after 2 hours. To cancel the function, press the button again. - Page 10 2. Connect the assembly to the exhaust air outlet. The hose may be extended from 500mm to 1500mm but for maximum efficiency use the shortest length. WARNING! Do not replace or prolong the exhaust hose with your own private hose as this could cause the unit to malfunction Air conditioning installation To install through the window, put the assembly outside the window when the unit is in use.
-
Page 11: Maintenance
MAINTENANCE Drainage Before the air conditioner is turned on, you can insert the rubber plug to the drain or attach the supplied drain hose to the drain hole. A. Rubber plug Bracket B. Drain hole C. Rubber plug for drain hose Use the supplied screw to fix the bracket to the unit. -
Page 12: Troubleshooting
Cleaning the Filter Remove the air inlet filter as shown. Use a vacuum cleaner or tap the filter lightly to remove loose dust and dirt from the filter and then rinse it under running water. Dry thoroughly before replacing. NOTE: Never operate the unit without the filter. Storing the Power Cord When the unit is not in use, please store the power cord away as shown. - Page 13 SPECIFICATIOINS Power supply 220-240~ 50Hz Cooling rated input 1250W Cooling power input 1000W 9000 BTU/hr Cooling capacity Pressure (Discharge/Suction) 3.8/1.0MPa Maximum allowable pressure 5.8MPa 56dB(A) Sound pressure level Refrigerant R410A Refrigerant charge 0.48 kg Timer Electronic switch 0.5~24 hours Air volume 300 m³/h Weight 27 kg...
- Page 14 MODÈLE GR90S CLIMATISEUR MOBILE MODE D’EMPLOI...
- Page 15 MISE EN GARDE: • Cet appareil doit toujours être posé debout, sur une surface plane et régulière ; aucun mur ou objet ne doit être situé à moins de 50 cm. Ne jetez pas les batteries dans un feu, le danger d'explosion. •...
- Page 16 DESCRIPTION Vue avant Horizontal louvers Vertical Louvers Castors (4) Horizontal louvers = Volets horizontaux Vertical louvers = Volets verticaux Castors (4) = Roulettes (4) Vue arrière Remote control box Filters Upper air inlet Exhaust air outlet Lower air inlet...
-
Page 17: Panneau De Contrôle
Remote control box = Boîte de la télécommande Filters = Filtres Exhaust air outlet = Sortie d’air Lower air inlet = Arrivée d’air (basse) Upper air inlet = Arrivée d’air (haute) PANNEAU DE CONTRÔLE Récepteur des signaux Écran de la télécommande Boutons : MODE Réglage température/minuterie... -
Page 18: Utilisation De La Télécommande
UTILISATION DE LA TÉLÉCOMMANDE Bouton Marche/Arrêt MODE : Appuyez de manière répétée sur ce bouton pour sélectionner le mode de fonctionnement souhaité. AUTO CLIMATISEUR DÉSHUMIDIFICATION VENTILATEUR Remarque : Dans le mode AUTO, la température n’est pas affichée. La température par défaut est 25°C. Appuyez de manière répétée sur pour régler la température souhaitée (de 16°C à... -
Page 19: Fonction Verrouillage
Appuyez sur le bouton pour activer la fonction. La flèche à l'écran indique l’icône En mode CLIMATISEUR et DÉSHUMIDIFICATION, la température réglée augmente de 1 degré au bout d'1 heure, puis à nouveau d'1 degré au bout de 2 heures. Pour annuler cette fonction, appuyez de nouveau sur le bouton. - Page 20 Une fois l'ensemble monté, reliez-le à la sortie d'air. Le tuyau est extensible de 50 cm à 1,5 m. Cependant, pour plus d'efficacité, nous vous conseillons de l'utiliser avec sa longueur minimale. ATTENTION ! N'essayez pas de remplacer le tuyau d'évacuation avec votre propre tuyau, ou de le prolonger avec un tel tuyau ; le fonctionnement de l'appareil s'en trouverait perturbé.
-
Page 21: Entretien
ENTRETIEN Vidange Avant d'allumer le climatiseur, vous pouvez soit insérer le bouchon dans le trou de vidange, soit connecter le tuyau de vidange au trou. A. Bouchon en caoutchouc B. Trou de vidange C. Bouchon en caoutchouc du tuyau de vidange D. - Page 22 4. Une fois toute l'eau écoulée, remettez en place le bouchon dans le trou ou le tuyau de vidange, et enfoncez-le bien. Le témoin lumineux de remplissage “H8” disparaît de l'écran. Nettoyage du boîtier Débranchez toujours l'appareil avant de le nettoyer. Nettoyez le boîtier en le frottant avec un chiffon humide.
-
Page 23: Dépannage
DÉPANNAGE Symptôme Cause possible Solution L’appareil ne • Le fusible a grillé. • Changez le fusible. fonctionne pas. • piles télécommande sont • Changez la pile. épuisées. • Branchez l'appareil correctement. • L'appareil est mal branché. La pièce ne se •... - Page 24 Le R-410A utilisé dans cet appareil est un gaz à effet de serre fluoré relevant du protocole de Kyoto, qui peut être nocif pour l’environnement et peut être responsable du réchauffement global s’il s’échappe dans l’atmosphère. Son potentiel de réchauffement global est 1725. En raison des mises au point et améliorations constamment apportées à...
Need help?
Do you have a question about the GR90S and is the answer not in the manual?
Questions and answers