Table of Contents
Advertisement
Advertisement
Table of Contents

Subscribe to Our Youtube Channel
Related Manuals for HP CW450t


Summary of Contents for HP CW450t
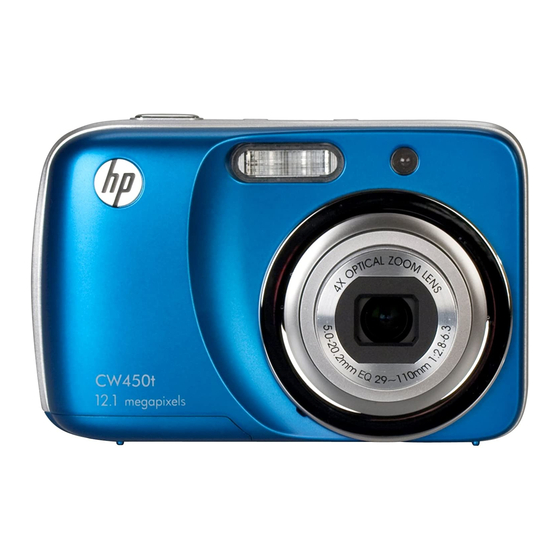
- Page 1 HP CW450t Digital Camera User Manual...
-
Page 3: Table Of Contents
Table of Contents Preface About this Manual.....................1 Safety and Handling Precautions Camera Information..........2 Battery Information....................2 Using this Menu......................2 Package Contents Getting Started Attach the Camera Strap....................4 Inserting the Batteries....................4 Inserting an SD/SDHC Memory Card................5 Camera Memory.......................5 Camera Views......................6 Camera Buttons.......................8 Onscreen Touch Buttons....................8 Turning the Power On and Off...................9 Initial Settings......................9... - Page 4 Setting Flash......................42 Setting Drive Mode....................42 Setting Focus Mode....................42 Setting Color Mode....................43 Setting the Digital Zoom..................44 Setting the Date Stamp..................44 Setting Auto Review....................45 Pre-Record......................46 Playback File Navigation......................47 Viewing in Single Navigation Mode................47 Viewing in Photo Stream Mode................48 Viewing in Thumbnail Mode..................48 Viewing in Calendar Mode..................49 Zooming images......................50 Playing Videos......................51...
-
Page 5: Preface
This manual is designed to assist you in using your new digital camera. All information presented is as accurate as possible but is subject to change without notice. For the latest reversion, please visit www.hp.com/support. Copyright This manual contains proprietary information protected by copyright. All rights are reserved. No part of this manual may be reproduced by any mechanical, electronic or other means, in any form, without prior written permission of the manufacturer. -
Page 6: Safety And Handling Precautions Camera Information
Battery Information • The HP CW450t camera uses 2 - AA batteries. For optimal performance and batteries life, please use photo lithium. • Turn off the camera before installing or removing the or batteries. -
Page 7: Package Contents
Package Contents Please check the contents of your camera package. It should contain: Digital camera AA battery x 2 pcs Camera strap USB cable User Manual and Software installation Quick Start guide Warranty card... -
Page 8: Getting Started
Getting Started Attach the Camera Strap To reduce the risk of dropping the camera, it is strongly recommended to attach and use the provided camera strap. Inserting the Batteries Follow these instructions to insert the rechargeable batteries into the batteries/memory card compartment. Please read “Battery Information”... -
Page 9: Inserting An Sd/Sdhc Memory Card
Inserting an SD/SDHC Memory Card It is highly recommended that the camera storage is expanded by inserting a SD or SDHC memory card. These memory cards are available at most consumer store and online locations. Make sure to power off the camera before proceeding. Inserting the memory card while powered on may damage the card and camera. -
Page 10: Camera Views
Camera Views Front View Flash Microphone Self-timer LED / Assist Lamp Lens Back View LCD monitor Zoom Button LED indicator Playback Button Top View Speaker Stabilizer button Shutter button Power button... - Page 11 Bottom View Tripod screw hole Battery / Memory compartment Left/Right View USB / TV Out Strap ring...
-
Page 12: Camera Buttons
Camera Buttons Your camera is equipped with different buttons for ease of use. Button Description Press the Power button to turn the power on/off. Power The stabilizer sets the optimal ISO value according to light levels to compensate Stabilizer for camera shake and help reduce motion blur. Press to set stabilizer on/off. Press to capture an image or start/stop recording video or audio clip. -
Page 13: Turning The Power On And Off
Turning the Power On and Off Press the Power button to power on and off the camera. • The startup image displays briefly and the startup sound plays if enabled. • This camera will also power up if the playback button is pressed . If pressed, the last recorded photo, video clip, or audio clip will be displayed and the lens will not be extended. -
Page 14: Modes
Modes Your camera has two modes: Record Mode This is the default mode while you turn on the camera every time. You are able to take photos and record videos/ audio clips in this mode. Playback mode Press the Playback button after the camera is turned on to view and edit captured images or playback videos and audio clips. -
Page 15: Using The Touch Screen
Using the Touch Screen The touch screen shows all important information regarding camera settings as well as the visual image of your image or video. It also provides all kinds of touch buttons to control the settings for the camera. The display on the touch screen is called the On Screen Display or OSD. - Page 16 Contrast Displays contrast settings. Please see page 42 for additional details. Saturation Displays saturation settings. Displays exposure settings. Please see page 38 for additional Exposure details. Displays ISO settings. Please see page 39 for additional details Displays shutter speed settings. Please see page 73 for additional Shutter speed details Displays aperture settings.
- Page 17 Scene Mode - Video Mode Screen Layout Standby layout Recording Layout Item Description Touch button - Record mode Tap to launch the scene mode menu. Zoom indicator Displays zoom. Please see page 21 for additional details. Time remaining Indicates the remaining time of video available. Indicates approximate battery level.
-
Page 18: Playback Mode Screen Layout
Playback Mode Screen Layout The Playback mode display varies depending on the type of image being viewed. Playback mode display of still images: Item Description Indicates the file number over the total number of files in the internal File no./Total no. memory or SD/SDHC memory card. -
Page 19: Playback Mode Of Videos
Playback mode of videos: Playback layout Playing Layout Item Description Indicates the current file number and total files stored in the internal File no./Total no. memory or SD/SDHC memory card. Battery Indicates approximate battery level. Indicates current storage memory. Options are internal camera memory or Storage media SD/SDHC memory card. -
Page 20: Playback Mode Of Audio Clips
Playback mode of audio clips: Item Description Indicates the current file number and total files stored in the internal File no./Total no. memory or SD/SDHC memory card. Battery Indicates the approximate battery level. Indicates current storage memory. Options are internal camera memory or Storage media SD/SDHC memory card. -
Page 21: Changing The Lcd Monitor Display
Changing the LCD Monitor Display The type of information displayed on the LCD monitor can be changed taping the onscreen display button . Tap the button repeatedly to change the LCD display from one type to another. In Photo/Video Mode, the LCD display can be changed into any of the following: •... -
Page 22: Recording Photos, Videos And Voices
Recording Photos, Videos and Voices Taking Photos This camera is designed to make the experience of taking photos simple and quick. It’s Auto mode feature will optimise the internal settings so that in most situations, it can take photos with ease. This camera also has additional modes and features that extend the capabilities for the more experienced user. -
Page 23: Recording Videos
Recording Videos This camera is capable of recording videos. Since video recording requires significant memory capacity, it is highly recommended to use SD/SDHC cards with this feature. The available recording time depends on the capacity of the memory card. Videos can be recorded until the maximum memory capacity has been reached. However the length of a single video clip is limited to 4 GB. -
Page 24: Using The Stabilizer Feature
Settings of Recording Videos Tap the onscreen MENU button to launch video menu and configure the settings before recording a video. Movie size The Movie size function appears only in Video mode. Use this function to adjust the resolution and quality of video clips. The table below shows the available size and corresponding image quality settings. -
Page 25: Setting The Zoom Control
To activate Stabilizer located • Press the Stabilizer button on the top of the camera to enable/disable stabilizer. If Stabilizer is enabled, the stabilizer icon is displayed on the LCD monitor and the ISO setting is automatically set to Auto. See “Setting ISO”... -
Page 26: Using Flash Features
• Digital zoom is not available for video recording. • Slight camera movement in digital zoom will make it more difficult to focus on objects/subjects. Use of a tripod can reduce this issue. Using Flash Features By default, this camera is set to automatic flash mode which means that it will determine when to use this feature or not. -
Page 27: Setting The Focus Mode
Setting the Focus Mode This function allows users to define the type focus when recording a still image or a video clip. To set the Focus mode • Tap the onscreen Macro button to display popup macro menu and tap the desired icon. Icon. - Page 28 The table below shows the available Drive mode settings. Icon Item Description Sets a 10-second delay to capture image after pressing the Shutter button 10 Sec Self-timer Sets a 2-second delay to capture image after pressing the Shutter button 2 Sec Self-timer Performs delay and capture twice: Double Self-timer •...
-
Page 29: Setting The Af Area/Face Tracking/Touch Shot
Setting the AF Area/Face tracking/Touch Shot AF stands for Automatic Focus. This feature determines the area on which the camera focuses. To set AF Area: • Tap the onscreen AF Area button to display the popup AF Area menu and tap the desired icon. How to use Face tracking: AF Area button Tap the onscreen... -
Page 30: Using The Record Menu
The table below shows the available AF Area settings. Icon Item Description Wide The camera automatically selects focus area within the wide frame. Center The focus area is fixed on the center. Face Tracking The focus area traces human face automatically. Touch Shot The focus area is controlled by finger and performs AF and shooting. -
Page 31: Setting The Scene Mode
Setting the Scene Mode By simply selecting one of the following 29 modes, you can capture the image with the most appropriate settings. MENU button, tap to select Scene Mode. Or, tap onscreen Record mode button From the Record (red color) to enter scene mode. - Page 32 The table below shows the available scene mode settings. Icon Item Description The simplest and usually safest way to shoot basic photos. Settings are automatically adjusted by the camera. Each time the camera is Powered Auto off then on, this mode will be selected by default. This is recommended for novice photographers.
- Page 33 This scene mode uses the flash and will leave the shutter open longer to get more ambient light from the background. This will help reduce typical flash pictures where the subject does not have a black/dark background. Ideally, Night Portrait this will produce photos that have more detail in the background.
- Page 34 This feature applies digital processing only to the necessary portion(s) of the image and preserves details in highlights and shadows with natural contrast. This mode is used to record audio clips. Slide the mode selector switch to Voice Recording the Voice Record icon ( )to enable this mode.
- Page 35 Using Intelligent Scene This feature is most useful for novice users to capture great images even without basic knowledge of photography. Simply frame the shot with the help of Intelligent Scene Mode, the camera automatically recognizes 11 kinds of scenes - Portrait, Landscape, Sunset, Macro, Text, Snow, Backlight Portrait, Backlight Portrait, Night Scene, Night Portrait and Foliage - and selects the ideal settings.
- Page 36 Using Sports Mode Ideal to taking a series of sports motion images, such as a golf swing, or try to capture the images of a flying hummingbird/butterfly, be sure to switch the scene mode to sports mode. This mode provides shutter in Burst speed (Keep shooting images long as the Shutter button is pressed) which allows you to capture a sequence of pictures that are frames apart clearly.
- Page 37 Select Auction mode from Scene mode menu. Choose a pattern by tapping the icon. Return the preview screen to start shooting. Shutter button Frame the subject and press the to take the first shot. Or, tap the onscreen Auction button to reset pattern.
-
Page 38: Using Smile Capture Mode
Auction mode provides 4 kinds of pattern as follow The image is set to low quality and VGA (640x480) size only. Using Smile Capture Mode When facing camera, especially kids, smiles are always short and hard to seize by manual shutter. Smile capture mode detects every smile all the time and performs Automatic Focus (AF) to capture an image without pressing Shutter button Follow these instructions to capture a photo by Smile Capture Mode:... - Page 39 Using Pre-composition Mode When asking someone else to take photos for you, but the photos always don’t come up right? Pre-composition helps to get the desired background, even if someone else is needed to take the picture. Basically, Pre-composition is a two-step process. Compose the desired background and press the Shutter button (full press), which causes a semi-transparent image of...
-
Page 40: Using Hdr Mode
Using Self Portrait When taking the picture for yourself, the self portrait mode is necessary besides the tripod. If a face has been recognized, the camera performs 2-second countdown with a beep notice then take a shot without pressing the Shutter button Tips to make a great shape by self portrait photography: •... -
Page 41: Setting Photo Size
Setting Photo Size The Photo Size function is used to set the resolution before you capture the image. Changing the Photo Size affects the number of images that can be stored in your memory card. The higher the resolution, the more memory space is required. -
Page 42: Setting Ev Compensation
Setting EV Compensation Images can be captured with the overall scene intentionally made brighter or darker. These settings are used when a suitable brightness (exposure) cannot otherwise be obtained in circumstances where the difference in brightness between the subject and the background (the contrast) is large, or when the subject that you wish to capture is very small within the scene. -
Page 43: Setting Iso
Setting ISO This sets the sensitivity of the sensor for capturing photos to compensate for various lighting situations. When the sensitivity is raised (and the ISO value is increased), photography in dark or dim lit locations are improved. However, this may result in a more pixelated (grainier) photo. -
Page 44: Setting Aeb
Setting AEB AEB stands for Automatic Exposure Bracketing. It takes 3 consecutive photos in the order of standard exposure, under exposure and overexposure compensation. To set AEB From the Record menu, tap AEB button. Tap On/Off to enable/disable AEB. Setting AF area AF stands for Automatic Focus. -
Page 45: Setting Sharpness
Setting Sharpness This function allows you to enhance or soften finer details of your photos. To set Sharpness From the Record menu, tap Sharpness. Tap the desired option button to apply. The table below shows the available Sharpness settings. Icon Item Description High... -
Page 46: Setting Contrast
Setting Contrast This function allows you to adjust the contrast of your photos. To set Contrast From the Record menu, tap Contrast. Tap the desired option button to apply. Icon Item Description High Enhance the contrast Normal Normal contrast Reduce the contrast Setting Flash To set Flash: Flash. -
Page 47: Setting Color Mode
Setting Color Mode This feature allows adjustment to record photos and videos in different colors and tones for a more artistic effect. Tinting an photo or video color can make them appear more vivid. • As you tap turn through the pages, you can see the closet 3 adjusting preview on screen. -
Page 48: Setting The Digital Zoom
Setting the Digital Zoom This feature controls the digital zoom mode of your camera. Your camera enlarges an image using the optical zoom first. When the zoom scale exceeds 4X, the camera uses digital zoom. To set Digital Zoom From the Record menu, tap Digital Zoom. -
Page 49: Setting Auto Review
Setting Auto Review The Auto Review function lets you view the captured image right after shooting it. If Auto review is On, the camera will display the captured image for 1 second on the LCD monitor. To set Auto Review From the Record menu, tap Auto Review. -
Page 50: Pre-Record
Pre-Record Catch the first three seconds of action that may would have potentially missed. Once enable this function, the camera starts recording video automatically before pressing Shutter button As soon as the Shutter button is hit, the most recent three seconds of video are added to the beginning of the clip. Display the icon in red while turning Pre-record on. -
Page 51: Playback
Playback You can playback the still images, videos and audio clips on the LCD monitor. File Navigation There are 4 playback modes for file navigation in this camera: • Single navigation • Photo Steam • Thumbnail • Calendar Viewing in Single Navigation Mode The single navigation mode displays the image one by one on the LCD monitor. -
Page 52: Viewing In Photo Stream Mode
Viewing in Photo Stream Mode The photo stream mode displays files side-by-side and supports finger motions allows you to browse files with ease. To use photo stream navigation: • Switch from single navigation by tapping any part of the screen, except onscreen buttons. •... -
Page 53: Viewing In Calendar Mode
To use thumbnail navigation: Thumbnail view with drag scroll • Drag left or right to scroll. (Dragging to scroll won’t choose or activate anything on the screen) • Flick to scroll quickly. You can wait for the scrolling to come to a stop, or touch anywhere on the screen to stop it immediately. -
Page 54: Zooming Images
Zooming images The zoom view function works with still images only. • In single navigation mode, press the Telephoto button repeatedly until the desired magnification level • The 4 arrows on the LCD monitor indicate that the image is zoomed in. • You can zoom to view an image up to 12X. •... -
Page 55: Playing Videos
Playing Videos Playback button Set the camera to Play button Tap the onscreen to play a video clip. During playback, tap the button on the control panel to fast forward or rewind the video. The camera supports forward and rewind speed of 4x. Tap the button to pause playback;... -
Page 56: Volume Control
• Volume cannot be adjusted when you pause the voice memo • Onscreen control panel and playing info appears 2 seconds then hide. Tap the screen to pop them up. Volume Control This feature controls the audio volume only when a video, voice recording or voice memo is playing back. To set volume control: During playback, tap the button to popup the volume bar. - Page 57 To use the search function: Search Photos by tapping it in the playback menu. Select Or, tap onscreen button from photo stream mode. Tap the desired sorting rules and display files of the group in single navigation mode. Switch to photo stream or thumbnail mode to locate the specific file(s).
- Page 58 Slideshow The slideshow function enables you to playback all your still images automatically in order one image at a time. To view slideshow: From the Playback menu, tap Slideshow. The Slideshow menu appears. Set the slideshow settings. Start button to start the slideshow. Tap onscreen During slideshow, tap the button to pause/resume...
-
Page 59: Perspective Control
Quick Retouch The unique feature is designed to create a retouched copy for a still image with the best balance of contrast and saturation. To use Quick Retouch: Set the camera to Playback mode and locate the desired photo by single navigation. MENU Tap the onscreen button to launch playback menu... -
Page 60: Radial Blur
The camera allows applying this feature up to 10 times in the same perspective angle to an image. Radial Blur The Radial Blur is an effect creates blurs around a point, simulating the result of a zooming or rotating camera. To set Radial blur for an image: Set the camera to Playback mode and locate the desired photo by single navigation. - Page 61 The succeeding table shows the available settings. Item Description Normal No effect is added to the image. Sepia Image is saved with a sepia tone. B&W Image is saved in black and white. Negative Image appears to be the opposite of the original image. Mosaic Image is saved with mosaic tiles.
-
Page 62: Voice Memo
Voice Memo A maximum of 30 seconds of audio can be recorded as a memo for captured still images. To record voice memo: Set the camera to Playback mode and locate the desired image by single navigation. Tap the onscreen Menu button to launch playback menu and tap Voice Memo. -
Page 63: To Delete Attached Voice Memo
To delete attached voice memo: Locate an image with voice memo attached in single navigation or photo stream mode. Tap the onscreen voice only button in the delete submenu to popup confirm menu. YES to delete the voice memo, Cancel to abort. Up to 200 files can be selected in one time for Delete. - Page 64 Protect Set the data to read-only to prevent images from being erased by mistake. a A protected file has a lock icon when viewed in Playback mode. To protect files: From the Playback menu, tap to select Protect. The Protect submenu is displayed on the LCD monitor. Available settings are as follow: •...
- Page 65 To unlock all files: Unlock all in the protect submenu to popup a confirm menu. Yes to unlock all files, Cancel to abort Trim The Trim function allows you to trim an image to another image size. This function is only available for still images. To trim an image: Set the camera to Playback mode and locate the desired image by single navigation mode.
-
Page 66: Startup Image
Resize Resizes a previously saved image and only resizing to a smaller size is available. To resize an image: Set the camera to Playback mode and locate the desired image by single navigation mode. MENU Tap the onscreen button to launch playback menu and tap Resize. - Page 67 DPOF DPOF is the abbreviation for Digital Print Order Format, which allows you to embed printing information on your memory card. You can select the images to be printed and how many prints to make with the DPOF menu in the camera and insert the memory card to the card compatible printer.
-
Page 68: Using The Setup Menu
Using the Setup Menu You can access the Setup menu whether you are in Record or Playback mode. The Setup menu allows you to configure general camera settings. To go to Setup Menu: Tap the onscreen Menu button to launch the Record/Playback Menu. -
Page 69: Setting Power Save
Setting Power Save The Power Save function allows you to set an idle time after which the camera automatically sets to sleep mode to save power. After a minute of being in sleep mode, the camera eventually turns off power. This function is not available in the following instances: •... -
Page 70: Setting Tv Out
Setting TV Out Use the TV Out function to adjust video output signal to accommodate different regional settings. If TV out is not set correctly, the image may not display properly on TV. Available settings are: • NTSC. Applicable in Japan, USA, Canada, Taiwan and others. •... -
Page 71: Setting Memory Kit
Setting Memory Kit This utility formats the internal memory (or memory card) and erases all stored images and data. If the images were saved in the internal memory, when inserting memory card into the camera, you can use Copy to Card function in order to copy all images from the internal memory into memory card. -
Page 72: Making Connections
Making Connections You can connect your camera to: TV, computer, or a printer. Connecting the Camera to a TV You can play back your images on a TV screen. Before connecting to any video devices, make sure to select NTSC/ PAL to match the broadcast standard of the video equipment you are going to connect to the camera. -
Page 73: Connecting The Camera To A Printer
The PC starts to detect the connection while the LCD monitor appears “Connecting…” PC MODE” appeared on the Connection established after “ LCD monitor Access the files in the camera by your PC. • The camera’s internal memory and memory card would display as removable drives in PC. -
Page 74: Setting The Print Mode Menu
Setting the Print Mode Menu Print Mode menu appears on the screen after the connection between a printer and your camera is established. Print Mode includes three major settings: • Select. An image can then be selected to print. • All. -
Page 75: Appendix
Appendix About Folder and File Names Your camera automatically creates specific directory of folder in the internal memory cards to organize captured images, videos and audio files. File Naming File names begin with “HPIM” and followed by a 4-digit number that increases in sequence. File numbering starts from 0001 when a new folder is created. -
Page 76: Troubleshooting
Troubleshooting Problem Cause and/or Action Camera does not turn on. The batteries may be exhausted. Charge or replace the batteries. Camera turns off automatically. Press any button except the Power button to power on the camera. LCD turns blank. Press any button except the Power button to turn on the LCD. Empty battery icon is displayed on One or both of the batteries may be exhausted. -
Page 77: Getting Help
Should you have a technical support question or your HP Digital Camera require service within the warranty period, please contact the original point of purchase or an authorized HP reseller in your country. If service is not available at those locations, please contact an HP Branded Product warranty agent from the support contact list provided below. - Page 78 Contact/phone Support: Country Language Number Europe Region (EMEA) België Dutch and German + 32 2700 1724 Français French + 33 171230454 Deutschland German + 49 6950073896 Ireland English + 353 1850882016 Italia Italian + 39 269682189 Netherlands Dutch + 31 202015093 Espana Spanish + 34 914533458...
- Page 80 P/N: 7525C00167A...
Need help?
Do you have a question about the CW450t and is the answer not in the manual?
Questions and answers