
Related Manuals for Feider FSBE400


Summary of Contents for Feider FSBE400
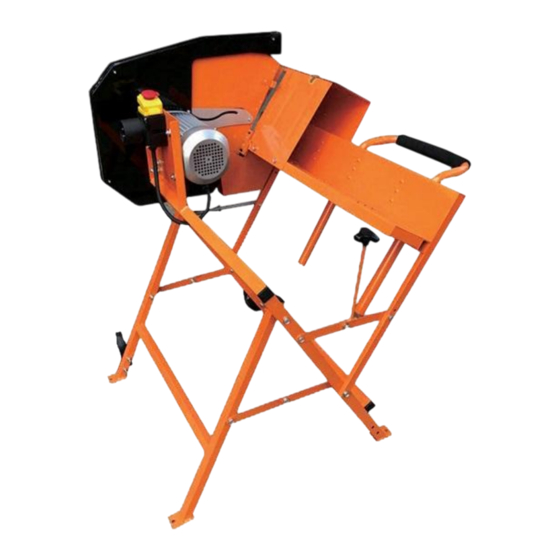
- Page 1 ORIGINAL INSTRUCTIONS >EN ELECTRIC LOG SAW FSBE400 USER GUIDE CAUTION: Read this manual before using this machine!
-
Page 2: Table Of Contents
CONTENTS 1. SAFETY INSTRUCTIONS........................3 2. DESCRIPTION............................8 3. ASSEMBLY.............................8 4. OPERATION............................17 5. MAINTENANCE AND STORAGE....................19 6. DISPOSAL............................22 7. DECLARATION OF CONFORMITY....................22 8. WARRANTY............................23 9. PRODUCT FAILURE.......................... 24 10. WARRANTY EXCLUSIONS......................25... -
Page 3: Safety Instructions
1. SAFETY INSTRUCTIONS UNDERSTAND YOUR CUTTER Read and understand the owner’s manual and labels affixed to the cutter. Learn its application and limitations as well as the specific potential hazards peculiar to it. DRUGS, ALCOHOL AND MEDICATION Do not operate the cutter while under the influence of drugs, alcohol, or any medication that could affect your ability to use it properly. - Page 4 refrigerator enclosures. Never open the push button box on the motor. Should this be necessary, contact a qualified electrician. Make sure your fingers do not touch the plug’s metal prongs when plugging or unplugging the log saw. A device for automatic disconnection of the power supply must to be installed by the user in the line powering the machine to protect people against electrical shock due to indirect contact in the machine.
- Page 5 These risks are most evident: ■ Within the range of operation ■ Within the range of the rotating machine parts In spite of the application of the relevant safety regulations and the implementation of safety devices, certain residual risks cannot be avoided. These are: ■...
-
Page 6: Application Conditions
Start the log splitter to push the wedge wood to go completely under the jammed one. Repeat above procedure with sharper slope wedge woods until the log is completely freed SPECIFICATIONS Model Number FSBE400 Motor 230V~ 50Hz, S6 40%, 2200W, IP54 No load speed 2800/min... -
Page 7: Electrical Requirements
Cutter Capacity Ø30-Ø135mm Saw blade Ø405mm×Ø30mm×3.2mm×32T Weight 32 kg IP Number IP54 ELECTRICAL REQUIREMENTS With 230 Volt~50Hz motor, the log saw should be connected to standard 230V±10%/50Hz. Connect the 230VAC motor using a power cable in a minimum section of 1.5mm (cable specs 3×1.5).Power feeding is performed via a control switch electrically connected between a power source(plug) and the drive motor. -
Page 8: Description
2. DESCRIPTION 1. Sliding support 7. Spanner (2X1) 2. working table 8. On/Off switch 3. Motor 9. extended holder 4. Saw blade inner guard 10. Guide plate 5. Saw blade outer guard 11. locking knob 6. Support leg 12. Table cover 3. - Page 9 and check against the list of loose parts. If any parts are missing, do not operate this machine until the missing parts are replaced. Failure to do so could result in serious personal injury. Do not discard the packing materials until you have carefully inspected the machine, identified all parts, and satisfactorily operated this machine.
- Page 10 I. Parts plastic bag for spanners contains: 2 pcs of spanners for changing saw blade II. Parts plastic bag for screws, bolts, nuts, washers and etc. contains: No. Description Specific Q’ty No. Description Specificati Q’ty ations 1. Procedure 1 2. Procedure 2 Screw M4X55 Screw...
- Page 11 NOTE: Check with your local Electricity Board or electrician if in doubt whether your house service connection meets these requirements. Position power supply cable so it does not interfere with the work and is not damaged. Protect power supply cable from heat, aggressive liquids and sharp edges. Use only rubber-jacked cable of sufficient lead cross section as extension cable.
- Page 12 M6X15 M8X15 M8X40 Assemble inside of saw blade inner guard and connect it to the worktable, and mount the movable baffle. Movable baffle Assemble the Lower cover,use screw M6X12 to connect the lower cover to worktable, and use screw M6X25 to fix.
- Page 13 Assemble the outside of sawblade inner guard, connect it to the worktable with 2 screws(M6x12),then use screws(M5x6) to connect the the outside and inseide of inner sawblade guard. Assemble the sawblade outer guard, pls remove the lower plastic cover of inner guard first, mount the outer guard and tighten the bols of outer guard,then mount the lower plastic cover.
- Page 14 Lower plastic cover Assemble the extension worktable, use 2 bolts (M8X12), 2 washers (Ø8) and 2 locking nuts (M8) to connect the extension worktable to worktable. Assemble the table cover plate, use 3 bolts(M8X15), 3 locking nuts (M8) to connect the table cover plate to worktable,...
- Page 15 Assemble the table cover. a. Assemble the handle b.Loosen 2 screws (M4X6) of the table cover,then connect it to the table cover plate and tighten 2 screws (M4X6) Install the sliding support, extended holder, handle...
- Page 16 Install 2 knobs (M8X20) Install spring guide tube, loosen bolt ,flat washer and locking nut on spring guide tube , put spring and washer onto spring guide tube, push the supporting leg (A) towards the blade, and insert spring guide tube into hole on supporting leg(B) and fasten it .
-
Page 17: Operation
Mount the switch back on the motor plate by 4 Bolts (M4X55). 4. OPERATION Please take note of the following safety information before operating the machine! Also follow the safety instructions given at the beginning of this manual! Hazard generated by machine defects! NOTE: Before Using the Machine, Please fix the 4 holes with Bolts (M8X20) at the Bottom of the Stand to avoid overturning or moving during the operation! - Page 18 Before starting work, check to see that the following are in proper working order: 1. Saw blade (firmly mounted? Undamaged? Sharp? Sufficient distance to other parts?) 2. Blade guard (undamaged? Distance to saw blade sufficient?) 3. Working table (must automatically return to the starting position) 4.
-
Page 19: Maintenance And Storage
Exert only so much pressure that the motor speed does not fall off. Push feed working table until it hits the stop. 4. Return working table completely to the starting position. NOTE: If the log was not completely separated, turn it over and repeat the cutting operation from the opposite side (reversing cut). - Page 20 1. loosen all coach screws , washers, locking nuts on right blade outer guard. And remove the right outer blade guard. Coach screw 2. Loosen 2 semicircle groove head screw and 2 spring washer , 2 washer on the blade inner guard 3.
- Page 21 5. Remove the nut (13) and outer flange (14) from the saw spindle 6. Take the saw blade (15) off the saw spindle. 7. Clean clamping surfaces of : - saw spindle, - inner flange, - saw blade, - outer blade flange, - nut.
-
Page 22: Disposal
Tel: +33 (0)5.34.502.502 Fax: +33 (0)5.34.502.503 The undersigned, hereby certifies that the units described below ELECTRIC LOG SAW Model: FSBE400 S/N: 20240604049-20240604072 is in compliance with the provisions of the following European directives: 2014/30/EU " ElectroMagnetic Compatibility " 2006/42/EC "Machinery"... -
Page 23: Warranty
8 . WARRANTY WARRANTY The manufacturer guarantees the product against defects in material and workmanship for a period of 2 years from the date of the original purchase. The warranty only applies if the product is for household use. The warranty does not cover breakdowns due to normal wear and tear. The manufacturer agrees to replace parts identifed as defective by the designated distributor. -
Page 24: Product Failure
9 . PRODUCT FAILURE WHAT TO DO IF MY MACHINE BREAKS DOWN? If you bought your product in a store: a) Empty the fuel tank if your product has one. b) Make sure that your machine is complete with all accessories supplied, and clean! If this is not the case, the repairer will refuse the machine. -
Page 25: Warranty Exclusions
10. WARRANTY EXCLUSIONS THE WARRANTY DOES NOT COVER: • Start-up and setting up of the product. • Damage resulting from normal wear and tear of the product. • Damage resulting from improper use of the product. • Damage resulting from assembly or start-up not in accordance with the user manual. •... - Page 26 BUILDER SAS 32 rue Aristide Bergès - Z.I. du Casque - 31270 Cugnaux - France MADE IN PRC...
Need help?
Do you have a question about the FSBE400 and is the answer not in the manual?
Questions and answers