
Subscribe to Our Youtube Channel
Related Manuals for ProScan PSB551


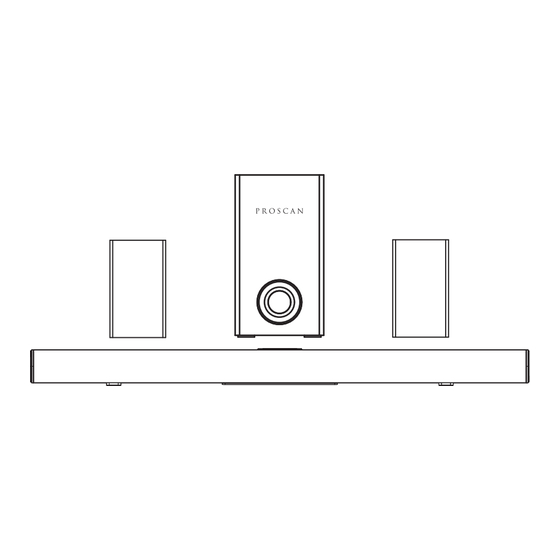
Summary of Contents for ProScan PSB551
- Page 1 5.1 CH BLUETOOTH SOUNDBAR WITH WIRED SUBWOOFER AND WIRELESS SURROUND BOXES PSB551 MODEL: PROSCAN, and the PROSCAN logo are trademarks used under license by CURTIS INTERNATIONAL LTD. – www.proscan-brand.com.
-
Page 2: Important Safety Instructions
IMPORTANT SAFETY INSTRUCTIONS CAUTION: TO REDUCE THE ELECTRIC SHOCK, DO NOT REMOVE THE COVER (OR BACK). NO USER SERVICEABLE PART INSIDE, REFER SERVICING TO QUALIFIED SERVICE PERSONNEL. DANGEROUS VOLTAGE:The lighting flash with arrowhead symbol within an equilateral triangle is intended to alert the user to the presence of uninsulated “dangerous voltage”... - Page 3 This equipment generates, uses and can radiate radio frequency energy and, if not installed and used in accordance with the instructions, may cause harmful interference to radio communications. However, there is no guarantee that interference will not occur in a particular installation. If this equipment does cause harmful interference to radio or television reception, which can be determined by turning the equipment off and on, the user is encouraged to try to correct the interference by one or more of the following measures:...
- Page 4 6.Clean only with dry cloth The appliance should be cleaned only as recommended by the manufacturer. 7.Do not block any ventilation openings. Install in accordance with the manufacturer’s instructions. Slots and openings in the cabinet and in the back or bottom are provided for ventilation, to ensure reliable operation of the product and to protect it from overheating.
- Page 5 15.Power source This product should be operated only from the type of power source indicated on the marking label. If you are not sure of the type of power supply to your home, consult your appliance dealer or local power company.
- Page 6 20.Service Do not attempt to service this product yourself as opening or removing covers may expose you to dangerous voltage or other hazards. Refer all servicing to qualified service personnel. 21.Replacement parts When replacement parts are required, be sure the service technician uses replacement parts specified by the manufacturer or those that have the same characteristics as the original parts.
-
Page 7: Product Overview
PRODUCT OVERVIEW TOP VIEW REAR VIEW 8 9 10 REAR VIEW OF SURROUND BOX 1.STANDBY/SOURCE button 8.AUX in jack 2.PLAY/PAUSE button 9.Antenna 3.VOL- button 10.SUBWOOFER jack 4.VOL+ button 11.DC IN jack 5.HDMI ARC jack 12.Indicator 6.USB jack 13.Power Indicator 7.OPTICAL IN jack 14.Standby button 15.DC IN jack... - Page 8 Vol+ 1.Power button Vol- 2.Play/Pause button 3.Previous button 4.BT button 5.Scan button Mute 6.Source button 7.Vol+ button Scan 8.Next button 9.Vol- button 10.EQ(equalizer) button 11.Mute button 12.REC button...
- Page 9 1.Slide and lift the battery door. 2.Install 2 (two) AAA size batteries into the battery compartment as indicated by the polarity markings. 3.Close the battery door. Caution: 1.Use only the size and type of battery specified. 2.Be sure to follow the correct polarity when installing the battery as indicated in the battery compartment, a reserved battery may cause damage to the device.
- Page 10 1. Placing the device on a table - Ventilation When placing the Soundbar on an entertainment center, bookshelf, or any type of enclosed space, be sure to allow at least 2-3 inches of space around the Sound Bar for ventilation. If the Sound Bar is enclosed in a tight space, without ventilation, heat generated from the Sound Bar could produce a potential heat hazard.
- Page 11 2.1Mounting to a wooden wall A.Mark the position of the mounting screws on the wall using a pencil. B.Drill the screws directly into the marks that you have made on the wall and leave approx. 0.3 inches length to hook the sound bar. C.Put the sound bar onto the mounting screws.
-
Page 12: Bluetooth Operation
3.Power on the external Bluetooth device and activate Bluetooth mode to search for the unit. 4.When the Bluetooth name Pro PSB551 appears, select it and make connection. 5.A sound will be heard when the unit is successfully connected and the indicator will stay solid blue. - Page 13 HDMI IN OPERATION Rear View HDMI IN arc port of the TV Video HDMI IN arc 1.Connect one end of HDMI cable(not included) to the HDMI ARC jack of this unit, the other end to the HDMI IN ARC jack of TV. 2.Power on the unit and switch to HDMI mode as previously mentioned and you will hear a sound “HDMI”.
- Page 14 OPTICAL IN OPERATION Rear View TV or DVD player etc. 1.Connect one end of Optical cable(not included) to the OPTICAL jack of this unit, the other end to the OPTICAL OUT jack of TV or DVD player etc. 2.Power on the unit and switch to OPTICAL mode as previously mentioned and you will hear a sound “OPTICAL”.
-
Page 15: Aux In Operation
AUX IN OPERATION Rear View MP3 Player Mobile Phone Connect to the Phones; AUX Out; Line Out Jack of the external devices (Such like MP3 Player; cell phones; iPod/iPad ... etc) 1.Connect one end of included AUX in cable to the AUX jack of this unit, the other end to the 3.5mm earphone jack or AUX out jack of external device. -
Page 16: Usb Operation
USB OPERATION Rear View 1.Insert the USB device(not included) into the USB jack of this unit. 2.Power on the unit as previously mentioned and you will hear a sound “USB”. 3.It will automatically play the tracks stored in USB device. Note: ●When play music in other modes, it will be in USB mode once you insert the USB device. -
Page 17: Subwoofer Connection
SUBWOOFER CONNECTION Rear View Subwoofer 1.Connect the subwoofer as above illustrate. 2.Connect one end of surround adapter to outlet and other end to DC IN jack of surround box, the Power Indicator will light red. 3.Press and hold the Standby button to power on or off the surround box. 4.The surround boxes are already paired to the unit when produced, the Indicator on the rear of surround box will light green and you can play music as usual. - Page 18 SYMPTOM POSSIBLE CAUSE POSSIBLE SOLUTION The adapter is not connected Connect the adapter to the unit and wall outlet. No power Press and hold the STANDBY/SOURCE The unit is in power off mode button on the unit or press the button on remote control to power on the unit.
-
Page 19: Specifications
SPECIFICATIONS Power input of main adapter........AC 100-240V 50/60Hz Power output of main adapter........DC 22V Power outpu Power output of Surround adapter......DC 15V Power outpu 0.8A Speaker output ................6x15W+50W Bluetooth effective working range in open area......up to 32 feet Remote effective working range............up to 16 feet Bluetooth version..................5.2 ACCESSORIES 1x Instruction Manual... - Page 20 To make a warranty claim, please email support2@curtiscs.com or call 1-800-968-9853. 90 Day Warranty This product is warranted to be free from defects in material and workmanship for a period of ninety (90) days from the date of original delivery to the consumer. During this period, your exclusive remedy is repair or replacement of this product or component found to be defective, at our option;...
- Page 27 8 9 10...
- Page 28 Vol+ Vol- Mute Scan...
- Page 33 Video HDMI IN arc...
- Page 40 Pour faire une demande de garantie, veuillez envoyer un courriel électronique à support2@curtiscs.com ou appeler le 1-800-968-9853. 90 jours de garantie Ce produit est garanti contre tout défaut de matériel et de fabrication pendant une période de quatre-vingt-dix (90) jours à compter de la date d'achat d'origine. Pendant cette période, votre seul recours est la réparation ou le remplacement de ce produit ou composant jugé...
Need help?
Do you have a question about the PSB551 and is the answer not in the manual?
Questions and answers