Table of Contents
Advertisement
KOBALT and logo design are trademarks
or registered trademarks of LF, LLC. All
rights reserved.
ATTACH YOUR RECEIPT HERE
Serial Number
Questions, problems, missing parts? Before returning to your retailer, call our custom-
er service department at 888-3KOBALT (888-356-2258), 8 a.m. – 8 p.m., EST,
Monday – Sunday. You could also contact us at ascs@lowes.com.
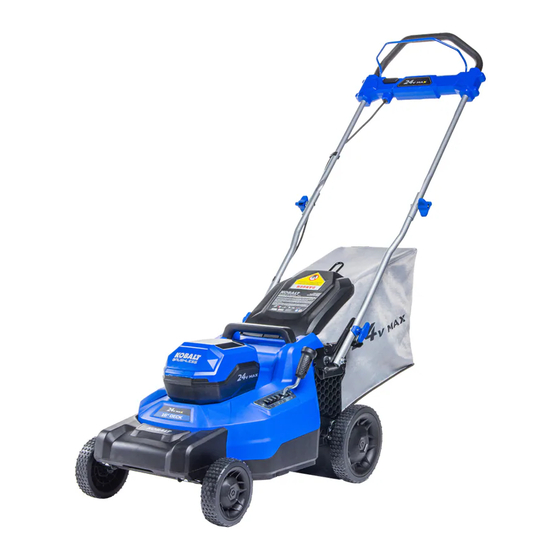
SS23530
BRUSHLESS
PUSH LAWN MOWER
Purchase Date
ITEM #5394843/5394842
MODEL #KPM 1624B-03
Español p. 23
Advertisement
Chapters
Table of Contents

Related Manuals for Kobalt KPM 1624B-03


Summary of Contents for Kobalt KPM 1624B-03
- Page 1 ITEM #5394843/5394842 BRUSHLESS PUSH LAWN MOWER MODEL #KPM 1624B-03 KOBALT and logo design are trademarks or registered trademarks of LF, LLC. All Español p. 23 rights reserved. ATTACH YOUR RECEIPT HERE Serial Number Purchase Date Questions, problems, missing parts? Before returning to your retailer, call our custom- er service department at 888-3KOBALT (888-356-2258), 8 a.m.
-
Page 2: Table Of Contents
TABLE OF CONTENTS Product Specifications ..................2 Packaging Contents ..................3 Safety Information .................... 5 Preparation ..................... 10 Operating Instructions ..................14 Care and Maintenance ................... 17 Troubleshooting....................22 Warranty ......................22 PRODUCT SPECIFICATIONS COMPONENT SPECIFICATIONS Rated voltage 24V d.c. No-Load speed 2800/min (RPM) 1.5”... -
Page 3: Package Contents
PACKAGE CONTENTS... -
Page 4: Part Description
PACKAGE CONTENTS PART DESCRIPTION PART DESCRIPTION Bail switch (switch lever) Front wheel (2) Handle Cutting-height adjustment lever Start button Rear wheel (2) Handlebar assembly Handle-adjustment knob (2) Cord clip Rear discharge door Handle locking knob (2) Trailing shield Rear handle Mulching insert Battery compartment cover Grass bag... -
Page 5: Safety Information
SAFETY INFORMATION Please read and understand this entire manual before attempting to assemble or operate this product. If you have any questions regarding the product, please call customer service at 888-3KOBALT, 8 a.m. - 8 p.m., EST, Monday - Sunday. You could also contact us at ascs@lowes.com. - Page 6 SAFETY INFORMATION Some of the following symbols may be used on this machine. Please study them and their meaning. Proper interpretation of these symbols will allow you to operate the machine better and more safely. SYMBOL DEFINITION SYMBOL DEFINITION Volts No-load Speed Direct Current /min...
- Page 7 SAFETY INFORMATION • Be alert and turn the mower off if a child enters the area. • Use extreme care when approaching blind corners, doorways, shrubs, trees, or other objects that may obscure your vision of a child who may run into the mower. •...
-
Page 8: Operation On A Slope
SAFETY INFORMATION • Never pull the mower back toward you while you are walking. If you must back the mower away from a wall or obstruction, first look down and behind you to avoid tripping, and then follow these steps: –... - Page 9 SAFETY INFORMATION • Watch for holes, ruts, rocks, hidden objects, or bumps which can cause you to slip or trip. Tall grass can hide obstacles. Do not: • Do not mow near drop-offs, ditches or embankments; you could lose your footing or balance.
-
Page 10: Preparation
PREPARATION Know Your Mower This mower can only be used for grass mowing. Before attempting to use the mower, familiarize yourself with all of its operating features and safety requirements. WARNING • Do not allow familiarity with the mower to cause carelessness. Remember that one careless moment is enough to cause severe injury. - Page 11 ASSEMBLY 2. Assembling the Grass Bag a. Check the grass bag before assembling, to make sure that there is no damage. b. Slide the grass bag onto the frame, as shown in Fig. 2a. c. Assemble the top clips to the frame, then assemble the two side clips.
- Page 12 ASSEMBLY Operating Position Before turning on the mower, the handle should UNLOCKED LOCKED be placed in one of the three operating positions: Three operating Upper Middle, or Lower operating position (Fig. 3c). position holes a. Pull the two handle-adjustment knobs (M) outward while turning them 90°...
- Page 13 ASSEMBLY 5. Attaching/Removing the Grass Bag WARNING • Do not at any time make any adjustment to the lawn mower without first stopping the motor, removing the battery pack and waiting for the Hook blade to stop rotating. NOTE: Remove the mulching insert before attaching the grass bag to the mower.
-
Page 14: Operating Instructions
OPERATING INSTRUCTIONS WARNING • Always wear eye protection with side shields marked to comply with ANSI Z87.1, along with hearing protection. Failure to do so could result in objects being thrown into your eyes and other possible serious injuries. • Do not use any attachments or accessories not recommended by the manufacturer of this product. - Page 15 OPERATING INSTRUCTIONS 8. To Start/Stop the Mower WARNING • The operation of any lawn mower can result in foreign objects being thrown into your or others’ eyes, which can damage eyes severely. Always wear safety glasses while operating the mower or while performing any adjustments or repairs on the mower.
- Page 16 OPERATING INSTRUCTIONS 10. Slope Gauge WARNING • Do not mow a slope that has an angle of greater than 15° [a rise of approximately 2-1/2’ (0.75 m) every 10’ (3 m)]. Mow across the face of a slope and never up and down. Sight and hold the line level with a vertical tree...
-
Page 17: Care And Maintenance
OPERATING INSTRUCTIONS • For the best mulching performance, set the cutting height to remove approximately one third of the grass blade length, ideally no more than 1/2” (13 mm) at one time. If the grass is overgrown, it may be necessary to increase the cutting height to make it easier to mow and to prevent overloading the motor. - Page 18 CARE AND MAINTENANCE 14. Removing the Blade WARNING • Always protect your hands by wearing heavy gloves or wrapping the cutting edges with rags or other materials when performing any maintenance on the mower blade. Always remove the battery pack when servicing or transporting the mower.
- Page 19 CARE AND MAINTENANCE 15. Installing the Blade WARNING Blade • Always protect your hands by wearing heavy gloves or wrapping the cutting edges with rags or other materials when performing any maintenance on the mower blade. Always remove the battery pack when servicing or transporting the mower.
- Page 20 CARE AND MAINTENANCE 16. Sharpening the Blade WARNING • Always protect your hands by wearing heavy gloves or wrapping the cutting edges with rags or other materials when performing any maintenance on the mower blade. Always remove the battery pack when servicing or transporting the mower.
- Page 21 CARE AND MAINTENANCE 17. Transporting and Storing the Mower • Do not store or transport the mower when it is running. Always remove the battery pack before storing or transporting. • Clean the mower thoroughly before storing. Lubricate the mower. •...
-
Page 22: Troubleshooting
TROUBLESHOOTING WARNING • Turn the mower off and remove the battery pack before performing troubleshooting procedures. PROBLEM POSSIBLE CAUSE CORRECTIVE ACTION 1. Low battery pack 1. Charge the battery pack. Mower fails to start charge. or stops working 2. Battery pack or motor 2. - Page 23 Artículo #5394843/5394842 PODADORA DE CÉSPED KOBALT y el diseño del logotipo SIN ESCOBILLAS son marcas comerciales o marcas registradas de LF, LLC. Todos los derechos reservados. MODELO #KPM 1624B-03 ADJUNTE SU RECIBO AQUÍ Número de serie Fecha de la compra ¿Preguntas, problemas, piezas faltantes? Antes de regresar a su distribuidor, llame a...
-
Page 24: Especificaciones Del Producto
ÍNDICE Especificaciones del producto ................ 24 Contenido del paquete ................... 25 Información de seguridad ................26 Preparación ....................32 Instrucciones de funcionamiento ..............37 Cuidado y mantenimiento ................41 Solución de problemas ................... 46 Garantía ......................46 ESPECIFICACIONES DEL PRODUCTO COMPONENTE ESPECIFICACIONES Voltaje nominal... -
Page 25: Contenido Del Paquete
CONTENIDO DEL PAQUETE... - Page 26 CONTENIDO DEL PAQUETE PIEZA DESCRIPCIÓN PIEZA DESCRIPCIÓN Interruptor de agarre (palanca Rueda frontal (2) del interruptor) Palanca de ajuste de la altura de Manija corte Botón de encendido Rueda posterior (2) Ensamble del manillar Perilla de ajuste en manija (2) Sujetador para cable Puerta para descarga posterior Perilla de bloqueo de la manija...
-
Page 27: Información De Seguridad
INFORMACIÓN DE SEGURIDAD Lea y comprenda completamente este manual antes de intentar ensamblar u operar este producto. Si tiene preguntas relacionadas con el producto, comuníquese con Servicio al Cliente al 888-3KOBALT, de lunes a domingo, de 8 a.m. a 8 p.m., hora estándar del Este. También puede ponerse en contacto con nosotros a través de ascs@lowes.com. -
Page 28: Instrucciones Importantes De Seguridad
INFORMACIÓN DE SEGURIDAD Algunos de los siguientes símbolos pueden aparecer en esta máquina. Obsérvelos y aprenda su significado. La interpretación correcta de estos símbolos le permitirá utilizar la máquina de manera más eficaz y segura. SÍMBOLO DEFINICIÓN SÍMBOLO DEFINICIÓN Voltios Velocidad sin carga Corriente continua /min... - Page 29 INFORMACIÓN DE SEGURIDAD • Mantenga a los niños fuera del área de trabajo y bajo estricta vigilancia de un adulto responsable distinto del operador. • Esté alerta y apague la podadora si un niño ingresa al área. • Tenga extremo cuidado cuando se acerque a esquinas ciegas, entradas de puertas, arbustos, árboles u otros objetos que puedan bloquearle la visión de un niño que pudiera correr hacia la podadora.
- Page 30 INFORMACIÓN DE SEGURIDAD • Use ropa adecuada: no use ropa holgada ni joyas. Pueden quedar atrapadas en las piezas móviles. Se recomienda utilizar guantes y calzado de goma si trabaja en el exterior. Use zapatos de trabajo resistentes con suela dura y pantalones y camisas ajustadas. Se recomiendan camisas y pantalones que cubran los brazos y las piernas, y zapatos con punta de acero.
- Page 31 INFORMACIÓN DE SEGURIDAD • Use solamente los paquetes de baterías y los cargadores que se indican a continuación: PAQUETE DE BATERÍAS CARGADOR KB 224-03; KB 424-03; KB 524-03; KRC 2445-03; KRC 2490-03; KRC 2404-03; KB 624-03; KXB 424-03; KXB 824-03 KDPC 124-03;...
-
Page 32: Preparación
INFORMACIÓN DE SEGURIDAD • Verifique, con frecuencia, que los pernos de montaje del motor y la cuchilla estén bien ajustados. También, realice una inspección visual para verificar si la cuchilla está dañada (p. ej., si está doblada, agrietada o desgastada). Reemplace la cuchilla solo con la cuchilla de reemplazo idéntica, como se indica en este manual. - Page 33 ENSAMBLAJE ADVERTENCIA • Para evitar un arranque accidental, que podría causar graves lesiones personales, siempre retire el paquete de baterías de la máquina cuando esté ensamblando las piezas. • No utilice ningún acoplamiento o accesorio que el fabricante de este producto no recomiende.
- Page 34 ENSAMBLAJE 2. Ensamblaje de la bolsa para césped a. Verifique la bolsa para césped antes de ensamblarla para asegurarse de que no haya daños. b. Deslice la bolsa para césped sobre la estructura, como se muestra en la Figura 2a. c.
- Page 35 ENSAMBLAJE Posición de funcionamiento NO BLOQUEADO BLOQUEO Antes de encender la podadora, la manija debe colocarse en una de las tres posiciones de Tres orificios de la posición de funcionamiento: posición de funcionamiento funcionamiento superior, intermedia o inferior (Fig. 3c). a.
- Page 36 ENSAMBLAJE 5. Colocación y extracción de la bolsa para césped ADVERTENCIA • No realice ningún ajuste en la podadora de césped en ningún momento sin antes detener el Gancho motor, retirar el paquete de baterías y esperar a que la cuchilla deje de girar. NOTA: retire el accesorio para los compuestos orgánicos antes de colocar la bolsa a la podadora.
-
Page 37: Instrucciones De Funcionamiento
INSTRUCCIONES DE FUNCIONAMIENTO c. Mueva la palanca hacia la parte posterior o frontal de la podadora y engánchela (K) en la posición de altura de corte deseada. ADVERTENCIA • siempre use lentes de protección con protectores laterales que cumplan con la norma ANSI Z87.1 junto con auriculares de seguridad. - Page 38 INSTRUCCIONES DE FUNCIONAMIENTO Protección contra temperaturas altas de las baterías El paquete de baterías generará calor durante el funcionamiento. El calor se disipa más lentamente en climas cálidos. Si la batería se sobrecalienta durante el funcionamiento, el circuito de protección apagará inmediatamente la podadora para proteger el paquete de baterías del daño por calor.
- Page 39 INSTRUCCIONES DE FUNCIONAMIENTO ADVERTENCIA • Si choca un objeto extraño, detenga el motor y retire la batería. Revise la podadora minuciosamente y verifique que no esté dañada. Si se produjo algún daño, repárelo antes de volver a encender y usar la máquina. La vibración excesiva de la podadora durante su funcionamiento advierte un daño.
- Page 40 INSTRUCCIONES DE FUNCIONAMIENTO 11. Consejos de trituración de compuestos orgánicos ADVERTENCIA • Inspeccione el área donde se utilizará la podadora y retire todas las piedras, palos, cables y otros desechos que pueda lanzar la cuchilla giratoria. • Suelte el interruptor para apagar la rotación de la cuchilla para podadora al cruzar cualquier área con gravilla;...
-
Page 41: Cuidado Y Mantenimiento
CUIDADO Y MANTENIMIENTO ADVERTENCIA • Todo el mantenimiento debe estar exclusivamente a cargo de un técnico de servicio calificado. • Antes de realizar una limpieza o mantenimiento, retire el paquete de baterías. Para un uso seguro y adecuado, siempre mantenga limpias la herramienta y sus ranuras de ventilación. •... - Page 42 CUIDADO Y MANTENIMIENTO 14. Retiro de la cuchilla ADVERTENCIA • Siempre use guantes para trabajo pesado y envuelva los bordes cortantes con harapos u otros materiales para protegerse las manos cuando realice cualquier tarea mantenimiento a las cuchillas para podadora. Siempre retire el paquete de baterías al transportar la podadora o efectuarle tareas de mantenimiento.
- Page 43 CUIDADO Y MANTENIMIENTO 15. Instalación de la cuchilla ADVERTENCIA Aspa • Siempre use guantes para trabajo pesado y envuelva los bordes cortantes con harapos u otros materiales para protegerse las manos cuando realice cualquier tarea mantenimiento a las cuchillas para podadora. Siempre retire el paquete de baterías al transportar la podadora o Ventilador efectuarle tareas de mantenimiento.
- Page 44 CUIDADO Y MANTENIMIENTO 16. Afilado de la cuchilla ADVERTENCIA • Siempre use guantes para trabajo pesado y envuelva los bordes cortantes con harapos u otros materiales para protegerse las manos cuando realice cualquier tarea mantenimiento a las cuchillas para podadora. Siempre retire el paquete de baterías al transportar la podadora o efectuarle tareas de mantenimiento.
- Page 45 CUIDADO Y MANTENIMIENTO 17. Transporte y almacenaje de la podadora • No almacene ni transporte la podadora mientras está funcionando. Siempre retire el paquete de baterías antes de almacenar o transportar el producto. • Haga una limpieza profunda de la podadora antes de almacenarla.
-
Page 46: Solución De Problemas
SOLUCIÓN DE PROBLEMAS ADVERTENCIA • Apague la podadora y retire el paquete de baterías antes de realizar los procedimientos de solución de problemas. PROBLEMA CAUSA POSIBLE ACCIÓN CORRECTIVA 1. Carga baja del paquete 1. Cargue el paquete de baterías. La podadora no de baterías.
Need help?
Do you have a question about the KPM 1624B-03 and is the answer not in the manual?
Questions and answers