Table of Contents
Advertisement
Available languages
Available languages
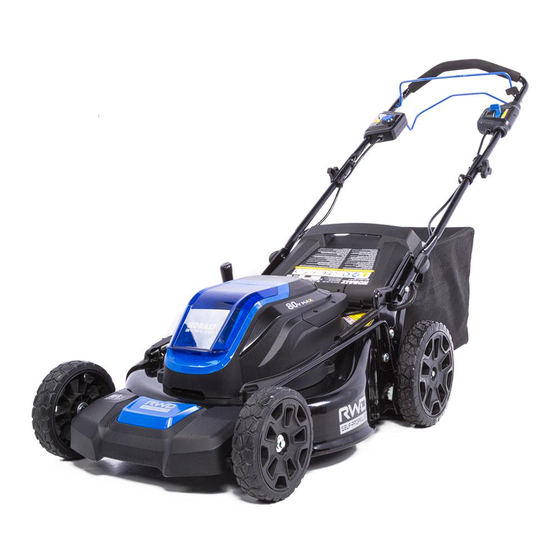
21-INCH DECK WIDTH SELF-PROPELLED MOWER
ATTACH YOUR RECEIPT HERE
Serial Number
Questions, problems, missing parts? Before returning to your retailer, call our customer
service department at 1-888-3KOBALT (1-888-356-2258), 8 a.m. - 8 p.m., EST,
Monday - Friday.
xxx
Purchase Date
1
ITEM #0534172
MODEL #KMP 2180B-06
Español p. 26
Advertisement
Chapters
Table of Contents

Subscribe to Our Youtube Channel
Related Manuals for Kobalt KMP 2180B-06


Summary of Contents for Kobalt KMP 2180B-06
- Page 1 ITEM #0534172 21-INCH DECK WIDTH SELF-PROPELLED MOWER MODEL #KMP 2180B-06 Español p. 26 ATTACH YOUR RECEIPT HERE Serial Number Purchase Date Questions, problems, missing parts? Before returning to your retailer, call our customer service department at 1-888-3KOBALT (1-888-356-2258), 8 a.m. - 8 p.m., EST,...
-
Page 2: Table Of Contents
TABLE OF CONTENTS Product Specifications......................2 Package Contents........................3 Symbols..........................4 Safety Information ......................6 Preparation ........................... 11 Know Your Mower ......................12 Assembly Instructions ......................13 Operating Instructions ....................... 16 Care and Maintenance......................20 Troubleshooting........................23 Warranty ..........................24 Replacement Parts List...................... 25 PRODUCT SPECIFICATIONS SPECIFICATIONS Battery type... -
Page 3: Package Contents
PACKAGE CONTENTS PART DESCRIPTION QUANTITY Lawn mower Mulching plug Grass catcher bag Side discharge chute HARDWARE CONTENTS (not shown actual size) Handle bolt Qty. 2 Handle knob Qty. 2... -
Page 4: Symbols
SYMBOLS Some of the following symbols may be used on this product. Please study them and learn their mean- ing. Proper interpretation of these symbols will allow you to operate the product better and safer. SYMBOLS DESIGNATION EXPLANATION Volts Voltage Amperes Current Hertz... - Page 5 SYMBOLS The following signal words and meanings are intended to explain the levels of risk associated with this product. SYMBOL SIGNAL MEANING Indicates an imminently hazardous situation, which, if not DANGER avoided, will result in death or serious injury. Indicates a potentially hazardous situation, which, if not WARNING avoided, could result in death or serious injury.
-
Page 6: Safety Information
SAFETY INFORMATION GENERAL SAFETY RULES READ ALL INSTRUCTIONS CAREFULLY WARNING • This symbol indicates important safety instructions. If these instructions are not followed, it could endanger the personal safety and/or property of the operator and others. Read and understand all instructions in this manual before attempting to operate the mower. - Page 7 SAFETY INFORMATION • Never pull the mower back toward you while you are walking. If you must back the mower away from a wall or an obstruction, first look down and behind in order to avoid tripping, and then follow these steps: •...
- Page 8 • Store indoors only. Always remove the battery from mower and charger when cleaning or storing the tool. BATTERY & CHARGER CAUTION Use only Kobalt approved replacement batteries. Other batteries may cause injury or damage to the mower. For use only with Kobalt KB 280-06/KB 2580-06 battery and KRC 30-06/KRC 06-06 charger. BATTERY SAFETY RULES •...
- Page 9 SAFETY INFORMATION • When battery pack is not in use, keep it away from other metal objects like: paper clips, coins, keys, nails, screws, or other small metal objects that can make a connection from one terminal to another. Shorting the battery terminals together may cause sparks, burns, or a fire. •...
- Page 10 SAFETY INFORMATION WARNING When transporting or servicing unit, always remove the battery. WARNING (PROPOSITION 65) Some dust created by power sanding, sawing, grinding, drilling, and other construction activities con- tains chemicals known to cause cancer, birth defects or other reproductive harm. Some examples of these chemicals are: •...
-
Page 11: Preparation
SAFETY INFORMATION PREPARATION Before beginning assembly of product, make sure all parts are present. Compare parts with package contents list and hardware contents list. If any part is missing or damaged, do not attempt to assemble the product. UNPACKING • Carefully remove the product and any accessories from the box. -
Page 12: Know Your Mower
KNOW YOUR MOWER PART DESCRIPTION QUANTITY PART DESCRIPTION QUANTITY Upper Handle Battery Release Button Handle Lock Knobs Bail Lever Side Discharge Cover Lower Handle Rear Discharge Cover Storage Switch Height Adjustment Lever Self-Propel Lever Battery Door Self-Propel Speed Controls Safety Lock-out Button... -
Page 13: Assembly Instructions
ASSEMBLY INSTRUCTIONS WARNING • If any parts are damaged or missing, do not operate this product until the parts are replaced. Us- ing a product with damaged or missing parts could result in serious personal injury. • Do not attempt to modify this product or create accessories not recommended for use with this product. - Page 14 ASSEMBLY INSTRUCTIONS 2. Removing the mulching plug • To remove the mulching plug (B), lift the rear discharge door (H). • Grasp the handle of the mulching plug (B). Using this handle, lift and pull the mulch plug out. • The mulching plug (B) is inserted at an angle, so it requires some force to remove.
- Page 15 ASSEMBLY INSTRUCTIONS WARNING Always remove battery from your tool when you are assembling parts, making adjustments, cleaning, or when not in use. Removing battery will prevent accidental starting that could cause serious person- al injury. 5a. To install battery • Lift and hold up the battery door (J).
-
Page 16: Operating Instructions
OPERATING INSTRUCTIONS 1. Starting/Stopping the mower a. To start the mower: • Raise the battery door. • Install battery. • Close the battery door. • Press and hold the safety lock-out button (K). • Pull the bail lever (M) upward to the handle to start the mower and release the safety lock-out button. - Page 17 OPERATING INSTRUCTIONS 3. Self-propelled mowing a. To engage the self-propelled feature: • Open the battery door. • Insert the battery. • Pull the self-propel lever (P) upward to meet the handle. b. To disengage the self-propelled feature: • Release the self-propel lever. c.
- Page 18 OPERATING INSTRUCTIONS WARNING • The operation of any mower can result in foreign objects being thrown into the eyes, which can cause severe eye damage. Always wear safety glasses while operating the mower and while per- forming any adjustments or repairs. •...
- Page 19 OPERATING INSTRUCTIONS Mowing tips Note: A sharp blade will greatly enhance the performance of the mower, especially when cutting high grass. Be sure to check the blade and to sharpen it at least once per year, as described in the Care and Maintenance section. •...
-
Page 20: Care And Maintenance
Always protect your hands by wearing heavy gloves and/or wrapping the cutting edges with rags or other materials when performing any maintenance on the blades. Always remove the battery when servicing or transporting the mower. Use only a Kobalt replacement blade (Item #0648547, sold separately). • Remove battery. - Page 21 CARE AND MAINTENANCE STORING THE MOWER: The following steps should be taken in order to prepare the lawn mower for storage. • Clean the mower as described in the previous section. • Inspect the blade and replace it or sharpen it, if required (refer to the Replacing the cutting blade section).
- Page 22 CARE AND MAINTENANCE Service Servicing requires extreme care and knowledge and should be performed only by a qualified service technician. For service, it is suggested you return the product to your nearest AUTHORIZED SER- VICE CENTER for repair. When servicing, use only identical replacement parts. WARNING •...
-
Page 23: Troubleshooting
TROUBLESHOOTING If you still have questions or an unresolved issue after going through this troubleshooting guide, or just want to speak to a Kobalt product expert, please call our Kobalt customer service department at 1-888-356-2258. PROBLEM POSSIBLE CAUSE CORRECTIVE ACTION The mower does 1. -
Page 24: Warranty
This Kobalt 80 V 21” cordless self-propelled lawn mower is warranted to the original purchaser from the original purchase date for five (5) years subject to the warranty coverage described herein. This Kobalt 80V Lithium-ion Battery carries a three (3) year warranty from the original user to be free from defects in material and workmanship. -
Page 25: Replacement Parts List
REPLACEMENT PARTS LIST For replacement parts, call our customer service department at 1-888-356-2258. PART DESCRIPTION PART # Mulching plug 341091531 Grass catcher bag 349011179L Blade 333041179 Blade bolt 322041555 Handle bolt 322041179 Handle knob 341291179 Front wheel 341281179A Rear wheel 341031531A 341191179-2 Printed in China... - Page 26 ARTÍCULO #0534172 PODADORA CON PLATAFORMA DE 53,34 CM DE ANCHO MODELO #KMP 2180B-06 ADJUNTE SU RECIBO AQUÍ Número de serie Fecha de compra ¿Preguntas, problemas, piezas faltantes? Antes de volver a la tienda, llame a nuestro Departamento de Servicio al Cliente al 1-888-3KOBALT (1-888-356-2258), de lunes a...
-
Page 27: Especificaciones Del Producto
ÍNDICE Especificaciones del producto....................27 Contenido del paquete......................28 Símbolos..........................29 Información de seguridad ....................31 Preparación ........................... 37 Familiarícese con su podadora ..................38 Instrucciones para el ensamblaje ..................39 Instrucciones de uso ....................... 42 Cuidado y mantenimiento....................46 Detección de problemas....................49 Garantía .......................... -
Page 28: Contenido Del Paquete
CONTENIDO DEL PAQUETE PIEZA DESCRIPCIÓN CANTIDAD Podadora de césped Adaptador para triturar y esparcir mantillo Bolsa para ensacar la hierba Conducto para descarga lateral ADITAMIENTOS (no se muestran en el tamaño real) Perilla de la manija Perno de la manija Cantidad: 2 Cantidad: 2... -
Page 29: Símbolos
SÍMBOLOS Algunos de los siguientes símbolos pueden ser usados en este producto. Obsérvelos y aprenda su significado. La interpretación correcta de estos símbolos permite una operación mejor y más segura. SÍMBOLOS DESIGNACIÓN EXPLANATION Voltios Voltaje Voltios Corriente Hercios Frecuencia(ciclos por segundo) Vatios Potencia Minutos... - Page 30 SÍMBOLOS Las siguientes palabras de senalizacion y sus significados tienen el objeto de explicar los niveles de riesgo relaciondos con este producto. SÍMBOLO SEÑAL SIGNIFICADO Indica una situación de peligro inminente que, si no es preveni- PELIGRO da, causará la muerte o lesiones severas. Indica una situación de peligro potencial que, si no es preveni- ADVERTENCIA da, podría causar la muerte o lesiones severas.
-
Page 31: Información De Seguridad
INFORMACIÓN DE SEGURIDAD NORMAS GENERALES DE SEGURIDAD LEA ATENTAMENTE LAS INSTRUCCIONES ADVERTENCIA • Este símbolo indica instrucciones importantes de seguridad. Si no se siguen estas instrucciones, la seguridad o propiedad personal del operador y otras personas podrían verse en peligro. Lea y comprenda todas las instrucciones en este manual antes de intentar usar la podadora. - Page 32 INFORMACIÓN DE SEGURIDAD • Muchas lesiones ocurren como resultado de pasar la podadora sobre los pies durante una caída provocada por resbalones o tropiezos. No use la podadora con pies descalzos ni con sandalias o zapatos livianos (de lona, por ejemplo). No se sostenga de la podadora si se está cayendo. Suel- te la manija inmediatamente •...
- Page 33 INFORMACIÓN DE SEGURIDAD • Repare cualquier daño antes de volver a poner en funcionamiento y utilizar el cortacésped. • No cargue la podadora bajo la lluvia o en un lugar húmedo. • Quite o desconecte la batería antes del mantenimiento, limpieza o retirada de material del corta- césped.
- Page 34 PRECAUCIÓN Use solamente baterías de repuesto de 80 voltios aprobadas por Kobalt, otras baterías pueden causar lesiones o daños a la podadora. Solo debe usarse con la baterías Kobalt KB KB 280-06/KB 2580-06 y con el cargador KRC 30-06/KRC 06-06.
- Page 35 INFORMACIÓN DE SEGURIDAD • Mantenga el paquete de baterías seco, limpio y sin aceite ni grasa. Use siempre un paño limpio para limpiar. Nunca use líquido de frenos, gasolina, productos derivados del petróleo o solvente para limpiar el paquete de baterías. CUIDADO ADECUADO DE LA BATERÍA Almacenamiento fuera de temporada Para obtener un periodo más largo de vida para las baterías, se sugiere seguir los siguientes pasos:...
- Page 36 INFORMACIÓN DE SEGURIDAD ADVERTENCIA Al transportar o dar servicio a la unidad, quite siempre la batería. ADVERTENCIA (PROPUESTA 65) Algo del polvo provocado por las lijas, sierras, trituradoras y taladros eléctricos, y otras actividades de construcción Contiene químicos reconocidos como causantes de cáncer y defectos congénitos u otros daños en el aparato reproductivo.
-
Page 37: Preparación
INFORMACIÓN DE SEGURIDAD ADVERTENCIA No pode el césped en pendientes con un ángulo mayor a 15° (una elevación de aproximadamente 2-1/2 pies [0,76 metros] cada 10 pies [3,04 metros]). Pode transversalmente en el frente de unapendiente y nunca arriba abajo. OBSERVE Y MANTENGA ESTE NIVEL CON UN ÁRBOL VERTICAL UN POSTE DE ENERGÍA LA ESQUINA DE UN EDIFICIO... -
Page 38: Familiarícese Con Su Podadora
FAMILIARÍCESE CON SU PODADORA PIEZA DESCRIPCIÓN CANTIDAD PIEZA DESCRIPCIÓN CANTIDAD Manija superior Botón de liberación de la batería Perillas de la manija Libere la palanca Cubierta para la descarga lateral Manija inferior Cubierta para la descarga Interruptor de almacenaje trasera Palanca de autopropusión Palanca para ajuste de Controles de velocidad... -
Page 39: Instrucciones Para El Ensamblaje
INSTRUCCIONES PARA EL ENSAMBLAJE ADVERTENCIA • En caso de que se dañe o falte alguna pieza, no utilice este producto hasta que se hayan rem- plazado las piezas. El uso de un producto al que le faltan piezas o cuyas piezas están dañadas, puede producir lesiones personales graves. - Page 40 INSTRUCCIONES PARA EL ENSAMBLAJE 2. Retiro de la clavija para compuesto orgánico • Para quitar el tapón de la función para cubrimiento con hojarasca(B), levante la puerta de descarga posterior (H). • Sujete el mango del adaptador para triturado. U- sando este mango(B), eleve y tire el adaptador de triturado.
- Page 41 INSTRUCCIONES PARA EL ENSAMBLAJE ADVERTENCIA Siempre retire la batería de su herramienta cuando esté instalando piezas, haciendo ajustes, lim- piando o cuando no esté en uso. La extracción de la batería evitará un arranque accidental que po- dría causar lesiones personales graves. 5a.
-
Page 42: Instrucciones De Uso
INSTRUCCIONES DE USO 1. Arranque y detención de la podadora a. Arranque de la podadora: • Levante la tapa del compartimento de las baterías. • Instalar la batería. • Cierre la tapa de la batería. • Mantenga pulsado el botón (K) de bloqueo de seguridad. - Page 43 INSTRUCCIONES DE USO 3. Siefa autopropulsada a. Arranque de la podadora: • Levante la tapa de la batería. • Instale la batería. • Tire la palanca de autopropulsión (P) hacia arriba para encontrar el mango. b. Para desactivar la función autopropulsión: •...
- Page 44 INSTRUCCIONES DE USO ADVERTENCIA • La utilización de cualquier podadora de césped puede dar como resultado que varios objetos ex- traños sean arrojados a los ojos, lo cual puede causar daños oculares graves. Siempre use gafas de seguridad mientras conduce la podadora o cuando la ajuste o repare. •...
- Page 45 INSTRUCCIONES DE USO Consejos para podar NOTA: el rendimiento de la podadora será mucho mayor con una cuchilla filosa, especialmente si de corta césped alto. Asegúrese de revisar la cuchilla y afilarla al menos una vez al año, según se describe en la sección de Cuidado y mantenimiento. •...
-
Page 46: Cuidado Y Mantenimiento
Siempre quite la batería cuando realice el mantenimiento o transporte la podadora. Utilice solo hojas de repuesto: Kobalt (artículo #0648547, se venden por separado). • Retire la batería. - Page 47 CUIDADO Y MANTENIMIENTO Almacenamiento de la podadora Para preparar la podadora para su almacenamiento, se deben seguir los siguientes pasos. • Limpie la podadora como se indicó en la sección anterior. • Inspeccione la cuchilla y reemplácela o afílela, si se requiere (consulte la sección Reemplazo de la cuchilla).
- Page 48 CUIDADO Y MANTENIMIENTO SERVICIO El servicio de la producto requiere extremo cuidado y conocimientos técnicos, por lo cual solo debe ser efectuado por un tecnico de servicio calificado. Si no comprende los avisos de advertencia y sugerimos llevarla al ESTABLECIMIENTO DE SERVICIO AUTORIZADO de su preferencia para que la reparen.
-
Page 49: Detección De Problemas
Si continua teniendo dudas o algún otro asunto sin resolver tras haber consultado esta guía de reso- lución de problemas o simplemente desea hablar con un experto en productos Kobalt, llame al servi- cio de atención al cliente de Kobalt al 1-888-356-2258. -
Page 50: Garantía
(5) años y está sujeta a la cober- tura de garantía que se describe en el presente. Esta batería Kobalt de litio-ión de 80 V tiene una garantía de tres (3) años para el usuario original contra defectos en los materiales y en la mano de obra. -
Page 51: Lista De Piezas De Repuesto
LISTA DE PIEZAS DE REPUESTO Para encargar piezas de repuesto, llame a nuestro Departamento de Servicio al Cliente al 1-888-356- 2258. PIEZA DESCRIPCIÓN PIEZA # Adaptador para triturar y esparcir mantillo 341091531 Bolsa para la hierba 349011179L Lámina 333041179 Pemo 322041555 Perno de la manija 322041179...
Need help?
Do you have a question about the KMP 2180B-06 and is the answer not in the manual?
Questions and answers
Can I find a kobalt parts list including the sizes of all fasteners for mower body removal etc?
The provided context includes a replacement parts list for the Kobalt KMP 2180B-06, but it does not list the sizes of all fasteners used for mower body removal. Therefore, the specific sizes of fasteners are not available in the given information.
This answer is automatically generated