Table of Contents
Advertisement
Quick Links
ELECTRIC FIREPLACE OPERATING MANUAL
MODELS: 2822-H-P2
3322-H-P2
261046
CONSUMER SAFETY INFORMATION: PLEASE READ THIS MANUAL BEFORE
INSTALLING AND OPERATING THIS APPLIANCE. FAILURE TO FOLLOW THESE
INSTRUCTIONS MAY RESULT IN A POSSIBLE ELECTRIC SHOCK, FIRE HAZARD, AND/OR
INJURY AND WILL VOID THE WARRANTY.
WARNING: IF THE INFORMATION IN THIS MANUAL IS NOT FOLLOWED, AN ELECTRIC
SHOCK OR FIRE MAY RESULT IN PROPERTY DAMAGE, PERSONAL INJURY, OR LOSS OF
LIFE.
THIS INSTRUCTION BOOKLET CONTAINS
IMPORTANT
SAFETY INFORMATION.
PLEASE READ AND KEEP FOR FUTURE REFERENCE.
01
Advertisement
Table of Contents

Subscribe to Our Youtube Channel
Related Manuals for LOWES 2822-H-P2


Summary of Contents for LOWES 2822-H-P2
- Page 1 ELECTRIC FIREPLACE OPERATING MANUAL MODELS: 2822-H-P2 3322-H-P2 261046 CONSUMER SAFETY INFORMATION: PLEASE READ THIS MANUAL BEFORE INSTALLING AND OPERATING THIS APPLIANCE. FAILURE TO FOLLOW THESE INSTRUCTIONS MAY RESULT IN A POSSIBLE ELECTRIC SHOCK, FIRE HAZARD, AND/OR INJURY AND WILL VOID THE WARRANTY.
-
Page 2: Important Instructions
IMPORTANT INSTRUCTIONS When using electrical appliances, basic precautions should always be followed to reduce the risk of fire, electrical shock, and/or injury including the following: 1. Read all instructions before using this heater. 2. This heater is hot when in use. To avoid burns, do not let bare skin touch hot surfaces. Keep combustible materials, such as furniture, pillows, bedding, papers, clothes, curtains etc., at least 3 feet (0.9 m) from the front of the heater and keep them away from the sides and rear. -
Page 3: Package Contents
PACKAGE CONTENTS Remote Control Manual Plastic Wire Ring Fireplace Screw A X6 Screw B X8 Trim Kit ELECTRICAL SPECIFICATIONS Voltage: 120VAC 60Hz Watts: 1500 Watts... -
Page 4: Installation Instructions
INSTALLATION INSTRUCTIONS Plan the installation of your fireplace to avoid the use of an extension cord, and ensure that you have clear access to a grounded electrical outlet. The fireplace appliance comes with a standard 6-ft. (1.8m) 3-wire cord exiting from the rear of the fireplace. Once you have decided on a location, position your assembled mantel close to the final location. - Page 5 Do not share a socket with other appliances when using the electric fireplace. Please use a dedicated socket. × √ × Never use with an extension cord or relocatable power tap (outlet / power strip). ×...
-
Page 6: Hardwire Installation
HARDWIRE INSTALLATION If it is necessary to hardwire this appliance, a qualified electrician must remove the cord connection, and wire the appliance directly to the house hold wiring. This appliance must be electrically connected and grounded in accordance with local codes if hard- wired. - Page 7 NOTE: Due to the many different materials used to build walls, it is highly recommended that you consult your local builder before you install this appliance on a wall. Cabinet dimensions Cabinet 2822-H-P2 27.5 in / 69.9 cm 8.5 in / 21.5 cm 24.7 in / 62.6 cm 27.5 in / 69.9 cm...
- Page 8 1. Plug into the power supply and put the fireplace into the cabinet. 2. Use the supplied screws A to secure the fireplace to cabinet. 3. Use the supplied screws B to assemble trim kit.
- Page 9 NOTE: If the bottom of the cabinet is flush with the floor, the bottom of the trim kit does not need to be assembled. If you want to hang a complete trim kit, the bottom of the cabinet must be more than 3 inch away from the floor.
- Page 10 Please select a mantel with the correct opening size to install the fireplace. The sizes of the opening of the mantel and the sizes of the fireplace frame refer to the table below. Mantel opening dimensions 2822-H-P2 28.2 in / 71.7 CM 22.8 in / 58.0 CM 3322-H-P2 33.2 in / 84.3 CM...
- Page 11 1. Unscrew the 4 screws to remove the 2 Bottom support plates. Bottom support plate Unscrew 4 screws Bottom support plate 2. With the help of an adult, lift the fireplace and gently slide it into the opening of the mantel. Make sure the fireplace is centered left and right in the opening.
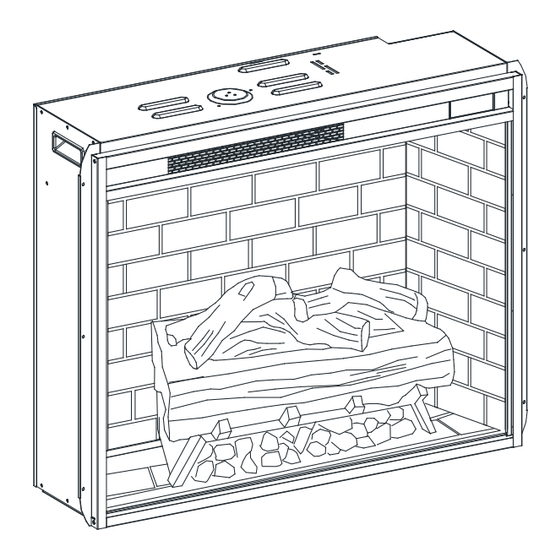
- Page 12 OPERATING INSTRUCTIONS On the top-right of the fireplace is the touchscreen control panel. This panel contains the buttons to properly operate the electric fireplace. POWER The power button turns the fireplace on and off. When the fireplace is off, pressing the power button once will switch on the fireplace.
- Page 13 TIMER The timer has adjustable settings from 1 hour to 9 hours and OFF. These are shown as: 1h-2h-3h-4h-5h-6h-7h-8h-9h-OFF. If the digital display turns on and no timer setting is chosen within 10 seconds, the digital display will shut off automatically. Once you set the timer and the timer is up, the unit will close all functions and enter standby mode.
-
Page 14: Remote Control
REMOTE CONTROL Power The Power Button turns the fireplace ON and OFF. Heater The Heater Button turns the heat ON and OFF. Press “+” or ”-” button to set the temperature. Flame The Flame Button is used to turn the flames ON, to alter the flame color, and turn the flames OFF. -
Page 15: Maintenance
MAINTENANCE Clean the metal trim using a soft cloth, slightly dampened with citrus oil based product and buff with a clean soft cloth. DO NOT use brass polish or household cleaners as these products will damage the metal trim. Citrus oil based products can be obtained at supermarkets or hardware stores. The motors used on the fan and the flame generator assembly are pre-lubricated for extended bearing life and require no further lubrication. -
Page 16: Fcc Statement
FCC STATEMENT This device complies with part 15 of the FCC Rules. Operation is subject to the following two condi- tions: (1) This device may not cause harmful interference, and (2) this device must accept any inter- ference received, including interference that may cause undesired operation. This equipment has been tested and found to comply with the limits for a Class B digital device, pursuant to part 15 of the FCC Rules. -
Page 17: Year Limited Warranty
1 YEAR LIMITED WARRANTY Our electrical fireplace is free from manufacturing and material defects for a period of one year from date of purchase, subject to the following conditions and limitations. 1. This electric fireplace must be installed and operated at all times in accordance with the installa- tion and operating instructions furnished with the product.
Need help?
Do you have a question about the 2822-H-P2 and is the answer not in the manual?
Questions and answers