
Related Manuals for Tuscany LENNO DHLN36BL


Summary of Contents for Tuscany LENNO DHLN36BL
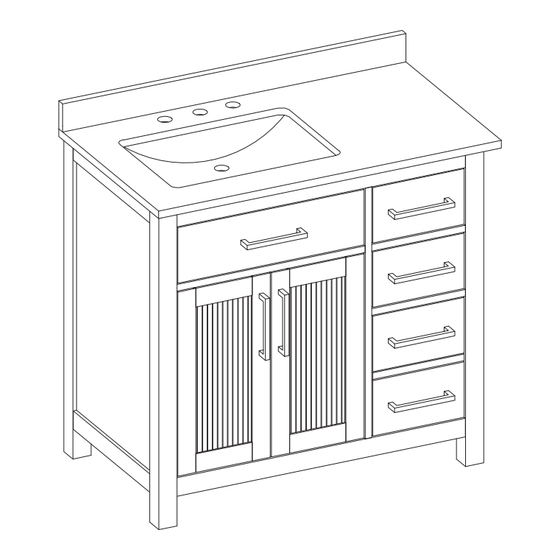
- Page 1 INSTALLATION AND CARE GUIDE LENNO 36 INCH VANITY MODEL#: DHLN36BL / DHLN36GR / DHLN36WH SKU#: 6052937 / 6052938 / 6052939 Page 1 of 7...
-
Page 2: Planning Assembly
Planning Assembly Before starting your installation, please check the parts list and inspect the product from every angle/side. If any part is missing or damaged, do not attempt to assemble install or operate the product. Contact the customer service for replacement. PACKAGE CONTENTS Part Description... -
Page 3: Safety Warning
Safety Warning Wear appropriate protective gear, such as gloves and safety glasses, when handling tools or sharp objects. Use caution when lifting heavy parts or cabinets to avoid strain or injury. Keep children and pets away from the installation area to prevent accidents. Do not place items on the bathroom cabinet that exceed its weight capacity to prevent tipping or damage. - Page 4 Assembly Insert the shelf support pins (EE) into the pre-drilled holes and put the shelf (C) on the pins from back of vanity body (B). Ensure the vanity body (B) is level, adjust floor levelers if * When installing to a concrete wall, drill two 5/16 inch dia. needed, then attaching long screws (BB) to fasten vanity holes on the wall and punch the expansion bolts (CC) into...
- Page 5 Assembly Apply a small bead of silicone (not included) around the top perimeter of the vanity body (B). Carefully place the vanity top (A) on the top of the vanity body (B) , and press it down to set in place. Silicone To mount the backsplash (D) to the wall, apply a thin bead of silicone compound (not included) to the unpolished back side and bottom of the backsplash (D).
- Page 6 Assembly If need to adjust the drawer, follow the steps as below : File Drawer Installation File Drawer Removal CORRECT INCORRECT Ball Bearing Plate Ball Bearing Plate FRONT Black Nylon clip Black Nylon clip FRONT FRONT FRONT Before inserting the drawer, make sure to slide the ball To release the glides, pull the drawer out until you can see/feel the bearing plates located on the side frames to the FRONT black nylon clips.
-
Page 7: Warranty
Assembly If need to adjust the door up or down, remove screws (B&D) If need to adjust door left or right, turn screw (F) in or out. from the hinge, turn screws (A&C) in or out to adjust door up or down, then reinstall screws (B&D) onto the hinge.
Need help?
Do you have a question about the LENNO DHLN36BL and is the answer not in the manual?
Questions and answers