Table of Contents
Advertisement
Quick Links
Advertisement
Table of Contents

Related Manuals for Haier HLC1290CTB1


Summary of Contents for Haier HLC1290CTB1
- Page 1 Laundry Centre HLC1290CTB1 NZ AU...
- Page 2 Thank You NZ AU Thank you for purchasing a Haier Product. Please read these instructions carefully before using this appliance. The instructions contain important information which will help you get the best out of the appliance and ensure safe and proper installation, use and maintenance.
-
Page 3: Table Of Contents
Content NZ AU Safety information..........................Product description........................Installation............................Technical data..........................Control panel ........................... Wi-Fi connection & Remote mode ..........................Programmes ............................ Preparation............................Eco-friendly washing ........................Care and cleaning ........................... Troubleshooting ..........................Customer service........................... -
Page 4: Safety Information
Before first use Do not operate this machine if it has been damaged during transport. Contact your dealer or Haier service technician. Ensure all transport bolts are removed before running the appliance. Failure to do so might end in damage to the appliance. - Page 5 NZ AU Daily use Do not touch or operate the machine with wet hands or with bare-feet. Do not place dripping wet clothing in or on top of the appliance as it may create an electrical hazard. Do not use the appliance if industrial chemicals (e.g. solvents ) have been used on the clothes.
- Page 6 Do not operate this product without the lint filter in place or allow lint to accumulate in or around the appliance. If the lint filter is damaged, contact your Haier service technician to arrange getting a new filter. Do not operate your appliance with a damaged lint filter or without the filter in place, as this will cause damage to your appliance.
- Page 7 NZ AU Dryer Information If ducting the dryer to the outdoors, ensure adequate ventilation is provided during operation of the appliance to avoid any backflow of gases from fuel burning appliances. WARNING: The last stage of the drying cycle is a cool down phase.
- Page 8 Keep the gasket, dispenser and door clean to prevent odours. Do not use water spray or steam to clean the appliance. A damaged electrical cable must be replaced by a Haier service technician or similarly qualified person. Do not use the appliance until it has been repaired to avoid a risk of electric shock.
- Page 9 Install the appliance in a well-ventilated, dust-free environment. This appliance must not be installed or operated on a plinth (other than a genuine Haier part, installed per the instructions ) . We do not recommend the use of e x tension cords or portable electrical outlet devices.
- Page 10 NZ AU Installation Do not install the appliance in a location where the ambient temperature drops below 5°C. Do not install the appliance outdoors or in a damp location. Appliances connected to water mains. Water supply requirements: Inlet water pressure: Ma x . 1MPa (145psi ) , Min. 50kPa (7.25psi ) Inlet water flow rate: Min.
-
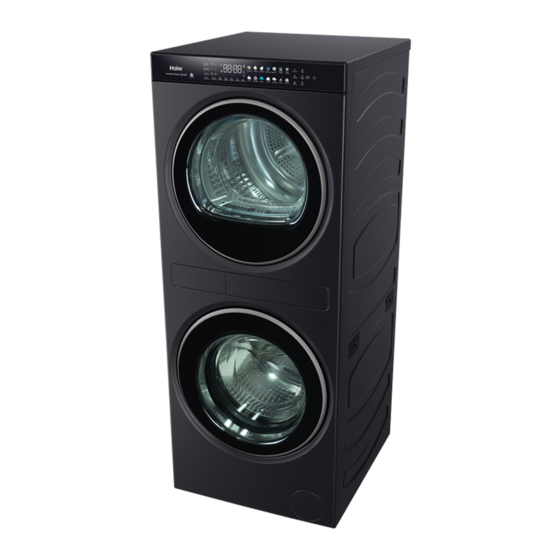
Page 11: Product Description
2-Product description NZ AU Note: Due to technical changes and different models, the illustrations in the following chapters may differ from your model. 2.1 Picture of appliance Front (Fig. 2-1): 1 Countertop 9 Upper drum opening 2 Display control panel 10 Upper Drum Lint Filter 3 Front plate 11 Upper drum secondary filter... - Page 12 2-Product description NZ AU Rear side (Fig. 2-2): 4 Transit rod×2 7 Upper back plate 1 Water inlet valve 8 Lower back plate 2 Power cord jack 5 Drain pipe 3 Transit bolt×4 6 Power cord 9 Transit brace 2.2 Accessories Check the accessories and literature in accordance with this list (Fig.
-
Page 13: Installation
3-Installation NZ AU 3.1 Unpacking Your washer is heavy. We recommend two people to remove the packaging. 1. Remove the outer packaging including the polystyrene packer and plastic wrapping. 2. Lift the washer off the base. 3. Remove all packaging and accessories from inside the drum. 4. - Page 14 3-Installation NZ AU Note: Keep in safe place Keep all the parts for later use. If the appliance needs to move location, reinstall the braces, rods and bolts in reverse order . 3.4 Leveling the appliance Before positioning your washer in its final position, allowing for required clearances, check that it is level Fig .
- Page 15 Inlet water flow rate at tap: Min.6 litres/min. Cold supply only For models HLC1290CTB1, if you only have a cold water supply, you must connect the inlet valve cap (blanking cap) provided with your washer to the hot inlet valve. The cap prevents water leaking out of the hot valve.
- Page 16 3-Installation NZ AU 3.8 Drain hose In multi-storey apartments or any upper floor, the washer should be installed on a floor equipped with a drain. Draining must comply with local by-laws. Place the drain hose in a tub or standpipe 3-10 The hose guide is used to hold the drain hose over the tub or standpipe (Fig.
- Page 17 3-Installation NZ AU 3.9 Complete your installation 1 . Press to activate your washer. 2. Select a Express15 cycle. Ensure the drum is empty and the door closed. 3. Press to start. The washer will start to fill. 4. Wait until you see water in the bottom of the drum. 5.
-
Page 18: Technical Data
4-Technical data NZ AU 4.1 Additional technical data HLC1290CTB1 Amps (maximum) Volts (V) 220 -240V 50Hz Rated Power (W) 2000W 4.2 Product dimensions FRONT PLAN PRODUCT DIMENSIONS 1500 Overall height* Overall width Overall depth** Depth of open door 1180 Standpipe height min. - Page 19 4- T echnical data NZ AU 4.3 Cavity and clearance dimensions iSOMETRIC CAVITY DIMENSIONS A Minimum cavity height 1520 B Minimum cavity width Minimum cavity depth Flush with front panel of the product* In cupboard CLEARANCE DIMENSIONS A Minimum washer door clearance to adjacent wall B Minimum gap clearance to adjacent product or cabinetry* *Applies to sides, top and rear...
-
Page 20: Control Panel
5-Control panel NZ AU “Power” button Functions Other settings Cycles Selectable options and modifiers Start/Pause 5.1 “Pow er“ Button Press the Power button (Fig. 5-2) to turn ON and OFF the product. When on the display illuminates the default cycle and options;... - Page 21 5-Control panel NZ AU 5.4 Selectab le options and modifiers The display (Fig. 5-5) will show important information about cycle: Options and modifiers, remaining time, error codes and service information, warnings and notifications. Selectable options: Your appliance's cycles have 5.4.6 5.4.5 5.4.4 5.4.3...
- Page 22 5-Control panel NZ AU 5.4.4 “Spin Speed” Button Press the Spin Speed button (Fig. 5-9 to change the spin at which the appliance will spun the clothes. Lower spin speeds will leave the clothes wetter, which might increase the drying times. Faster spin speeds might increase wrinkles in the clothes.
- Page 23 5-Control panel NZ AU 5.4.6.4 Soil - 5-15 Use "Soil -" (Fig. 5-15 to modify the cycle settings to decrease wash time and detergent for lightly soiled loads. Available for the following cycles: Cotton, Mixed, Synthetic, Delicate, Shirts, Wool Care, Bulky, Towels, Bedding, Care + . 5.4.6.5 “Add Soak“...
- Page 24 5-Control panel NZ AU The Door Open icon will light up if the lower washer drum door is not closed properly. The Water Connection icon will light up if the product is not receiving any water. 5-19 5.5 Functions button 5.5.1 Your appliance has four primary functions: 5.5.2...
- Page 25 5-Control panel NZ AU 5-24 5.6 Cycl e selector The cycle selection area displays the available cycles for the chosen function. Wash ( Fig. 5-24 ), Dry ( Fig. 5-25 ), Deodorise ( Fig. 5-26 ), Refresh (Fig. Fig. 5-26 ). 5-25 5.7 “Favour ite”Button...
- Page 26 5-Control panel NZ AU For lightly soiled clothes, use level “L-1” or level ”L-2” and for heavily soiled clothes we recommend setting the washer to level ”L-4”. Similarly, for sensitive skin, we recommend using the lower setting “L-1”, to minimize possible residual detergent in the clothes.
-
Page 27: Wi-Fi Connection & Remote Mode
On your mobile device: 1. Your product is Wi-Fi connectable. Please visit the webpage below to download the app and find out more: Australia https://www.haier.com.au/smart New Zealand https://www.haier.co.nz/smart 2. Register and create an account. 3. Add your appliance and set up the Wi-Fi connection... - Page 28 6-Wi-Fi connection & Remote mode NZ AU Remote Wash Mode Press "Remote Washer " button (Fig.6-2) to turn ON and Off the Remote Mode Washer function. When the Remote Mode Washer is ON the appliance lower washer drum can be controlled by the Smart HQ App for your convenience. Not all functions will be available through the App.
-
Page 29: Programmes
7-Programmes NZ AU Wash Cycles x. load Spin speed Cycle Designed for Wash in rpm temperature wash in °C in kg Cotton Normally soiled garments made of ,30,40,60,90 0,400,800,1000 , cotton fabrics. 1200,1400 Loads with different types of clothes ,30,40,60,90 0,400,800,1000 , and fabrics, with normal soil. - Page 30 7-Programmes NZ AU Dry Cycles Cycle Default dry Designed for Max. load level drying, in kg Cotton Autosensing cycle for garments made of cotton fabrics. Mixed Autosensing cycle for loads with different types of clothes and fabrics. Synthetic Autosensing cycle for garments made with synthetic fabrics or synthetic blends.
- Page 31 7-Programmes NZ AU Check the energy label for energy consumption information. The actual energy consumption may differ from the declared one according to local conditions. Actual water temperature may differ from declared cycle temperature. Note: Auto Weight The appliance is equipped with a loading recognition. At low loading, energy, water and washing time will be reduced automatically in some programmes.The display shows“...
-
Page 32: Preparation
8-Preparation NZ AU Connect the washing machine to a power supply (220V to240V~ / 50Hz; Fig. 8-1). Please refer also to section Installation. Before connecting check the cleanliness and clarity of the water inlet. 8.3 Wash Preperation Sort out clothes according to fabric (cotton,syntheti cs,wool or silk etc.) and how dirty they are (Fig.8-3). - Page 33 8-Preparation NZ AU Care chart Washing Washable up to 95°C Washable up to 60°C Washable up to 60°C normal process normal process mild process Washable up to 40°C Washable up to 40°C Washable up to 40°C normal process mild process very mild process Washable up to 30°C Washable up to 30°C...
- Page 34 8-Preparation NZ AU 8.4 Loading the Lower washer drum Put in the laundry piece by piece. Don't overload. Note the different maximum load according to programmes! Rule of thumb for maximum load: Keep six inches between load and drum top. Close the door carefully.
- Page 35 8-Preparation NZ AU Note: First Wash It is recommended before using the product to run a Cotton cycle with 90° C wash temp and 800 rpm spin speed without any load to reduce odors. 8.7 Ending a Wash cycle When a was cycle has finished it is recommended to remove the load as soon as possible to prevent additional wrinkling.
- Page 36 8-Preparation NZ AU 8.9 Dryer Preparation Sort items into loads of similar items,and loads that will likely take similar times to dry. This prevents the possibility of some items becoming over-dried whilst others are still damp. Separate coloured items from white/light items where possible, especially when new.
- Page 37 8-Preparation NZ AU 8.12 Drying times Drying very small loads is inefficient. Try to dry medium to large loads. Heavier items (towels, flannelette sheets) will take longer to dry than light item (synthetics and polyester cotton sheets and shirts). Drying times can be reduced by spinning the wash load at the highest spin speed suitable for the load type in your washing machine Check bulky items during the cycle to ensure even drying, pause the dryer and reposition the item if necessary.
-
Page 38: Eco-Friendly Washing
9-Eco-friendly washing NZ AU Environmentally responsible use Washing To achieve best use of energy,water,detergent and time you should use the recommended maximum load size. Do not overload (hand width clearance above laundry). For slightly soiled laundry select the Express 15 programme. Choose the lowest adequate washing temperature-modern detergents are efficiently cleaning below 60°C. -
Page 39: Care And Cleaning
10-Care and cleaning NZ AU WARNING! Before cleaning and maintenance, remove the power plug from the socket. After cleaning and maintenance, reinstall the components in reverse order. 10-1 10.1 Cl eaning the detergent drawer Take always care there are no detergent residues. Clean the drawer regularly (Fig. - Page 40 10-Care and cleaning NZ AU 10.5 Cle an the upper drum lint filter 10-6 10-7 10.5.1 C lean primary filter To ensure good drying results, clean the primary filter before or after each cycle. 1. Open the upper drum door (Fig. 10-6) 2.
- Page 41 10-Care and cleaning NZ AU 10.6 Lon g periods of disuse 10-14 10-15 If the appliance is left idle for a longer period: Pull out the electrical plug (Fig. 10-14) . Turn off water supply(Fig. 10-15) . Open the door to prevent formation of moisture and odours.
- Page 42 10-Care and cleaning NZ AU 10-22 10-23 (Fig. 10-22 ). 10. Refix it thoroughly (Fig. 10-23 ). 11. Close service flap.
-
Page 43: Troubleshooting
Note: When a continuous series of beeps sound, all the lights turn off and a string of codes appears on the display ‘ a fault has occurred’ . Please call your trained and supported Haier service technician. - Page 44 11-Troubleshooting NZ AU 11.2 Troubleshooting without display code Cause Problem Solution Programme is not yet started. Check programme and start it. Appliance fails Door is not properly closed. Close the door properly. to operate. Machine has not been switched on. Switch the machine on.
- Page 45 11-Troublesho oting NZ AU Problem Cause Solution Excessive Detergent is not a appropriate. Check detergent foam floats recommendations. Excessive use of detergent. drum and/or Reduce amount of detergent. detergent drawer. Automatic Washing programme duration will This is normal and doesn't be adjusted.
- Page 46 11-Troubleshooting NZ AU Cause Problem Solution Caused by fats such as oils, Pretreat the laundry with a special Laundry has creams or ointments. cleaner. grey patches. Dryer is overloaded. Remove some items from the dryer. Noises At the start of the cycle the dryer Dryer makes unfamiliar noises.
- Page 47 11-Troubleshooting NZ AU Cause Problem Solution Fabric Instructions on care label not Follow the instructions on the damage care label of the items. followed. Ensure the DRYNESS LEVEL DRYNESS LEVEL selected not appropriate for the fabric type. selected is appropriate for the fabric type.
-
Page 48: Customer Service
12-Customer service NZ AU We recommend our Haier Customer Service and the use of original spare parts. : your local dealer. and FAQs and where you can activate the service claim. To contact our Service, ensure that you have the following data available. - Page 49 NZ AU...
- Page 50 NZ AU...
- Page 51 NZ AU...
Need help?
Do you have a question about the HLC1290CTB1 and is the answer not in the manual?
Questions and answers