Advertisement
Quick Links
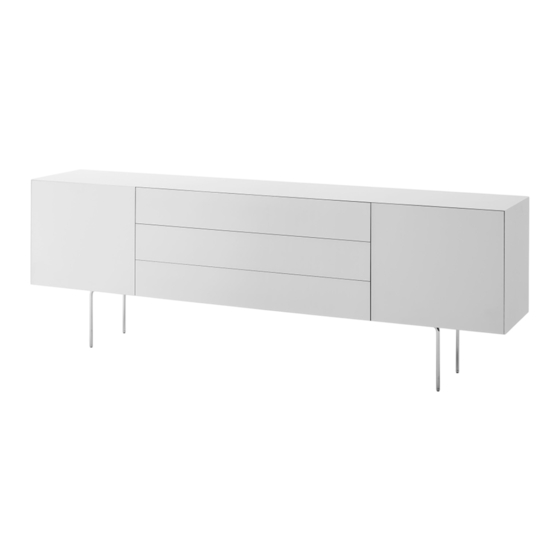
MAGIC BOX
DESIGN PIERO LISSONI
MGB01/MGB02/MGB03/
MGB04/MGB05/MGB06/
MGB07/MGB08
MGB09/MGB10/MGB11
x 1/2/4
Per/For MGB02/MGB04/MGB13
x 1/2/3
Accessori / Tools
X n
X n
step 7
A
C
B
step 8
step 1
MGB12/MGB13
step 2
ITALIANO
step 1. Per le versioni MGB02, MGB04 e MGB13
svitare i piedini e avvitare le gambe metalliche con
le viti in dotazione.
step 2. Nelle versioni MGB01, MGB03, MGB05,
MGB06,
MGB07,
MGB11, MGB12 (senza gambe) prestare attenzione
a non scheggiare gli spigoli nel posizionare il mobile
a terra.
step 3. Solo per MGB01. MGB02, MGB03, MGB04,
MGB05,
MGB06,
MGB13 (con ante) infilare i reggiripiani negli appositi
fori nelle spalle e successivamente inserire delicata-
mente il piano in cristallo, prestando attenzione a
non urtarlo.
step 4.
Agganciare le cerniere alle ante come
mostrato in figura; prima di eseguire l'operazione
assicurarsi che le viti A e C siano completamente
ruotate in senso antiorario.
step 5. Installare con cautela le antine alla struttura,
prestando attenzione a non urtare i cristalli.
step 6. Per la regolazione dell'antina:
A. Regola la posizione interno-esterno.
B. Regola la posizione destra-sinistra.
C. Regola la posizione su-giù.
ATTENZIONE: assicurarsi che l'antina sia perfet-
tamente a filo esterno con le spalle e il top.
step 7. Solo per MGB09, MGB10, MGB11, MGB12,
MGB13 per regolare i cassetti agire sulle rotelline A
(destra-sinistra), B ( dentro-fuori) e la levetta C (al-
to-basso).
step 8. Se necessario mettere in piano il mobile,
regolando i piedini come mostrato in figura.
ENGLISH
step 1. For versions MGB02, MGB04 and MGB13
unscrew the feet and fit the metal legs with the
screws provided.
step 2. In versions MGB01, MGB03, MGB05,
MGB06,
MGB07,
MGB04/ MGB12/MGB13
MGB04/ MGB12/MGB13
NO
MGB11, MGB12 (no legs) be careful not to damage
the edges placing the cabinet on the floor.
step 3. Only for MGB01. MGB02, MGB03, MGB04,
MGB05,
MGB06,
MGB07,
MGB08,
MGB13 (with doors) put the shelf brackets into the
MGB08,
MGB09,
MGB10,
holes in the sides and then gently put the top made
of crystal, being careful not to damage it.
step 4. Hook the hinges to the doors as shown in
the picture; before doing this operation, make sure
that the screws A and C are fully turned anticlockwise.
step 5. Carefully install the doors to the structure,
MGB07,
MGB08,
MGB12,
being careful not to hit the crystals.
step 6. To set up the door:
A. Adjust the position inside-outside.
B. Adjust the position of the right-left.
C. Adjust the position upwards-downwards.
ATTENTION: make sure that the door is perfect-
ly flush with the outer sides and the top.
step 7. Only for MGB09, MGB10, MGB11, MGB12,
MGB13 (with drawers) to adjust the drawers act on
wheels A (right-left), B (inside – outside out) and le-
ver C (up - down).
step 8. If necessary, level the cabinet, adjusting the
feet as shown in picture.
FRANÇAIS
step 1. Pour les versions MGB02, MGB04 et MGB13
dévisser les petits pieds et visser les pieds en métal
avec les vis fournies.
step 2. Dans les versions MGB01, MGB03, MGB05,
MGB06,
MGB07,
MGB08,
MGB09,
MGB11, MGB12 (pas de jambes) faire attention de
ne pas ébrécher les coins en placement du cabinet
sur le terrain.
step 3. Seulement pour les MGB01, MGB02,
MGB03,
MGB04,
MGB05,
MGB06,
MGB08, MGB12, MGB13 (avec portes) introduire
les supports pour les étagères dans les trous sur les
côtés et ensuite insérer doucement l'étagère en cris-
MGB08,
MGB09,
MGB10,
tal en faisant attention à ne pas le heurter.
step 3
step 4
A
C
step 6
A
B
C
step 4. Accrocher les charnières a les portes, selon
l'illustration, avant de faire cette opération il faut
s'assurer que les vis A et C soient complétement
MGB12,
tournées en sens inverse de celui des aiguilles d'une
montre.
step 5. Monter avec prudence les portes sur la struc-
tureen faisant attention à ne pas heurter les cristaux.
step 6. Pour la régulation de la position de la porte:
A. Régulation de la position intérieur-extérieur
B. Régulation de la position droite-gauche.
C. Régulation de la position haut-bas.
ATTENTION: s'assurer que la porta soit parfaite-
ment alignée extérieurement avec les côtes et le top.
step 7. Seulement MGB09, MGB10, MGB11,
MGB12, MGB13 (avec tiroirs) pour régler les tiroirs
agissent sur roues A (droite-gauche), B (intérieur-ex-
térieur) et levier C (haut-bas).
step 8. Si le niveau nécessaire de l'armoire, en
ajustant les pieds comme indiqué sur la figure.
DEUTSCH
step 1. Für die Version MGB02, MGB04 und MGB13
lösen Sie die Füßchen und schrauben Sie die Füße
aus Metall mit den mitgelieferten Schrauben.
step 2. Für die Version MGB01, MGB03, MGB05,
MGB06,
MGB07,
MGB08,
MGB09,
MGB10,
MGB11, MGB12 (ohne Füße) achten Sie darauf, die
Kanten nicht zu zersplittern.
step 3. Nur für MGB01, MGB02, MGB03, MGB04,
MGB05,
MGB06,
MGB07,
MGB08,
MGB12,
MGB10,
MGB13 (mit Türen) setzen Sie die Bodenhalterungen
in den geeigneten Löcher der Seiten ein, setzen Sie
dann nun vorsichtig das Fachböden ein und achten
Sie darauf, nirgendwo anzustoßen.
step 4. Hängen Sie die Scharniere an die Türen an,
MGB07,
wie auf der Skizze gezeigt. Vorher versichern Sie
sich, dass die schrauben A und C völlig gegen den
Uhrzeigersinn gedreht sind.
step 5. Schrauben Sie vorsichtig die Türen an der Struk-
tur und achten Sie darauf nirgendwo anzustoßen.
step 5
step 6. Um die Tür zu regulieren:
A. Regulieren Sie die Stellung innen-außen.
B. Regulieren Sie die Stellung rechts-links.
C. Regulieren Sie die Stellung auf-nieder.
ACHTUNG: achten Sie darauf, dass die Tür völlig
bündig mit den Seiten und die Oberfläche ist.
step 7. Nur für MGB09, MGB10, MGB11, MGB12,
MGB13 (mit Schubladen) wirken Sie auf die Räd-
chen A (rechts-links), B (innen-außen) und Hebel C
(auf-nieder), um die Schubladen zu regulieren.
step 8. Wenn notwendig, regulieren Sie die verstell-
baren Füßchen, damit das Möbel im Wasser steht,
wie auf der Skizze gezeigt.
ESPAÑOL
step 1. Para las versiones MGB02, MGB04 y MGB13
desatornillar los pies y atornillar las patas metalicas
con los tornillos en dotación.
step 2. En las versiones MGB01, MGB03, MGB05,
MGB06,
MGB07,
MGB08.
MGB09,
MGB10,
MGB11, MGB12 ( sin patas) poner atención a no
mellar las esquinas.
step 3. Solo para MGB01, MGB02, MGB03,
MGB04,
MGB05,
MGB06,
MGB07,
MGB08,
MGB12, MGB13 (con puertas) insertar los soportes
para los estantes en los agujeros apropiados en los
montantes y luego insertar con delicadez el plano en
cristal, prestando atención a no golpearlo.
step 4. Engachar las bisagras a las puertas como
indicado en la imagen; antes de realizar esta op-
eración asegurarse que los tornillos A y C sean com-
pletamente girados en sentido opuesto a las agujas
del reloj.
step 5. Instalar con cautela las puertas a la estruc-
tura prestando atención a no golpear los cristales..
step 6. Para la regulación de la puerta:
A. Regula la posición interior-exterior
B. Regula la posición derecha-izquierda
C. Regula la posición arriba-abajo
ATENCIÓN: asegurarse que la puerta sea per
Advertisement

Related Manuals for Glas Italia MAGIC BOX MGB01


Summary of Contents for Glas Italia MAGIC BOX MGB01
- Page 1 MAGIC BOX step 1 step 3 DESIGN PIERO LISSONI MGB01/MGB02/MGB03/ MGB04/MGB05/MGB06/ MGB07/MGB08 MGB12/MGB13 step 4 step 5 MGB09/MGB10/MGB11 x 1/2/4 MGB04/ MGB12/MGB13 Per/For MGB02/MGB04/MGB13 x 1/2/3 step 2 step 6 Accessori / Tools step 7 ITALIANO MGB11, MGB12 (no legs) be careful not to damage step 4.
- Page 2 fectamente al hilo con los montantes y el plano. step 7. Solo para MGB09, MGB10, MGB11, MGB12, MGB13 (con cajones) para regular los ca- jones actuar wn las ruedas A (derecha – izquierda), B ( interior - exterior) y la palanca C ( arriba – abajo). step 8.
Need help?
Do you have a question about the MAGIC BOX MGB01 and is the answer not in the manual?
Questions and answers