Table of Contents
Advertisement
Quick Links
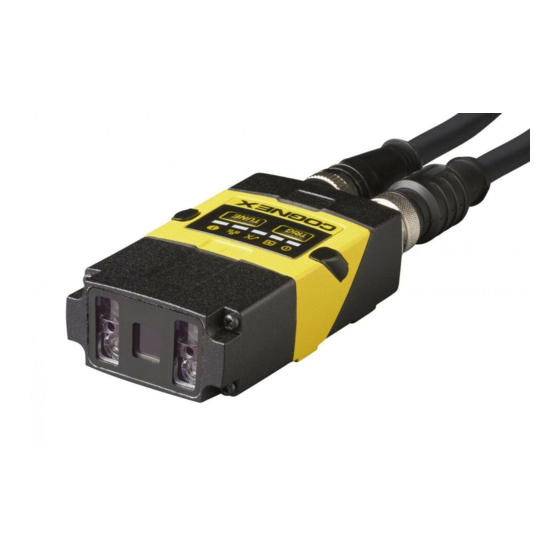
Cognex DM262QL
DataMan 262 Reader
A l l t r a d e m a r k s , b r a n d n a m e s , a n d b r a n d s a p p e a r i n g h e r e i n a r e t h e p r o p e r t y o f t h e i r r e s p e c t i v e o w n e r s .
• C r i t i c a l a n d e x p e d i t e d s e r v i c e s
• I n s t o c k / R e a d y - t o - s h i p
Artisan Scientific Corporation dba Artisan Technology Group is not an affiliate, representative, or authorized distributor for any manufacturer listed herein.
In Stock
Used and in Excellent Condition
Buy Today!
https://www.artisantg.com/98261-2
• We b u y y o u r e x c e s s , u n d e r u t i l i z e d , a n d i d l e e q u i p me n t
• F u l l - s e r v i c e , i n d e p e n d e n t r e p a i r c e n t e r
Advertisement
Table of Contents

Related Manuals for Cognex DataMan 262


Summary of Contents for Cognex DataMan 262
- Page 1 Cognex DM262QL DataMan 262 Reader In Stock Used and in Excellent Condition Buy Today! https://www.artisantg.com/98261-2 A l l t r a d e m a r k s , b r a n d n a m e s , a n d b r a n d s a p p e a r i n g h e r e i n a r e t h e p r o p e r t y o f t h e i r r e s p e c t i v e o w n e r s .
- Page 2 ® DataMan Reference Manual 04/24/2017 Version: 5.7.0.218 Artisan Technology Group - Quality Instrumentation ... Guaranteed | (888) 88-SOURCE | www.artisantg.com...
-
Page 3: Legal Notices
Copyright © 2017. Cognex Corporation. All Rights Reserved. Portions of the hardware and software provided by Cognex may be covered by one or more U.S. and foreign patents, as well as pending U.S. and foreign patents listed on the Cognex web site at: http://www.cognex.com/patents. -
Page 4: Table Of Contents
Changing a 6.2 mm Lens to a 16 mm Lens Changing to an Illumination with a Different Color Mounting Replacing a DataMan 300 series with a DataMan 262 on the Factory Floor Field of View and Reading Distances DataMan 260 Readers with a 6.2 mm Lens... - Page 5 Table of Contents Industrial Protocols Setting the Focus Position Tuning External Triggering and Trigger Modes Training and Trigger Modes Training Incremental Training for Multiple Symbologies Cleaning/Maintenance Cleaning the Reader Housing Cleaning the Reader Lens Cover Precautions Regulations/Conformity Artisan Technology Group - Quality Instrumentation ... Guaranteed | (888) 88-SOURCE | www.artisantg.com...
-
Page 6: Symbols
Symbols Symbols The following symbols indicate safety precautions and supplemental information. WARNING: This symbol indicates the presence of a hazard that could result in death, serious personal injury or electrical shock. CAUTION: This symbol indicates the presence of a hazard that could result in property damage. Note: Notes provide supplemental information about a subject. -
Page 7: Getting Started
The DataMan Fixed Mount Readers Reference is a complete online hardware reference for the DataMan fixed- mount ID readers. Cognex->DataMan Software v x.x.x->Documentation->English->DM260 ->Fixed Mount Reference Manual Artisan Technology Group - Quality Instrumentation ... Guaranteed | (888) 88-SOURCE | www.artisantg.com... -
Page 8: Dataman 260 Accessories
DataMan Setup Tool or as a stand-alone help file. Cognex->DataMan Software v x.x.x->Documentation->DM260->Questions and Answers The Release Notes list detailed system requirements and additional information about this DataMan software release. Cognex->DataMan Software v x.x.x->Documentation->DataMan v x.x.x Release Notes DataMan 260 Accessories Lens Options 6.2 mm lens kit (DM150-LENS-62) 6.2 mm optics mount... - Page 9 Getting Started 16 mm lens with ImageMax kit (DM260-KIT-16LL) 16 mm optics mount 16 mm lens Liquid Lens Module (DMA-LLM-150-260) High Powered red LED illumination (DM260-LED-RED-HP) 2-LED half-polarized extended cover (DM260-LENS-16CVR-P) Artisan Technology Group - Quality Instrumentation ... Guaranteed | (888) 88-SOURCE | www.artisantg.com...
-
Page 10: Filters
Getting Started Filters Blue bandpass filter (DM150-BP470) Red bandpass filter (DM150-BP635) Lens Covers Clear lens cover (DM150-CVR-CLR)* Clear lens cover, ESD safe (DM150-CVR-ESD)* Polarized front cover (DM260-LENS-62CVR-F)* Extended lens cover, un-polarized (DM260-LENS-16CVR)** Extended lens cover, half-polarized (DM260-LENS-16CVR-P)** Extended lens cover, fully polarized (DM260-LENS-16CVR-F)** C-mount adaptor, IP40 (DM260-CMNT-00) C-mount adaptor, IP65 (DM260-CMNT-CVR) Note: *Use with a 6.2 mm lens only! -
Page 11: Cables
Getting Started High Powered red LED illumination (DM260-LED-RED-HP)** Note: *Use with a 6.2 mm lens only! **Use with a 16 mm lens only! Cables Connection cable 24V, I/O, RS-232 (CCBL-05-01) Connection cable 24V, I/O, RS-232 (CCB-M12x12Fy-xx) (y=S: straight / y=A: angled *, xx specifies length) Connection cable RS-232 (CCB-M12xDB9Y-05) RS-232 &... -
Page 12: Dataman 260 Systems
DataMan 260 Q √ √ √ 752x480 Global shutter DataMan 260X √ √ √ √ 752x480 Global shutter DataMan 262 S √ √ √ 1280x960 Global shutter DataMan 262 QL √ √ 1280x960 Global shutter DataMan 262 Q √ √... -
Page 13: Communication Modules
Getting Started Communication Modules The DataMan 260 is available with the following communication options: 24 VDC Ethernet Model PoE (Power over Ethernet) Ethernet Model Ethernet Interfaces The DataMan 260 readers provide the following interface modules: 24 VDC Ethernet Model/ RS-232: This module has Ethernet and RS-232 interfaces and requires 24V external power (Non-PoE). -
Page 14: Reader Layout
Getting Started Reader Layout The following images shows the built-in lighting system and other features of the DataMan 260. Illumination LEDs LED aimers 3-4* Mounting holes (M3 x 3.5mm) Trigger button Power indicator Train status/ Trigger status indicator Good/bad read indicator Network status indicator Error indicator Tune button... -
Page 15: Changing Orientation
Getting Started Changing Orientation Perform the following steps to change between in-line and right-angle configuration. Note: Switching between in-line and right-angle configuration is recommended only up to 10 times in the lifetime of the DataMan 260. Disconnect the DataMan 260 from power before changing the orientation. WARNING: Make sure that no electrostatic charges are applied to the PCB. - Page 16 Getting Started Place the bottom edge of the gasket onto the underside of the main module. Press on the top edge to fully seat the gasket: Note: The flat side of the gasket (marked as "Front" in the image above) has to face outside. WARNING: Do not touch any electrical component.
- Page 17 Getting Started 6. After each cap nut has been fastened, torque to 0.12 Nm (1.06 in-lb) and reinstall the screw covers. Note: There are unique left and right screw covers. Take care to attach them correctly. Artisan Technology Group - Quality Instrumentation ... Guaranteed | (888) 88-SOURCE | www.artisantg.com...
-
Page 18: Dimensions
Getting Started Dimensions The DataMan 260 consists of three main parts: 1. Optics module (lens including lens mount, illumination and front cover including filter mounting option for a Diameter (Ø): 12.3mm<Ø<12.7mm, Thickness (t): 1.6mm<t<2mm filter) 2. Main module, including sensor and CPU 3. - Page 19 Getting Started The size of the DataMan 260 in the straight configuration is shown in the following figure: The size of the DataMan 260 in the angled configuration is shown in the following figure: Artisan Technology Group - Quality Instrumentation ... Guaranteed | (888) 88-SOURCE | www.artisantg.com...
-
Page 20: Dataman 260 Specifications
Duplex Mode Full duplex or half duplex DataMan 260 Series Imager Specifications Specification DataMan 260 Imager DataMan 262 Imager Image Sensor 1/3 inch CMOS 1/3 inch CMOS Image Sensor 4.51 mm x 2.88 mm (W x H), 6.0 μm square 4.8 mm x 3.6 mm (W x H), 3.75 μm square... -
Page 21: Illumination Options
Getting Started Illumination Options Illumination 5V USB Powered PoE Powered 24V Externally Powered Board Max. exposure Max. duty Max. exposure Max. duty Max. exposure Max. duty time cycle time cycle time cycle Standard Red 500 µs 500 µs 1 ms High Power Red 500 µs 500 µs 10 ms... -
Page 22: Setting Up Your Dataman 260
Setting Up Your DataMan 260 Setting Up Your DataMan 260 This section provides information on the physical appearance of the DataMan 260 reader. It also details the steps of mounting the reader, installing the lenses and filters of the reader, and gives information on the imager itself. This section provides information on the physical appearance of the DataMan 260 reader, details the steps of mounting the reader, and gives information on the imager itself. - Page 23 Setting Up Your DataMan 260 3. Push the top side of the filter firmly until it is sitting flat against the PCB. Note: Use finger to push the filter in and then a q-tip to clean the filter, or use a q-tip to push the filter into place.
-
Page 24: Installing A Liquid Lens
Setting Up Your DataMan 260 Installing a Liquid Lens Perform the following steps to install a liquid lens on your DataMan 260 reader. Note: Disconnect the DataMan 260 reader from power before installing the liquid lens. 1. Remove the front cover: unscrew the four M2x12mm Phillips Pan screws and take off the LED cover. 2. - Page 25 Setting Up Your DataMan 260 5. Attach the liquid lens accessory by aligning the 2x2 connectors of the liquid lens with the 2x2 sockets on the optics mount. 6. Press the liquid lens onto the imager lens until you reach the stop. 7.
- Page 26 Setting Up Your DataMan 260 8. Attach the front cover. Observing the tightening sequence below, tighten all four M2x12mm Phillips Pan screws to 9 Ncm using a torque wrench. Note: The rib in the front cover must be oriented to the top side. Note: The DataMan 260 liquid lens must be calibrated after field exchange.
-
Page 27: Changing A 6.2 Mm Lens To A 16 Mm Lens
Setting Up Your DataMan 260 Changing a 6.2 mm Lens to a 16 mm Lens Perform the following steps to change a 6.2 mm lens to a 16 mm lens on your DataMan 260 reader. Note: Disconnect the DataMan 260 reader from power before changing lenses. WARNING: This modification must be made in a dust-free and ESD safe area. - Page 28 Setting Up Your DataMan 260 4. Attach the 16 mm lens mount. 5. Fasten the two M2x5mm Phillips head screws to 0.06 Nm using a torque wrench. 6. In the case of a manual focus lens, press the 16 mm lens cap onto the lens. The lens has 12 cutouts so it can be locked in steps of 30 degrees.
-
Page 29: Changing To An Illumination With A Different Color
Setting Up Your DataMan 260 8. Attach the front cover. Observing the tightening sequence below, tighten all four M2x25 Phillips Pan head screws to 9 Ncm using a torque wrench. Note: The rib in the front cover must be oriented to the top side. Changing to an Illumination with a Different Color Perform the following steps to change the illumination. -
Page 30: Mounting
Setting Up Your DataMan 260 3. Attach a new color illumination module. Note: Take care to attach the illumination with the right orientation. 4. Attach the front cover. Observing the tightening sequence below, tighten all four screws to 9 Ncm using a torque wrench. - Page 31 Setting Up Your DataMan 260 Artisan Technology Group - Quality Instrumentation ... Guaranteed | (888) 88-SOURCE | www.artisantg.com...
-
Page 32: Replacing A Dataman 300 Series With A Dataman 262 On The Factory Floor
Replacing a DataMan 300 series with a DataMan 262 on the Factory Floor An adapter kit (DM-ADAP-PLT) is available for DataMan 262 using which you can replace a DataMan 300, 302, 360 and 362 devices with a DataMan 262 device in the field. The kit includes the following:... -
Page 33: Field Of View And Reading Distances
Setting Up Your DataMan 260 Note: The adapter plate must always be connected to the mounting holes of the DataMan 262 IO module. The threaded holes in the adapter plate are matching with the DataMan 300 series mounting holes. Field of View and Reading Distances DataMan 260 Readers with a 6.2 mm Lens... - Page 34 Setting Up Your DataMan 260 The FoV values are shown as follows: outer: DM262 inner: DM260 Long Range (Focused to 190 mm) The following tables show the FoV widths of the 6.2 mm lens focused to 190 mm at various distances. DM260 Distances in mm 2D min.
-
Page 35: Dataman 260 Readers With A 16 Mm Lens
Setting Up Your DataMan 260 outer: DM262 inner: DM260 DataMan 260 Readers with a 16 mm Lens The following tables show the FoV widths of the 16 mm lens at various distances. DM260 Distances in mm 2D min. code 1D min. code 3 MIL 2 MIL 5 MIL... - Page 36 Setting Up Your DataMan 260 The following map shows the FoV of the DataMan 260 readers with a 16 mm lens. The horizontal and vertical field of view is shown for working distances of 80 mm, 150 mm, 190 mm, 225 mm, 375 mm, 500 mm and 1000 mm. The FoV values are shown as follows: outer: DM262 inner: DM260...
-
Page 37: Connections, Optics And Lighting
Setting Up Your DataMan 260 Connections, Optics and Lighting Descriptions about the I/O Cables, RS-232 cable, Ethernet cable, and high-speed output lines and wiring are provided in the following sections. 5m I/O Breakout Cable (CCBL-05-01) The I/O cable provides access to trigger and high-speed outputs. Unused wires can be clipped short or tied back using a tie made of non-conductive material. - Page 38 Setting Up Your DataMan 260 Signal: PoE Ethernet Model Artisan Technology Group - Quality Instrumentation ... Guaranteed | (888) 88-SOURCE | www.artisantg.com...
-
Page 39: I/O Breakout Cable (Ccb-M12X12Fy-Xx)
Setting Up Your DataMan 260 5m I/O Breakout Cable (CCB-M12x12Fy-xx) The I/O cable provides access to trigger and high-speed outputs. Unused wires can be clipped short or tied back using a tie made of non-conductive material. For RS-232, use the Power Supply return path for ground. The drawing on the left shows the plug on the device. -
Page 40: I/O Breakout Cable (Ccb-Pwrio-15)
Setting Up Your DataMan 260 15m I/O Breakout Cable (CCB-PWRIO-15) The I/O cable provides access to trigger and high-speed outputs. The cable is not terminated. Unused wires can be clipped short or tied back using a tie made of non-conductive material. For RS-232, use the Power Supply return path for ground. -
Page 41: High Speed Output Lines
Setting Up Your DataMan 260 High Speed Output Lines The high-speed outputs can be used as either NPN (pull-down) or PNP (pull-up) lines. Specification Description Voltage 28VDC maximum through external load 50mA maximum ON sink or source Current OFF state leakage current 100µA External load resistance 240 Ohms to 10K Ohms Each line rated at a maximum 50mA, protected against over-current, short circuits and transients from switching inductive loads. - Page 42 Setting Up Your DataMan 260 Artisan Technology Group - Quality Instrumentation ... Guaranteed | (888) 88-SOURCE | www.artisantg.com...
-
Page 43: High-Speed Output Wiring
Setting Up Your DataMan 260 High-Speed Output Wiring To connect to an NPN-compatible PLC input, connect Output 0, Output 1, Output 2 or Output 3 directly to the PLC input. When enabled, the output pulls the PLC input down to less than 3VDC. To connect to a PNP-compatible PLC input, connect Output 0, Output 1, Output 2 or Output 3 directly to the PLC input. -
Page 44: Ethernet Cables
Setting Up Your DataMan 260 Ethernet Cables The Ethernet cable (CCB-84901-2001-05) provides Ethernet connection for network communications. The Ethernet cable can be connected to a single device or provide connections to multiple devices via a network switch or router. X-coded to RJ45 Cable P1 Pin Number Wire Color Signal Name... -
Page 45: Multi-Port Connections
Setting Up Your DataMan 260 Multi-port Connections You can connect multiple DataMan 260 readers to a single PC (or other device equipped with a serial port) using a multi-port connection. A multi-port connection creates a daisy-chain of readers. Each reader receives serial data from the previous reader and transmits it to the next reader. - Page 46 Setting Up Your DataMan 260 You must connect each DataMan 260 to DataMan Setup Tool using a USB connection and set the DataMan for multi- port operation. To configure a DataMan 260 for multi-port operation, click on the Enable Multi-Port (RS-232 Sharing) check box in Communication Settings.
- Page 47 Setting Up Your DataMan 260 If a DataMan 260 is transmitting its own read result, it will buffer any data received from another reader until it has finished its own data transmission. If a DataMan 260 is transmitting another reader’s data, it will buffer its own data if it receives a trigger signal while it is processing the other reader’s data.
-
Page 48: Using Your Dataman 260
3. Connect the DataMan 260 to your PC. 4. Choose Start > Programs > Cognex > DataMan Software vx.x.x > Setup Tool to launch the DataMan Setup Tool. Detected readers will appear under COM ports. 5. Click Refresh to update the list of connected devices. -
Page 49: Setting The Focus Position
Using Your DataMan 260 1. Enable the protocols using the Industrial Protocols pane of the DataMan Setup Tool (under Communication Settings). 2. Scan the appropriate Reader Configuration codes (see Reader Configuration Codes available through the Windows Start menu or the DataMan Setup Tool Help menu). 3. -
Page 50: Tuning
Using Your DataMan 260 3. Remount the front cover. Observing the tightening sequence below, tighten all four screws to 9 Ncm using a torque wrench. Note: If you use an optical filter and the illumination was removed, remount the illumination module first and then remount the front cover. - Page 51 Using Your DataMan 260 DataMan 260 supports a variety of trigger modes: Single: Acquires a single image and attempts to decode any symbol it contains or more than one symbol in cases where multicode is enabled. The reader relies on an external trigger source. Presentation: Repeatedly scans for a symbol and decodes it whenever one is detected.
-
Page 52: Training And Trigger Modes
Using Your DataMan 260 Training and Trigger Modes Training is supported for the following trigger modes: Single trigger Burst mode Self trigger Continuous mode Training Training your reader with the expected symbology may help increase decode yield. To train your reader, place a code in front of the reader and do one of the following: Press and hold the trigger button ( ) for at least 3 seconds and the release it. - Page 53 Using Your DataMan 260 With incremental training enabled, you can train the reader using multiple images showing the symbologies you expect to decode. The reader will train each new symbology while retaining the existing trained symbologies. Artisan Technology Group - Quality Instrumentation ... Guaranteed | (888) 88-SOURCE | www.artisantg.com...
-
Page 54: Cleaning/Maintenance
Cleaning/Maintenance Cleaning/Maintenance Cleaning the Reader Housing To clean the outside of the reader housing, use a small amount of mild detergent cleaner or isopropyl alcohol on a cleaning cloth. Do not pour the cleaner directly onto the reader housing. CAUTION: Do not attempt to clean any DataMan product with harsh or corrosive solvents, including lye, methyl ethyl ketone (MEK) or gasoline. -
Page 55: Precautions
Precautions Observe these precautions when installing the Cognex product, to reduce the risk of injury or equipment damage: This device requires the use of an LPS or NEC class 2 power supply (non-PoE device) or the use of a PoE Class 1 (PoE device). -
Page 56: Regulations/Conformity
Australia VCCI V-3/2015.04 Class A Japan Note: For the most up-to-date CE declaration and regulatory conformity information, please refer to the Cognex online support site: http://www.cognex.com/Support. CAUTION: This device requires the use of a PoE Class 1 or 48V DC LPS power supply. -
Page 57: Led Safety Statement
Group. No further labeling is required. For European Community Users Cognex complies with Directive 2012/19/EU OF THE EUROPEAN PARLIAMENT AND OF THE COUNCIL of 4 July 2012 on waste electrical and electronic equipment (WEEE). This product has required the extraction and use of natural resources for its production. It may contain hazardous substances that could impact health and the environment, if not properly disposed. - Page 58 Artisan Technology Group - Quality Instrumentation ... Guaranteed | (888) 88-SOURCE | www.artisantg.com...
Need help?
Do you have a question about the DataMan 262 and is the answer not in the manual?
Questions and answers