Table of Contents
Advertisement
Quick Links
1)材质
:70g
2)成型尺寸:
3)印刷要求黑色印刷、印刷清晰;
4)制品应平整、无脏污及起皱破损,制件切边应
整齐平滑;
5)其余要求应符合标准
的相关规定;
6)有毒有害物质管控要求应符合Q/HJD J02169
《厨卫产品有害化学物质含量规定》;
7)批量前需将墨稿及样品送至研发确认。
韩健
唐明军
褚延宾
曲承童
吴曰浩
2024.5.17
双胶纸,钉装成型;
140mm 210mm
×
Q/HJ J04024
WD16-E720Xi
2024.7.25
70g双胶纸
,空白页加在封底页;
《说明书》
/
海信(山东)厨卫有限公司
C
D
C06010336
12456604
/
1:1
/
Advertisement
Table of Contents

Related Manuals for Hisense HSAA16FS


Summary of Contents for Hisense HSAA16FS
- Page 1 1)材质 :70g 双胶纸,钉装成型; 2)成型尺寸: 140mm 210mm × ,空白页加在封底页; 3)印刷要求黑色印刷、印刷清晰; 4)制品应平整、无脏污及起皱破损,制件切边应 整齐平滑; 5)其余要求应符合标准 Q/HJ J04024 《说明书》 的相关规定; 6)有毒有害物质管控要求应符合Q/HJD J02169 《厨卫产品有害化学物质含量规定》; 7)批量前需将墨稿及样品送至研发确认。 C06010336 WD16-E720Xi 12456604 2024.7.25 韩健 唐明军 70g双胶纸 海信(山东)厨卫有限公司 褚延宾 曲承童 吴曰浩 2024.5.17...
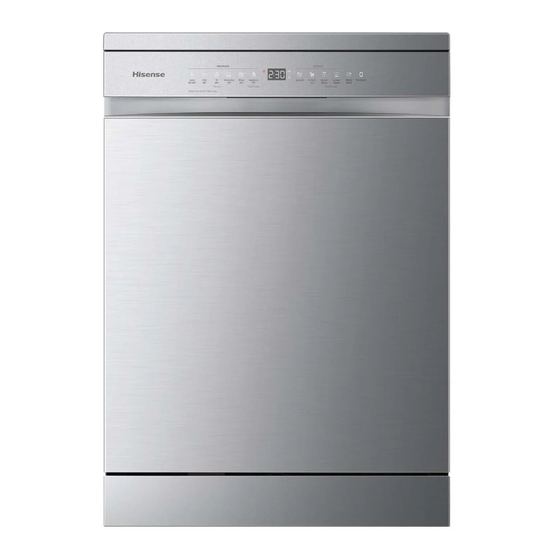
- Page 2 HSAA16FS English...
-
Page 3: Table Of Contents
Contents Your dishwasher ........................Safety instructions ........................ Installation ..........................Overflow guard function ......................Winter storage/transport ......................Packaging ..........................Disposal ............................ Before washing for the first time ..................Water hardness ......................... Basic settings ........................... Top up with rinse aid ........................ Greener dishwashing ......................Save energy and water ...................... - Page 4 Troubleshooting ........................General ............................ WiFi ............................Installation ..........................Safety instructions ........................Transport protection for the door ..................... Placing the dishwasher ......................Adjust the height and slide the dishwasher into place ............. Drainage connection ......................... Connection to water supply ...................... Electrical connection ......................... Remove dishwasher worktop ....................
-
Page 5: Your Dishwasher
Your dishwasher Install the dishwasher, see the chapter Installation. Press The first time the dishwasher is switched on, it is important that you choose the right settings to ensure good dishwashing results. See the chapter Before washing for the first time. On/Off Display Start/Pause/Stop... -
Page 6: Safety Instructions
Safety instructions • Read the operating instructions and keep them in a safe place! • Number of standard place settings: 16 • Never use the dishwasher for any purpose other than that specified in these operating instructions. • Do not load the dishwasher door or dishwasher baskets with anything other than dishes. -
Page 7: Installation
• Children must be watched. Do not allow children to use or play with the dishwasher. Be especially vigilant when the door is open. Some detergent may remain inside! After adding detergent, always start the dishwasher immediately. WARNING! Knives and other utensils with sharp points must be loaded in the basket with their points down or placed in a horizontal position. -
Page 8: Packaging
Packaging The outer packaging protects the product during transport. The packaging material is recyclable. Separate the different packaging materials to help reduce raw material use and waste. Your dealer can take the packaging for recycling or direct you to the nearest recycling centre. The packaging is comprised of: •... -
Page 9: Before Washing For The First Time
Before washing for the first time Water hardness In order to achieve good dishwashing results, the dishwasher needs soft water (water with low mineral content). Hard water leaves a white coating on dishes and the dishwasher. Checking water hardness Contact the local water utility to check the water hardness in your area. This is important with regard to how much detergent and rinse aid to use. -
Page 10: Greener Dishwashing
Greener dishwashing Save energy and water When using a dishwasher in a residential setting, less energy and water are generally used compared to washing the dishes by hand. Do not rinse under running water Do not rinse the dishes under running water as this will lead to increased energy and water consumption. Simply scrape off large food particles before loading the dishwasher. -
Page 11: Loading The Dishwasher
Loading the dishwasher Fragile dishes Some cookware is not dishwasher safe. This can be for several reasons. Some materials cannot withstand high heat, others can be damaged by dishwasher detergent. Exercise caution with, for example, handmade items, fragile decoration, crystal/glassware, silver, copper, tin, aluminium, wood and plastic. -
Page 12: Upper Basket
Upper basket Place glasses, cups, bowls, side plates and saucers in the upper basket. All dirty surfaces should face inwards and downwards! Wine glasses are placed on the wine glass shelf and knives are placed in the knife stand on the right. 2 positions Knife stand Raising and lowering the upper basket... -
Page 13: Lower Basket
Adjustable plate supports The adjustable plate supports can be folded down to make it easier to load pots, bowls and glasses. Lower basket Place plates, side plates, serving dishes and pots in the lower basket. Cutlery can be placed in the cutlery holder. -
Page 14: Using The Dishwasher
Using the dishwasher Add detergent Follow the instructions on the detergent packaging. And use detergent and rinse aid doses suitable for soft water. Too much detergent can result in less effective dishwashing and also entails greater environmental impact. Detergent compartment The detergent compartment must be dry when adding detergent. -
Page 15: On/Off
On/Off Display Start/Pause/Stop NOTE! The control panel only reacts to use when the door is closed. On/Off Close the door properly, otherwise the dishwasher will not start. Press . Also turn on the water tap if it is turned off. When the program is not running, press to turn off the dishwasher immediately. -
Page 16: Connect (Wifi)
Intensive 70° A program with a high temperature for dissolving grease on very dirty dishes, such as pans, casserole dishes and oven dishes. If these dishes do not completely fill the dishwasher, you can add plates and other dishes. Glass 40° A gentle dishwashing program with a low temperature for washing fragile items made of crystal/glass. -
Page 17: Delay Start
Smart Dry The dishwasher door and fan dry open automatically, which improves drying results. Wait until the dishwasher indicates that the program has ended and the dishes have cooled before unloading the dishwasher. (If the dishwasher is built-in, surrounding furnishings must be resistant to any condensation from the dishwasher.) Press to activate the option, which is indicated by an indicator light. -
Page 18: If You Want To Load More Dishes
Stopping or changing a program Press to pause the program. If you want to interrupt or change the program after starting the dishwasher, press and hold for three seconds. Open the door and top up with new detergent if the lid of the detergent dispenser has opened. Close the door. -
Page 20: Wifi Connection
WiFi connection ConnectLife You can remote control this dishwasher with your smartphone/tablet. Connect the dishwasher to your wireless network to be able to remote control and start the dishwasher using the ConnectLife app. The app can be used to find information, change settings, start a program and monitor the dishwasher. (The dishwasher can always be used without the app.) Start/Pause/Stop Display... - Page 21 Network symbol on the display Flashing 0.25 sec on/off The dishwasher is ready to be connected to your wireless network or paired with your smartphone/tablet. Flashing 0.5 sec on/off The dishwasher is connecting to your wireless network. Glows The dishwasher is connected to your wireless network and the cloud. Remote control the dishwasher The dishwasher’s network symbol is shown on the display when the dishwasher is paired with a...
-
Page 22: Settings
Settings 1. Press 2. To open the dishwasher's settings menu, press and hold until SEt is shown on the display. 3. Press to step through the setting menu. 4. Press to step through the alternatives . 5. Confirm the selected setting by pressing 6. - Page 23 Settings Alternatives 00 (Off) Activate this setting when using an all-in-one detergent 01 (On) that contains rinse aid. This setting reduces the rinse aid dose. Pre-selected at factory: 00 Error readout Any error messages. When contacting the service department, you may be asked to provide the most recent error messages.
-
Page 24: Care And Cleaning
Care and cleaning Top up with rinse aid When the rinse aid needs topping up, the above symbol lights on the display. Press the elliptical protrusion above the lid while pulling upwards to open the lid 1. Open the rinse aid compartment lid. 2. -
Page 25: Cleaning The Spray Arms
NOTE! Dishwashing results may be affected if the filter is fitted incorrectly. The dishwasher must not be used without the filter in place! Check that the yellow drainage pump stop on the right in the bottom drain is in place. Cleaning the spray arms Holes and bearings can sometimes become blocked. -
Page 26: Clean The Outside Of The Dishwasher
Lower spray arm • Pull the lower spray arm straight up to release it. Corner boost spray arm • Press and hold the metal tube, then pull the corner boost spray arm straight up to release it. (Before pulling up the spray arm, the metal tube must be held, otherwise it will cause deformation of the metal tube.) NOTE! If the dishes are misplaced, the rotation of corner boost might be obstructed, or even blocked. -
Page 27: Remove Blockages
Remove blockages Unblocking the drainage pump If the dishwasher still contains water after the program has finished, something may be blocking the drainage pump, which results in the Water outlet fault error message. 1. Turn off the machine using and remove the plug from the wall socket. 2. -
Page 28: Troubleshooting
Troubleshooting Error messages Action Water outlet fault See Water remains in the dishwasher in the table Problem below. If the problem persists, contact your nearest service centre. Water inlet fault Check that the water tap is on. Check that the outer filter on the inlet hose is not blocked. - Page 29 Problem Possible causes Action The door lock does not click Check the door lock. If it does into place and lock. not click into place and lock, open the door. Press to turn on the dishwasher, press and hold until the display starts counting down.
- Page 30 Problem Possible causes Action Dishes loaded incorrectly. Do not cover porcelain with large bowls or the like. Avoid placing very tall glasses in the corners of the baskets. See the chapter Loading the dishwash- The filter is clogged. Clean the filter. The filter is not fitted correctly.
- Page 31 Problem Possible causes Action Rattling sound when dishwash- The dishes are not correctly Check that the dishes are ing. placed or the spray arms are not placed securely. Spin the spray rotating. arms to make sure they can ro- tate. Water remains in the dishwash- The filter is clogged.
-
Page 32: Wifi
WiFi Problem Possible causes Action The dishwasher’s network sym- The dishwasher is not connect- Connect the dishwasher to your ed to your wireless network. wireless network. See the does not appear on the chapter, WiFi connection . display. The WiFi connection is deactivat- Activate the WiFi connection. -
Page 33: Installation
Installation [mm] Nominal dimensions. Actual measurements may vary. Safety instructions • Connections to electricity, water and drainage must be performed by a qualified professional. • Always follow applicable regulations for water, drainage and electricity. • Take care during installation! Wear protective gloves! There must always be two people! •... -
Page 34: Adjust The Height And Slide The Dishwasher Into Place
Ÿ When the dishwasher is installed with its worktop, the built-in measurements are shown in the illustration. 【mm】 Ÿ When the dishwasher is installed in a recess without its worktop, the built-in measurements are shown in the illustration. 【mm】 Adjust the height and slide the dishwasher into place 24 mm Freestanding •... -
Page 35: Drainage Connection
5. Slide the dishwasher into place. • Pull through the drainage and supply hoses when the machine is slid into place. • Check that the hoses have no kinks or sharp bends, and check that there is nothing that can damage the hoses. -
Page 36: Connection To Water Supply
The drainage hose may be extended by a maximum of 3 m (the total length of the drainage hose must not exceed 4.5 m). Any joins and connecting pipes must have an internal diameter of at least 14 mm. However, the drainage hose should ideally be replaced with a new hose without joins. No part of the drainage hose may be more than 950 mm above the bottom of the dishwasher. -
Page 37: Service
Read the chapter Troubleshooting before contacting the service centre. If you have encountered a problem that you cannot resolve, please contact your nearest service centre for professional help, see www.hisense.com.au. Our website also has information about spare part availability and what you can repair yourself. -
Page 38: Technical Data And Energy Labelling
1900 W Weight can vary due to different specifications. Information for consumers Information about your product can be found at https://hisense.com.au. Please click on the magnifying glass icon and type the Model Number in the search bar. Test standard Dishwasher tested in conformity with standard AS/NZS 2007.1 2005... - Page 39 2. Lower basket: Number Item Bread-and-butter plate Dinner plate Soup(Dessert) plate 3. Top cutlery tray: Number Item Tea spoon Dessert spoon Soup spoon Fork Knife...
- Page 40 12456604-D...
Need help?
Do you have a question about the HSAA16FS and is the answer not in the manual?
Questions and answers