Table of Contents
Advertisement
Available languages
Available languages
Quick Links
Advertisement
Chapters
Table of Contents

Related Manuals for Black & Decker BXASBH04019


Summary of Contents for Black & Decker BXASBH04019
- Page 1 BXASBH04019...
- Page 2 Este manual de instrucciones contiene información importante de seguridad y recomendaciones que le pediríamos que cumpliera para obtener mejores resultados del aire acondicionado. Antes de usar, lea y siga todas las reglas de seguridad y el aviso de funcionamiento. Bee-Tech tiene una política de mejora continua en sus productos y se reserva el derecho de cambiar materiales y especificaciones sin previo aviso.
-
Page 3: Table Of Contents
CONTENTS PRECAUCIONES DE SEGURIDAD ……………………………………………………………………………………… 1 NOMBRE DE LAS PIEZAS …………………….…………………………………………………………………………… 4 CONTROL REMOTO …………………….………………………………………………………………………………..… 6 INSTRUCCIONES DE OPERACIONES …………………….…………………………………………………………… 13 PRECAUCIONES DE INSTALACIÓN …………………….……………………………………………………………… 14 INSTALACIÓN DE LA UNIDAD INTERIOR …………………….……………………………………………..……… 17 INSTALACIÓN DE LA UNIDAD EXTERIOR …………………….……………………………………………………… 20 OPERACIÓN DE PRUEBA …………………….………………………………………………………………………..……... -
Page 5: Precauciones De Seguridad
PRECAUCIONES DE SEGURIDAD SAFETY RULES AND PROHIBITIONS WARNING No doble, tire ni comprima el cable de alimentación ya que esto podría dañarlo. Las descargas eléctricas o los incendios probablemente se deben a un cable de alimentación dañado. Sólo personal técnico especializado deberá sustituir un cable de alimentación dañado. No utilice extensiones ni módulos grupales. - Page 6 PRECAUCIONES DE SEGURIDAD 21. Las trampillas deben estar dirigidas hacia abajo en el modo calefacción y hacia arriba en el modo refrigeración. 22. Asegúrese de que el aparato esté desconectado de la fuente de alimentación cuando vaya a permanecer inactivo por un período prolongado y antes de realizar cualquier limpieza o mantenimiento.
-
Page 7: Nombre De Las Piezas
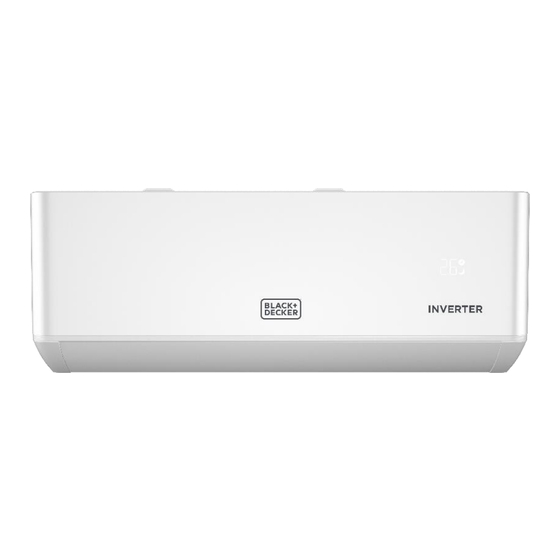
NOMBRE DE LAS PIEZAS Unidad interior Placa de montaje Filtro de aire Entrada de Aire Panel Frontal Botón de Emergencia Air outlet Air deflector and flap Tubo de conexión refrigerante Unidad exterior Entrada de aire Cubierta de cableado Air outlet Tubo de drenaje Cableado de conexión Tapa protectora de válvula... - Page 8 NOMBRE DE LAS PIEZAS Pantalla interior Funcion Indicador de temporizador, temperatura y códigos de error. Se ilumina durante el funcionamiento del temporizador. Modo de sueño La forma y posición de los interruptores e indicadores pueden ser diferentes según el modelo, pero su función es la misma.
-
Page 9: Control Remoto
CONTROL REMOTO PANTALLA de control remoto Significado de los símbolos en la pantalla de cristal líquido. Símbolo Significado Indicador único Indicador de función bloqueo infantil Indicador de batería Modo indicador función automática Modo indicador de enfriamiento Modo indicador de secado Modo indicador de ventilador Indicador de calefacción Indicador ECO... - Page 10 CONTROL REMOTO Botón Función Para encender o apagar el aire acondicionado. OPTION Para activar o desactivar la función opcional (consulte la siguiente tabla). Para disminuir la temperatura, configurar el tiempo o elegir la función. Para aumentar la temperatura, ajustar el tiempo o elegir la función. Presione este botón para activar/desactivar la función ECO.
- Page 11 CONTROL REMOTO Reemplazo de baterías Remove the battery cover plate from the rear of the remote control, by sliding it in direction as the arrow. Install the batteries according the direction (+ and -)shown on the Remote Control. Reinstall the battery cover by sliding it into place. Utilice 2 pilas LRO3 AAA (1.5V).
- Page 12 CONTROL REMOTO MODO DE ENFRIAMIENTO MODO DE CALEFACCIÓN La función de enfriamiento La función de calefacción permite COOL HEAT permite que el aire acondicionado que el a/c caliente la habitación. enfríe la habitación y reduzca la Para activar la función (HEAT), presione el botón humedad del aire al mismo MODE hasta que aparezca el símbolo [HEAT] en la...
- Page 13 CONTROL REMOTO Función TEMPORIZADOR- Función de OSCILACIÓN TEMP. ENCENDIDO Para configurarel temporizador encendido/apagado automático del A/C Configuración/cambio/cancelación temporizador Presione el botón para activar FLAP , 1. Presione botón OPTION seleccione el temp. (1) si el intervalo de tiempo es de 1 segundo, el presione o hasta que el símbolo TIMER swing realiza el ciclo así:...
- Page 14 CONTROL REMOTO Función SUEÑO Función ECO En este modo el aparato configura SLEEP automáticamente el funcionamiento para ahorrar Presione OPTION , seleccione SLEEP energía presionando o hasta que el símbolo parpadee. Presione OPTION nuevamente para activar Presione el botón y ECO aparecerá en la SLEEP y SLEEP aparecerá...
- Page 15 CONTROL REMOTO Función de viento suave (Opcional) Función AUTOLIMPIEZA (Opcional) En el estado de enfriamiento, presione CLEAN Apague el A/C para empezar. OPTION hasta que el icono GENTLE WIND se ilumine para activar/desactivar la función de Pulse OPTION seleccione CLEAN pulsando viento suave.
- Page 16 OPERATION INSTRUCTIONS Intentar utilizar el aire acondicionado a una temperatura superior al rango especificado puede provocar que se active el dispositivo de protección del aire acondicionado y que el aire acondicionado no funcione. Por lo tanto, intente utilizar el aire acondicionado en las siguientes condiciones de temperatura.
-
Page 17: Precauciones De Instalación
PRECAUCIONES DE INSTALACIÓN ADVERTENCIA Lea esta guía antes de instalar y utilizar el aparato. Durante la instalación de las unidades interior y exterior, se debe prohibir el acceso a la zona de trabajo a los niños. Podrían ocurrir accidentes imprevisibles. Asegúrese de que la base de la unidad exterior esté... - Page 18 PRECAUCIONES DE INSTALACIÓN evitando así el riesgo de descarga eléctrica o incendio debido a un contacto insuficiente. 23. No desenchufar el enchufe para apagar el aparato cuando esté en funcionamiento, ya que se podría generar una chispa y provocar un incendio, etc. 24.
- Page 19 PRECAUCIONES DE INSTALACIÓN Longitud de tubería y refrigerante adicional Capacidad modelos inverter (Btu/h) 9K-12K 18K-24K 30K-36K Longitud de tubería con carga estándar 5m/16ft 5m/16ft 5m/16ft 5m/16ft 5m/16ft 5m/16ft Longitud de tubería con carga estándar (como: norteamericana, etc.) 7.5m/24ft 7.5m/24ft 7.5m/24ft 7.5m/24ft 7.5m/24ft 7.5m/24ft 15m/49ft 15m/49ft 20m/65ft 20m/65ft 30m/98ft 30m/98ft Distancia máxima entre la unidad interior y exterior...
-
Page 20: Instalación De Unidad Interior
INSTALACIÓN DE UNIDAD INTERIOR Paso1: Seleccione la ubicación de la instalación 1.1 Asegúrese de que la instalación cumpla con las dimensiones mínimas de instalación (definidas a continuación) y cumpla con la longitud mínima y máxima de la tubería de conexión y el cambio máximo en elevación como se define en la sección Requisitos del sistema. -
Page 21: Instalación De La Unidad Interior
INSTALACIÓN DE LA UNIDAD INTERIOR Paso2: Instale la placa de montaje 2.1 Tome la placa de montaje de la parte posterior de la unidad interior. 2.2 Asegúrese de cumplir con los requisitos mínimos de dimensión de instalación como en el paso 1, de acuerdo con el tamaño de la placa de montaje, determine la posición y pegue la placa de montaje cerca de la pared. - Page 22 INSTALACIÓN DE LA UNIDAD INTERIOR Paso4: Conecte el tubo de refrigerante 4.1 De acuerdo con la posición del orifico de la pared, seleccione el modo de tubo apropiado. Hay tres modos de tubo opcionales para las unidades interiores como se muestra en la figura: En el modo de tubo 1 ó...
- Page 23 INSTALACIÓN DE LA UNIDAD INTERIOR Paso5: Conecte la manguera de drenaje 5.1 Ajuste la manguera de drenaje (si corresponde) En algunos modelos, ambos lados de la unidad interior cuentan con puertos de drenaje; puede elegir uno de ellos para conectar la manguera de drenaje. Y tape el puerto de drenaje no utilizado con la goma adherida uno de los puertos.
- Page 24 INSTALACIÓN DE LA UNIDAD INTERIOR Paso7: Envuelva los tubos y el cable Después de instalar las tuberías de refrigerante, los cables de conexión y la manguera de drenaje, para ahorrar espacio, protegerlos y aislarlos, se deben atar con cinta aislante antes de pasarlos por el orificio de la pared.
- Page 25 INSTACIÓN DE LA UNIDAD EXTERIOR Paso1: Seleccione el lugar de instalación Seleccione un sitio que permita lo siguiente: 1.1 No instale la unidad exterior cerca de fuentes de calor, vapor o gas inflamable. 1.2 No instale la unidad en lugares con mucho viento o polvo. 1.3 No instale la unidad en lugares donde suele pasar gente.
- Page 26 INSTACIÓN DE LA UNIDAD EXTERIOR Paso4: Instale el cable 4.1 Utilice un destornillador Phillips para desenroscar la cubierta del cableado, sujétela y presiónela suavemente para bajarla. 4.2 Desenrosque la abrazadera del cable y bájela. 4.3 De acuerdo con el diagrama de cableado pegado dentro de la cubierta de cableado, conecte los cables de conexión a los terminales correspondientes y asegúrese de que todas las conexiones estén firmes y seguras.
-
Page 27: Instalación De La Unidad Exterior
INSTALACIÓN DE LA UNIDAD EXTERIOR Paso6: Bomba de vacío 6.1 Utilice una llave para quitar las tapas protectoras del puerto de servicio, la válvula de baja presión y la válvula de alta presión de la unidad exterior. 6.2 Conecte la manguera de presión del manómetro múltiple al puerto de servicio en la válvula de baja presión de la unidad exterior. -
Page 28: Operación De Prueba
OPERACIÓN DE PRUEBA Inspaeciones antes de la ejecución de la prueba Realice las siguientes comprobaciones antes de realizar la prueba. Descripción Método de inspección • Compruebe si el voltaje de la fuente de alimentación cumple con las Inspección de especificaciones. •... - Page 29 OPERACIÓN DE PRUEBA 5. Observe el estado de prueba del aire acondicionado durante al menos 30 minutos. 6. Después de la prueba exitosa, regrese a la configuración normal y presione el botón ON/OFF en el control remoto para apagar la unidad. 7.
-
Page 30: Mantenimiento
MANTENIMIENTO <40 (104 ) Limpieza del filtro Saque el filtro de la Limpi eel filtro con agua Reemplace filtro unidad jabonosa y seque al aire Tip: Cuando encuentre polvo acumulado en el filtro, límpielo a tiempo para garantizar un funcionamiento limpio, saludable y eficiente dentro del aire acondicionado. Primero afloje la perilla en el medio de la rejilla y doble la rejilla hacia afuera para sacarla. - Page 31 POSIBLES CAUSAS FALLOS Fallo de alimentación/enchufe desconectado. Motor del ventilador de la unidad interior/exterior dañado. Disyuntor termomagnético del compresor defectuoso. Dispositivo de protección o fusibles defectuosos. El aparato no funciona Conexiones sueltas o enchufes desconectados. A veces deja de funcionar para proteger el aparato. Voltaje mayor o menor que el rango nominal.
- Page 32 CÓDIGO DE ERROR EN LA PANTALLA En caso de error, la pantalla de unidad interior muestra los siguientes códigos de errores: Pantalla Descripción del problema Fallo del sensor de temperatura de ambiente interior Fallo del sensor de temperatura de tubo interior Fallo del sensor de temperatura de tubo exterior Fuga o fallo del sistema de refrigerante Mal funcionamiento del motor del ventilador interior...
-
Page 33: Garantía
GARANTÍA LIMITADA El producto de Bee-Tech viene con una garantía de 1 año (solo defectos de fabricación) a partir de la fecha de compra original. Si surge algún defecto debido a materiales o mano de obra defectuosos, los productos defectuosos deben devolverse al lugar de compra. El reembolso o reemplazo queda a discreción del minorista. - Page 34 This instruction manual contains important safety information and recommendations that we would ask you to comply with to obtain best results from the air conditioner. Before use, please read and follow all the safety rules and operating notice. Bee-Tech has a policy of continuous improvement on its products and reserves the right to change materials and specifications without notice.
- Page 35 CONTENTS SAFETY PRECAUTIONS ........................32 ..........................34 NAME OF PARTS ...........................36 REMOTE CONTROL OPERATION INSTRUCTIONS ......................43 ......................44 INSTALLATION PRECAUTIONS ......................47 INDOOR UNIT INSTALLATION OUTDOOR UNIT INSTALLATION .....................52 TEST OPERATION ..........................56 MAINTENANCE .......................... 57 ........................58 TROUBLESHOOTING .........................60 WARRANTY * The design and specifications are subject to change without prior notice for product improvement. Consult with the sales agency or manufacturer for details.
-
Page 37: Safety Precautions
SAFETY PRECAUTIONS SAFETY RULES AND PROHIBITIONS WARNING Do not bend, tug or compress the power cord since this could damage it. Electrical shocks or fire are probably due to a damaged power cord. Specialized technical personnel only must replace a damaged power cord. - Page 38 SAFETY PRECAUTIONS The flaps must be directed downwards in the heating mode and upwards in the cooling mode. Ensure that the appliance is disconnected from the power supply when it will remain inoperative for a long period and before carrying out any cleaning or maintenance. Selecting the most suitable temperature can prevent damage to the appliance.
-
Page 39: Name Of Parts
NAME OF PARTS Indoor Unit Mounting plate Air filter Air inlet Front panel Emergency button Air outlet Air deflector and flap Refrigerant connecting pipe Outdoor Unit Air inlet Wiring cover Air outlet Drainage pipe Connection wiring Valve protective cover Gas valve (Low pressure valve) Liquid valve (High pressure valve) - Page 40 NAME OF PARTS Indoor Display Indicator for Timer, temperature and Error codes. Lights up during Timer operation. SLEEP mode The shape and position of switches and indicators may be different according to the model, but their function is the same.
-
Page 41: Remote Control
REMOTE CONTROL Remote control DISPLAY Meaning of symbols on the liquid crystal display Symbols Meaning Single indicator Child Lock function indicator Battery indicator Mode Auto function indicator Mode Cooling indicator Mode Dry indicator Mode Fan indicator Mode Heating indicator ECO indicator Timer indicator TIMER Temperature indicator... -
Page 42: Button Function
REMOTE CONTROL Button Function To turn on or off the air conditioner . OPTION To activate or deactivate optional function(Check below table). To decrease temperature, time setting or choose the function. To increase temperature, time setting or choose the function. Press this button to activate/deactivate the ECO function . - Page 43 REMOTE CONTROL Replacement of Batteries Remove the battery cover plate from the rear of the remote control, by sliding it in direction as the arrow. Install the batteries according the direction (+ and -)shown on the Remote Control. Reinstall the battery cover by sliding it into place. Use 2 pieces LRO3 AAA (1.5V) batteries.
- Page 44 REMOTE CONTROL COOLING MODE HEATING MODE The cooling function allows the air The heating function allows the air COOL HEAT conditioner to cool the room and conditioner to heat the room. reduce Air humidity at the same To activate the heating function (HEAT), press the time.
- Page 45 REMOTE CONTROL TIMER function ---- TIMER ON SWING function To set the automatically timer switch-on /off of the air conditioner Press the button to activate the FLAP , Timer setting/change/cancel: (3) If press time interval is within 1 seconds, the 1.
- Page 46 REMOTE CONTROL SLEEP function ECO function In this mode the appliance SLEEP automatically sets the operation to save energy. Press OPTION button, select the SLEEP by pressing the button until symbol SLEEP Press the button, the [ECO] appears on the is flashing;...
- Page 47 REMOTE CONTROL Gentle Wind function (Optional) SELF-CLEAN function (Optional) In the state of cooling, press OPTION until CLEAN Switch off the air conditioner at first. the icon GENTLE WIND lights up to turn on/off the gentle wind function. Press OPTION button , select CLEAN by pressing the button or until symbol CLEAN is flashing;...
-
Page 48: Operation Instructions
OPERATION INSTRUCTIONS Attempt to use the air conditioner under the temperature beyond the specified range may cause the air conditioner protection device to start and the air conditioner may fail to operate. Therefore, try to use the air conditioner in the following temperature conditions. Fixed air conditioner: MODE Heating... -
Page 49: Installation Precautions
INSTALLATION PRECAUTIONS WARNING Read this guide before installing and using the appliance. During the installation of the indoor and outdoor units, access to the working area should be forbidden to children. Unforeseeable accidents could happen. Make sure that the base of the outdoor unit is firmly fixed. Check that air cannot enter the refrigerant system and check for refrigerant leaks when moving the air conditioner. - Page 50 INSTALLATION PRECAUTIONS for any other purpose, such as for drying clothes, cooling food, etc. Always use the appliance with the air filter mounted. The use of the conditioner without air filter could cause an excessive accumulation of dust or waste on the inner parts of the device with possible subsequent failures.
- Page 51 INSTALLATION PRECAUTIONS Pipe Length and Additional Refrigerant Inverter Models Capacity (Btu/h) 9K-12K 18K-24K 30K-36K Length of pipe with standard charge 5m/16ft 5m/16ft 5m/16ft 5m/16ft 5m/16ft 5m/16ft Length of pipe with standard charge (Like: North American, etc.) 7.5m/24ft 7.5m/24ft 7.5m/24ft 7.5m/24ft 7.5m/24ft 7.5m/24ft Maximum distance between indoor and outdoor unit 15m/49ft 15m/49ft 20m/65ft 20m/65ft 30m/98ft 30m/98ft...
-
Page 52: Indoor Unit Installation
INDOOR UNIT INSTALLATION Step1: Select Installation location 1.1 Ensure the installation complies with the installation minimum dimensions (defined below) and meets the minimum and maximum connecting piping length and maximum change in elevation as defined in the System Requirements section. 1.2 Air inlet and outlet will be clear of obstructions, ensuring proper airflow throughout the room. - Page 53 INDOOR UNIT INSTALLATION Step2: Install Mounting Plate 2.1 Take the mounting plate from the back of indoor unit. 2.2 Ensure to meet the minimum installation dimension requirements as step 1, according to the size of mounting plate, determine the position and stick the mounting plate close to the wall. 2.3 Adjust the mounting plate to a horizontal state with a spirit level, then mark out the screw hole positions on the wall.
- Page 54 INDOOR UNIT INSTALLATION Step4: Connecting Refrigerant Pipe 4.3 According to the wall hole position, select the appropriate piping mode. There are three optional piping modes for indoor units as shown in the figure below: In Piping Mode 1 or Piping Mode 3, a notch should be made by using scissors to cut the plastic sheet of piping outlet and cable outlet on the corresponding side of the indoor unit.
- Page 55 INDOOR UNIT INSTALLATION Step5: Connect Drainage Hose 5.1 Adjust the drainage hose (if applicable) In some model, both sides of the indoor unit are provided with drainage ports, you can choose one of them to attache the drainage hose. And plug the unused drain port with the rubber attached in one of the ports.
- Page 56 INDOOR UNIT INSTALLATION Step7: Wrap Piping and Cable After the refrigerant pipes, connecting wires and drainage hose are all installed, in order to save space, protect and insulate them, it must be bundle with insulating tape before passing them through the wall hole.
-
Page 57: Outdoor Unit Installation
OUTDOOR UNIT INSTALLATION Step1: Select Installation Location Select a site that allows for the following: 1.1 Do not install the outdoor unit near sources of heat, steam or flammable gas. 1.2 Do not install the unit in too windy or dusty places. 1.3 Do not install the unit where people often pass. - Page 58 OUTDOOR UNIT INSTALLATION Step4: Install Wiring 4.1 Use a phillips screwdriver to unscrew wiring cover, grasp and press it down gently to take it down. 4.2 Unscrew the cable clamp and take it down. 4.3 According to the wiring diagram pasted inside the wiring cover, connect the connecting wires to the corresponding terminals, and ensure all connections are firmly and securely.
- Page 59 OUTDOOR UNIT INSTALLATION Step6: Vacuum Pumping 6.1 Use a spanner to take down the protective caps from the service port, low pressure valve and high pressure valve of the outdoor unit. 6.2 Connect the pressure hose of manifold gauge to the service port on the outdoor unit low pressure valve.
-
Page 60: Test Operation
TEST OPERATION Inspections Before Test Run Do the following checks before test run. Description Inspection method Check whether the power supply voltage complies with specification. Check whether there is any wrong or missing connection between the Electrical power lines, signal line and earth wires. safety inspection Check whether the earth resistance and insulation resistance comply with requirements. -
Page 61: Maintenance
TEST OPERATION 9. Observe the test run state of the air conditioner at least 30 minutes. 10. After the successfully test run, return the normal setting and press ON/OFF button on the remote controller to turn off the unit. 11. Inform the user to read this manual carefully before use, and demonstrate to the user how to use the air conditioner, the necessary knowledge for service and maintenance, and the reminder for storage of accessories. - Page 62 MAINTENANCE Opposite to the direction of taking <40 out the filter (104 ) Clean the Take out the filter Clean the filter with Replace the filter filter from the unit soapy water and air dry it Tip: When you find accumulated dust in the filter, please clean the filter in time to ensure the clean, healthy and efficient operation inside the air conditioner.
-
Page 63: Troubleshooting
TROUBLESHOOTING POSSIBLE CAUSES MALFUNCTION Power failure/plug pulled out. Damaged indoor/outdoor unit fan motor. Faulty compressor thermomagnetic circuit breaker. Faulty protective device or fuses. The appliance does Loose connections or plug pulled out. not operate It sometimes stops operating to protect the appliance. Voltage higher or lower than the voltage range. - Page 64 TROUBLESHOOTING ERROR CODE ON THE DISPLAY In case of error, the display on the indoor unit shown the following error codes: Display Description of the trouble Indoor room temperature sensor fault Indoor pipe temperature sensor fault Outdoor pipe temperature sensor fault Refrigerant system leakage or fault Malfunction of indoor fan motor Outdoor ambient temperature sensor fault...
-
Page 65: Warranty
LIMITED WARRANTY: Bee-Tech’s product comes with a 1 year warranty (manufacturing defects only) from the original date of purchase. If any defect arises due to faulty materials or workmanship, the faulty products must be returned to the place of purchase. Refund or replacement is at the discretion of the retailer.
Need help?
Do you have a question about the BXASBH04019 and is the answer not in the manual?
Questions and answers