Table of Contents
Advertisement
Available languages
Available languages
INTEGRATED WINE COOLER
Owner's Use and Care Guide
• Welcome
• Important Safety Information
• Installation Instructions
• Operating Instructions
• Care and Cleaning
• Troubleshooting
• Warranty
REFROIDISSEUR INTÉGRÉ DE VIN
Guide d'utilisation et soins de Propriètaire
• Bienvenue
• Consignes de Sécurité Importantes
• Instructions d'installation
• Instructions de Fonctionnement
• Soins et Entretien
• Dépannage
• Garantie
HELADERA PARA VINOS
Guía para utilizar y cuidar del Proprietario
• Bienvenido
• Instrucciones Importantes de Seguridad
• Instrucciones de Instalación
• Instrucciones de Operación
• Cuidado y Limpieza
• Diagnóstico de Problemas
• Garantía
Danby Products Limited, Guelph, Ontario Canada N1H 6Z9
Danby Products Inc., Findlay, Ohio USA 45839-0669
Owner's Use and Care Guide
Guide d'utilisation et soins de Propriètaire
Guía para utilizar y cuidar del Proprietario
Model • Modèle • Modelo
DWC508BLS
CAUTION:
Read and Follow All Safety Rules and
Operating Instructions Before First Use of This
Product.
ATTENTION:
Avant de faire fonctionner cette machine, lisez
et suivez toutes les consignes de sécurité de ce
guide en premier lieu.
ATENCIÓN:
Lea y siga todas las indicaciones de seguridad
y de operación antes de utilizar este producto.
. . . . . . . . . . . . . . . . . . . . . . . . . . . . . . . . . . . . . 1 - 9
. . . . . . . . . . . . . . . . . . . . . . . . 10 - 18
. . . . . . . . . . . . . . . . . . . . . . . . . 19 - 27
V 1.06.09 JF
Advertisement
Table of Contents

Related Manuals for Danby Designer DWC508BLS


Summary of Contents for Danby Designer DWC508BLS
- Page 1 • Instrucciones de Operación • Cuidado y Limpieza • Diagnóstico de Problemas • Garantía Danby Products Limited, Guelph, Ontario Canada N1H 6Z9 Danby Products Inc., Findlay, Ohio USA 45839-0669 Owner’s Use and Care Guide Guide d’utilisation et soins de Propriètaire Guía para utilizar y cuidar del Proprietario...
-
Page 2: Before Using Your Wine Cooler
Welcome to the Danby family. We’re proud of our quality products and we believe in dependable service. You’ll see it in this easy-to-use manual and you’ll hear it in the friendly voices of our consumer service department. Best of all, you’ll experience these values each time you use your Wine Cooler. That’s important, because your new appliance will be part of your family for a long time. -
Page 3: Important Safety Information
READ ALL SAFETY INFORMATION BEFORE USING WARNING DANGER, RISK OF CHILD ENTRAPMENT! An empty refrigerator is a very dangerous attraction to children. Remove either the gasket, latches, lids, lock and/or doors from unused or discarded appliances, or take some other action to guarantee it harmless. -
Page 4: Tools You Will Need
INSTALLTION INTRUCTIONS TOOLS YOU WILL NEED FOR YOUR SAFETY: While performing installations described in this section, gloves, safety glasses, or goggles should be worn. ELECTRICAL REQUIREMENTS: The appliance must be connected to an PREPARING THE individual, properly grounded electrical outlet, protected by a 15 or 20 ampere circuit ENCLOSURE breaker or time delay fuse. -
Page 5: Operating Intructions
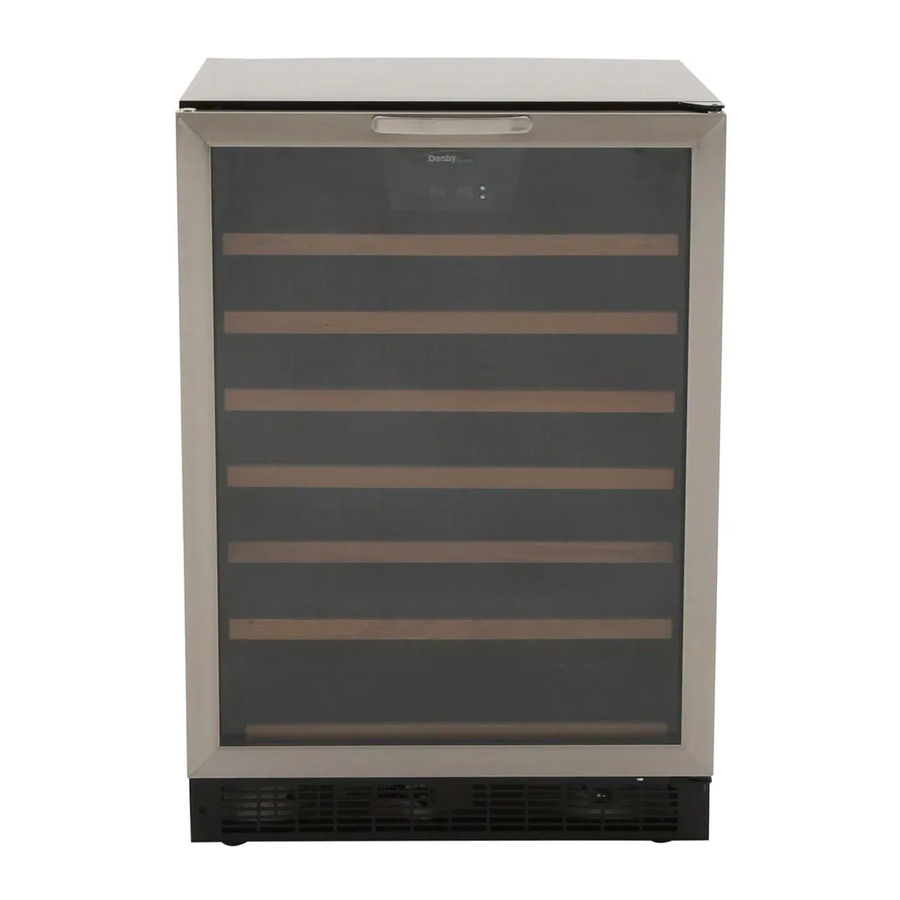
OPERATING INTRUCTIONS FEATURES OF YOUR WINE COOLER 1) Tempered Glass Door: Tinted for UV protection while still allowing for easy interior viewing. 2) Electronic Display and Controls: For viewing and regulating the temperature of the wine cooler. 3) Magnetic Door Gaskets: Tight fitting seals retain all the cooling power and humidity levels. -
Page 6: Setting The Temperature
• You may view your ‘set’ temperature at any time by briefly depressing either the ‘Set Upper’or ‘Set Lower’ button. The Maximum Capacity* of the DWC508BLS is 50 (750mL) wine bottles. WINE STORAGE * When stocked as per instructions below. -
Page 7: Door Reversal Instructions
OPERATING INTRUCTIONS (cont’d) DOOR REVERSAL INSTRUCTIONS 1) Unplug the unit from electrical outlet (if connected) and lay it on its back. 2) Open the door until the screws securing the lower door support bracket are exposed on the bottom of the door (Fig. -
Page 8: Care And Cleaning
Allow the wine cooler door to remain open for a few minutes after manual cleaning to air out HELPFUL and dry the inside of the wine cooler cabinet HINTS NOTE: Be certain the power is off before cleaning any part of this appliance. HOW TO CLEAN Never use any commercial or abrasive cleaners or sharp objects on any part of the wine cooler. -
Page 9: Troubleshooting
BEFORE YOU CALL FOR SERVICE PROBLEM 1) No power. 2) Cabinet temperature too high. 3) Condensation on the cabinet and/or doors. If none of the above rectify the situation please contact our customer care department at TROUBLESHOOTING POSSIBLE CAUSE • A fuse in your home may be blown or a circuit breaker tripped •... -
Page 10: En Cas De Besoin D'assistance
Bienvenue dans la famille Danby. Nous sommes fiers de nos produits de qualité et croyons au bien fondé de fournir une assistance fiable à nos clients. Vous le découvrirez par ce guide facile d’utilisation et vous pourrez l’entendre en provenance des voix amicales de notre service d’assistance à... -
Page 11: Conditions Électriques
INFORMATION DE SÉCURITÉ IMPORTANTES LISEZ TOUTES LES INFORMATIONS DE SÉCURITÉ AVANT DE FAIRE FONCTIONNER L’APPAREIL DANGER, RISQUE DES ENFANTS DEVIENNENT COINCER DANS L’APPAREIL ATTENTION Un réfrigérateur vide est une attraction dangereuse aux enfants. Enlever les joints étanches, les loquets, les couvercles ou les porte des appareils qui ne sont pas utiliser, ou faites de soit que l’appareil ne présente aucun danger. -
Page 12: Instructions D'installation
INSTRUCTIONS D’INSTALLATION OUTILS NÉCESSAIRES POUR VOTRE SÛRETÉ: En faire les installations décrites dans cette section, des gants, les lunette de sûcurité devraient être portés. Alimentation: Cet appareil doit être raccordé à un circuit de dérivation indivdual PRÉPARATION correctment mis à la terre, protégér par un disjoncteur de 15 ou 20 ampères ou d’un DE L’ENCEINTE fusible temporisé. -
Page 13: Instructions De Fonctionnement
INSTRUCTIONS DE FONCTIONNEMENT CARACTÉRISTIQUES DE VOTRE REFROIDISSEUR DE VIN 1) Portes En Verre Trempé: Teinté pour protéger contre les rayons UV tout en permettant de voir facilement le contenu du cabinet. 2) Affichage et Controls Électroniques: Affichage et réglage de la température du refroidisseur de vin. 3) Joint Étanche Magnétique: Le joint étanche permet de conserver le niveau de température et d’humidité... -
Page 14: Entreposage Des Vins
INSTRUCTIONS DE FONCTIONNEMENT (suite) RÉGLAGE DU IMPORTANT: En cas de panne de courant attendez de 3 à 5 minutes avant de TEMPÉRATURE redémarrar. • Pour changer l’affichage entre la température en Celsius (°C) et la température en Fahrenheit (°F) appuyez sur les bouton de control ‘Réglage Supérieure’... -
Page 15: Renversement De La Porte
INSTRUCTIONS DE FONCTIONNEMENT (suite) RENVERSEMENT DE LA PORTE 1) Débranche l’appareil et placez la sur son dos. 2) Ouvrez la porte jusque les deux vis retenant le support inférieur sont visible sur le bas du porte (Fig 3) Retirez la vis la plus proche du charnière inférieur et ferme la porte pour retirez l’autre vis de la support inférieur. -
Page 16: Soins Et Entretien
CONSEILS UTILS Après nettoyage, laissez la porte de la machine ouverte durant quelques minutes pour aérer et assécher l’intérieur de l’armoire. NOTE : Avant de nettoyer cet appareil, assurez-vous que l’alimentation est coupée. COMMENT NETTOYER N’utilisez jamais de nettoyant industriels sur aucune partie de votre L’INTÉRIEUR refroidisseur de vin Parois, Plancher, Intérieur de la Visière et Tablettes:... -
Page 17: Dépannage
AVANT DE PLACER UN APPEL DE SERVICE PROBLÈME 1) L’appareil n’es pas alimenté. • Un fusible de votre panneau de 2) La température dans la cabinet est trop haute. 3) L’eau de condensation sur le coffret et/ou les portes. Si aucune de ce qui précède ne rectifie la situation svp entrez en contact avec notre département de soin de client à... -
Page 18: Necesita Ayuda
Bienvenido a la familia Danby. Estamos orgullosos de nuestros productos de alta calidad y creemos en el servicio confiable. Usted lo podrá apreciaren este manual fácil de usar, y lo escuchará en las voces amistosas de nuestro departamento de servicio al consumidor. -
Page 19: Instrucciones Importantes De Seguridad
INSTRUCCIONES IMPORTANTES DE SEGURIDAD LEA TODAS LAS INSTRUCCIONES DE SEGURIDAD ANTES DE UTILIZARLA ATENCIÓN ¡PELIGRO, LOS NIÑOS PODRÍAN QUEDAR ATRAPADOS! Una heladera para vinos vacía es una atracción muy peligrosa para los niños.Remueva la junta, las trabas, la manija y/o las puertas de los artefactos que no se usen o se hayan desechado, otome alguna otra medida para garantizar que sean inofensivos. -
Page 20: Instrucciones De Instalación
INSTRUCCIONES DE INSTALACIÓN HERRAMIENTAS NECESARIAS POR SU SEGURIDAD: Al realizar las instalaciones descriptas en esta sección, use guantes, gafas des eguridad o gafas protec-toras. Requisitos Eléctricos: El artefacto debe conectarse a un circuito eléctrico independiente PREPARACIÓN y correctamente conectado a tierra, protegido por una llave térmica de 15-20 amperes o DEL HUECO un fusible lento. -
Page 21: Instrucciones De Operación
INSTRUCCIONES DE OPERACIÓN CARACTERÍSTICAS DE SU HELADERA PARA VINOS 1) 1.Puerta de Vidrio Templado: Permitever fácilmente el interior. Polarizadas para proteger contra la radiación UV. 2) Controles Electrónicos: Para regular la temperatura de la heladera para vinos. 3) Juntas Magnéticas de la Puesta: Las juntas ajustadas mantien en todo el poder de enfriamiento y los niveles de humedad. -
Page 22: Ajuste De Temperatura
INSTRUCCIONES DE OPERACIÓN AJUSTE DE ¡IMPORTANTE! En caso de falla de energía eléctrica, espere de 3 a 5 minutos antes TEMPERATURA de volverla a encender. • Para cambiar la indicación entre Fahrenheit (°F) y Celsuis (°C), presione los botones “Set Upper” y “Set Lower”... -
Page 23: Inversión De Apertura De Puerta
INSTRUCCIONES DE OPERACIÓN INVERSIÓN DE APERTURA DE PUERTA 1) Desenchufe la unidad del tomacorriente (si está conectada) y apóyela sobre la parte de atrás. 2) Abra la puerta hasta que se vean los tornillos que sujetan el soporte inferior en la parte de abajode la puerta (Fig. -
Page 24: Cuidado Y Limpieza
Deje la puerta de la heladera para vinos abierta por unos minutos luego de limpiar la para CONSEJOS quese ventile y para secar el interior del gabinete. ÚTILES NOTA: Verifique que la unidad esté apagada antes de limpiar cualquiera desus partes. CÓMO LIMPIAR Nunca use un limpiador comercial o abrasivo u objetos filosos en ninguna parte de la heladera para vinos. -
Page 25: Diagnóstico De Problemas
DIAGNÓSTICO DE PROBLEMAS ANTES DE LLAMAR POR ASISTENCIA PROBLEMA 1) No Enciende. 2) Temperatura del Gabinete demasiado alta 3) Condensación en el gabinete y/o las puertas Si ninguno de los casos anteriores soluciona su problema, llame a nuestro departa-mento de servicio al cliente al 1-800-26- POSIBLE CAUSA •... - Page 26 Nada dentro de esta garantía implica que Danby será responsable por cualquier daño que hayan sufrido los alimentos u otros contenidos de este aparato, ya sea debido a un defecto del aparato, o su uso, adecuado o inadecuado.
- Page 27 1-800-26- (1-800-263-2629) para recomendarle un centro derepara-ciones en su área. Danby Products Limited, Guelph, Ontario Canada N1H 6Z9 Danby Products Inc., Findlay, Ohio USA 45839-0669 Printed in China (P.R.C.) Model • Modèle • Modelo DWC508BLS Integrated Wine Cooler The model number can be found on the serial plate located on the back panel of the unit.
Need help?
Do you have a question about the Designer DWC508BLS and is the answer not in the manual?
Questions and answers