Advertisement
Available languages
Available languages
Quick Links
IB51924324
Installation Instructions – MMS Multi-Mount Selectable Panel
Instructions d'installation – Panneau sélectionnable à multiple
montage MMS
Instrucciones de instalación – del panel multimontaje
seleccionable MMS
Risk of Fire, Electrical Shock, Cuts or other Casualty Hazards- Installation and maintenance of this product
must be performed by a qualified electrician. This product must be installed in accordance with the applicable
installation code by a person familiar with the construction and operation of the product and hazards involved.
The light source contained in this luminaire shall only be replaced by the manufacturer or his service agent or a
similar qualified person.
Risk of Fire and Electric Shock- Make certain power is OFF before starting installation or attempting any
maintenance. Disconnect power at fuse or circuit breaker.
Risk of Fire- Minimum 90°C supply conductors.
Risk of Burn- Disconnect power and allow fixture to cool before handling or servicing.
Risk of Personal Injury- Due to sharp edges, handle with care.
Failure to comply with these instructions may result in death, serious bodily injury and property damage.
DISCLAIMER OF LIABILITY: Cooper Lighting Solutions assumes no liability for damages or losses of any kind that may arise
from the improper, careless, or negligent installation, handling or use of this product.
IMPORTANT: Read carefully before installing fixture. Retain for future reference.
NOTICE: Ground screw provided in proper location. Do not relocate.
NOTICE: Fixture may become damaged and/or unstable if not installed properly.
NOTICE: Use 16-18 AWG solid or stranded wire for push-in terminals.
Note: Specifications and dimensions subject to change without notice.
ATTENTION Receiving Department: Note actual fixture description of any shortage or noticeable damage on delivery receipt.
File claim for common carrier (LTL) directly with carrier. Claims for concealed damage must be filed within 15 days of delivery.
All damaged material, complete with original packing must be retained.
• Connect fixture to a 120/277V (or 347V if indicated on driver), 60Hz power supply. Any other connection voids the warranty.
• Fixture should be installed by persons with experience wiring or by a qualified electrician. The electrical system, and the method
of electrically connecting the fixture to it, must be in accordance with the National Electrical Code and local building codes.
• This equipment has been tested and found to comply with the limits for a Class B digital device, pursuant to Part 15 of the
FCC Rules. These limits are designed to provide reasonable protection against harmful interference in a residential installation.
This equipment generates, uses and can radiate radio frequency energy and if not installed and used in accordance with the
instructions, may cause harmful interference to radio communications. However, there is no guarantee that interference will not
occur in a particular installation. If this equipment does cause harmful interference to radio or television reception, which can
be determined by turning the equipment off and on, the user is encouraged to try to correct the interference by one or more of
the following measures:
- Reorient or relocate the receiving antenna.
- Increase the separation between the equipment and receiver.
- Connect the equipment into an outlet on a circuit different from that to which the
receiver is connected.
- Consult the dealer or an experienced radio/TV technician for help.
WARNING
CAUTION
Metalux
Advertisement

Related Manuals for Cooper Lighting Solutions Metalux MMS


Summary of Contents for Cooper Lighting Solutions Metalux MMS
- Page 1 Failure to comply with these instructions may result in death, serious bodily injury and property damage. DISCLAIMER OF LIABILITY: Cooper Lighting Solutions assumes no liability for damages or losses of any kind that may arise from the improper, careless, or negligent installation, handling or use of this product.
-
Page 2: Installation
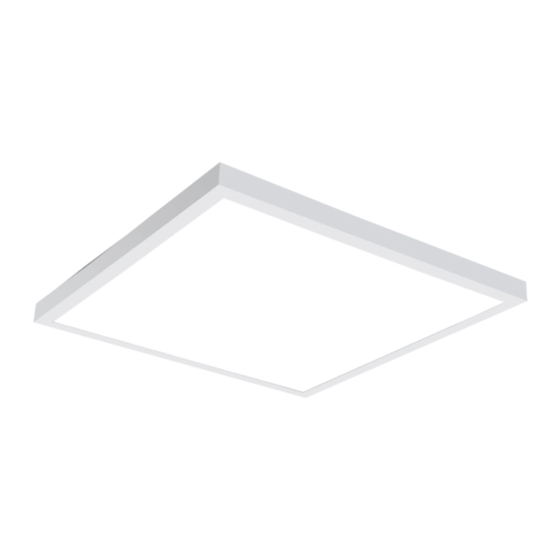
CAUTION: Covered surface mount only. Insure that the fixture does not extend beyond the edge of the surface on which it is mounted. 12MMS-L3C5 SMK 14MMS-L3C3 SMK 22MMS-L3C3 SMK 24MMS-L3C3 SMK Figure 1. COOPER LIGHTING SOLUTIONS IB51924324 Installation instructions... - Page 3 The fixture should drop down from locking Figure 2. lever side. Hang fixture to surface mount bracket. Click clip onto hook (Fig. 3 Detail A). Attach safety cable onto bracket loop (Fig. 3 Detail B). COOPER LIGHTING SOLUTIONS IB51924324 Installation instructions...
- Page 4 Figure 7. Remove the two screws holding the access plate to the driver enclosure. Figure 11. Figure 8. Disconnect the flexible cord by removing the wire nuts. Discard the flexible cord. See Fig.9. Figure 12. COOPER LIGHTING SOLUTIONS IB51924324 Installation instructions...
- Page 5 10. Cover wires with access plate and re-install screws to finish installation (See Fig.15). Figure 16. Screws may strip if over torqued. ote: 11. Turn on power at main breaker to illuminate fixture. DETAIL A SCALE 1 : 1 Figure 17. Figure 15. COOPER LIGHTING SOLUTIONS IB51924324 Installation instructions...
- Page 6 Connect wires to the fixture J-box: green to green (ground), white to white (neutral), black to black (hot), Pink and violet wires are provided to connect to a 0-10V dimmer. See Fig.20. Figure 20. COOPER LIGHTING SOLUTIONS IB51924324 Installation instructions...
- Page 7 La désobéissance aux instructions suivantes représente un risque de blessures graves ou mortelles et de dommages matériels. EXONÉRATION DE RESPONSABILITÉ : Cooper Lighting Solutions n’assume aucune responsabilité pour les dommages ou pertes de toute nature pouvant découler d’une installation inappropriée, imprudente ou négligente et d’une mauvaise manipulation ou utilisation de ce produit.
- Page 8 11MMS-L3C5 SMK Ouvrez soigneusement la boîte et sortez les composants de l’emballage. Les modèles 14MMS-L3C3 et 12MMS-L3C5 utilisent ote: la même trousse de montage en surface; les modèles 22MMS-L3C3 et 24MMS-L3C3 utilisent la même trousse de montage en surface. MISE EN GARDE : Montage en surface couvert seulement. Veillez à ce que le luminaire ne dépasse pas le bord de la surface sur laquelle il est monté. 12MMS-L3C5 SMK 14MMS-L3C3 SMK 22MMS-L3C3 SMK 24MMS-L3C3 SMK Figure 1. COOPER LIGHTING SOLUTIONS IB51924324 Instructions d’installation...
- Page 9 à l’interrupteur mural et passez à l’étape 11. 11. Pour retirer du plafond, tournez les leviers de verrouillage comme illustré à la figure 6, puis glissez-les vers Figure 2. l’extérieur et loin du centre. Le luminaire devrait Accrochez le luminaire au support de montage en descendre du côté du levier de verrouillage. surface. Cliquez sur l’attache du crochet (figure 3, détail A). Fixez le câble de sécurité à la boucle du support (figure 3, détail B). COOPER LIGHTING SOLUTIONS IB51924324 Instructions d’installation...
- Page 10 Installez la vis ici pour fixer à la grille en T Figure 10. Assurez-vous que tous les loquets sont réinitialisés comme ci-dessous, puis posez le luminaire dans la grille en T. Voir les figures 11 et 12. Figure 7. Enlevez les deux vis fixant la plaque d’accès au boîtier du pilote. Figure 11. Figure 8. Débranchez le cordon souple en enlevant les connecteurs. Jetez le cordon souple. Voir la figure 9. Figure 12. COOPER LIGHTING SOLUTIONS IB51924324 Instructions d’installation...
- Page 11 Pour les luminaires 1x4, 2x2, 2x4 et 6x4, repliez les bords des attaches vers le haut comme illustré à la figure 16 et fixez le mousqueton. Voir la figure 17. Figure 14. 10. Recouvrez les fils avec la plaque d’accès et réinstallez les vis pour terminer l’installation (voir la figure 15). Figure 16. Ne serrez pas trop les vis pour éviter d’endommager ote: la tête. 11. Mettez le disjoncteur principal sous tension pour allumer le luminaire. DÉTAIL A ÉCHELLE 1 : 1 Figure 17. Figure 15. COOPER LIGHTING SOLUTIONS IB51924324 Instructions d’installation...
- Page 12 Connectez les fils à la boîte de jonction du luminaire : vert à vert (mise à la terre), blanc à blanc (neutre), noir à noir (sous tension). Les fils rose et violet sont fournis pour raccorder un gradateur de 0 à 10 V. Voir la figure 20. Figure 20. COOPER LIGHTING SOLUTIONS IB51924324 Instructions d’installation...
- Page 13 El incumplimiento de estas instrucciones puede ocasionar la muerte, lesiones corporales graves y daños a la propiedad. RENUNCIA DE RESPONSABILIDAD: Cooper Lighting Solutions no asume ninguna responsabilidad por daños o pérdidas de ningún tipo que puedan surgir por la instalación, manipulación o uso inadecuado, descuidado o negligente de este producto.
-
Page 14: Instalación
PRECAUCIÓN: Solo para montaje en superficie cubierta. Asegúrese de que la luminaria no se extienda más allá del 12MMS-L3C5 SMK borde de la superficie sobre la que está montada. 14MMS-L3C3 SMK 22MMS-L3C3 SMK 24MMS-L3C3 SMK Figura 1. COOPER LIGHTING SOLUTIONS IB51924324 Instrucciones de instalación... - Page 15 Figura 2. luminaria debería caer por el lado del pestillo de fijación. Cuelgue la luminaria al soporte de montaje en superficie. Enganche el clip en el gancho (Figura 3, Detalle A). Conecte el cable de seguridad en la presilla del soporte (Figura 3, Detalle B). COOPER LIGHTING SOLUTIONS IB51924324 Instrucciones de instalación...
- Page 16 Figura 7. Retire los dos tornillos que sujetan la placa de acceso al recinto del controlador. Figura 11. Figura 8. Desconecte el cable flexible retirando las tuercas para cables. Deseche el cable flexible. Ver Figura 9. Figura 12. COOPER LIGHTING SOLUTIONS IB51924324 Instrucciones de instalación...
- Page 17 Los tornillos pueden perder las ranuras de su cabeza ote: si se aprietan demasiado. 11. Conecte la alimentación desde el disyuntor principal para encender la luminaria. DETALLE A ESCALA 1: 1 Figura 17. Figura 15. COOPER LIGHTING SOLUTIONS IB51924324 Instrucciones de instalación...
- Page 18 Figura 19. Figura 21. Siga las instrucciones incluidas con el kit de ote: suspensión para completar la instalación de la luminaria. 11. Conecte la alimentación desde el disyuntor principal para encender la luminaria. COOPER LIGHTING SOLUTIONS IB51924324 Instrucciones de instalación...
- Page 19 Visite www.cooperlighting.com/global/resources/legal para conocer nuestros términos y condiciones. Cooper Lighting Solutions 1121 Highway 74 South Peachtree City, GA 30269 P: 770-486-4800 Cooper Lighting Solutions is a registered www.cooperlighting.com trademark. All trademarks are property of their respective owners. Product availability, specifications,...
Need help?
Do you have a question about the Metalux MMS and is the answer not in the manual?
Questions and answers