
Related Manuals for Vermeer RTX130


Summary of Contents for Vermeer RTX130
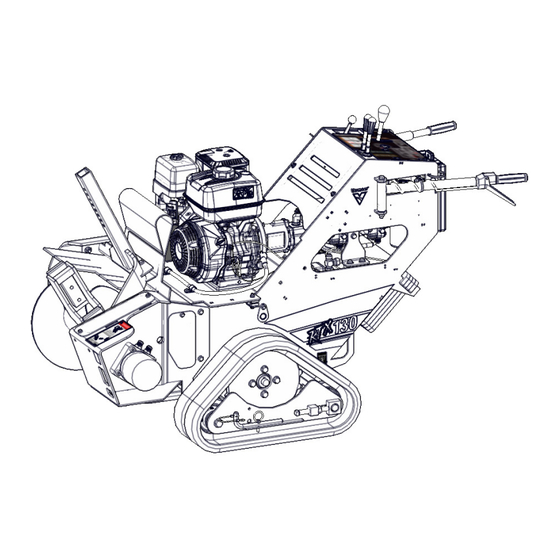
- Page 1 RTX130 trencher Operator’s manual EN_o1_02 original instructions Published date: 2022_11_18 Serial no. 101 - Order no. 105400DY1 Cabled assembly no. 163743447...
-
Page 2: Notice To Owner
This manual explains the proper operation of your machine. Study and understand these instructions thoroughly before operating or maintaining the machine. Failure to do so could result in personal injury or equipment damage. Consult your Vermeer dealer if you do not understand the instructions in this manual, or need additional information. - Page 3 Orientation: Right and left sides of the machine are determined by facing in the direction of forward travel. The attachment is at the front. Trademarks Vermeer, the Vermeer logo and Equipped to Do More are trademarks of Vermeer Manufacturing Company in the U.S. and/or other countries. Honda is a trademark of Honda Motor Co. Ltd.
- Page 4 Vermeer dealer. The warranty repair or replacement must be made by a Vermeer independent authorized dealer at the dealer’s location. Vermeer will pay for replacement parts and such authorized dealer’s labor in accordance with Vermeer’s labor reimbursement policy. Vermeer reserves the right to supply remanufactured replacement parts as it deems appropriate.
- Page 5 (7) Transportation costs, if any, of transporting to the Vermeer dealer. Freight costs, if any, of transporting replacement parts to the Vermeer dealer. (8) The travel time of the Vermeer dealer’s service personnel to make a repair on the retail purchaser’s site or other location. (9) In no event shall Vermeer’s liability exceed the purchase price of the product, (10) Vermeer shall not be liable to any person under any circumstances for any incidental or consequential damages (including but not limited to, loss of profits, out of service time) occurring for any reason at any time.
- Page 6 (12) Depreciation damage caused by normal wear, lack of reasonable and proper maintenance, failure to follow operating instructions, misuse, lack of proper protection during storage. (13) Accessory systems and electronics not of Vermeer’s manufacture are warranted only to the extent of such manufacturer’s respective Limited Warranty if any.
- Page 7 NO DEALER WARRANTY. The selling dealer makes no warranty of its own and the dealer has no authority to make any representation or promise on behalf of Vermeer or to modify the terms or limitations of this warranty in any way.
- Page 8 Vermeer are pleased to explain the evaporative emission control system (EECS) warranty on your Vermeer equipment. Vermeer must warrant the EECS on your equipment for the period of time listed below provided there has been no abuse, neglect or improper maintenance of your equipment. Your EECS may include components such as the fuel lines, fuel caps, canisters, vapor hoses, clamps, connectors, and other associated evaporative emission-related components.
- Page 9 You are responsible for presenting your equipment to an authorized Vermeer dealer or distributor as soon as the problem exists. The warranty repairs should be completed in a reasonable amount of time, not to exceed 30 days. If you have a question regarding your warranty coverage, you should contact the Vermeer Customer Data Department at 1-800-829-0051.
- Page 10 Fittings, clamps, gaskets, grommets, and mounting hardware associated with systems above. The exclusive remedy for breach of this limited warranty shall be, at the exclusive option of Vermeer, repair or replacement of any defective materials, components or products. THE REMEDIES SET FORTH IN THIS LIMITED WARRANTY ARE THE ONLY REMEDIES AVAILABLE TO ANY PERSON FOR BREACH OF THIS EMISSIONS WARRANTY.
- Page 11 ___ Check that machine does not move when the ground drive lever is in neutral and engine is at full throttle. ___ Check that digging chain does not move when digging chain drive lever is in neutral and engine is at full throttle. RTX130 operator’s manual Receiving and delivery report i...
-
Page 12: Engine
Review and demonstrate with the customer the various aspects of tractor operation: ___ Overall explanation of how the machine works ___ Overall explanation of how trencher works ___ Tractor and trencher safety ___ Preparing the machine and trencher for operation ii Receiving and delivery report RTX130 operator’s manual... -
Page 13: Dealer/Owner Information
Dealer/Owner information dealer owner address address city city state/province state/province zip/postal code zip/postal code country country phone number phone number email address email address RTX130 operator’s manual Receiving and delivery report iii... -
Page 14: Machine Identification Numbers - Record
Machine identification numbers - record Machine model number ________________ Machine serial number ________________ Honda engine identification numbers - record Engine model number _________________ Engine serial number _________________ iv Receiving and delivery report RTX130 operator’s manual... -
Page 15: Identification Decals
The barcode contains the machine’s VIN number and can be scanned with any barcode reading device. Machine identification decal (1) Backfill blade (option) identification decal (2) Backfill blade (option) model number ________________ Backfill blade (option) serial number ________________ Backfill blade (option) identification RTX130 operator’s manual Receiving and delivery report v... - Page 16 This page intentionally left blank.
-
Page 17: Table Of Contents
Jobsite assessment......40-8 Avoid battery explosion......22-4 RTX130 operator’s manual Table of contents vii... - Page 18 Hourmeter - check for maintenance interval (SN 496–) ..60-3 Maintenance intervals......60-4 viii Table of contents RTX130 operator’s manual...
-
Page 19: Safety Messages
This symbol indicates that at least one part of the machine is not operating correctly. Shutting down the machine may not be necessary, but some maintenance may be required. RTX130 operator’s manual Safety messages 10-1... - Page 20 WARNING: Wear personal protective equipment. Wear close-fitting clothing and confine long hair. Additional personal protection requirements are explained separately. Refer to “Personal protection,” page 40-2. WARNING: Keep spectators away. 10-2 Safety messages RTX130 operator’s manual...
- Page 21 Wait for leaking to stop before disconnecting the fitting. Fluid injected under the skin must be removed immediately by a surgeon familiar with this type of injury. RTX130 operator’s manual Safety messages 10-3...
- Page 22 5 minutes. Turn fuel cap 1/4 turn, wait 10 seconds. Touch spout to tank to discharge static, then remove cap. Keep spout in contact with tank while filling. CAUTION: Hot muffler can burn. Stay away. 10-4 Safety messages RTX130 operator’s manual...
-
Page 23: Crystalline Silica
A jobsite plan can include jobsite dust reduction measures including using water spray, vacuum or other methods. • If possible, change into disposable or washable clothes on the jobsite. Shower and change into clean clothing before leaving the jobsite. RTX130 operator’s manual Safety messages 10-5... - Page 24 WARNING: Failure to follow any of the preceding safety instructions or those that follow within this manual, could result in death or serious injury. This machine is to be used only for those purposes for which it was intended as explained in this operator’s manual. 10-6 Safety messages RTX130 operator’s manual...
-
Page 25: Intended Use
Section 15: Intended use The RTX130 is a self-propelled rubber tire or track machine intended to be used solely to produce an open trench in a continuous operation with rearward motion of the machine. The RTX130 backfill blade attachment is intended to be used solely to push earthen material, typically to return excavated material back into the trench. - Page 26 This page intentionally left blank.
-
Page 27: Controls
Push bottom of switch ......engine off Push top of switch ......engine on RTX130 operator’s manual Controls 20-1... - Page 28 Clockwise from vertical position ... starts engine kit IK003702 installed Key returns to vertical position when released. S/N 949 and above and S/N 101–948 with safety kit IK003702 installed 20-2 Controls RTX130 operator’s manual...
- Page 29 Slide lever left ......close valve Rope start option Pull rope to crank engine for starting. Switch on machine dash must be on to start. RTX130 operator’s manual Controls 20-3...
-
Page 30: Machine Controls
Pull back ....momentarily reverse chain • Lever will spring return to neutral from reverse position. • Lever must be in neutral before engine will start. 20-4 Controls RTX130 operator’s manual... - Page 31 Pull red lever under handlebar grip to allow engine to run when ground drive control or digging chain drive control is engaged. Handlebars Pivot handlebars to steer, rotating rear of machine in direction of push. RTX130 operator’s manual Controls 20-5...
- Page 32 This page intentionally left blank.
-
Page 33: Starting Procedure
If engine fails to start in three attempts, turn switch off and check for fuel blockage or issues with ignition system. Step 8: Reduce throttle to idle. • Do not operate engine under load until engine has warmed up. For cold-weather starting, refer to Engine cold-weather starting in this section. • RTX130 operator’s manual Starting procedure 22-1... -
Page 34: After Engine Starts
Check that trencher digging chain does not turn with digging chain drive control in neutral. • This system is intended for your safety and must be maintained in good functional condition. Contact your Vermeer dealer if it does not function correctly. 22-2 Starting procedure RTX130 operator’s manual... -
Page 35: Cold-Weather Starting
• Reduce engine speed if hydraulic pump whines. Pump noise may indicate lack of oil which can damage the pump. • Do not spray starting fluid into the air cleaner. Engine damage can result. RTX130 operator’s manual Starting procedure 22-3... -
Page 36: Jump-Starting (Electric Start Option)
Vehicles in contact have a ground connection which allows a spark to occur at the battery when the positive jumper cable is connected or removed. If equipped with battery caps, they must be in place and tight to reduce risk of battery explosion. 22-4 Starting procedure RTX130 operator’s manual... -
Page 37: Avoid Battery Burns
Internal: Drink large quantities of water or milk, follow with milk of magnesia, beaten egg or vegetable oil. Call a physician immediately. Jump-starting procedure WARNING: Battery post, terminals, and related accessories contain lead and lead compounds. Wash hands after handling. RTX130 operator’s manual Starting procedure 22-5... - Page 38 NOTICE: To avoid sparks near battery, disconnect black jumper cable at point (4) frame before adjusting red cable at point (1). Boost battery Step 3: Start engine. Step 4: Remove cables in reverse order and install covers over cable clamps. Install battery access cover. 22-6 Starting procedure RTX130 operator’s manual...
-
Page 39: Shutdown Procedure
Push off/on switch to off to shut off engine (recoil start). Step 5: Turn keyswitch to off and remove key (electric start option). Shut off fuel valve to prevent flooding of the carburetor. Step 6: RTX130 operator’s manual Shutdown procedure 23-1... - Page 40 If pin does not go all the way through, push the unit forward or backward slightly until pin will fully engage. Remove pin and place in bracket and secure with clip (2) before moving machine. 23-2 Shutdown procedure RTX130 operator’s manual...
-
Page 41: Transporting The Machine
Section 30: Transporting the machine Driving the machine WARNING: Rollover can crush. Do not allow anyone to ride on machine. WARNING: Runover can crush. Keep feet away from wheels or tracks. RTX130 operator’s manual Transporting the machine 30-1... - Page 42 Use propel lever (3) to move machine. Step 6: Until the operator has become familiar with the controls and understands the capability of the machine, use a slower ground speed to move machine. 30-2 Transporting the machine RTX130 operator’s manual...
-
Page 43: Steering The Machine
These maximums are stated below since they are design limits. These angles are not operating limits and therefore must never be used alone to establish safe operating angles for varying conditions. Maximum engine lubrication angle - 20° all directions. RTX130 operator’s manual Transporting the machine 30-3... -
Page 44: Trailering The Machine
Drive machine squarely onto trailer. Step 5: Stop machine when tie-down position is reached. The tie-down position distributes weight on the trailer as recommended by the trailer manufacturer. Step 6: Lower trencher boom to trailer. 30-4 Transporting the machine RTX130 operator’s manual... -
Page 45: Unloading
Use propel lever to slowly move machine down the ramp to the ground. Minimize steering while on the ramps. Steering while on the ramps may result in the machine driving off the ramps or cause the ramps to move and drop off the trailer deck. RTX130 operator’s manual Transporting the machine 30-5... -
Page 46: Lifting - Single Point Lift Assembly (Optional)
1,000 lb (450 kg). Minimum sling leg length is 6 ft (2 m). Step 3: Use suitable equipment to lift and lower machine onto the transport vehicle. Step 4: Fasten machine to transport vehicle using tie-downs. 30-6 Transporting the machine RTX130 operator’s manual... -
Page 47: Emergency Towing
NOTICE: Do not exceed 1 – 2 mph (2 – 3 km/h) when towing. Higher speeds will cause heat buildup and will damage hydraulic motor. After towing, tighten tow valves (1); torque to 9 – 10 ft-lb Step 4: (12.2 – 13.6 Nm). RTX130 operator’s manual Transporting the machine 30-7... - Page 48 This page intentionally left blank.
-
Page 49: Preparing Machine And Work Area
Become familiar with the controls, operation and use of the machine under the supervision of a trained and experienced operator. The operator must be familiar with the workplace’s safety rules and regulations, and must be mentally and physically capable of operating the machine safely. RTX130 operator’s manual Preparing machine and work area 40-1... -
Page 50: Personal Protection
Other workers in the immediate area must also wear hard hats, safety shoes, hearing protection and eye protection. Wear close-fitting clothing and confine long hair. Avoid wearing jewelry, such as rings, wristwatches, necklaces or bracelets. 40-2 Preparing machine and work area RTX130 operator’s manual... -
Page 51: Sound And Vibration Levels
The stated sound levels are representative for a given operating condition. Operating conditions may vary at each jobsite. The actual sound levels for your application and operating conditions may be different. RTX130 operator’s manual Preparing machine and work area 40-3... -
Page 52: Operator Presence Switch - Check
The ground drive and attachment drive controls must be returned to neutral before restarting the engine. The operator presence system is intended for your safety and must be maintained in good functional condition. Contact your Vermeer dealer if it does not function properly. Prepare the area WARNING: Keep all spectators and other workers away from the machine and work area while in operation. -
Page 53: Underground Utility Contact
Utilities will then mark their underground facilities by using the following international marking codes: Electric Green/Brown Sewer Yellow Gas, oil or petroleum White Proposed excavation Orange Communication, telephone, TV Pink Surveying Blue Potable water RTX130 operator’s manual Preparing machine and work area 40-5... -
Page 54: Look For Evidence Of Underground Placement
Do not resume operation until utility company declares area safe. Some circuit breakers automatically reset. Do not assume power has been permanently disconnected until you confirm that the utility company has locked out power to that line. 40-6 Preparing machine and work area RTX130 operator’s manual... -
Page 55: Gas
Do not look into the end. Fiber optic cables carry laser light which may damage your eyes. If you are not sure what kind of cable it is, do not look into the end. Contact appropriate utility company for assistance. RTX130 operator’s manual Preparing machine and work area 40-7... -
Page 56: Jobsite Assessment
The operator or job foreman should inspect jobsite for: • Notices of underground placements • Manhole covers • Drop boxes • Recent trenching activity • Any evidence of possible underground placements • Banks, overhangs, drop-offs and trenches 40-8 Preparing machine and work area RTX130 operator’s manual... - Page 57 Do not operate this machine in an area with flammable dust or vapors. Carbon monoxide fumes from the engine can asphyxiate. Operate only outdoors or provide adequate ventilation if indoor operation is essential. RTX130 operator’s manual Preparing machine and work area 40-9...
-
Page 58: Prepare The Machine
Keep pressure washer stream away from machine controls and electrical/electronic devices. Compressed air can also push moisture through some connector and component seals. Do not air nozzle directly at seal areas. 40-10 Preparing machine and work area RTX130 operator’s manual... -
Page 59: Fuel Tank - Fill
(B) To prevent a static electric spark from igniting fuel or vapors, touch the fuel nozzle or spout to the machine. (C) Remove the fuel cap. (D) Keep the fuel nozzle or spout in contact with the tank neck while fueling to help prevent static electric buildup. RTX130 operator’s manual Preparing machine and work area 40-11... - Page 60 NOTICE: The fuel tank capacity is 1.6 gal (6.1 L). Unleaded gasoline up to 10% ethyl alcohol, 90% is acceptable. Use octane rating of 87 (R+M or higher). Fill cap 40-12 Preparing machine and work area RTX130 operator’s manual...
-
Page 61: Operating The Trencher
Starting the ground drive or digging chain drive without engaging the operator presence lever must also stop the engine. Contact your authorized independent Vermeer dealer if system requires repair or adjustment. -
Page 62: Trenching Tips
Some digging conditions, such as mixed aggregate rock that fractures easily and crumbles, may go better with a combination cup cutter and rotary cutter setup. • Contact your Vermeer dealer for optimal chain setup in your area. • Do not overload engine while trenching. -
Page 63: Trenching
Line up machine at beginning of trench. Step 1: Step 2: If equipped with trench cleaner. Follow Shutdown procedure, page 23-1. If not so equipped, proceed to Step 5. RTX130 operator’s manual Operating the trencher 50-3... - Page 64 Step 9: If using a trench cleaner, follow instructions. Refer to “Trench cleaner - adjust,” page 50-5. Step 10: Adjust ground speed for the best productivity when the required trench depth has been reached. 50-4 Operating the trencher RTX130 operator’s manual...
-
Page 65: Trench Cleaner - Adjust
Clean excess mud and dirt from tracks or other components that could freeze and affect operation. • Park machine on a hard surface or planks to keep tracks from freezing to the ground. RTX130 operator’s manual Operating the trencher 50-5... - Page 66 This page intentionally left blank.
-
Page 67: Backfill Blade (Option)
The backfill blade is intended for machines on which backfill blade spacer assembly (1) has been installed. Installation instructions are included with spacer assemblies purchased from Vermeer Parts Center. The backfill blade is not intended for machines that do not have this assembly installed. -
Page 68: Backfill Blade - Install/Remove
Remove backfill blade before trenching; install it to backfill. Move propel lever to neutral. Step 1: Step 2: Move trencher digging chain to stop. Step 3: Raise trencher boom. Step 4: Reduce engine speed to idle. Shut off engine. Step 5: 55-2 Backfill blade (option) RTX130 operator’s manual... - Page 69 Insert pin into one of three holes (2) depending on desired working width. When changing angle after blade is installed on machine, raise blade enough to remove contact with the ground before adjustment. RTX130 operator’s manual Backfill blade (option) 55-3...
- Page 70 Slide blade in pocket until locking pin engages. 700IF239 To remove blade: Refer to “Backfill blade - install/remove,” Step 1: page 55-2. Step 2: Pull locking pin (5) to release blade. Step 3: Slide blade out of pocket. 55-4 Backfill blade (option) RTX130 operator’s manual...
-
Page 71: Backfill Blade Operation
Refer to “Backfill blade - install/remove,” page 55-2. Trench Step 3: Once trench is completely backfilled, drive with one track or set of tires on trench to compact soil. RTX130 operator’s manual Backfill blade (option) 55-5... - Page 72 This page intentionally left blank.
-
Page 73: Maintenance Intervals
Shutdown 23-1. Visually inspect machine daily before starting the machine. Make no modifications to your equipment unless specifically recommended or requested by Vermeer Corporation. Safety signs Safety signs located on your machine contain important and useful information that will help you operate your equipment safely. -
Page 74: Maintenance Manual
As a general rule, grease machine after it is shut down for the day. This protects the metal under the seals from corrosion caused by condensation as the temperature drops. Ensure all fittings and grease applicator nozzle are clean before applying the grease. If any grease fittings are missing, replace them immediately. 60-2 Maintenance intervals RTX130 operator’s manual... -
Page 75: Hourmeter - Check For Maintenance Interval/Reset (Sn 101-495)
The hourmeter (1) is used to determine maintenance intervals for the machine. Hourmeter displays engine rpm and machine hours only. Maintenance intervals are based on normal operating conditions. When operating under severe conditions, the maintenance intervals should be shortened. RTX130 operator’s manual Maintenance intervals 60-3... -
Page 76: Maintenance Intervals
= Initial maintenance on new machine. Regular maintenance interval may be different. Initial = Regular maintenance interval. For Vermeer maintenance replacement part numbers, refer to the parts manual or consult your Vermeer dealer. Maintenance interval - service hours 10 or... - Page 77 Air cleaner element - replace Hydraulic fluid - change Battery electrolyte levels and terminals - check/clean (electric start option) Engine system - check Battery - replace (electric start option) RTX130 operator’s manual Maintenance intervals 60-5...
- Page 78 Digging chain - adjust Digging chain - remove/install Digging chain wear - check Cutters - replace Trench cleaner/restraint bar - adjust Track tension - adjust Tracks - replace 60-6 Maintenance intervals RTX130 operator’s manual...
- Page 79 Driving the machine, 30-1 Jobsite assessment, 40-8 Jump-starting (electric start option), 22-4 Electricity, 40-6 Jump-starting procedure, 22-5 Emergency towing, 30-7 Engine controls, 20-1 Engine maintenance intervals, 60-2 Engine, 22-3 Lifting - single point lift assembly (optional), 30-6 RTX130 operator’s manual Index...
- Page 80 Underground utility contact, 40-5 Prepare the machine, 40-10 Unloading, 30-5 Preparing machine and work area, 40-1 Receiving and delivery report, i Safe operation on slopes, 30-3 Safety messages, 10-1 Safety signs, 60-1 Safety symbol explanation, 10-1 Index RTX130 operator’s manual...
-
Page 81: Revision History
03/16 First edition production manual released Updated ignition switch location. Updated hourmeter. o1_01 07/19 Pages v, 10-3, 20-2, 30-4, 30-6, 60-3 Updated warranty, added emissions control warranty 01_02 10/22 Introduction statement, new style updates RTX130 operator’s manual Revision history... -
Page 82: Proposition 65 Warning
State of California to cause cancer and reproductive harm. Wash hands after handling. © 2022 Vermeer Corporation. All Rights Reserved. 1210 Vermeer Road East, P.O. Box 200 Pella, Iowa 50219-0200 USA...
Need help?
Do you have a question about the RTX130 and is the answer not in the manual?
Questions and answers