Advertisement
Advertisement
Table of Contents

Subscribe to Our Youtube Channel
Related Manuals for Crossbeats ROADEYE DC03


Summary of Contents for Crossbeats ROADEYE DC03
- Page 1 R ADEYE DC03 U S E R M A N U A L...
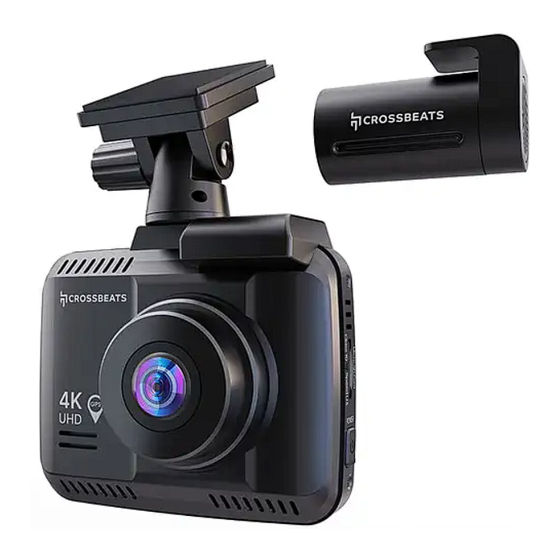
- Page 2 Overview of camera Front Camera DC03 Rear Camera...
- Page 3 Overview DC03 13.Mount 1.Menu/mode 7.TF Card Slot 14. Rear Camera port(AV/IN) 2. Up 8. Charging Port 15. IPS Screen 3.Lock/Wifi 9. Mic 4.Down/LCD Off 10. Reset 5.Ok/Confirm 11. Speaker 6.Power 12. Lens...
-
Page 4: Keys And Functions
Keys and Functions Key/Port Function Instruction 1. Turn on Short press Power key to turn 1. Turn On the camera ON the camera 2. Turn off Long press Power to turn off 2. Turn Off the camera the camera 3. Take Photo 3. - Page 5 Keys and Functions Key/Port Function Instruction 1.On Recording Mode short press to start/stop recording 1. Start/Stop Recording 2. On Photo Mode short press to take 2. Take Photo photos 3. Playback 3. On Playback Mode short press to playback/ pause the video 4.
- Page 6 Dash camera Installation 1. Keep the engine in the off condition 2. Make sure to clean your windshield from the dust particles from the dashboard surface. Attach the dash camera with the suction mount. Set the camera lens to point forward to the centre when installing it 3.
- Page 7 4. Adjust the lens angle of the camera by loosening the screw to adjust the camera’s view angle and then tighten to lock that angle 5. Use the power cable to connect the USB Port of the product to car's cigarette lighter socket.
- Page 8 The rear camera comes with six meter cable, that is to be connected to the front camera Follow the below steps for installation: 1. Connect the DC jack to the AV IN port of the front dashcam. When connected properly, the video of the rear camera is shown PiP (Picture in Picture) wise on the LCD screen of the front camera 2.
-
Page 9: Inserting / Removing Amicro Sd Card
INSERTING / REMOVING A MICRO SD CARD TO INSTALL Make sure the camera is turned OFF First. Then align the GOLD CONTACTS facing towards the front of the camera (Lens Side). Then insert the memory card halfway in. Then use your fingernail or a paper clip to push the card all the way inward until it clicks and locks in place. - Page 10 DC03 Screen UI 1.Recording 8.Vehicle Speed data 14.Recording Time 2.Loop Recording 9.Power status 15.Recording status 3.WDR 10.SD card indicator 16.GPS Status 4.Exposure Settings 11.MIC 5.G sensor 12.Parking mode status 6.Date 13.Video resolution 7.Time...
-
Page 11: Modes And Settings
Modes and Settings Roadeye DC03 dash cam has three different camera modes: Video Photo Playback To shift mode Press “OK’ key to stop recording, then press and hold ‘Mode’ for 2 seconds. Video mode VideoMode Different Settings available in the Video mode are Resolution Setting Allow to choose the desired video resolution and fps (frames per second). - Page 12 3840x2160P 2160+1080P 2560x1440P 1440+1080P 1920x1080P 1080P60+1080P 1920x1080P 1080+1080P Default resolution will be 2K and can be changed from video settings: resolution settings Loop recording Setting --default 1min Off/ 1mins/ 2mins/ 3mins select the length (1/2/ 3 min) of each video clip for the loop recording. This function allows the dashcam to continuously record up to that particular loop length selected.
- Page 13 Stamp -- Default ON Icons and stamps provide the option to Turn On/Off the Date/Time / Speed / GPS Coordinates / Logo Stamp that are shown on recorded files. Video Recording G-Sensor -- Default 5 Off: Disables impact detection for event recording. 1 (Low Impact Detection): Triggers event recording for low impact incidents.
- Page 14 Parking Mode — Default Off Functionality: This mode is specifically designed to activate when the camera detects movement, such as in a hit-and-run scenario, while the car is parked. If a collision causes your vehicle to shake, which is sensed by the G-sensor according to its settings, the camera will power on automatically.
-
Page 15: Photo Mode
Photo Mode To shift to photo mode Press “OK’ key to stop recording, then press and hold ‘Mode’ for 2 seconds for 2 times. PhotoMode Different settings options available under the photo mode option are: Capture Mode Single/2s Timer/5s Timer /10s Timer, default Single Switch to any of the picture resolutions between (640*480)/ 1.3M 1280*96, 2M HD(1920*1080) , 3M Resolution... -
Page 16: Playback Mode
Playback Mode PlaybackMode Allows to delete the available recorded videos, Delete Delete Current/ Delete All, default Delete Current. Lock Current/Unlock Current/Lock All/Unlock All Protect 2 Seconds/5 Seconds/8 Seconds Slide Show SYSTEM SETTINGS This option allows the user to Modify the System settings of the dash camera available with the System settings tab To shift to the system settings Press “OK’... - Page 17 Date/Time Press [Mode] button to shift and press [UP] [DOWN] button to enter your time, then select [OK] button to confirm. Date Format options - yyyy/mm/dd, mm/dd/yyyy, dd/mm/yyyy , any one option can be selected as per the user preference. Clock Format - Default 12 Hours 24 Hours / 12 Hours Adjust the time display format on your dash camera to match your preference:...
- Page 18 Voice Guidance— Default ON ON/Off On: With this setting enabled, your dash cam will provide spoken alerts and status updates. Off: Turn off this option to disable voice alerts for a quieter ride. Language — Default English Allow to choose your desired language for dashcam system. License Plate —...
- Page 19 Application connection and Settings Download & Install Kacam App Download the KACAM app, available on both Google Playstore and iOS Store, Scan the below code to download the Application...
- Page 20 (Please ALWAYS connect to power supply.) Optional-Turn on Bluetooth on 1.Turn on Wi-fi on your mobile phone. your mobile phone and connect 2.Search and connect with Roadeye with Roadeye DC03 Dashcam DC03 Wi-Fi Network. for quicker App connections 3.Default Password is 12345678...
- Page 21 Connection with camera and App Product name will be displayed on Open the Kacam App the screen as (dashcam model DC03) when Wi- Fi is connected successfully. Click on it to open the App interface.
- Page 22 App connection and Live preview Live video preview will be displayed On the App home Screen also check for current recording and many more options to record, view recorded Albums with the GPS Sync videos and more...
- Page 23 Video albums and Downloading Download the videos or pictures you Video wil be saved with the text ‘F’ want, which will be directly saved to and ‘R’ to indicate the front and your phone directory Rear and photos can also be taken with the help of this APP.
- Page 24 First Time GPS Map Setup and Download. To download the Offline maps go to home section off the app and Click on About and then on offline Map. Then Disconnect from the Dashcam Wi-Fi and connect to any other Wi-Fi network or mobile data to download the offline Map, Once downloaded save the map with your preferred name...
Need help?
Do you have a question about the ROADEYE DC03 and is the answer not in the manual?
Questions and answers
Which memory card (128 gb) to use in crossbeat roadeye DC03 model
A 128 GB Micro SD card with Class 10 and U3 speed is compatible with the Crossbeats Roadeye DC03 model.
This answer is automatically generated
DC03 STOP RECORDING AND START COUNTINUE BUT NO POWER FLUCTUATION