
Subscribe to Our Youtube Channel
Related Manuals for Blackberry ITL100-1


Summary of Contents for Blackberry ITL100-1
- Page 1 BLACKBERRY RADAR D ITL100-1 October 2024 Chassis Container On/Off Detection Installation Guide...
-
Page 2: Table Of Contents
Table of contents 1 Overview ......................3 2 Get ready for installation .................. 4 3 Installing BlackBerry Radar D modules ............5 Prepare to install ....................5 Installation tools ....................8 Matching a module identifier to an asset identifier ..........9 Module installation .................... -
Page 3: Overview
BLACKBERRY RADAR D ITL100-1 INSTALLATION GUIDE—CHASSIS CONTAINER ON/OFF DETECTION 1 Overview This guide provides detailed instructions for installing and activating new BlackBerry Radar D modules. It includes three main tasks: Task 1: Get ready for installation (see Section 2) Task 2: Install a BlackBerry Radar D (see Section 3) Match the module identifier with the asset identifier on the installation worksheet. -
Page 4: Get Ready For Installation
BlackBerry Radar Installation App. This app will allow you to record the pairing of each BlackBerry Radar D module to its asset (that is, the container that the device will be installed on) and its associated BlackBerry Radar gateway. -
Page 5: Installing Blackberry Radar D Modules
BLACKBERRY RADAR D ITL100-1 INSTALLATION GUIDE—CHASSIS CONTAINER ON/OFF DETECTION 3 Installing BlackBerry Radar D modules You may have a large number of BlackBerry Radar D modules to install. Follow the instructions in this section to: Match each module identifier to its asset identifier •... - Page 6 BLACKBERRY RADAR D ITL100-1 INSTALLATION GUIDE—CHASSIS CONTAINER ON/OFF DETECTION To attach the module to the asset you wish to track, you must supply your own fasteners. Depending on the construction of your mounting location, you may wish to use the following types of fasteners.
- Page 7 BLACKBERRY RADAR D ITL100-1 INSTALLATION GUIDE—CHASSIS CONTAINER ON/OFF DETECTION Fastener selection considerations—Rivets If you desire a more permanent mounting solution, you may use rivets instead of screws. Rivets As you will need to supply the fasteners, the length of the rivet will be determined by the depth of your mounting surface, plus the depth of the Radar D mounting flange.
-
Page 8: Installation Tools
BLACKBERRY RADAR D ITL100-1 INSTALLATION GUIDE—CHASSIS CONTAINER ON/OFF DETECTION 3.2 Installation tools Required tools to complete the installation: Smartphone with BlackBerry Drill and Drill bits Screwdriver or Bit Radar Installation App *Specific size and type of screwdriver or bit is dependent on the screws selected for your install. -
Page 9: Matching A Module Identifier To An Asset Identifier
In order to track an asset, the Radar D module that is installed on the asset must be associated with the asset in the BlackBerry Radar Dashboard. It is, therefore, very important to keep a clear record of which module is installed on which asset. - Page 10 3. If you are unable to use the BlackBerry Radar Installation App during your installation, you need to obtain a worksheet where you can record the pairing of each BlackBerry Radar D module to its asset and associated BlackBerry Radar gateway devices.
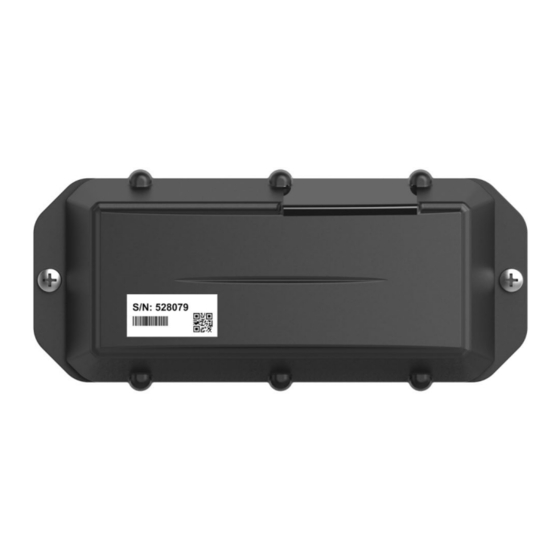
- Page 11 BLACKBERRY RADAR D ITL100-1 INSTALLATION GUIDE—CHASSIS CONTAINER ON/OFF DETECTION Tip: For modules that have previously been transferred to new assets, the temporary S/N label may no longer be in place. If this is the case, you will need to write the module identifier (S/N) for each module on the installation worksheet.
-
Page 12: Module Installation
2. To monitor the presence or absence of a container on the chassis, when installing the Radar D module, always ensure the sensor area is pointed towards the sky. This diagram illustrates the supported installation orientations for the BlackBerry Radar D module. -
Page 13: Module Activation
3.4.1 Prepare module for installation—Module activation IMPORTANT: Please do not perform the module activation process until you are ready to install and associate the BlackBerry Radar modules on your asset. Once the module is activated, please complete the module installation and association, as soon as you can, to conserve battery life. - Page 14 BLACKBERRY RADAR D ITL100-1 INSTALLATION GUIDE—CHASSIS CONTAINER ON/OFF DETECTION SPECIAL NOTE—MAGNETS AND TAMPER DETECTION: If you plan to use the Tamper Detection feature, please save this magnet. The magnet will be installed on the asset to trigger tamper alerts. For a full explanation of the tamper detection installation procedure, please refer to Section 3.4.2: Installing the module on an...
-
Page 15: Chassis Installation Procedure
INSTALLATION GUIDE—CHASSIS CONTAINER ON/OFF DETECTION 3.4.2 Chassis installation procedure—Container On/Off detection If you are using BlackBerry Radar D to monitor a chassis trailer, you may mount the module on any flat, vertical surface that offers enough mounting area for the module. When selecting a mounting location, carefully consider how the asset will be used in its normal, day-to-day operation. - Page 16 BlackBerry Radar D module. This unobstructed viewing area, above the module, will allow your BlackBerry Radar D to accurately detect the presence or absence of a container on the chassis, by sensing the container’s underside.
- Page 17 If you are installing on an extendable chassis or a chassis that can simultaneously support multiple containers, be sure to install your BlackBerry Radar D module in an area of the chassis that will be covered by the containers, when the containers are present.
- Page 18 BLACKBERRY RADAR D ITL100-1 INSTALLATION GUIDE—CHASSIS CONTAINER ON/OFF DETECTION If you are installing on some extendable chassis models, you may encounter fixed overhead crossmembers that are attached to part of the chassis. There is a chance for these flat crossmembers, at top of the chassis, to block the Radar D detection beam when the chassis is extended or collapsed to certain intervals (adjustment stops).
- Page 19 BLACKBERRY RADAR D ITL100-1 INSTALLATION GUIDE—CHASSIS CONTAINER ON/OFF DETECTION Extendable Chassis Example = Radar D Alternate Installation Location. For extendable chassis models with overhead crossmembers. Stacked Chassis If you routinely store your chassis in a stack, or transport stacked chassis--we recommend installing Radar D towards the middle of the chassis, as shown below.
- Page 20 BLACKBERRY RADAR D ITL100-1 INSTALLATION GUIDE—CHASSIS CONTAINER ON/OFF DETECTION Distance Above the Module Once you have identified a suitable mounting area on the chassis, ensure there is a minimum 6” (15 cm) clearance between the top surface of the module and the surface that will support the corner fitting of the container.
- Page 21 BLACKBERRY RADAR D ITL100-1 INSTALLATION GUIDE—CHASSIS CONTAINER ON/OFF DETECTION To achieve this minimum clearance, try to position the module as low on the chassis crossmember as you can, without extending the bottom of the module beyond the bottom edge of the crossmember. Extending the bottom edge of module beyond the bottom edge of the crossmember can expose the module to potential damage.
- Page 22 BLACKBERRY RADAR D ITL100-1 INSTALLATION GUIDE—CHASSIS CONTAINER ON/OFF DETECTION Scenario 1: General Installation—Without Tamper Detection 1. Identify the desired installation location for your module. IMPORTANT: If your chassis crossmember has lightening holes, we recommend that the module is installed completely on a solid area of the crossmember, that does not span the lightening hole.
- Page 23 BLACKBERRY RADAR D ITL100-1 INSTALLATION GUIDE—CHASSIS CONTAINER ON/OFF DETECTION 3. Using a drill bit, drill a hole through each of the marked holes. This will create two holes you will use to mount the module to the crossmember. Drilling tips for chassis and frame installations Due to the thicker, harder steel used on chassis and trailer frames, you may wish to follow these suggestions.
- Page 24 BLACKBERRY RADAR D ITL100-1 INSTALLATION GUIDE—CHASSIS CONTAINER ON/OFF DETECTION 5. Place the module on the chassis, aligning the holes on the module with the holes you drilled into the chassis. 6. Insert your fastener of choice into the holes and use the appropriate tools to secure the module to the asset.
- Page 25 If you are unable to use the BlackBerry Radar Installation App during your installation, you need to obtain a worksheet where you can record the pairing of each BlackBerry Radar D module to its asset and associated BlackBerry Radar gateway devices.
- Page 26 BLACKBERRY RADAR D ITL100-1 INSTALLATION GUIDE—CHASSIS CONTAINER ON/OFF DETECTION 8. Installation is complete.
- Page 27 BLACKBERRY RADAR D ITL100-1 INSTALLATION GUIDE—CHASSIS CONTAINER ON/OFF DETECTION Scenario 2: Tamper Detection Installation 1. Identify the desired installation location for your module. To support the use of super glue to bond the tamper detection magnet to the chassis crossmember, ensure the crossmember mounting area is clean and dry.
- Page 28 BLACKBERRY RADAR D ITL100-1 INSTALLATION GUIDE—CHASSIS CONTAINER ON/OFF DETECTION 3. With the rear of the module facing the sky, place the bottom edge of the module against the crossmember. Carefully rotate the module, vertically, to place the rear of the module against the face of the crossmember. Rotating the device slowly towards the crossmember helps keep the magnet aligned within the magnet recess, as the magnet attaches to the crossmember.
- Page 29 BLACKBERRY RADAR D ITL100-1 INSTALLATION GUIDE—CHASSIS CONTAINER ON/OFF DETECTION 5. Carefully, pull the module away from the chassis crossmember. Pulling the module away from the crossmember is important, as it helps the magnet remain in place, as the module is removed from the crossmember.
- Page 30 BLACKBERRY RADAR D ITL100-1 INSTALLATION GUIDE—CHASSIS CONTAINER ON/OFF DETECTION 8. Using a drill bit, drill a hole through each of the marked holes. This will create two holes you will use to mount the module to the chassis. If there are any burrs around the holes after the drilling process, remove them.
- Page 31 BLACKBERRY RADAR D ITL100-1 INSTALLATION GUIDE—CHASSIS CONTAINER ON/OFF DETECTION 9. Place the module on the chassis, aligning the holes on the module with the holes you drilled into the chassis. Insert your fastener of choice into the holes and use the appropriate tools to secure the module to the asset.
- Page 32 If you are unable to use the BlackBerry Radar Installation App during your installation, you need to obtain a worksheet where you can record the pairing of each BlackBerry Radar D module to its asset and associated BlackBerry Radar gateway devices.
- Page 33 BLACKBERRY RADAR D ITL100-1 INSTALLATION GUIDE—CHASSIS CONTAINER ON/OFF DETECTION 11. Installation is complete.
-
Page 34: Removing Blackberry Radar D Modules
INSTALLATION GUIDE—CHASSIS CONTAINER ON/OFF DETECTION 4 Removing BlackBerry Radar D modules Use this procedure if you need to remove your BlackBerry Radar D module for servicing or recycling. For more information on obtaining service for your devices, or recycling and safe disposal... -
Page 35: Module Removal
BLACKBERRY RADAR D ITL100-1 INSTALLATION GUIDE—CHASSIS CONTAINER ON/OFF DETECTION 4.2 Module removal 1. Remove the module from the asset by removing the two fasteners from the ends of the module and remove the module. -
Page 36: Battery Removal And Replacement
Silicone Seal 2. Remove the old batteries and replace with new batteries. Replace only with BlackBerry BAT-63898-001 batteries to ensure good performance. IMPORTANT: Do not mix old batteries with new batteries. - Page 37 BLACKBERRY RADAR D ITL100-1 INSTALLATION GUIDE—CHASSIS CONTAINER ON/OFF DETECTION 3. Locate the upper housing and place on the lower housing. IMPORTANT: Ensure the glossy sensor window is positioned towards the top of the device. This sensor window should be aligned with the sensor component located at the top of the circuit board.
- Page 38 BLACKBERRY RADAR D ITL100-1 INSTALLATION GUIDE—CHASSIS CONTAINER ON/OFF DETECTION Preparing modules for shipment (used or previously activated modules) If you are looking to ship Radar D devices that have already been activated, you must remove the batteries from the device. When the batteries are removed from the module and shipped separately from the batteries, Radar D modules are not Dangerous Goods and may be shipped in any packaging.
- Page 39 BLACKBERRY RADAR D ITL100-1 INSTALLATION GUIDE—CHASSIS CONTAINER ON/OFF DETECTION 3. Locate the upper housing and place on the lower housing. IMPORTANT: Ensure the glossy sensor window is positioned towards the top of the device. This sensor window should be aligned with the sensor component located at the top of the circuit board.
-
Page 40: Support
BLACKBERRY RADAR D ITL100-1 INSTALLATION GUIDE—CHASSIS CONTAINER ON/OFF DETECTION 5 Support If you run into any problem during the installation process, contact the BlackBerry Radar support team at 1-844-RADAR-BB. -
Page 41: Legal Notice
The terms of use of this documentation and any BlackBerry product or service are set out in a separate license or other agreement with BlackBerry applicable thereto. Certain features...
Need help?
Do you have a question about the ITL100-1 and is the answer not in the manual?
Questions and answers