Table of Contents
Advertisement
Quick Links
Advertisement
Table of Contents
Troubleshooting

Related Manuals for LENCO Pro Control

Summary of Contents for LENCO Pro Control
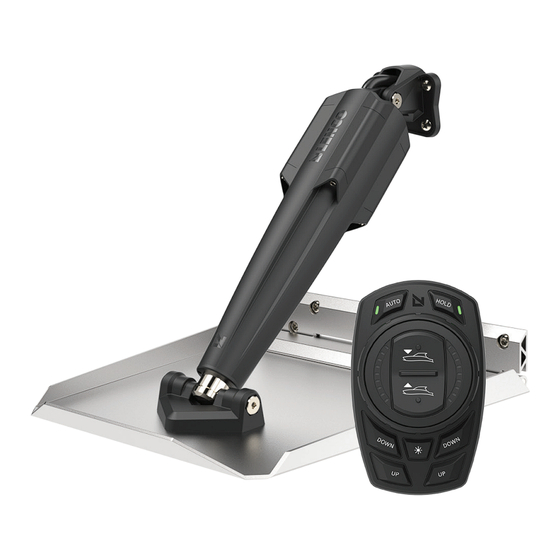
- Page 1 Lenco Pro Control ™ Operator's Manual...
-
Page 2: Table Of Contents
Pro Control Assist: Keypad Layout........ -
Page 3: Basic Safe Operation
Lenco trim tabs make the single most important difference in the way your boat rides and performs. They are optional on some boats but should be as standard as power trim and tilt. Lenco trim tabs make your boat ride smoother, drier, faster and with increased safety whether on a small skiff or a mega-yacht. -
Page 4: Safety
Lenco trim tabs have been designed to improve the overall attitude of a boat. When used properly, Lenco trim tabs improve the ride, reduce drag, increase speed, and improve the fuel efficiency of your boat. -
Page 5: Glossary Of Terms
Glossary of Terms & Special Conditions lencomarine.com Instructions for Glossary of Terms Special Conditions Front part of a boat Following Sea Make sure the tabs are fully retracted by pressing Bow Up on both sides or All Up on the controller. This Chine Portion of the hull where brings both tabs to a fully retracted... -
Page 6: Boat Centric Keypad Control-Manual Operation
Boat Centric Keypad Control lencomarine.com Boat Centric Keypad Control—Manual Operation Starting Condition Starting Condition Starboard is too high. Roll correction is needed. *Keypad is in Manual Mode. Roll Corrected Roll control dial is rotated to starboard. Starboard lowers to operator’s desired roll position. -
Page 7: Keypad Lighting: Pro Control Assist And Auto
Keypad Lighting & Assist Keypad Layout lencomarine.com Keypad Lighting: Pro Control Assist and Auto NIGHT MODE DAY MODE LED's Green 9 Digit LED Array Text White (Day) Red (Night) Pro Control Assist: Keypad Layout FAV 1 FAV 2 Dial Control... -
Page 8: Pro Control Assist: Commissioning Menu
• The two FAV LEDs will begin to flash in an alternating pattern when all four buttons are depressed for four seconds. See the Pro Control Installation Manual for instructions to locate the actuators, port and starboard, on the boat. -
Page 9: Calibration: 1. Actuator Rate Of Travel
Assist Callibration lencomarine.com Calibration: 1. Actuator Rate of Travel • Actuator rate of extension and retraction is set by the pitch UP/DOWN button on the dial: 1 is slowest; 5 is fastest. • This function sets the rate at which the actuators operate. •... -
Page 10: Calibration: 4. On Plane Transition Speed
• To exit the Calibration mode, press the DIM ( ), Fav 1, and Fav 2 buttons at the same time together. • At this point the Pro Control Assist system set-up is complete and your boat is ready for normal operation. -
Page 11: Pro Control Auto: Keypad Layout
• The AUTO and HOLD LEDs will begin to flash alternating when the four buttons are depressed for four seconds. See the Pro Control Installation manual for instructions to locate the actuators, port and starboard, on the boat. Entering the... -
Page 12: Pro Control Auto Calibration
Pro Control Auto Calibration Entering Calibration Menu 1. To enter or exit the Pro Control Auto Calbration Menu press Auto, Hold and DIM ( ). 2. The AUTO and HOLD LEDs will both display constantly lit when all three buttons are pressed correctly. -
Page 13: Calibration: 2. Holeshot Activation Speed
Auto Calibration lencomarine.com Calibration: 2. Holeshot Activation Speed This function sets the speed of the vessel at which the actuators will automatically move to the Holeshot position. LED's The system is already in the Calibration mode from 1 = 3 mph 2 = 4 mph the last calibration step: both AUTO and HOLD 3 = 5 mph... -
Page 14: Calibration: 5. On-Plane Delta Pitch
Auto Calibration lencomarine.com Calibration: 5. On-Plane Delta Pitch This function sets the actuator extension position for the trim tab to control orientation of the boat. LED's The system is already in the Calibration mode from the No LEDS = 0° last calibration step: both AUTO and HOLD button LEDs 1 = .75°... -
Page 15: Calibration: Exit Calibration Mode
Only one LED on left hand side of dial will be lit. First time power-up after actuator locating and calibration; this is an automatic commissioning for the Pro Control Auto keypad, even if the system Entering is powered OFF and then back ON. This process... -
Page 16: Set Pitch Control To On Or Off
(1 foot or less of water chop is preferred). Note: On first time power up Pro Control Auto will be in a commisioning mode with lights flashing fast in sync! The following two steps must be completed on open water with less than 1’... -
Page 17: High Speed Pitch Control Set Up
Sea Trial Commissioning lencomarine.com g. Manually retract the actuators to 0% using the ALL UP button on the dial. No right hand LEDs lit. h. Rotate dial counterclockwise to next menu with four LEDs lit on the left hand side of the dial. 4. -
Page 18: Auto Keypad Operation
Auto Keypad Operation lencomarine.com Auto Keypad Operation Enabling AUTO mode: After completing the Calibration and Commissioning for your boat the AUTO trim tab control mode may be safely used. 1. Press and release the AUTO button. The green LED will illuminate on the AUTO button. -
Page 19: Auto Mode Button Functions
Auto Mode Button Functions lencomarine.com Auto Mode Button Functions Automatic Temporary Pitch Mode and Roll Hold Instant Roll Control Dial All Down All Up Port Starboard Bow Up Bow Down Port Starboard Bow Down Bow Up Bow ALL Up / ALL Down: All down—Changes controlled pitch down by an incremental fraction of a degree and switches to HOLD mode. -
Page 20: Flybridge Keypads
‘boat centric’ . In Tab Centric mode the port UP button will control the port tab. We do not recommend setting up the vessel in this configuration. Troubleshooting Troubleshooting Pro Control Assist Symptom Status Cause Resolution Keypad does not... -
Page 21: Troubleshooting Pro Control Auto
Troubleshooting: Auto lencomarine.com Troubleshooting Pro Control Auto Symptom Status Cause Resolution Keypad does not Condition: Keypad not powered Secure all NMEA® and respond to inputs keypad NOT lit by L2K bus, as L2K cabling connections: required ensure Purple wire is... -
Page 22: Pro Control Faults
1. Make sure you check all connections and wiring for corrosion, as this can cause unforeseen problems 2. Make sure you have a fully charged battery and terminals are free of corrosion For More information on additional troubleshooting, or any of the Lenco Marine products please visit our website: lencomarine.com... -
Page 23: Trim Tab Maintenance Tips
Maintenance Tips: Environmental Compliance Statement Cleaning your Trim Tabs All Pro Control products that are subject to the The attractive surface appearance of stainless steel Directive 2012/19/EU are compliant with the cannot be regarded as completely maintenance- WEEE marking requirement. Such products free. -
Page 24: Notice
The contents of this manual are subject to change without notice and do not constitute a commitment on the part of Lenco Marine LLC. Every effort has been made to ensure the accuracy of this document. However due to ongoing product improvement and revision, Lenco Marine LLC cannot guarantee the accuracy of printed material after date of publication nor can it accept the responsibility for errors or omissions.
Need help?
Do you have a question about the Pro Control and is the answer not in the manual?
Questions and answers