Advertisement
Quick Links
T10-1141/PSM30
HEATING ONLY THERMOSTAT
43344 npk e
SPECIFICATIONS
ELfiCTRICAL RATING.24 Vac (30
Maximum)
SWITCH ACTION
.Open CJonlact Switert
ANTICIPATOR RATING.0 TSAtO 1
2A
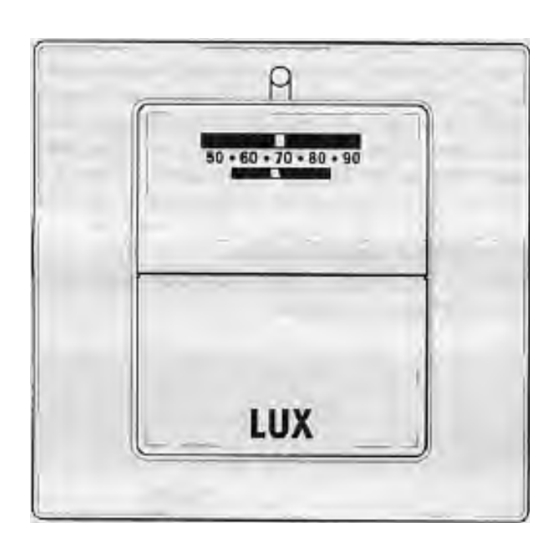
TEMPERATURE RANGE.50"F to 90"f
INSTAllATIQN & OPERATION
1]. THERMOSTAT LOCATION
For accurats Mmperati/re control and comtoit, corred localcrt is very rvodani
On new tfistsKshcra. Ihe QutdeJirtes hsied bebw should be bikiwsd a$ closely
as possible When replecin^ an old ihermoslst. Install the now one m the same
looaUon unless these conditions suggest otherwise
1
Locate Ihe theimosiat on an rieide wsl about Ave <ee( above the floor,
where i is easy to inslalf and adjust It should be r> a room that is teed
oUen, such as a family room.
2
Os not instaB il where mere are unusual heating conditions, such as direct
sunlight close io a lamp, radio, teieveion, radiator regisier. near a
litepiMe, or other heat producing appeance. Also, check for hoi water
pipos within (he wail ot a stove on the other side of the wall.
3
Do not locate ^nunustfilcooiing ccndittens, such as on an outside wal, oroie
separating ar unheated rocm, or r drafts trornstarweis, doers, or wndow^
4. Do not locale m a damp or humid area TNs cat> shorten thermostat tNe
due to corrosion
S
Do not locate where av circulation is poor such as in a corner, alcova. or
behind an open doer.
S
Do not install uriil al constrvctioo work and panting have Men cornpleted.
2» TOOLS REOUIREO
Wirestnpper or knife, dHH with ^is* bit, scrawdnvei, level and a pencil
31 REMOVING OLD THERMOSTAT
Please reed all insinjctions carafuly. As you complete each step, oheck the
adfotning square
I
Disccmect ettclncity and turn ofl gas lo the heater.
I
Remove cover Item old thermosial.
~
Loosen all screws
Disccnnect wires from ihewnostat making sure they do not Fall back iiu«de
the wait
'
Stre> naulaticin^" frcrntvfreertds and clsanofF any ccrroeiorv.
Rl walcpervng with ncn>ocmbjstiCilensulation Io piavant dralts licm
atleciinq ihermostal
_i
Anach wires to Temiinel screws Shown in Figure 2. (Either wira to ai(he<
temiirtal) Push excess wire back mio wan opening
.
Ftnd anticipator setlmg on old thanncalat Sethrvg on new thermostat
should be the same Do this by carefully sliding the long pointer on the
anticipator overtha desired number. H otd anbcipator sefting cannot be
determined look on gss control cn furnace, or set it at .f. During heahng
season, furnace should operate about fwe hmes an nou« it adjustments
are neoessary. move heat anicipator pointer slightly
recheck NOTE'
Set pointer to 1.2 for milEvoft sysiems.
_
Attach from cover, Figna I. to base.
->
Tian eiectncity and gas back on and set pointer on top of Ihermpatat 10
desired temperature
A thxwo&rar C9n only eorrtro/
fe/nperafure rapfir/f.
If you
ffrW
thstit
is uncomfortable some disrance away from Ihe thermostat,
change the setting m order to
compensate
for this.
Fioune 1 FRom ocvea
mune: base
UOUrTTIMO hiOiE
ANIICiPWTOA
LONG
poMTen
CAPTIVE
senew
UOUNTIHO
HOLE
Hous POnwiREe
ncuKE 3 cccofiATive mu. put;
TECHNICAL SERVICE
tr you have aiy (vieolenis insiaiiinp or using B«s numDCUt piN» 'eM 9e netniaois raisiiJy
Technical ServicekSsvalaBlelhrouoh oiatgctiniGai Semes iciirCa It you requiir
plHse cell out offices be tween S 00 3 m anO 4 30 p m Eaewn Swidertf Tinv Mondey Ivough
R0sy Iiie nuinOe ns es 234-3803 Please relf' lo ihodet 110-1141
Advertisement


Need help?
Do you have a question about the T10-1141/PSM30 and is the answer not in the manual?
Questions and answers
Why doesn’t my thermostat turn on my gas fireplace
The Lux Products T10-1141/PSM30 thermostat may not turn on your gas fireplace if the anticipator setting is incorrect. For millivolt systems like gas fireplaces, the anticipator should be set to 1.2. Also, make sure the wires are properly connected to the terminal screws, the thermostat is securely mounted, and the electricity and gas are turned back on. If these steps are not followed, the thermostat may not function properly.
This answer is automatically generated