
Related Manuals for Flymo VT350


Summary of Contents for Flymo VT350
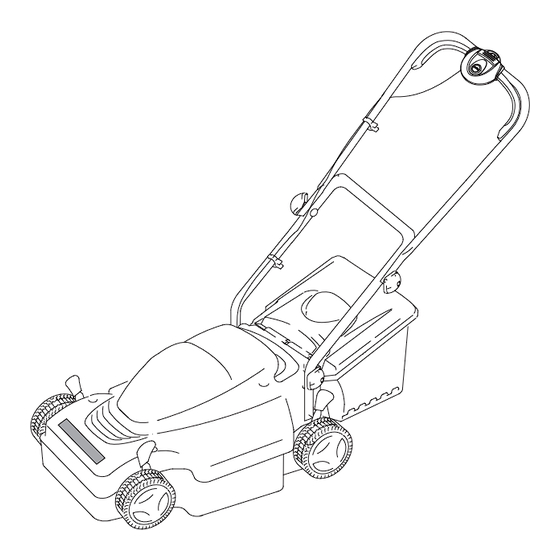
- Page 1 Venturer Turbo 350 For all customer enquiries or for replacement parts, contact:- 01325 300303 www.flymo.com eop.customer.services@electrolux.co.uk...
- Page 2 Carton Contents IMPORTANT ! BEFORE IF ANY PARTS ARE MISSING CONTACT:- Safety Explanation of Symbols on the Venturer Turbo 350 General Electrical...
- Page 3 before Preparation Maintenance and storage banks steep CABLES MAINS PLUG REPLACEMENT IMPORTANT IMPORTANT • • If the plug supplied is cut off it should be destroyed. There is an electric shock hazard if Maximum rating : a cut off plug is inserted into a 13 amp socket. No earth required.
- Page 4 Assembly Instructions - Handles Fitting the Lower Handles to your Lawnmower (A) Fitting the Upper Handle to the Lower Handle (B) (A1) (B1) (B2) (B3) (B4) (B2) (A2) (A3) (A4) (A4) Assembly Instructions - Grassbox Assembling the Grassbox Screen (See Figures C1 - C2) DO NOT CUT OR SEPARATE THE 3 PARTS OF THE GRASSBOX SCREEN (C1)
- Page 5 Starting and Stopping To Start your Lawnmower The switchbox is provided with a lock-off button (K1) to prevent accidental starting. • NOTE:There are two start/stop levers fitted. Either one can be used for starting the lawn- mower. • IMPORTANT Do not use the start/stop levers intermittently To Stop your Lawnmower How to Mow Do Not Overload Your Mower...
- Page 6 Adjusting the Cutting Height REMEMBER all 4 wheels must be adjusted to Switch off your the same height. lawnmower, wait until the blade has stopped rotating and disconnect from the mains electricity supply BEFORE To Produce a Striped Effect on Your Lawn adjusting the cutting height.
- Page 7 We strongly recommend that your product is serv- iced at least every twelve months, more often in a professional application. All of the centres listed stock genuine Flymo Spare Parts. NOTE: Our Service Repairers act on their own behalf and are not empowered to commit or legally bind Electrolux Outdoor Products in any manner whatsoever.
- Page 8 NEWTON AYCLIFFE, NEWTON AYCLIFFE, NEWTON AYCLIFFE, ..Electric Wheeled Rotary .....Electrolux Outdoor Products ..Rotary Blade ............. VT350 ..See Product Rating Label ..........35 cm ..ANNEX VI ... 2,950 RPM ......I.T.S., Cleeve Road, Leatherhead, ....88 dB (A) Surrey. KT22 7SB England .....
Need help?
Do you have a question about the VT350 and is the answer not in the manual?
Questions and answers