Table of Contents
Advertisement
Quick Links
Advertisement
Table of Contents

Related Manuals for Focusrite Scarlett 18i20 4th Gen


Summary of Contents for Focusrite Scarlett 18i20 4th Gen
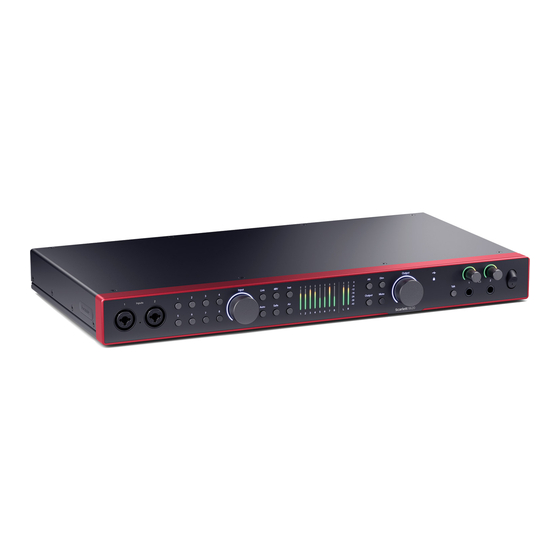
- Page 1 Version 1.0 Scarlett 18i20 4 The Studio 18-in, 20-out interface User Guide...
-
Page 2: Table Of Contents
Scarlett 18i20 4th Gen User Guide Table of Contents Scarlett 18i20 Overview ........................................4 Introduction . - Page 3 Scarlett 18i20 4th Gen User Guide Logic and GarageBand ......................................36 Pro Tools .
-
Page 4: Scarlett 18I20 Overview
• Set your levels in seconds, and never lose a great take again with Auto Gain and Clip Safe. To check we support Focusrite Control 2 on your operating system (OS) please use our Help Centre’s compatibility articles: • Re-engineered Air mode with Presence and Harmonic Drive. -
Page 5: Getting Started With Your Scarlett 18I20
During Easy Start, you'll install Focusrite Control 2. After you install and open Focusrite Control 2, click 'Update Scarlett 18i20'. Do not disconnect your Scarlett while Focusrite Control 2 updates it. After the Focusrite Control 2 update is complete, the Scarlett no longer appears as a Mass Storage Device on your computer. -
Page 6: Mac
During Easy Start, you'll install Focusrite Control 2. After you install and open Focusrite Control 2, click 'Update Scarlett 18i20'. Do not disconnect your Scarlett while Focusrite Control 2 updates it. After the Focusrite Control 2 update is complete, the Scarlett no longer appears as a Mass Storage Device on your computer. -
Page 7: What Is Focusrite Control 2
We occasionally update your Scarlett 18i20's firmware with new features and improvements, to Note make sure you are getting the most from your Scarlett. Focusrite Control 2 updates your Scarlett On Windows, installing Focusrite Control 2 also installs the driver. You can 18i20's firmware. -
Page 8: Manual Registration
Easy Start, updates your Scarlett 18i20 's firmware, and unlocks your Scarlett 18i20's full feature set. In Easy Start mode, the interface functions at up to 48 kHz sample rate; once you install Focusrite Control 2, you can work at sample rates up to 192 kHz. -
Page 9: Hardware Features
Scarlett 18i20 4th Gen User Guide Hardware Features Front Panel Input 1 Neutrik® Combo XLR and 6.35mm (1/4") jack connector. Accepts XLR mic-level 14. Alt button - press the Alt button to route the signal going to the first monitor output inputs, or unbalanced mono (TS) and balanced Mono (TRS) 1/4"... - Page 10 Scarlett 18i20 4th Gen User Guide Back Panel Power input - A standard IEC power input. Line Outputs 1-10 - Neutrik® 1/4" jack (TS or TRS) sockets to connect your Scarlett to line- level inputs on devices such as monitor speakers, amplifiers, mixers or external processors.
-
Page 11: Your Scarlett 18I20'S Front Panel In Depth
Your Scarlett 18i20's front panel in depth Software Gain Control You can also control the preamp gain remotely using Focusrite Control 2. This section covers all the features on your Scarlett 18i20's front panel, what they do, how you might use them, and how they work in Focusrite Control 2. -
Page 12: Select (1-8) Buttons
Scarlett 18i20 4th Gen User Guide Select (1-8) Buttons Many front panel controls on your Scarlett 18i20 are shared across the preamp inputs. The select buttons, labelled 1 to 8 move the preamp controls to different inputs. At least one preamp is always selected, to change which preamp(s) the controls are affecting, press one of the buttons labelled 1 to 8. - Page 13 To link preamps from Focusrite Control 2, click the link icon at the top of the channel strip When you link two preamps, the link icon turns green , one set of preamp controls disappears, and the meters for each channel merge to form a stereo meter.
-
Page 14: Button (Phantom Power)
48V (Phantom Power) Software Control To enable 48V (Phantom Power) from Focusrite Control 2 click the +48V button for the input you want to enable it on. This is the same as pressing the 48V button on the Scarlett 18i20 hardware. -
Page 15: Auto Gain
Scarlett 18i20 4th Gen User Guide Instrument/Line Software Control Auto Gain To change inputs 1 or 2 between instrument and line from Focusrite Control 2 click Auto Gain allows you to send a signal into your Scarlett 18i20 (for example singing or playing the Inst button once. - Page 16 Auto Gain Software Control To use Auto Gain in Focusrite Control 2: Click the Auto Gain button in Focusrite Control 2. Speak or sing into the microphone or play your instrument during the Auto Gain countdown. Perform as you would while you're recording to make sure Auto Gain sets...
-
Page 17: Multichannel Auto Gain
The gain returns to the value you set before starting Auto Gain. Click Start Auto Gain. Once Auto Gain has finished, Focusrite Control 2 shows the channels that have been set and their Multichannel Auto Gain in Focusrite Control 2 new gain levels: You can also run multichannel Auto Gain from within Focusrite Control 2. -
Page 18: Clip Safe Button
96,000 times a second, and through a combination of analogue preamp adjustment and DSP, Clip Safe significantly reduces the risk of clipping. Clip Safe Focusrite Control 2 To enable Clip Safe from Focusrite Control 2, click the Safe button: Safe off Safe on... -
Page 19: Air Modes
96kHz Air circuit. Air Software Control To enable AIR from Focusrite Control 2 click the Air button. This is the same as pressing the Air button on the Scarlett 18i20 hardware. Air Off Air Presence selected Air Presence and Drive selected When you click Focusrite Control 2's Air button, the last selected Air mode becomes activated. -
Page 20: Speaker Switching (Alt)
Output control for each set of speakers to match their volume. When you disable and re-enable Speaker switching, or restart your Focusrite Control 2, the Alt Output level resets to -48dBFS. -
Page 21: Dim Button
The Dim button is useful to help allow conversation or to try ideas in the room without stopping playback. By default, Dim affects the Main monitor outputs 1 and 2, but in Focusrite Control 2 you can Mute off (white). -
Page 22: Output Control And Level Meters
Output control dial Focusrite Control 2 Output section On the right-hand side of Focusrite Control 2 the Output section is a visual representation of the Output control and level meters. The dial in Focusrite Control 2 is a software representation of the Output control on your Scarlett 18i20's front panel. - Page 23 Scarlett 18i20 4th Gen User Guide Speaker Switching (Alt) software control The Output section allows you to control the Alt, or speaker switching, function. Click Main or Alt to switch between your Main or Alt monitors. For more information, see Speaker Switching (Alt) [20].
-
Page 24: Sync Status And Using Your Scarlett With Adat And S/Pdif
The Sync Status icon on the front panel lights green when your Scarlett 18i20 is 'locked' or In these examples, we’ve used Focusrite products to demonstrate ADAT and S/PDIF 'synchronised' to a clock source. digital expansion. But remember, ADAT and S/PDIF are universal standards. So, any device with digital ADAT or S/PDIF outputs will work with your Scarlett’s digital inputs. - Page 25 Scarlett 18i20. Set the ADAT preamp clock to Internal and your chosen sample rate. In Focusrite Control 2, set the Scarlett 18i20 clock to ADAT and match the sample rate to the ADAT preamp. In your DAW, set your channels to inputs 13 - 20, these are the eight ADAT inputs.
- Page 26 Set the ADAT preamp clock to ADAT and your chosen sample rate. In Focusrite Control 2, set the Scarlett 18i20 clock to Internal and march the sample rate to the ADAT preamp.
- Page 27 Scarlett 18i20 4th Gen User Guide Setup 3 - Using more than one expansion device In this setup, we’re using two expansion devices: an ADAT device and an S/PDIF device. For ADAT, Connect a second S/PDIF cable from the Scarlett 18i20's S/PDIF Out to the S/PDIF you might use a preamp like an OctoPre or a mic preamp.
-
Page 28: Talkback Button
When you enable Talk, the rest of the outputs in the mix dim, by 25dB, to make it easier to hear the talkback microphone. You can change the Talkback routing in Focusrite Control 2 to feed any combination of mixes. By default, the Talk button is ‘momentary’ – talkback is only active while you hold the button. -
Page 29: Headphone Outputs
The mix you've created is now being sent to the headphones output you selected. You can control the overall level using the headphones control on the Scarlett or in software. You can control different parts of the mix using the Mix in Focusrite Control 2. -
Page 30: Your Scarlett 18I20'S Back Panel In Depth
This section covers all the features on your Scarlett 18i20's back panel, what they do, how you MIDI IN receives MIDI signals from keyboards or controllers; MIDI OUT sends MIDI information to might use them and how they work in Focusrite Control 2. Synths, Drum machines or MIDI-controllable equipment. -
Page 31: Speaker Outputs
Output control. You can assign these outputs to be controlled by the Output control. You can set the signals available at these outputs using Focusrite Control 2, and use the outputs to drive additional speakers in a multichannel monitoring system, such as a subwoofer or to send signals to outboard effects processors. -
Page 32: Setting Up Your Daw (Recording Software) With Your Scarlett 18I20
Scarlett 18i20 4th Gen User Guide Setting up your DAW (Recording Software) with your Scarlett 18i20 The Scarlett is compatible with any ASIO-supported DAW on Windows and any Core Audio- supported DAW on macOS. It is also compatible with non-ASIO applications but your channel count may be limited. -
Page 33: Ableton Live
Do the same for the Output Config, if you are using multiple outputs from your Scarlett 18i20. Go to the Audio tab on the left-hand side of the Preferences window. Set the Driver Type to ASIO, and Audio Device to Focusrite USB ASIO. Close the Preferences Window. Open Ableton Live on your computer. -
Page 34: Click Settings
Go to the Audio tab on the left-hand side of the Preferences window. Click OK. Set the Audio Input Device and Audio Output Device to Scarlett 18i20 4th Gen. Do the same for the Output Config, if you are using multiple outputs from your Scarlett 18i20. - Page 35 Scarlett 18i20 4th Gen User Guide Getting sound into Ableton Click to highlight an Audio Track in Live's main window. Live had two views (Session and Arrangement), so depending on which view you are in, please see the following screenshots.
-
Page 36: Logic And
Scarlett 18i20 4th Gen User Guide Logic and GarageBand To get set up in Logic Pro and GarageBand follow these steps: Open Logic Pro or GarageBand on your computer (you may be prompted to Choose a project, you can choose an Empty Project or use a template). -
Page 37: Pro Tools
Click the main Record Enable button at the top of the Pro Tools window, it turns red when enabled Select Focusrite USB ASIO (Windows) or Scarlett 18i20 4th Gen in the Playback Engine Click the Play button to begin recording. -
Page 38: Reaper
Select ASIO in the Audio system: dropdown. Reaper Select Focusrite USB ASIO in the ASIO Driver: dropdown. To get set up in Reaper, follow these steps: Set the first and last input and output range to match the number of inputs Windows you want to use. - Page 39 Scarlett 18i20 4th Gen User Guide Click the red record-armed button. If you don't see the pop-up, go to Options (top menu) > Settings > Device Click the Input 1 box to select your input on your Scarlett 18i20. Choose Scarlett 18i20 in the Audio Device dropdown menu.
-
Page 40: Fl Studio
If you're not sure which option to choose, please see FL Studio's help files. Set the Device to Scarlett 18i20 4th Gen (or Focusrite USB ASIO on Windows) in the When you're ready to record, press the play button in the transport section. -
Page 41: Cubase
Configure the track type as Audio and set the Audio Input to the channel you're using on your interface. Click Audio System on the left-hand side. Set the ASIO Driver to Focusrite USB ASIO. Click Add Track. 10. Click the Record Enable and Monitor buttons... - Page 42 In the top menu bar click Studio > Studio Setup... Configure the track type as Audio and set the Audio Input to the channel you're using on your interface. Change the ASIO Driver to Scarlett 18i20 4th Gen. Click Add Track. 10. Click the Record Enable and Monitor buttons...
-
Page 43: Using Your Scarlett 18I20
Scarlett 18i20 4th Gen User Guide Using your Scarlett 18i20 This section covers some common use cases for the Scarlett 18i20. Often your use case is a Setup variant of these and how you use your Scarlett 18i20 probably reuses some principles. -
Page 44: Recording A Drum Kit
Scarlett 18i20 4th Gen User Guide Recording a drum kit • A pair of room microphones if your room has a good sound. • A mic on the hi-hats, if your drummer has a lot of intricate hi-hat work. In this section, we'll cover how you might use the eight mic preamps on your Scarlett 18i20 to mic up a drum kit. -
Page 45: Recording A Hardware Electronic Music Setup
Scarlett 18i20 4th Gen User Guide Recording a hardware electronic music setup Recording an acoustic session Using your Scarlett 18i20's line inputs, you can make it the central hub for recording in an In this section, we're covering how you might record an acoustic session, a stripped-back electronic music setup. -
Page 46: Using Your Scarlett 18I20'S Loopback Feature
Scarlett 18i20 4th Gen User Guide Using your Scarlett 18i20's Loopback feature The loopback feature on your Scarlett 18i20 allows you to send the sound produced by your computer and route it back into your Scarlett for recording or streaming, without using physical cables. -
Page 47: Using Focusrite Control 2 With Your Scarlett 18I20
Scarlett 18i20 4th Gen User Guide Using Focusrite Control 2 with your Scarlett 18i20 Focusrite Control 2 is the software you need to use to manage your Scarlett interface. Focusrite Control 2 manages your routing, monitoring, mixer settings, and firmware updates. -
Page 48: Mixes
Mixes Note At the top of Focusrite Control 2's Mixer you can see the different Mixes you have available listed You can only feed each Output from one Mix. For example, you can't send Mix A and as Mix A, Mix B, etc. -
Page 49: Using The Mixer Channels
Scarlett 18i20 4th Gen User Guide Using the Mixer Channels If you enable both Mute and Solo, the last clicked option takes priority. Each mixer channel has several functions. Mix Channel Name This shows the name of the mixer input. -
Page 50: Using The Focusrite Control 2 Routing Tab
Scarlett 18i20 4th Gen User Guide Using the Focusrite Control 2 Routing tab The routing tab in Focusrite Control 2 lets you organise what inputs and mixes you're sending to the outputs of your Scarlett. When you open the Routing tab, you'll see a list of Sources and Outputs: •... -
Page 51: Using Presets In Focusrite Control 2
Click Save Preset. • Air mode. Once you've saved the preset, the name of the preset shows in the bottom left corner of Focusrite • Mixer settings Control 2. If you change any setting while you're in that preset, the name shows an asterisk *. -
Page 52: Loading A Preset
Loading a preset recalls a set of settings you've saved previously. Caution Deleting a Preset removes the preset from Focusrite Control 2. You cannot get it back Click the Presets button in the bottom left of Focusrite Control 2. and you can't undo this action. Deleting a Preset won't change your interface's settings. -
Page 53: Focusrite Control 2 Preferences
Use this tick box to opt into usage analytics to help us make Focusrite Control 2 better. Please see Privacy Policy for more information. -
Page 54: Remote Devices - Installing The Focusrite Control 2 Mobile App
Focusrite Control 2. The Focusrite Control 2 mobile app runs on Android and iOS, and you can download it from the Google Play Store or Apple App Store by clinking on this link or scanning the QR code on your mobile device: fc2.focusrite.com/mobile/download ... -
Page 55: Updating Focusrite Control 2 And Your Scarlett 18I20
Find your Scarlett on the Downloads website. There are two ways to make sure you have the latest Focusrite Control 2 version: Download Focusrite Control 2 for your operating system (Windows or Mac). Use the updater in Focusrite Control 2: Open the Downloads folder on your computer and double-click the Focusrite Control 2 installer. -
Page 56: Updating Your Scarlett 18I20
Scarlett 18i20 4th Gen User Guide Updating your Scarlett 18i20 We occasionally update your Scarlett 18i20's firmware with new features and improvements, to make sure you are getting the most from your Scarlett. Focusrite Control 2 updates your Scarlett 18i20's firmware. To update your Scarlett: Open Focusrite Control 2. -
Page 57: Scarlett 18I20 Specifications
Scarlett 18i20 4th Gen User Guide Scarlett 18i20 Specifications These specifications allow you to compare your Scarlett 18i20 with other devices and make sure Line Outputs (balanced) they’ll work together. If you’re not familiar with these specifications, don’t worry you don’t need Output impedance 200Ω... - Page 58 Scarlett 18i20 4th Gen User Guide Other I/O ADAT Eight channels at 44.1/49kHz Eight channels at 88.2/96kHz Disabled at 176.4/192kHz S/PDIF Two channels of coaxial S/PDIF. Up to 96kHz. Word Clock One BNC connector Output Front Panel Indicators Channel Selection...
-
Page 59: Channel Order
Scarlett 18i20 4th Gen User Guide Channel Order Dual-band - 88.2kHz and 96kHz Single-band - 44.1kHz and 48kHz DAW Input Hardware Input Optical: S/PDIF Mode Optical: ADAT Mode DAW Input Input Mic/Line/Inst 1 Mic/Line/Inst 1 Mic/Line/Inst 1 Mic/Line/Inst 2 Mic/Line/Inst 2... -
Page 60: Notices
For all troubleshooting queries, please visit the Focusrite Help Centre at support.focusrite.com. Copyright & Legal Notices Focusrite is a registered trademark and Scarlett is a trademark of Focusrite Group PLC. All other trademarks and trade names are the property of their respective owners. -
Page 61: Credits
Scarlett 18i20 4th Gen User Guide Credits Focusrite would like to thank the following Scarlett 4th Gen team members for their hard work in bringing you this product: Aarron Beveridge, Adam Watson, Adrian Dyer, Adrien Fauconnet, Alex Middleton-Dalby, Alice Rizzo, Alistair Smith, Andy Normington, Andy Poole, Andy West, Arne Gödeke, Bailey Dayson,...
Need help?
Do you have a question about the Scarlett 18i20 4th Gen and is the answer not in the manual?
Questions and answers