Table of Contents
Advertisement
Quick Links
Advertisement
Table of Contents

Related Manuals for Otodynamics Otocheck LE


Summary of Contents for Otodynamics Otocheck LE
- Page 1 Otocheck User Manual Otocheck LE Issue 4.7...
- Page 2 No part of this publication may be copied by any means, translated or distributed to third parties without the express written permission of Otodynamics Ltd. Copyright © 2022 Otodynamics Ltd. All Rights Reserved. Otodynamics Ltd MDSS GmbH Schiffgraben 41, 30-38 Beaconsfield Rd...
-
Page 3: Table Of Contents
Contraindications Safety The importance of setting the appropriate stimulus levels Types of otoacoustic emissions OAEs and screening Training Equipment identification Supplied in Otocheck LE kit Optional accessory Controls, indicators and connections Labelling Getting started Initial charge Quickstart Using the keys... - Page 4 Test setup (TEOAE model) Selecting levels for DPOAE screening Test setup (DPOAE model) Controls Battery System 7.10 Printing When can you print? The Otodynamics mini printer The printing process Printer fault detection Printer light summary Paper Charging the printer Changing the battery...
- Page 5 Probe tips 10.3 Probe care Cleaning 11.1 Changing probe coupler tubes 11.2 Probes safety note 11.3 Care of the Otocheck LE Use of the Otocheck LE and cleaning 12.1 Care of cradle 12.2 Power Battery life 13.1 Initial charge 13.2 Standby 13.3...
- Page 6 CHAPTER ONE Introduction Obtaining service Calibration Mode of operation TEOAE model 17.1 DPOAE model 17.2 Technical specifications Otocheck LE 18.1 Electromagnetic compatibility - User Guidance 18.2 Electromagnetic compatibility - Technical Description 18.3 EN60645-3 conformance notes 18.4 End of life management 18.5 Symbol explanations 18.6...
-
Page 7: Introduction
• Frequency band analysis • Long battery life Intended Use This Otodynamics Otocheck LE device is indicated for use when there is a requirement to screen for hearing disorders by objective and non-invasive means. TEOAE and DPOAE screening test results are automatically interpreted and a clear ‘Pass’... -
Page 8: What Do Oaes Test For
General guidance The screening functions of this instrument are especially suitable for use with infants. OAE screening functions include Otodynamics classic Quickscreen TEOAE technology and Rapid DPOAE technology (depending on the model). The device can be used in a wide range of different environments for example in the well-baby nursery, the NICU, a doctor’s office, an audiology... -
Page 9: General Use Precautions
A blocked microphone tube will prevent the Otocheck LE from sensing the stimulus level in the ear and from detecting the OAE. As a result the Otocheck LE may apply a louder than normal sound to the ear. -
Page 10: Contraindications
If the ear is not clean and dry the probe may be damaged. This misuse is not covered by warranty. All surfaces of the Otocheck LE may be cleaned with an alcohol based wipe or cloth with antiseptic fluid. Dry the device immediately with tissue. -
Page 11: Safety
Otodynamics Ltd. only selects materials for use in its instruments and accessories that have a proven track record of safe use in medical devices. All materials used in the manufacture of the Otocheck LE and applied parts meet the biocompatibility requirements of ISO 10993; in consideration of the likely nature and duration of contact of each material with both patient and user. -
Page 12: The Importance Of Setting The Appropriate Stimulus Levels
CHAPTER ONE Introduction The importance of setting the appropriate stimulus levels The correct stimulus setting is vital for effective hearing screening with OAEs and ABR. The optimum stimulus level for your screening programme will be one that identifies the vast majority of infants with abnormal ears, but only rarely wrongly reports a healthy normal ear as needing to be referred. -
Page 13: Types Of Otoacoustic Emissions
Otoacoustic emissions are sounds which can be recorded in the ear canals of functionally normal ears. This Otocheck LE can make two types of OAE measurements: Transient Evoked OAEs (TEOAEs) and Distortion Product OAEs (DPOAEs). The difference between the measurements is largely in the means used to generate and measure the emission, rather than in the source of the emission itself. -
Page 14: Training
12.1 Otocheck LE and cleaning). If a problem occurs during the operation of your Otocheck LE or a message or warning appears that you don’t understand, make note of the issue and messages provided. Refer these to your department lead, or directly to... -
Page 15: Equipment Identification
Otocheck LE User Manual Equipment identification Supplied in Otocheck LE kit REF LE-ST (TEOAE model) or LE-SD (DPOAE model) Otocheck LE REF OP-CAS Equipment case for Otocheck LE kit REF UGS UGS TEOAE probe Supplied with TEOAE model REF UGD... - Page 16 CHAPTER TWO Equipment identification REF PR-POUCH Drawstring probe pouch REF PR-CLIP Probe cable clip REF TPC TPC probe coupler tubes x 5 Supplied with TEOAE probe Re-order quantity: 10 or 100 REF DPC DPC probe coupler tubes x 5 Supplied with DPOAE probe Re-order quantity: 10 or 100 REF BGS BGS probe body and lid x 1...
- Page 17 Otocheck LE User Manual REF BGD BGD probe body and lid x 1 Supplied with DPOAE probe Re-order quantity: 10 Sample probe tips (box or pediatric screening kit) See chapter 10 Probe, tips and accessories for re-order codes REF ABR-CAV...
-
Page 18: Optional Accessory
CHAPTER TWO Equipment identification REF OP-INF Infection control sleeve Documentation pack Includes instrument and software manuals, quickstart and probe use guides Optional accessory REF OMP Otodynamics mini printer Wired and wireless models available`... - Page 19 Otocheck LE User Manual Otodynamics mini printer accessories and consumables 2.2.1 REF OMP-CAB Mini printer cable REF OMP-CHG Mini printer charger REF OMP-PAP Mini printer paper rolls Quantity: 10 REF OMP-PAP Mini printer self-adhesive paper rolls Quantity: 6...
-
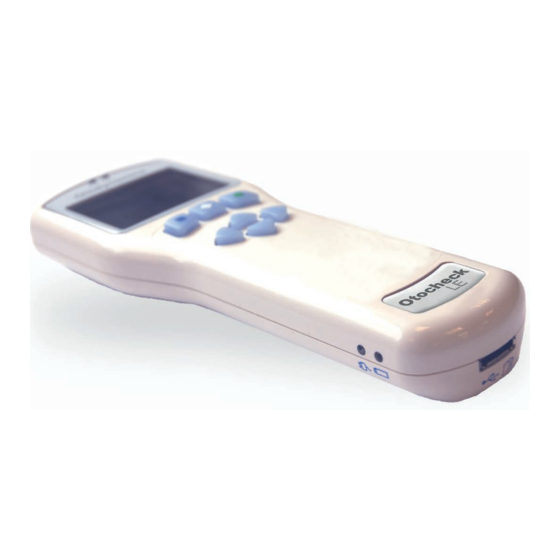
Page 20: Controls, Indicators And Connections
CHAPTER TWO Equipment identification Controls, indicators and connections Probe socket Stimulus OK (S) and Noise OK (N) indicators Display screen Menu selection keys Up/down/left/right navigation keys Charging status indicators Charger and PC cable socket... -
Page 21: Labelling
LE. Otocheck LEs belong to the Otoport family of products. The model is indicated by the letters after ‘OAE System’ on the top line. ‘LE-SD’ indicates an Otocheck LE model with firmware for screening with DPOAEs. ‘LE-ST’ indicates an Otocheck LE model with firmware for screening with TEOAEs. - Page 22 18.6 Unique Device Identifier (UDI) 2.4.2 The Otocheck LE OAE system complies with the unique device identifier system to aid the identification of medical devices within the healthcare supply chain. The UDI is to be found on the right side of the produce label, under the 2D barcode.
-
Page 23: Getting Started
Otocheck LE User Manual Getting started Initial charge Before using your Otocheck LE for the first time, fully charge the unit. See chapter Power for details. Quickstart The Quickstart guide, included as a separate item in your document pack, is shown on the next two pages. - Page 24 CHAPTER THREE Getting started QUICKSTART Otocheck LE Step 1. Setting up your Otocheck LE knurled sleeve With the arrow at the front, Press the button to turn Confirm within 2 seconds by connect the probe and on the Otocheck LE.
- Page 25 PRINT will appear. Up to Two blue LEDs light on the CANCEL. four results from the last Otocheck LE when conditions patient can be printed. All are good for testing. results are deleted when a new test session is started.
- Page 26 Do NOT turn the main probe Gently pull out the probe. To body. turn off press and hold the button. © Otodynamics Ref: MOLEQ-6 May 2019 Otodynamics Ltd 30-38 Beaconsfield Rd Hatfield Herts AL10 8BB UK 1639 www.otodynamics.com Email: support@otodynamics.com International: +44 (0)1707 267667...
-
Page 27: Using The Keys
Otocheck LE User Manual Using the keys Control keys 3.3.1 The keys directly below the screen marked with a square, a diamond or a circle enable you to execute the functions offered on the screens. Their functions vary from screen to screen, but generally the right (circle) key provides affirmative options and the left (square) key provides negative options. -
Page 28: Hard Reset
Configuration). Hard reset 3.3.5 In the unlikely event that the Otocheck LE fails to respond to any user control, you may need to RESET the device. To reset the device, while the unit is on, hold down the On/Off key AND the Down arrow key for 10 seconds. - Page 29 User Manual The arrow at the front of the probe plug indicates the position of the ‘key’ and should be aligned with the front of the Otocheck LE. Arrow It is possible to feel when the probe key is aligned as the probe will mate with the socket easily.
-
Page 30: Disconnecting The Probe
CHAPTER THREE Getting started Disconnecting the probe To disconnect the probe, unscrew the knurled sleeve in an anticlockwise direction until the thread is disengaged. Then gently pull the probe out from the probe socket. Turn knurled sleeve anti-clockwise Remove probe Important Note: Do NOT attempt to screw or unscrew the probe by holding the main probe body (smooth chrome section). -
Page 31: Switching On
Switching On Switch on screen To switch on the Otocheck LE press the On/Off power key found at the top left of the keypad. The display screen will show Switch Unit On?. Select Yes to confirm Otocheck LE switch on, or No to turn the unit off again. -
Page 32: Logo Screen
(see chapter Configuration). It is important that the date and time in the Otocheck LE are correct, especially if test results are printed. Enter Configuration mode, as above, to check and set the date and time. -
Page 33: Main Screen
Main screen After the Logo screen you will see the Main screen above. Note that Otocheck LE TEOAE models will show TEOAE at the top. The Main screen is where you begin testing a new patient. Begin testing by choosing your test ear by selecting LEFT or RIGHT. You will be returned to this screen when you finish testing a patient. -
Page 34: Test Preparation
Choose a quiet room, without background noises. Ensure the patient is comfortable and settled. Ensure you can clearly see the ear to be tested. Connecting the probe Prior to the testing session, connect the probe to the Otocheck LE. See section... -
Page 35: Tip Selection And Probe Fitting
OAE recordings. A good probe fit will help to block out external noise and enhance the OAE signal. The Otocheck LE is supplied with a full range of tips to fit all ear canal sizes. When selecting a tip, first inspect the ear to be tested to assess its size and to check that it is clear and free from debris. -
Page 36: Helpful Hints
CHAPTER FIVE Test preparation Fitting for children and adults 5.3.2 Line up the probe to 7 o’clock (for left ear) or 5 o’clock (for right ear). Push the probe firmly into the ear canal at this angle. Hold the probe for several seconds. Then release the probe. No discomfort should be felt by the patient. - Page 37 Testing should only be conducted in rooms where the noise level recording on the Otocheck LE is mainly below the noise reject level when the probe is not fitted in the ear. Some intermittent noise can be tolerated, but constant...
-
Page 38: Testing
Choose your test ear by selecting LEFT or RIGHT. After selecting the ear to be tested, the Otocheck LE will show the Checkfit display. You will not be able to start a test if the Otocheck LE is connected to a PC or power supply. -
Page 39: Checkfit
The size of ear canal detected in Checkfit is indicated by an arrow. During Checkfit the Otocheck LE repeatedly plays a click at a fixed level and records the sound level this click produces in the ear. - Page 40 CHAPTER SIX Testing If the position of the Fit Size Indicator corresponds with the age of the patient and Checkfit is displayed on the top of the screen then the probe fit and the test conditions are adequate for testing. The Stimulus and Noise OK indicators (above the screen) should also be illuminated.
- Page 41 Otocheck LE User Manual The following table describes what Highlighted Message will appear if more than one condition is met. Consistent Stimulus Out Stimulus Highlighted High Noise of Range Ringing Message Checkfit Noisy Check Probe Fit Ringing Check Probe Fit...
-
Page 42: Te Test (Teoae Model Only)
The longer the Otocheck LE records for, the easier it is to distinguish the OAE signal from the noise. The Otocheck LE looks at the ratio of the OAE signal to the noise;... -
Page 43: Test Screens
Efforts should then be made to improve the probe fit, check the probe coupler tubes are clear and improve the test environment. Probe checks should be conducted if the Otocheck LE fails to adjust correctly (see chapter Probe Checks). If stimulus adjustment is still unsuccessful, continuing the test may provide useful results but it is likely that the stimulus level will be incorrect. - Page 44 CHAPTER SIX Testing The letter below the indicator represents the noise reject threshold level. This can be altered using the up and down arrow keys between High (H), Medium (M) and Low (L). Noise rejection threshold can also be fixed at one level in the Config area (see chapter The noise level indicator allows continuous monitoring of the noise level during a test.
- Page 45 Otocheck LE User Manual Infant distraction screens 6.2.2.5 Animated distraction screens are available during a test by pressing the left and right arrow keys. Once displayed, different distraction themes can be accessed using the Infant distraction screens for up and down arrow keys. See section more details.
- Page 46 CHAPTER SIX Testing Test timeout 6.2.3.3 If a test has not met the set pass criteria and the noise is consistently above the Noise Reject Threshold Level so that the Maximum NLo Sweeps cannot be achieved, then the test will stop after 120 seconds, regardless of the amount of good data collected.
- Page 47 Otocheck LE User Manual Test results 6.2.4 The following table lists all possible test results with the associated result graphic and gives an explanation of the circumstances under which each result would be shown. Test Result Description TEOAE Pass The data collected has met the set pass criteria.
- Page 48 CHAPTER SIX Testing Test review 6.2.5 When the test has ended the Result screen will be shown, as described in 6.2.4 A large checkmark in the display indicates a pass. If more details of the test are required, these can be seen on the Review screens.
- Page 49 These screens are only available on the Otocheck LE immediately after a test has ended. If your Otocheck LE has the Print option, detailed results of up to four previous tests from the same session can be printed from the Main screen.
-
Page 50: Dp Test (Dpoae Model Only)
The longer the Otocheck LE records for, the easier it is to distinguish the OAE signal from the noise. The Otocheck LE looks at the ratio of the OAE signal to the noise;... - Page 51 SNR circles 6.3.2.1 The Otocheck LE looks at the ratio of the OAE signal to the noise; this is known as the Signal to Noise Ratio or SNR. The Otocheck LE measures the SNR in a number of different frequencies.
- Page 52 CHAPTER SIX Testing Noise level indicator 6.3.2.2 A noise level indicator is shown on the right of screen. The shaded bar moves in response to changes in noise and is high when there is excessive ambient noise or if the probe is fitted poorly in an ear. The bar displayed on screen will be green if it is acceptable i.e.
- Page 53 The Otocheck LE will beep once if a test has stopped with a DPOAE Pass result and will beep twice if the test has stopped with any other result.
- Page 54 CHAPTER SIX Testing Test timeout 6.3.3.2 If a test has not met the set pass criteria then the test will stop after 60 seconds. Manual end 6.3.3.3 Selecting End at any time will stop the test. Pausing and cancelling the test 6.3.3.4 You may wish to pause a test for instance during periods of noise.
- Page 55 Otocheck LE User Manual Test results 6.3.4 The following table lists all possible test results with the associated result graphic and gives an explanation of the circumstances under which each result would be shown. Test Result Description DPOAE Pass The data collected has met the set pass criteria.
- Page 56 Example review screens for a 3 band Pass on the DPOAE model are shown below. The default configuration for DPOAE is Any 3 bands. See section for DPOAE configuration options. These screens are only available on the Otocheck LE immediately after a test has ended.
- Page 57 Otocheck LE User Manual If your Otocheck LE has the Print option, detailed results of up to four previous tests from the same session can be printed by selecting the REVIEW button from the main menu, and selecting PRINT on the test you wish to print (see chapter 8).
- Page 58 CHAPTER SIX Testing Further tests on the same patient (Retest) 6.3.6 After you have completed a test you may want to repeat the test or move to the other ear. If you want to start another test on the same patient, select Retest on the Result screen or on the Review screen.
-
Page 59: Infant Distraction Screens
The distraction screen may be locked so that the arrow keys do not function. The Otocheck LE can then be given to a child to view without the risk of them stopping the test. key to LOCK the screen. Unlock is child proofed. To unlock Press the UNLOCK key and the up arrow simultaneously. -
Page 60: Configuration
CHAPTER SEVEN Configuration Configuration TRAINING REQUIRED Configuration menu The Configuration menu can be accessed by selecting Config on the logo screen after switching on. Select Date & Time to set or check the date and time set on the Otocheck. Select Test Setup to change test settings, including pass criteria. -
Page 61: Date & Time
Select Save to set the current date and time settings or Cancel to discard changes. Selecting the appropriate stimulus level Otodynamics instruments differ in the facility to change stimulus levels. Where the stimulus is pre-set and unchangeable on a screening instrument, the stimulus level will have been chosen on the basis of independent trials reported in the literature which reliably alerts to the possibility of a mild loss. -
Page 62: Selecting Levels For Teoae Screening
CHAPTER SEVEN Configuration Selecting levels for TEOAE screening • For TEOAEs a peak equivalent stimulus level of 84dBSPL has been extensively tested in controlled screening trials and found to detect mild losses. This level is currently adopted by major infant screening programs, as the initial screen, followed up by AABR screening at either 35 or 40dBHL. - Page 63 Otocheck LE User Manual The fixed and configurable test parameters are summarised in the tables below: Configurable test parameters Name Any 2 Any 3 Any 4 Narrow Min pass bands None Min total (wide band) SNR None None None Min SNR per...
-
Page 64: Selecting Levels For Dpoae Screening
CHAPTER SEVEN Configuration Selecting levels for DPOAE screening • For DPOAEs L1, L2 levels of 65/55dBSPL is most commonly used for hearing screening. Many studies have confirmed the appropriateness of these levels. • Gorga et al found that L1/L2 stimulus levels of 65/55dBSPL “resulted in the greatest separation between normal and impaired ears. - Page 65 Otocheck LE User Manual Select Save to apply the settings changes you have made and return to the Configuration screen. Select Cancel to discard changes made to date and time settings and return to the Configuration screen. DP levels 7.7.1 This sets the target stimulus levels for the tones L1 and L2 that are represented during the test.
-
Page 66: Controls
CHAPTER SEVEN Configuration Controls Volume 7.8.1 Use the left and right arrow keys to decrease or increase the Volume level. To turn the sound off press the left arrow key repeatedly until Sound Off appears in the centre of the display. Select Save to accept the new Volume level. -
Page 67: Battery
The battery graphic is also displayed on the Logo screen to inform the user of the Battery Power every time the device is switched on. Select condition to discharge the Otocheck LE battery. See chapter Otocheck LE power for more information. -
Page 68: System
14.3 About 7.10.3 The About screen provides information relating to the Otocheck LE’s identification and mode of operation. The firmware revision number and issue date is stated, together with the unit’s unique hardware ID. If a probe is connected, the Probe ID will also be displayed for reference. -
Page 69: Printing
Otocheck LE User Manual Printing When can you print? The option to print the last completed test is available from the Results screen shown at the end of each test. The option to print up to four tests on the same patient is only available after the test session with the current patient is finished. - Page 70 Saved test records from the previous test session (i.e. the previous patient) are deleted when a new test session is begun from the Main screen, or if the Otocheck LE is switched off. Only Otocheck LEs supplied with the Otodynamics mini printer and firmware with printing enabled can print test results.
-
Page 71: Sample Prints
Otocheck LE User Manual Sample prints 8.1.1 Each print begins with a form which allows the user to manually add details of the patient, tester and other information. A test sequence number is included at the bottom of the print. -
Page 72: The Otodynamics Mini Printer
Printing The Otodynamics mini printer Otocheck LE is available with or without the Otodynamics mini printer. The printer is used to create a paper record of the OAE test results recorded on the Otocheck LE. The Otocheck LE either communicates with the printer using Bluetooth ®... - Page 73 LE must be closed before printing on another Otocheck LE can begin. Print sessions are closed when the Otocheck LE screen shows the main menu, or when the Otocheck LE or the printer has been switched off. If printing is attempted while a previous session is still open, the Printer not found! screen will be displayed.
- Page 74 To retry the print, ensure the printer is switched on and is within range (5m). Then select Retry. If printing wirelessly and you have an alternative printer available, select Alter. and the Otocheck LE will connect to this printer. To cancel the printout, select Cancel.
-
Page 75: Printer Fault Detection
Printer fault detection The printer can detect if the paper roll has run out, or if the lid is open. Under these circumstances the Otocheck LE will report the printer is out of paper and the following message will be displayed. -
Page 76: Paper
CHAPTER EIGHT Printing Paper When the printer is switched on, the button provides a paper feed function. A double press of the button will initiate a test print. The printer is supplied with spare paper rolls. To change the printer roll, pull the lid release catch (1) forwards with your thumb and the paper roll lid will spring open. -
Page 77: Charging The Printer
The printer light will flash green/red when the batteries are low. Note: The printer charger is not medically approved. The Otocheck LE must not be in patient contact if connected to the printer whilst the printer is charging. -
Page 78: Changing The Battery
4 AAA batteries, is provided with the printer. Alternatively a new battery pack can be obtained from your dealer or Otodynamics. To change the battery pack: Remove the screw (1) from the battery compartment cover. Push down, and slide back the battery compartment cover (2). -
Page 79: Probe Checks
User Manual Probe checks Damage or malfunction of the Otocheck LE or the probe can lead to errors in OAE recording. To ensure that any faults are detected before they lead to faulty data collection, the following tests can be performed. - Page 80 The probe outputs sound at 1, 2 and 4kHz via its loud speaker(s). There is one loud speaker in the UGS (TEOAE) probe and two in the UGD (DPOAE) probe. The Otocheck LE compares the response at each frequency against an absolute range and probe specific values stored on the probe connected.
- Page 81 Probe Test, by selecting Retest, ensuring the ear piece is firmly inserted in the test cavity. If the test continues to fail there may be a fault with the probe or system. Contact your dealer or Otodynamics for advice.
- Page 82 It may be possible for the probe calibration to be adjusted if the probe is returned to Otodynamics. Noisy 9.1.1.4 There was significant noise during the calibration test.
- Page 83 Otocheck LE User Manual Details 9.1.1.5 The full test result can be viewed by selecting Details. The details screen shows the levels recorded from the probe loud speaker at each frequency tested. The NEW column shows the levels just recorded and the OLD results are the levels that are stored in the probe.
-
Page 84: Cavity Test
Follow the instructions in for inserting the probe into the test cavity. Start a test on the Otocheck LE as you would for an ordinary ear (see Testing). chapter Follow the Checkfit and Test screen sequences until the test stops. In a cavity the Checkfit screen should indicate a large cavity volume. -
Page 85: Occlusion Test
Otocheck LE User Manual Occlusion test If the probe coupler is not fitted correctly, sound may leak between the probe loudspeaker and microphone. The Occlusion Test helps to check that the probe is assembled and is performing correctly. To occlude the probe place a finger firmly over the end of the coupler tubes to block sound from being omitted from the ear piece and to prevent ambient noise from being read by the microphone. - Page 86 • Try recording emissions from another subject. If you are still unable to achieve a Real Ear OK result then, if the resources are available try recording with a different probe or with a different Otocheck LE. If the problem persists, contact your dealer or Otodynamics.
-
Page 87: Probe, Tips And Accessories
Probe and service accessories 10.1 Your kit will include either a TEOAE or DPOAE probe, with appropriate accessories and sample probe tips, depending on the Otocheck LE model purchased. Probe cable clip 10.2 The probe cable clip is provided to aid the practical aspects of positioning and securing the probe cable during OAE testing. - Page 88 CHAPTER TEN Probe, tips and accessories Place the probe cable in the slot and release the plunger. The position of the clip on the cable can be adjusted if necessary. Open the crocodile clothing clip. Attach the probe cable clip to the patient’s clothing. If the cable slips through the grip, turn the head to grip the cable.
-
Page 89: Probe Tips
Otocheck LE User Manual Probe tips 10.3 Samples of either TEOAE or DPOAE tips are provided with your instrument. Further supplies may be obtained from your distributor or from Otodynamics. TEOAE probe tips 10.3.1 T-T3E Fits ~3mm ear canal Small and premature newborns T5.5B... - Page 90 CHAPTER TEN Probe, tips and accessories DPOAE probe tips 10.3.2 R5.8B R4.8S T-R5.8B T-R4.8S Fits ~5.8mm ear canal Fits ~4.8mm ear canal Most newborns Small newborns R6.8B T-R6.8B T-R7M Fits ~6.8mm ear canal Fits ~7mm ear canal Large newborns and Infants and children first year infants T-R9M...
- Page 91 10.3.3 TRAINING REQUIRED All Otodynamics probe tips are disposable and MUST be discarded after each test. The probe coupler tubes should be visually examined for signs of contamination and the outer parts cleaned with an antiseptic wipe. Take care not to squeeze any cleaning fluid into the tubes.
-
Page 92: Probe Care
REQUIRED Cleaning 11.1 Otodynamics does not recommend the use of bleaches such as sodium hypochlorite based cleansers. The following is the suggested method of cleaning an Otodynamics probe. It should be noted that the probe is a precision assembly and, as such, care should be taken throughout in its handling and cleaning. - Page 93 Otocheck LE User Manual Disassembling the probe 11.2.1 First, unplug the probe from the instrument. Remove the tip and then the lid (fig. 1). Remove the coupler tubes by pushing the end of the tubes down onto a hard surface (fig. 2). Pull out the tubes by gripping them (fig.
-
Page 94: Probes Safety Note
Probe care Probes safety note 11.3 Probes are designed for use with an Otodynamics disposable tip. Use of a tip is essential. Use without a tip will expose the ear canal to the hard plastic sound tubes and this might cause injury. -
Page 95: Care Of The Otocheck Le
• Do not expose to moisture (keep it dry) Use of the Otocheck LE and cleaning 12.1 The following is a suggested cleaning method for the Otocheck LE and probe. The Otocheck LE and accessories are precision assemblies, so care should be taken throughout handling and cleaning. -
Page 96: Care Of Cradle
Ensure the Otocheck LE is cleaned if it becomes contaminated. Clean surfaces of the Otocheck LE with an alcohol based sterile wipe or cloth and antiseptic fluid. Dry the Otocheck LE with tissue immediately afterwards. Do not allow liquid to enter the instrument and do not immerse in fluid. -
Page 97: Power
Standby 13.3 To save power, the Otocheck LE will go into standby mode after 3 minutes of inactivity. The screen illumination will turn off. The Otocheck LE will not go into standby if a test is being performed. - Page 98 CHAPTER THIRTEEN Otocheck LE power If the Otocheck LE is left for 20 minutes in standby it will turn off. An audible beep will be emitted from the device for a period of 10 seconds to alert the user prior to the automatic shut down.
-
Page 99: Battery Charge
User Manual Battery charge 13.4 When the Otocheck LE is switched on, the opening screen shows a battery indicator which displays the remaining level of battery charge. The indicator has 5 segments which convey the total Battery Charge remaining. The battery segments are shaded according to the following criteria. - Page 100 Select OK to accept the message and return to the previous screen. It will not be possible to start a new test when the Otocheck LE has reached this level of charge. The Otocheck LE should be charged as soon as convenient.
-
Page 101: Charging The Otocheck Le
REQUIRED Observe the on-screen battery indicators to determine when to charge your Otocheck LE. In general it is advisable to charge the Otocheck LE batteries when the indicator is empty, showing less than 10% charge. However, the batteries should be at least 30% charged if a full day’s testing is planned. - Page 102 When the Otocheck LE is connected the display will show the current battery level. This screen is updated every minute to show how the charge is progressing.
- Page 103 Otocheck LE but it is not possible to run a test. When connected to a PC it is not possible to control the Otocheck LE. If the Otocheck LE is on when it is connected to a PC the current screen displayed will remain until the device is unplugged again.
-
Page 104: Conditioning The Otocheck Le Battery
Wait for the tick on the screen and for the charge light to extinguish, to confirm a full charge. Additional battery care 13.7 If the Otocheck LE is not in regular use, in order to maintain the battery, fully charge the device every two months. -
Page 105: Troubleshooting
Otocheck LE lock-up 14.1 In the unlikely event of an Otocheck LE lock-up and it is not possible to control the device, turn the unit off and switch it on again. If this is not possible, hold down the left softkey and the down arrow key for three seconds;... -
Page 106: Instrument Fault Message
In the event of an instrument fault, the following message will be displayed at the start a test. No stimulus will be delivered from the Otocheck LE probe and you will not be able to start a test. Turn off the device and then switch it on again. -
Page 107: Hardware Fault Messages
User Manual Hardware fault messages 14.6 The Otocheck LE performs a series of hardware tests when it is first turned on. In the event of a fault being detected the following message will be displayed: The error code number displayed indicates the type of error detected. You should make a note of this error number. -
Page 108: Obtaining Service
Obtaining service Otodynamics or its authorised distributor will replace or service, free of charge, this Otocheck LE within the period of warranty, where the fault is not associated with misuse. Servicing after that period will be provided at reasonable cost. - Page 109 Otocheck LE User Manual Calibration The Otocheck LE is a precision instrument designed to make accurate measurements of OAE responses. Before it leaves Otodynamics, each system supplied is calibrated using high quality acoustic measuring equipment traceable to national standards. Users should conduct the recommended weekly checks (see chapter Probe checks) to ensure the instrument is working correctly.
-
Page 110: Mode Of Operation
CHAPTER SEVENTEEN Mode of operation Mode of operation TEOAE model 17.1 Parameter Description Stimulus Idle 80µs positive broadband square wave pulse with an intensity of 64dB pe (peak equivalent) in a 1cc cavity. Adjusted 80µs positive broadband square wave. Test 300µs biphasic broadband triangular pulse. - Page 111 Otocheck LE User Manual Signal and noise calculation Measures of signal and noise levels are based on the correlation and differences between waveforms A and B. Stimulus repetition rate One stimulus every 13ms, approximately 80 stims per second. Response window 2.5-12.5 ms or 4-10ms after start of stimulus.
-
Page 112: Dpoae Model
CHAPTER SEVENTEEN Mode of operation DPOAE model 17.2 Parameter Description Checkfit stimulus 80µs positive broadband square wave pulse with an intensity of 64dB pe (peak equivalent) in a 1cc cavity. Sample rate 25.6kHz Sample buffer 80ms (gives 2048 points) FFT frequency bin 25Hz DP Noise calculation DP noise from the five spectral points above and... -
Page 113: Technical Specifications
90mm x 38mm x 28mm – Weight 120g Interfaces 18.1.2 Probe connector compatible with Otodynamics UGx probes (8 pin) Charging/Data connector - connects to Otodynamics PSU (charging) or to PC USB port (USB 1.1 or 2.0) via Data Cable Bluetooth wireless print (option) Indicators 18.1.3... - Page 114 Accuracy 18.1.10 The Otocheck LE measures the sound delivered to the ear as a stimulus and automatically adjusts its level to be equal to the nominal value set. This ‘in-the-ear’ calibration process compensates for different ear canal sizes. It is most effective below 3kHz.
- Page 115 Relative Humidity: Noncondensing: 10% to 90% Warm-up time: <10s when unit is stored within stated temperature range *Otodynamics instruments and probes are calibrated at an ambient pressure of 101kPa (standard atmospheric pressure at sea level). Lowering the ambient pressure significantly (e.g. when operating at altitude) alters the acoustic response of the probe.
- Page 116 Class IIa under rules 5 and 10 of Medical Device Directive [93/42/EEC] & [MEDDEV 2. 4/1 Rev. 9]. The Otocheck LE products are declared to be in compliance with the council directives 93/42/EEC Annex II (excluding Section 4), 93/68/EEC, 2001/104/EC and 2007/47/EC and new Regulation (EU) 2017/745 of 5 April 2017 on medical devices at the product level (taking account of the intended purpose of the devices concerned).
- Page 117 REACH regulations. • Otocheck LE packaging is recyclable. • The Otocheck LE medical device / system is not supplied sterile or intended to be sterilized by the user. It is recommended that probe tips, electrodes and ear cups are for SINGLE PATIENT use only.
-
Page 118: Essential Performance
Support information for this EMC 3.0 compliance is given in the Issue 4.0 Otocheck LE manual, available on request. In the rest of the world, the Otocheck LE has been tested and certified to the medical electromagnetic compatibility standard EN 60601-1-2:2015. - Page 119 (i) UGD or UGS probe, as supplied by Otodynamics; (ii) charger and mains lead, as supplied Otodynamics; (iii) PC download cable, as supplied by Otodynamics; (iv) electrode cables, as supplied by Otodynamics or equivalent. Maximum length 2m. Warning Use of accessories, transducers and cables other than those...
- Page 120 Electromagnetic compatibility - Technical 18.3 Description Compliance levels 18.3.1 The Otocheck LE has been tested and certified to the medical electromagnetic compatibility standard EN 60601-1-2:2015. Compliance levels are as below: (i) Electromagnetic emissions - complies with: CISPR 11:2015 EC 61000-2:2014 IEC 61000-3:2013 The instrument is group 1, class B for the purposes of CISPR 11.
-
Page 121: Specific Absorption Rate (Sar)
® module with the current antenna position of 8mm from the edge of the Otocheck LE case and firmware setting output power level to 13dBm. Measurements confirm that the Otocheck LE maximum RF Energy output is below the limits set forth... - Page 122 Europe Radio Equipment Directive (2014/53/EU) CE marking certification Silicon Labs Declaration of Conformity - DoC for WT11i and WT11u. Otodynamics Otocheck and Otocheck+ABR 3rd Body Test House Validation Safety & EMC measurements. The WT11u is Bluetooth ® qualified and the declaration ID is B016141 (QDID 22298).
- Page 123 SPL peak-to-peak equivalent, as defined in EN60645-3. (f) Signal levels: The following conversion factors convert between the stimulus level reported on the Otocheck LE screen and the signal level in the IEC 60711 occluded ear simulator: rectangular stimulus: -6.1dB bipolar stimulus: -7.1dB...
- Page 124 The polarity of the stimulus varies between positive and negative, according to the TEOAE test sequence. (h) Repetition rate: The stimulus is repeated every 12.5mS during standard Otocheck LE TEOAE setup and testing. (i) Covered in (a) above (j) Covered in (f) above...
- Page 125 • No hazardous materials are included in the Otocheck LE. • No Ozone Depleting Substances are used by the Otocheck LE. • No Latex is included in the Otocheck LE. The Otocheck LE does not contain any phthalates. • Local guidance for disposal of medical devices should be followed, for example in the UK follow the NHS Healthcare (clinical) Waste National guidelines.
-
Page 126: Symbol Explanations
CHAPTER EIGHTEEN Technical specifications Symbol explanations 18.6 Symbol Description Class II Type BF Bluetooth ® enabled Caution USB 1.1 When discarded, the item must be sent to separate collection facilities for recovery and recycling Probe socket Battery charging indicator Power supply connection Stimulus OK indicator Noise OK indicator... - Page 127 REQUIRED Note: The Bluetooth word mark and logos are registered trademarks ® owned by Bluetooth SIG, Inc. and any use of such marks by Otodynamics Ltd. is under license. Other trademarks and trade names are those of their respective owners...
- Page 128 Changing the printer battery 78 Charger and PC cable socket 20 Electromagnetic compatibility 118 Charging status indicators 20 Electromagnetic (EM) immunity 118 Charging the Otocheck LE 101 EN60645-3 conformance notes 123 Charging the printer 77 End of life management 125 End the test 54...
- Page 129 Noise rejection calculation 112 Frequency ratio 112 Noisy 40, 82 Hard reset 28 Occlusion test 85 Hardware fault 107 Otocheck LE lock-up 105 Hardware processing and storage 114 Paper 76 Infant distraction screens 45, 53, 59 Pass 81 Initial charge 97...
- Page 130 CHAPTER NINETEEN Index Radio receivers 121 TEOAE Pass 47 Radio transmitters 121 Test condition information 44, 52 Real ear test 85 Test result 47, 55 Reassembling the probe 93 Test review 48, 56 Regional standards 122 Test screens 43, 51 Regulatory marks 22 Test settings 62 Response buffer averaging 110...
Need help?
Do you have a question about the Otocheck LE and is the answer not in the manual?
Questions and answers