
Related Manuals for Canon Cassette Module-AG1


Summary of Contents for Canon Cassette Module-AG1
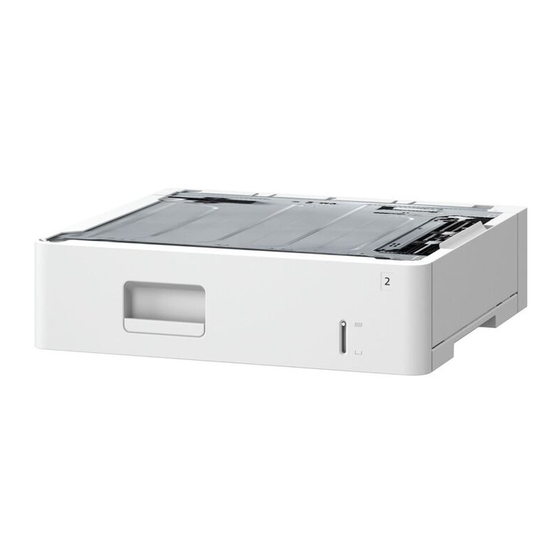
- Page 1 Cassette Module-AG1 / Envelope Cassette Module-A1 SERVICE MANUAL Canon July 20, 2018 Rev. 1 CANON Cass. Mod.-AG1/Env. Cass. Mod.-A1 Rev. 1 PRINTED IN U.S.A. COPYRIGHT 2018 CANON INC. ©...
-
Page 2: Explanation Of Symbols
When changes occur in applicable products or in the contents of this manual, Canon will release technical information as the need arises. In the event of major changes in the contents of this manual over a long or short period, Canon will issue a new edition of this manual. - Page 3 Introduction Symbols Explanation Symbols Explanation Disconnect the connector. Connect the power cable. Connect the connector. Disconnect the power cable. Remove the cable/wire from the Turn on the power. cable guide or wire saddle. Install the cable/wire to the cable Turn off the power. guide or wire saddle.
-
Page 4: Table Of Contents
Contents Contents Safety Precautions....................1 1. Product Overview.....................2 Specifications............................3 Cross Section View..........................4 2. Technology....................... 5 Basic Configuration..........................6 Parts Configuration..........................6 Paper Path............................7 Controls............................... 8 Paper Size Detection..........................8 Paper Level/ Presence Detection Control....................8 Lifter Control............................9 List of Jams............................10 3. - Page 5 5. Adjustment..................... 29 Image Position Adjustment........................30 Cassette Left Edge Margin Adjustment (1st Side)..................30 Cassette Left Edge Margin Adjustment (2nd Side).................30 Leading Edge Margin Adjustment (1st Side)..................31 Leading Edge Margin Adjustment (2nd Side)..................31 APPENDICES......................32 GeneralCircuit Diagram........................33 Cassette Module-AG1/Envelope Cassette Module-A1................33...
-
Page 6: Safety Precautions
Safety Precautions... -
Page 7: Product Overview
Product Overview Specifications........3 Cross Section View....... 4... -
Page 8: Specifications
1. Product Overview Specifications Cassette Module AG1 Item Specification Paper accommodation Front loading Paper Feeding Method Retard separation method Stacking capacity 550 sheets (75/80 g/m Paper feed reference Center reference Paper Type Thin ( 60 g/m ) , Plain ( 61-105 g/m ) , Recycled ( 75-89 g/m ) , Heavy ( 106-135 g/m >... -
Page 9: Cross Section View
1. Product Overview Cross Section View Cassette Module-AG1 Cassette 2 Pickup Sensor Cassette 2 Feed Roller Cassette 2 Paper Sensor Cassette 2 Separation Roller Cassette 2 Pickup Roller Cassette Module-AG1 Envelope Cassette Module-A1 Cassette 2 Pickup Sensor Cassette 2 Feed Roller... -
Page 10: Technology
Technology Basic Configuration....... 6 Controls..........8... -
Page 11: Basic Configuration
2. Technology Basic Configuration Parts Configuration Layout Drawing of Rollers Cassette 2 Feed Roller Cassette 2 Separation Roller Cassette 2 Pickup Roller Sensors Layout Drawing Cassette 2 Pickup Sensor Cassette 2 Paper Sensor Diagram of Load Drives M202 SL501... -
Page 12: Paper Path
2. Technology Paper Path... -
Page 13: Controls
2. Technology Controls Paper Size Detection With the sliding of the Guide Plate, the Cassette Size Dial shifts between its peaks and valleys in accordance with the cassette's paper size. Paper size is detected according to the combination of ONs and OFFs of the PF Paper Size Switch-A and -B (SW603/604). SW603 SW604 Symbol... -
Page 14: Lifter Control
2. Technology PS603 PS602 Symbol Parts name Lifter Plate Paper Detection Flag Paper Surface Detection Flag Lifter Gear Lifter Motor PS602 PF Media Presence Sensor PS603 PF Lifter Sensor Because paper level is not detected by a software, it is shown in 2 levels on UI. Level display Level Paper Sensor... -
Page 15: List Of Jams
2. Technology • E015-0004: Cassette 4 Lifter Motor error List of Jams PS601 PS603 PS602 Sensors for Jam Detection Symbol Parts name PS601 PF Feed Sensor PS602 PF Media Presence Sensor PS603 PF Lifter Sensor... -
Page 16: Periodical Service
Periodical Service Periodically Replaced Parts....12 Consumable Parts List......13... -
Page 17: Periodically Replaced Parts
3. Periodical Service Periodically Replaced Parts Periodic replacement parts are not required in this machine. -
Page 18: Consumable Parts List
3. Periodical Service Consumable Parts List Cassette Module-AG Name Parts number *1 Quantity Estimated Work de- Parts counter Alarm code life *2 scription (service mode) at counter clear Intermedi- Sub item ate item 1 Roller Kit FM1-U030 225,000 Replace- DRBL-2 C2-FD-RL 43-0083 sheets... -
Page 19: Parts Replacement And Cleaning
Parts Replacement and Cleaning Cover (Cassette 2)......15 Main Unit (Cassette 2)......16 List of Electrical Parts (Cassette 2)..17 Removing the Cassette2 Rear Cover ............18 Removing the Cassette2 Left Cover... 19 Removing the Cassette2 Rear Inner Cover..........20 Removing the Cassette2 Right Door Unit.......... -
Page 20: Cover (Cassette 2)
4. Parts Replacement and Cleaning Cover (Cassette 2) Name Cassette2 Cassette2 Right Lower Cover Cassette2 Right Door Unit Cassette2 Rear Cover Cassette2 Left Cover... -
Page 21: Main Unit (Cassette 2)
4. Parts Replacement and Cleaning Main Unit (Cassette 2) Name Cassette2 Pickup Unit Cassette2 Drive Unit Cassette2 Lifter Drive Unit... -
Page 22: List Of Electrical Parts (Cassette 2)
4. Parts Replacement and Cleaning List of Electrical Parts (Cassette 2) M601 CL602 FDR PCA CL601 SW603 SW604 SW601 PS603 PS601 ENCODER1 PCA PS602 Name M601 Cassette2 Lifter Motor CL601 Cassette2 Pickup Clutch CL602 Cassette2 Feed Clutch PS601 Cassette2 Feed Sensor PS602 Cassette2 Paper Sensor PS603... -
Page 23: Removing The Cassette2 Rear Cover
4. Parts Replacement and Cleaning Removing the Cassette2 Rear Cover Procedure... -
Page 24: Removing The Cassette2 Left Cover
4. Parts Replacement and Cleaning Removing the Cassette2 Left Cover Preparation 1. Pull out the Cassette 2. “Removing the Cassette2 Rear Cover” on page 18 Procedure... -
Page 25: Removing The Cassette2 Rear Inner Cover
4. Parts Replacement and Cleaning Removing the Cassette2 Rear Inner Cover Preparation “Removing the Cassette2 Rear Cover” on page 18 Procedure... -
Page 26: Removing The Cassette2 Right Door Unit
4. Parts Replacement and Cleaning Removing the Cassette2 Right Door Unit Preparation 1. Pull out the Cassette 2. “Removing the Cassette2 Rear Cover” on page 18 Procedure... -
Page 27: Removing The Cassette2 Right Lower Cover
4. Parts Replacement and Cleaning Removing the Cassette2 Right Lower Cover Preparation 1. Pull out the Cassette 2. “Removing the Cassette2 Rear Cover” on page 18 “Removing the Cassette2 Right Door Unit” on page 21 Procedure... -
Page 28: Removing The Cassette2 Controller Pcb
4. Parts Replacement and Cleaning Removing the Cassette2 Controller PCB Preparation “Removing the Cassette2 Rear Cover” on page 18 “Removing the Cassette2 Rear Inner Cover” on page 20 Procedure... -
Page 29: Removing The Cassette2 Pickup Unit
4. Parts Replacement and Cleaning Removing the Cassette2 Pickup Unit Preparation 1. Pull out the Cassette 2. “Removing the Cassette2 Rear Cover” on page 18 “Removing the Cassette2 Right Door Unit” on page 21 “Removing the Cassette2 Rear Inner Cover” on page 20 Procedure... - Page 30 4. Parts Replacement and Cleaning...
-
Page 31: Removing The Cassette2 Drive Unit
4. Parts Replacement and Cleaning Removing the Cassette2 Drive Unit Preparation 1. Pull out the Cassette 2. “Removing the Cassette2 Rear Cover” on page 18 “Removing the Cassette2 Rear Inner Cover” on page 20 “Removing the Cassette2 Right Door Unit” on page 21 “Removing the Cassette2 Pickup Unit”... -
Page 32: Removing The Cassette2 Lifter Drive Unit
4. Parts Replacement and Cleaning Removing the Cassette2 Lifter Drive Unit Preparation 1. Pull out the Cassette 2. “Removing the Cassette2 Rear Cover” on page 18 “Removing the Cassette2 Rear Inner Cover” on page 20 “Removing the Cassette2 Right Door Unit” on page 21 “Removing the Cassette2 Pickup Unit”... - Page 33 4. Parts Replacement and Cleaning...
-
Page 34: Adjustment
Adjustment Image Position Adjustment....30... -
Page 35: Image Position Adjustment
5. Adjustment Image Position Adjustment Cassette Left Edge Margin Adjustment (1st Side) CAUTION: • Check the left edge margin with TYPE=5, black halftone. • When printing duplicate copies, 1st side is printed to the front of paper and 2nd side is printed to the back of paper. Copy from the cassette, and check that the left edge margin (L1) is within 2.5 +/- 1.5mm (for LTR/LGL: 4.2 +/- 1.5 mm). -
Page 36: Leading Edge Margin Adjustment (1St Side)
5. Adjustment Leading Edge Margin Adjustment (1st Side) CAUTION: • Check the left edge margin with TYPE=5, black halftone. • When printing duplicate copies, 1st side is printed to the front of paper and 2nd side is printed to the back of paper. Copy from the cassette, and check that the left edge margin (L1) is within 4.0 +/- 2.0mm. -
Page 37: Appendices
APPENDICES GeneralCircuit Diagram.......33... -
Page 38: Generalcircuit Diagram
GeneralCircuit Diagram GeneralCircuit Diagram Cassette Module-AG1/Envelope Cassette Module-A1 Cassette2 Pickup Unit CL602 CL601 PS601 PS602 PS603 Cassette2 Cassette2 Cassette2 Cassette2 Cassette2 Feed Clutch Pickup Clutch ENCODER1 PCA Feed Sensor Paper Sensor Lifter Sensor Encoder PCB1 J99BLH J99BL J5612 J5611 1 2 3...
Need help?
Do you have a question about the Cassette Module-AG1 and is the answer not in the manual?
Questions and answers