Table of Contents
Advertisement
Advertisement
Table of Contents

Related Manuals for TRENDnet TV-IP672W


Summary of Contents for TRENDnet TV-IP672W
- Page 1 Cover Page TRENDnet User’s Guide...
-
Page 2: Table Of Contents
Wireless Setup......................18 Dynamic DNS ......................19 Video and Audio ......................19 Video and Audio ...................... 20 Day/Night Mode ...................... 21 Audio Setup ......................21 Image Setup ......................21 Action ........................... 22 Recording ........................ 22 © Copyright 2011 TRENDnet. All Rights Reserved. -
Page 3: Product Overview
HD video while streaming low resolution video to a compatible smart phone at the same time. Manage up to 32 TRENDnet cameras with the included complimentary camera management software. Advanced features include adjustable motion detection recording areas, email alerts, scheduled recording sessions, pan/tilt Auto-Patrol, H.264/MPEG-4/MJPEG... -
Page 4: Product Hardware Features
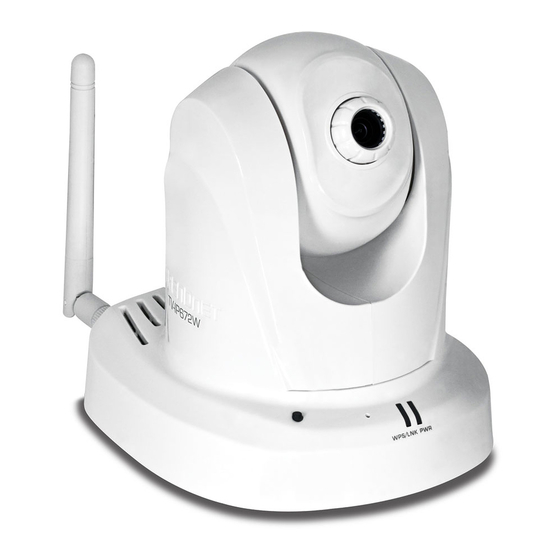
Link – This LED indicator is blinking orange when there is connection/data to Line Out – Connect speaker to enable audio out your camera. Micro SD Lot – Insert a Micro-SD card to store camera video files. Antenna – 2dBi detachable antenna © Copyright 2012 TRENDnet. All Rights Reserved. -
Page 5: Installation
Attach the included power supply to the DC 12V 1.25A receptor on the rear panel of the camera and then connect it to a wall outlet or power strip. A blue LED will light up under the lens indicating that the camera has power. © Copyright 2012 TRENDnet. All Rights Reserved. -
Page 6: Wall Mount Installation
Secure the metal plate to the base of the Camera with the two screws provided. The camera can now be mounted to the ceiling or a wall. See the diagram below for more information. © Copyright 2012 TRENDnet. All Rights Reserved. -
Page 7: Starting The Setup Wizard
When the installation of the Setup Wizard is complete, run the Setup Wizard: 1. Click Start > Programs > TRENDnet > SetupWizard > SetupWizard. The TRENDnet Setup Wizard appears. © Copyright 2012 TRENDnet. All Rights Reserved. - Page 8 Fixed IP: Select this option if your camera is directly connected to a DSL modem and your ISP has supplied you with a fixed IP for your Internet connection. Select the radio button for your connection type and click Next to continue. © Copyright 2012 TRENDnet. All Rights Reserved.
- Page 9 9. A summary screen of the settings you have chosen appears. Click Next to continue. You are now ready to use your camera. Click the IP address link or the link button to access the camera’s advanced configuration page. © Copyright 2012 TRENDnet. All Rights Reserved.
- Page 10 Select the type of authentication and encryption required by the access point and enter the Key required to connect. Check the radio button for the method of connection you want to use for your camera and click Next to continue. © Copyright 2012 TRENDnet. All Rights Reserved.
- Page 11 Next to continue. When the Setup Wizard has finished, the configuration is complete. If there is no wireless connection found, the following screen will appear: © Copyright 2012 TRENDnet. All Rights Reserved.
-
Page 12: Configuration
Web configuration utility is designed to allow you to easily access and configure your TV-IP672W or TV-IP672WI camera. Open a web browser such as Internet Explorer® and enter the IP address of your camera. To log in, use the User name admin and the password you created in the Setup Wizard. - Page 13 This profile, in grey, is inactive. Active Profile This profile, in yellow, is active. Full Screen Mode The viewable screen is expanded to full screen Snapshot Click this button to take a snapshot of your current viewing angle. © Copyright 2012 TRENDnet. All Rights Reserved.
-
Page 14: Setup Wizard
In DHCP Connection all fields are non-existent cause your router selects an IP address for you. Under Static IP address field to enter the IP address details yourself according to what your network provider gave you. Select the appropriate option and click Next to continue. © Copyright 2012 TRENDnet. All Rights Reserved. - Page 15 Host Name, User Name, and Password. Verify the password by entering your details again and then enter the Timeout settings in hours. Click Next to continue. If you do not want to use the DDNS settings uncheck the Enable checkbox and click Next. © Copyright 2012 TRENDnet. All Rights Reserved.
- Page 16 Auto Daylight Saving or Set date and time manually. Click Next to to exit without saving the settings. continue. The camera will gather and reboot the camera to its new settings © Copyright 2012 TRENDnet. All Rights Reserved.
-
Page 17: System
Enter a User Name, Password, and Verify the New Password.Click Add to continue. User List: Here you can select a user and click the Delete button to remove the user from your list. Device Management consists of Admin Password Settings: © Copyright 2012 TRENDnet. All Rights Reserved. - Page 18 Privacy Settings: Here you can enable/disable the Privacy button function. Under Automatic Time Configuration, click the Synchronize with NTP Server checkbox if you wish to sync your W/WI with your NTP server. Click Apply to continue. © Copyright 2012 TRENDnet. All Rights Reserved.
-
Page 19: Network
Under LAN Settings, select either DHCP Connection or Static IP Address. If you want to setup PPPoE, click the PPPoE checkbox and enter the Username, Password, confirm the Password and click Apply. The Status will change from Disabled to Enabled. © Copyright 2012 TRENDnet. All Rights Reserved. -
Page 20: Wireless Setup
WPA-PSK - is a more secured method of wireless encryption. With WPA-PSK you don’t provide your router with an encryption key but rather a paraphrase. WPA2-PSK – highly secured method of wireless encryption. © Copyright 2012 TRENDnet. All Rights Reserved. -
Page 21: Dynamic Dns
Host Name, with the profile icons in Live View. Setting up each profile individually gives the user User Name, Password, Confirm Password, and Timeout. Click Apply to set these better choice. changes and continue. © Copyright 2012 TRENDnet. All Rights Reserved. -
Page 22: Video And Audio
RTSP URL – play1.sdp Video Profile Four for Mobile Devices Only - Options: Encode Type – H.264 & MPEG4 Resolution – 640X400/320X192/160X96 FPS – 30/15/10/5/3/2/1 Encode Method – CBR/Quality © Copyright 2012 TRENDnet. All Rights Reserved. -
Page 23: Day/Night Mode
Audio Setup The TV-IP672W/TV-IP672WI allows users to record and broadcast audio. Click the Speaker checkbox to change the volume settings on the camera’s speaker. Click the Microphone checkbox and select your preference from the volume drop-down list. Click Apply to continue. -
Page 24: Action
Motion, click the Onlyduring checkbox. Then a calendar of the days of the week appears. Here you can click one of the day’s checkboxes and you can create a start and end time. The Recording Type changes to pre-record or pre-event settings. This means © Copyright 2012 TRENDnet. All Rights Reserved. -
Page 25: Video Clip
Folder (if needed) and enter the disk space needed. If you click the Account radio button then enter a Username and Password. This will authenticate the user every time they log on to the samba server. © Copyright 2012 TRENDnet. All Rights Reserved. - Page 26 Filename Prefix – the filename you are using to access the data or save the data to result will not be successful. Interval – The default interval range is 60-86400. The time the server interacts with your camera Passive Mode – Server/client initiation access to bypass proxies. © Copyright 2012 TRENDnet. All Rights Reserved.
-
Page 27: Snapshot
5. Click the Default Home button if you wish to use this configuration as your default home viewing area. 6. Preset Position – From the Preset Position drop-down menu, you can select the preset you created and delete it. © Copyright 2012 TRENDnet. All Rights Reserved. - Page 28 4. For each Patrol Position you can adjust the Pan/Patrol Speed (1-3 with 1 being the slowest), and Dwelling Time (in seconds). This indicates the time needed to span an area covered by the camera. 5. Click Apply to continue and finish the process. © Copyright 2012 TRENDnet. All Rights Reserved.
-
Page 29: Sd Management
This is useful when the camera is out of focus and comes back into focus at a later stage. Once you have set all setting options click Apply. © Copyright 2012 TRENDnet. All Rights Reserved. -
Page 30: Tools
When you want to reset the camera to system default, click the Restore Factory Defaults button to reset the system. If the system is not working properly for any reason, you can reboot the system by clicking the Reboot Device button. © Copyright 2012 TRENDnet. All Rights Reserved. -
Page 31: Advanced
The description is laid out in the picture below. For more monitoring features, please refer to SecurView Pro software user’s guide for details. © Copyright 2012 TRENDnet. All Rights Reserved. -
Page 32: How To Setup/Access The Camera Remotely
HTTP Port on the camera is 80. The example shows above is using port number 9000. 4. Open another web browser and go to your Router’s Web Configuration page. (In the example, TRENDnet’s TEW-651BR Wireless N router is used) © Copyright 2012 TRENDnet. All Rights Reserved. - Page 33 Configure DDNS on your router 3. Enable DDNS, fill out the following information and then click Apply. 1. Go to Camera’s DDNS Ports Number section, assign a HTTP port for your camera and click Apply. © Copyright 2012 TRENDnet. All Rights Reserved.
- Page 34 Some router might use Port Forwarding or Special applications for this function. The setup steps should be very similar. 5. Open another web browser and enter your DDNS domain and camera’s port number. © Copyright 2012 TRENDnet. All Rights Reserved.
-
Page 35: Technical Specifications
3GPP (video only) WPS Button Enable WPS connection Wireless Reset Button Reset to factory default Standard IEEE 802.11b, IEEE 802.11g, and IEEE 802.11n Privacy Button Privacy mode on/off Frequency 2.4 ~ 2.483 GHz ISM band © Copyright 2011 TRENDnet. All Rights Reserved. - Page 36 Max frame rate: 30fps View: Profile 2: H.264/ MPEG-4 Horizontal: 51.8 degrees Resolution: 640 x 400, 320 x 192, 160 x 96 Vertical: 33.8 degrees Max frame rate: 30fps Diagonal: 59.6 degrees Profile 3: MJPEG © Copyright 2011 TRENDnet. All Rights Reserved.
- Page 37 Storage: -25C ~ 70C (-13F ~ 158F) 802.11g: 15dBm (typical) 802.11n: 14dBm (typical) Humidity Max. 90% (non-condensing) Receiving Sensitivity 802.11b: -88dBm at 11Mbps Certifications CE, FCC 802.11g: -74dBm at 54Mbps Requirement 802.11n: -68dBm at 150Mbps © Copyright 2011 TRENDnet. All Rights Reserved.
- Page 38 Resolution: 640 x 400, 320 x 192, 160 x 96 Max frame rate: 30fps RTSP: http://ipcamera_ip/3gpp 3GPP Audio format/AMR Video format/MPEG4 Protocols/RTSP, RTP, RTCP Recording Resolution: Define individual resolution for up to 4 profiles Required storage: 32MB (minimum per profile) © Copyright 2011 TRENDnet. All Rights Reserved.
-
Page 39: Troubleshooting
© Copyright 2011 TRENDnet. All Rights Reserved. - Page 40 This device complies with the essential requirements of the R&TTE Directive 1999/5/EC. The following test methods have been applied in order to prove presumption of conformity with the essential requirements of the R&TTE Directive 1999/5/EC: © Copyright 2011 TRENDnet. All Rights Reserved.
- Page 41 Directive 1999/5/EC. Português TRENDnet declara que este TV-IP672W / TV-IP672WI está Español Por medio de la presente TRENDnet declara que el TV-IP672W / [Portuguese] conforme com os requisitos essenciais e outras disposições da [Spanish] TV-IP672WI cumple con los requisitos esenciales y cualesquiera Directiva 1999/5/CE.
- Page 42 Download section limited to, duty, tax, and other fees. and look for the desired TRENDnet product to access to the GPL Code or LGPL Code. These codes are distributed WITHOUT WARRANTY and are subject to the copyrights of WARRANTIES EXCLUSIVE: IF THE TRENDNET PRODUCT DOES NOT OPERATE AS the developers.
Need help?
Do you have a question about the TV-IP672W and is the answer not in the manual?
Questions and answers