Advertisement
Quick Links
Dear customer,
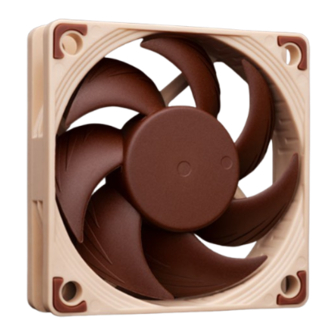
Congratulations on choosing the Noctua NF-A6x15 5V PWM.
We at Noctua always strive to achieve superior quiet
cooling performance regardless of whether it's a big
200mm fan or a small 40mm one. That's why the
NF-A6x15 5V PWM sports many of the features and
advanced aerodynamic design measures of our award-
winning larger models, making it perhaps the most
thoroughly optimised 60mm fan on the market.
Each Noctua fan is double-checked for flawless operation
by our quality control team before it leaves the factory and
I'm confident that you will be able to sense some of the
research, attention and care we've put into making this
product.
Enjoy your NF-A6x15 5V PWM!
Yours sincerely,
Roland Mossig, Noctua CEO
This document includes some instructions for installing,
running and cleaning your NF-A6x15 5V PWM.
Should you encounter any difficulties, please
check the FAQs on our website (faqs.noctua.at)
and don't hesitate to contact our support team at
support@noctua.at.
Multilingual versions of this manual are available on our
website: www.noctua.at/manuals
Included mounting parts:
OmniJoin™ adaptor set
30cm extension cable
NA-AC7
4x NA-AV2
USB power adaptor cable
anti-vibration mounts
4x fan screws
NOCTUA NF-A6x15 5V PWM
INSTALLATION MANUAL
1
Installation
If you replace an existing 60mm fan with the NF-A6x15
5V PWM in devices such as storage or network solutions,
it is usually best to use the screws (or other mounting
mechanism) used for the original fan.
Depending on the application, it may also be possible to
use the supplied mounting screws or silicone anti-vibration
mounts.
Caution: Being a 5V fan, the NF-A6x15 5V PWM can not
be run at 12V and will be damaged when used with typical
12V power sources such as PC motherboard fan headers.
For installing the fan using the NA-AV2 mounts, please
first pull the F side through the fan's mounting holes and
then pull the C side through the mounting holes of the
case:
F = fan side
NA-EC1
If the long ends of the mounts are in the way, you can use
scissors to cut them after installation. Note that this will
then make them difficult to reinstall in the future.
2
Connection
2
3
The NF-A6x15 5V PWM comes with a 4-pin PWM fan
connector for PWM based speed control. Please note
that the fan can also be connected to standard 3-pin fan
headers though. When connected to 3-pin fan headers, the
fan will run at full speed.
If you would like to run the fan on USB power sources such
as devices with USB host ports, power banks or USB power
supplies, please use the included NA-AC7 USB power
adaptor cable. Please note that the NA-AC7 must be used
exclusively with the NF-A6x15 5V PWM fan because using
it with other fans bears the risk of damaging sensitive USB
host devices.
If you would like to connect the fan to other fan headers,
please use the supplied OmniJoin™ adaptor set as
described below.
The fan features a short 20cm primary cable in order to
C = case side
help you minimise cable clutter in typical applications. If
you need a longer cable, please add the supplied 30cm
extension (NA-EC1).
3
Using the OmniJoin
The supplied OmniJoin™ adaptor set allows you to easily
connect the NF-A6x15 5V PWM to proprietary fan headers
if you want to replace a 60mm fan in devices such as
network or storage solutions.
Please first identify the individual leads of the OmniJoin™
adaptor and the original fan. The OmniJoin™ adaptor uses
black for ground (GND) and red for +5V.
The black lead of the adaptor has to be matched with
the original GND lead and the red adaptor cable with the
original +5V lead. Many fan cables use the same colours
as the OmniJoin™ adaptor, but please note that there is
no guarantee for this, so make sure to correctly identify the
GND and +5V leads of the original fan. Please refer to the
manual that came with the device or contact the device
manufacturer if in doubt.
GND
Connector of the original fan
After you've identified the individual leads, please proceed
with the following steps to install the OmniJoin
adaptor set
TM
OmniJoin
TM
adaptor
Cable connectors
+5V
Make sure to correctly
identify the GND and
+5V leads of the
original fan!
adaptor:
TM
Advertisement

Subscribe to Our Youtube Channel
Related Manuals for Noctua NF-A6x15 5V PWM


Summary of Contents for Noctua NF-A6x15 5V PWM
- Page 1 NA-AC7 USB power thoroughly optimised 60mm fan on the market. Caution: Being a 5V fan, the NF-A6x15 5V PWM can not adaptor cable. Please note that the NA-AC7 must be used be run at 12V and will be damaged when used with typical...
- Page 2 Repeat Step 2 and 3 for the +5V lead. After you’ve fixed the original fan’s cable to the OmniJoin™ adaptor using the cable connectors, simply connect the NF-A6x15 5V PWM to the adaptor in order to use it in your device.
Need help?
Do you have a question about the NF-A6x15 5V PWM and is the answer not in the manual?
Questions and answers