Advertisement
Available languages
Available languages
Quick Links
USA office: Fontana
AUS office: Truganina
GBR office: Ipswich
If you're having difficulty, our friendly
customer team is always here to help.
FRA office: Saint Vigor d'Ymonville
USA:cs.us@costway.com
AUS:cs.au@costway.com
GBR:cs.uk@costway.com
FRA:cs.f r @costway.com
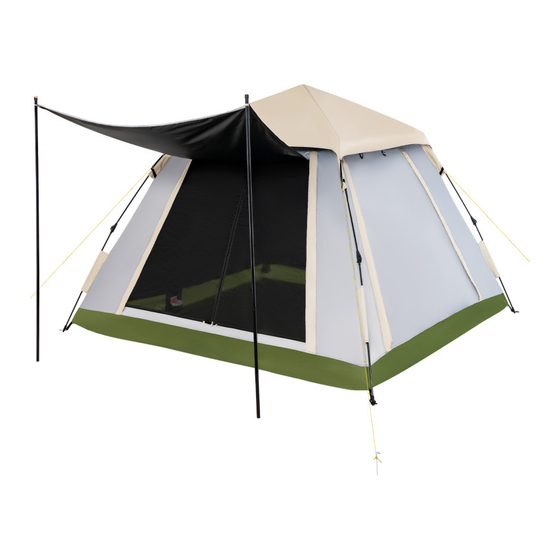
Outdoor Tent
Tente Extérieure
NP11365
THIS INSTRUCTION BOOKLET CONTAINS IMPORTANT SAFETY INFORMATION. PLEASE READ AND KEEP FOR FUTURE REFERENCE.
Advertisement

Related Manuals for Costway NP11365


Summary of Contents for Costway NP11365
- Page 1 GBR office: Ipswich FRA office: Saint Vigor d'Ymonville USA:cs.us@costway.com If you're having difficulty, our friendly AUS:cs.au@costway.com customer team is always here to help. GBR:cs.uk@costway.com THIS INSTRUCTION BOOKLET CONTAINS IMPORTANT SAFETY INFORMATION. PLEASE READ AND KEEP FOR FUTURE REFERENCE. FRA:cs.f r @costway.com...
-
Page 2: Before You Begin
TENT SETUP INSTRUCTIONS Before you begin • Read all instructions before set up. • Select a level site clear of rocks, branches, and other hard or sharp Before You Start objects, to install your tent. Please read all instructions carefully. WARNING: Keep clear of overhead power lines. - Page 3 Step 4: Attached Rainfly Step 2: Raise the Tent • Unfold the arm joints • Drape rainfly over tent, and attach the (4) S hooks to the straps. located at each of the tent corners. S Hook Step 3: Lift the Center Hub •...
- Page 4 • Push down on the roof poles to fatten tent, pull apart the arm joint INSTRUCTIONS D’INSTALLATION DE LA TENTE on (4) leg poles, then fold the leg poles towards center. Avant que tu commences • Gather folded tent poles and fabric into the center to form a pod. •...
- Page 5 Étape 4 : Fixation du Double Toit Étape 2 : Élevez la Tente • Dépliez les articulations • Drapez le double toit sur la tente et fixez les (4) crochets en S aux sangles. des bras situées à chacun des coins de la tente. Crochet en S Étape 3 : Soulevez le Moyeu Central •...
- Page 6 • Appuyez sur les mâts du toit pour gonfler la tente, écartez l’articulation du bras sur les (4) mâts des pieds, puis pliez les mâts des pieds vers le centre. • Rassemblez les piquets de tente pliés et le tissu au centre pour former une nacelle.
Need help?
Do you have a question about the NP11365 and is the answer not in the manual?
Questions and answers