Table of Contents
Advertisement
Quick Links
Advertisement
Table of Contents

Related Manuals for TRENDnet TPL-304E


Summary of Contents for TRENDnet TPL-304E
-
Page 2: Table Of Contents
Table of Contents Installation .............................. 3 Package Contents .......................... 3 Status Lights and Label Information ..................... 3 LED Indicators ............................ 3 Prepare to Install Your Powerline Adapter .................... 4 Connect a TPL‐304E to the Router ...................... 5 Connect other Powerline Adapters ....................... 5 Install the Utility ............................ 6 Set Your Private Network Name...................... 9 Add a Device to an Existing Powerline Network ................. 11 Adding a New Device from a Locally Connected Computer ............... 11 Adding a New Device from a Remotely Connected Computer ............ 11 Troubleshooting ............................ 12 ... -
Page 3: Installation
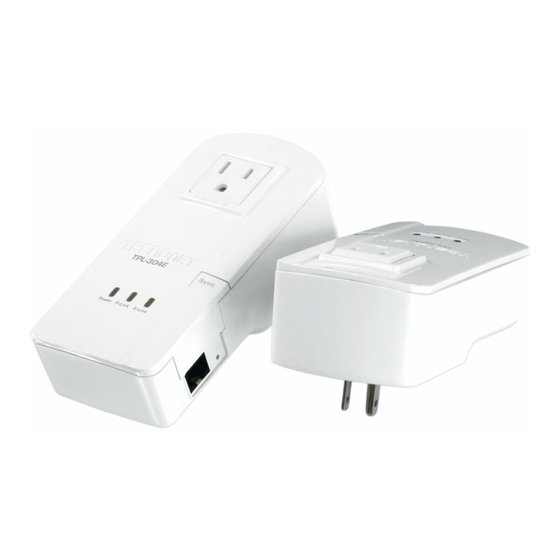
Installation This chapter describes how to set up the TPL‐304E / TPL‐304E2K200Mbps 200Mbps Powerline AV Adapter with Bonus Outlet with on your local area network (LAN) and connect to the Internet. Package Contents The product package should contain the following items: TPL‐304E or TPL‐304E2K Multi‐Language Quick Installation Guide CD‐ROM (Utility & User’s Guide) Cat.5 Ethernet cable If any of the parts are incorrect, missing, or damaged, contact your dealer. Keep the carton, including the original packing materials, in case you need to return the Powerline adapter for repair. Status Lights and Label Information The Powerline adapter has status indicators and a label with important information. Familiarize yourself with these features of your product. LED Indicators The front panel of the TPL‐304E / TPL‐304E2K contains status lights. You can use them to verify connections. The table below describes the lights on the front panel. Status Lights on Front Panel Description Off – Power Off Power Solid Green – Power On Off – No Link Solid Green – Link Powerline Link/ACT LED Blinking Green – Activity Off – No Link Solid Green – Link Ethernet Link/ACT LED Blinking Green – Activity ... -
Page 4: Prepare To Install Your Powerline Adapter
How the Powerline Adapter Fits in Your Network You can use the TPL‐304E / TPL‐304E2K 200Mbps Powerline AV Adapter with Bonus Outlet to implement or extend an Ethernet local area network (LAN) anywhere in your house using your existing electrical power line in place of a dedicated LAN wiring infrastructure. An example is illustrated in the following diagram: Follow the instructions below to set up your Powerline adapter. Prepare to Install Your Powerline Adapter Check that these minimum requirements are met. Your Ethernet network is set up and an Ethernet port is available on your router. Your Internet connection is working. Each computer or device to be used on your network has an Ethernet port. ... -
Page 5: Connect A Tpl-304E To The Router
Connect a TPL‐304E to the Router First, connect a TPL‐304E 200Mbps Powerline AV Adapter with Bonus Outlet to a LAN port on the router so that the Powerline network can access the Internet. NOTE: Do not connect the Powerline adapter to a power strip, extension cord, or surge protector as this may prevent it from working properly or degrade the network performance. Plug the Ethernet cable that came in the box into a LAN port on your router or switch in your network. Plug the Powerline adapter into an electrical outlet near the router. Plug the other end of Ethernet cable that came in the box into the Powerline adapter. Check the status lights: — Power: The power LED turns solid green. If it does not, see Chapter 2, “Troubleshooting”. — Power Link: The Power Link LED blinks to indicate that the device is connected to the power line, and that no other Powerline devices have been detected at this stage. — Ethernet Link: The Ethernet LED blinks to indicate activity. If not, make sure that the Ethernet cable on the Powerline adapter that you connected in the previous step is securely attached to the Powerline adapter and the router, that the router is connected to the modem, and the router and modem are powered on. Make sure that the Internet port of your router is connected to your modem, and that your computer is either connected to a LAN port on the router or to a port on the Powerline adapter. Connect other Powerline Adapters Before plugging in your other Powerline devices, take a note of the device password printed on the label on the back of each device. You will need this password later if you want to change the Powerline network password. If you are adding more than one other Powerline adapter, also note the MAC address given on the label, so that you will know which device the password is for. Plug your other Powerline devices into power outlets in your home near to the other computers and peripherals to be included in your Powerline local area network. Use an Ethernet cable to connect an Ethernet port on each of the computers and peripherals to the nearest Powerline device. When you plug in a second Powerline adapter into a power outlet, check the blue HomePlug LEDs. They should turn on and then briefly blink at the same time as the Ethernet activity LED. This completes the Powerline installation. ... -
Page 6: Install The Utility
Install the Utility The utility gives you the option of setting a unique encryption Powerline network password. Important features: The encryption password is case‐sensitive. (located on the device label) Each device must be set to exactly the same encryption password—if they are to communicate on the same network. Powerline devices on different networks will not be able to communicate. A default button resets the encryption password to the default password (HomePlugAV). The encryption password can protect your network from unauthorized access through the Powerline network. A device password is printed on each Powerline product. This is not the network password, but you are required to enter it if you are setting the network password with another Powerline adapter device. To install the Powerline Encryption Utility, follow these steps: Insert the TPL‐304E / TPL‐304E2K CD‐ROM into a CD‐ROM drive on the computer that is connected to your router. The CD will start up automatically. If the CD does not start automatically: — Go to My Computer on the Windows Start menu, and double‐click the drive that contains the TPL‐304E / TPL‐304E2K CD or — Select the CD drive and click on the Autorun.exe executable file. All devices on a Powerline network can be managed from one computer. If you add another TPL‐304E ... - Page 7 Click Install Utility to start the installation Prior to the utility installation, it will prompt you to install the WinPcap program. Click Next to continue. ...
- Page 8 Then the powerline utility installation will start, click Next to continue Click Next and follow the instructions on the screen. ...
-
Page 9: Set Your Private Network Name
The InstallShield Wizard indicates that the installation is complete. Click Close. Set Your Private Network Name The fastest and most reliable way to set the network name is to set the password for all devices at once. To do this, you need the device password on the back label of each Powerline device. There are two steps to setting the network name: first enter the device password for each remote Powerline device, and then set the network name. Enter the device password for each remote Powerline device: Make sure that all Powerline devices are plugged into 100~240V AC wall sockets. Start the Powerline encryption utility Note: Accessing the utility for the first time, you might receive the following warning message, please connect OK to continue. ... - Page 10 Check that the utility lists all the remote Powerline devices. Select a Powerline device and, if more than one remote device is listed, identify it from the MAC address. Click Enter Password. Enter the password recorded from the label on the back of the selected Powerline device. Click OK. Repeat this step for all devices that you want attached to your network. Set the Private Network Name Select the Privacy tab. Type a Name in the Private Network Name text box. Click Set All Devices. A pop‐up window indicates that the operation was successful. ...
-
Page 11: Add A Device To An Existing Powerline Network
Add a Device to an Existing Powerline Network To add a device to a Powerline network with the default network password, all you need to do is plug the new device into a power outlet. If the network name has been set, then you will need to run the Powerline encryption utility to set the new device to the network name. How you do this depends on whether the computer running the Powerline encryption utility is connnected directly to the new Powerline device (local) or is connected to a different device in the Powerline network (remote). Adding a New Device from a Locally Connected Computer Plug the new Powerline device into an available AC power outlet and connect it to an Ethernet port on the computer. Start the Powerline encryption utility and select the Security tab. Type the network name in the Private Network Name text box and click Set Local Device Only. Select the Main tab and check that the other devices in the Powerline network appear in the device list. It may take a minute or two for all devices in the network to be detected. Adding a New Device from a Remotely Connected Computer Note the device password given on the label on the back of the new Powerline device. Plug the new Powerline device into an AC power outlet. Start the Powerline encryption utility on the remote computer and select the Security tab. Click Use Default (Public Network). The password in the Private Network Password text box changes to the default password, HomeAVPlug. Click Set All Devices. Select the Main tab and wait for the new Powerline device to be listed. Select the new Powerline device from the device list, and click Enter Password. In the pop‐up window, enter the password from the back label of the device and click OK. Select the Privacy tab. 10. Re‐enter the network name in the Private Network Name text box, and then click Set All Devices. ... -
Page 12: Troubleshooting
Troubleshooting This chapter gives information about troubleshooting your TPL‐304E / TPL‐304E2K Mbps Wall‐Mount Ethernet Adapter. After each problem description, instructions are provided to help you diagnose and solve the problem. Basic Functioning After you plug in the Powerline adapter, the following sequence of events should occur: When power is first applied, verify that the Power light is on. After approximately 10 seconds, check the LEDs on the Powerline adapter. The following should occur: The power LED is solid green. The green Power Link LED is lit. The Ethernet LED blinks. If any of these conditions does not occur, refer to the appropriate following section. Power Light Not On Make sure that, if power to the AC power outlet is controlled by a wall switch, the wall switch is in the on position. Verify that the wall socket is live. To do this, disconnect the Powerline adapter and plug in another electrical product, such as a lamp or a hairdryer. If the Power LED still does not come on, and you have confirmed the power outlet is live, you have a hardware problem and should contact technical support. Power Link Light Not On If the power light is on but the Power Link light is not, check the following: —... -
Page 13: Sync The Device
Sync the device Press the Sync button for 3 seconds to synchronize the encryption key and connect to the existing network. Reset the device Press the Reset or Sync button for 10 seconds, the powerline adapter settings will be reset to factory default value. Power Saving The unit will automatically reduce the power usage when the connected device is powered off, unplugged or not active for more than 10 minutes. ... -
Page 14: Specification
Specification Hardware Standards IEEE 802.3, IEEE 802.3u, IEEE 802.3x, HomePlug AV Interface 1 x 10/100Mbps Auto‐MDIX RJ‐45 Port 1 x Electrical power socket 1 x Sync button Frequency Band 2 ~ 30 MHz Modulation OFDM, QAM, QPSK, BPSK, ROBO Speed Powerline: Up to 200Mbps LAN: 200Mbps with Full Duplex mode Utility Compatibility Windows 7 (32/64‐bit), Vista (32/64‐bit), XP(32/64‐bit) Nodes Connect up to 8 adapters Encryption 128‐bit AES LED Power, Powerline, Ethernet Dimension (L x W X H) 148 x 65 x 67 mm (5.8 x 2.6 x 2.6 in.) Weight 181.4 g (6.4 oz) Power Source A: 100~240V/ 5A AC, 50~60Hz EU: 220~240V / 5A AC, 50Hz UK: 230‐240V/ 5A AC, 50 Hz FR: 220~240V/ 5A AC, 50Hz Consumption ... -
Page 15: Limited Warranty
AC/DC Power Adapter, Cooling Fan, and Power Supply carry 1 year warranty. If a product does not operate as warranted during the applicable warranty period, TRENDnet shall reserve the right, at its expense, to repair or replace the defective product or part and deliver an equivalent product or part to the customer. The repair/replacement unit’s warranty continues from ... - Page 16 Some TRENDnet products include software code written by third party developers. These codes are subject to the GNU General Public License ("GPL") or GNU Lesser General Public License ("LGPL"). Go to http://www.trendnet.com/gpl or http://www.trendnet.com Download section and look for the desired TRENDnet product to access to the GPL Code or LGPL Code. These codes are distributed WITHOUT WARRANTY and are subject to the copyrights of the developers. TRENDnet does not provide technical support for these codes. Please go to http://www.gnu.org/licenses/gpl.txt or http://www.gnu.org/licenses/lgpl.txt for specific terms of each license. ...
Need help?
Do you have a question about the TPL-304E and is the answer not in the manual?
Questions and answers