
Related Manuals for Bico DISPENDIX I-DOT Mini


Summary of Contents for Bico DISPENDIX I-DOT Mini
- Page 1 I-DOT Mini User Manual User Manual version 1.4 May 5, 2022 Applies to software version v1.2.6 (5 May 2022) Dispendix GmbH Ruppmannstraße 28 70565 Stuttgart Germany www.dispendix.com Tel.: +49 (0) 711 49054400 E-Mail: support@dispendix.com www.dispendix.com...
- Page 2 FOR RESEARCH USE ONLY. Not for use in diagnostic procedures. Intellectual Property Rights This I-DOT Mini system manual and its contents are property of Dispendix GmbH (“Dispendix”) and is intended solely for the use of Dispendix customers, for the purpose of operating the I-DOT Mini System and the use of I-DOT Mini consumables.
-
Page 3: Table Of Contents
Content Preface .............................. 4 Technology Basics.......................... 5 Getting Started ..........................6 3.1. Operating the I-DOT Mini Instrument ................6 3.2. Starting the I-DOT Mini Software ..................9 Setting up a Dispensing Run ..................... 10 4.1. Define Layout ......................... 10 4.2. Dispensing Volume ....................... 11 4.2.1. -
Page 4: Preface
1. Preface Purpose This user manual details specific information pertaining to safe and proper handling and operation of the I-DOT Mini. Conventions Used The following conventions are used throughout this manual and are described below for your reference: Underline Used to emphasize an important word or expression within the text. -
Page 5: Technology Basics
2. Technology Basics By applying a well-defined pressure pulse on top of the well a droplet is formed, and a highly precise and accurate nanoliterer droplet is released into or onto nearly any destination (Figure 1). Larger volumes are achieved by applying up to 100 pulses per second. -
Page 6: Getting Started
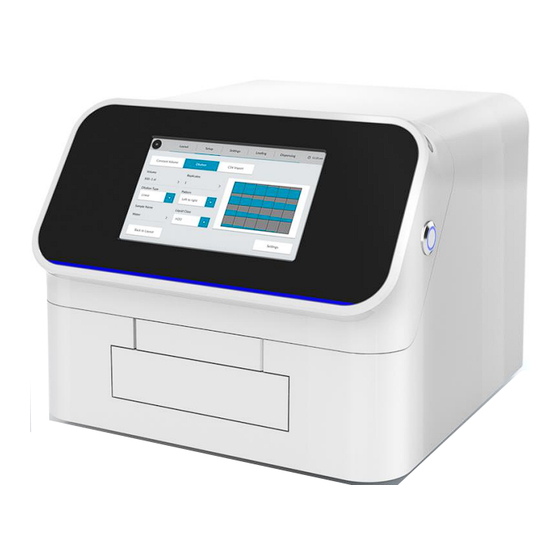
3. Getting Started This chapter describes the physical parts of I-DOT Mini system. 3.1. Operating the I-DOT Mini Instrument Plug in the Power Cable on the back side of the I-DOT Mini instrument (Figure 2). Figure 2: Power switch, air pressure connection and ethernet port at the back side of the device. Press the Power Button on the right side (from a user perspective) of the I-DOT Mini to start the system (Figure 3). - Page 7 Figure 3: Power button at the right side. To use external files on the I-DOT Mini instrument, use the USB port on the left side (from a user perspective) of the device. (Figure 4). Figure 4: USB port at the right side. Trays to insert Source Well (top) and Target Plate (bottom) are on the front side of I-DOT Mini (Figure 5).
- Page 8 Figure 5: Source Well and Target Plate trays at the front side of the device. www.dispendix.com...
-
Page 9: Starting The I-Dot Mini Software
3.2. Starting the I-DOT Mini Software The I-DOT Mini software enables users to: o Define target layout o Assign liquid class and volume per well o Define the priming settings and load trays o Start a dispensing run o Analyze the dispensing performance via Drop Detection result Push the Power Button and wait for the device to initialize. -
Page 10: Setting Up A Dispensing Run
4. Setting up a Dispensing Run This chapter describes how to set-up and perform dispensing runs. The software is designed in a way that the user is guided through the process. Setting up the protocol starts with setting up the target plate (Layout), followed by entering the dispensing volume (Volume), followed by the setting (Settings), inserting the source and targets (Loading) and finally start the protocol (Dispensing). -
Page 11: Dispensing Volume
4.2. Dispensing Volume Select either Constant Volume, Dilution or Import. Pre-defined volumes and dilutions can be opened by pressing the Import button. 4.2.1. Constant Volume Constant Volume: dispenses a fixed target volume into selected wells. • Volume: Define the fixed target volume •... -
Page 12: Direct Dilution
4.2.2. Direct Dilution Select Dilution to set up a Direct Dilution: • Volume: define start and end volume of the dilution series. • Dilution Type: select between linear, logarithmic, 2:1 ratio or 1:2 ratio. • Replicates: enter the number of replicates •... - Page 13 Dispensing volumes for each well can be checked by clicking on the well plate shown in Volume tab and choosing respective wells. Figure 10: Detailed well information. www.dispendix.com...
-
Page 14: Volume File Import
4.2.3. Volume File Import Import allows to load a CSV “Volume File” from a USB stick. Click on Select Volume File. Figure 11: Volume configuration using Import function. A window pops up. Select the Volume File in a CSV Array or a CSV List format. Volume File is NOT a protocol. - Page 15 CSV Volume Array File A CSV Volume Array File specifies the target volumes for each well in a table with dimensions of the selected plate. The volume unit can be specified in the top-left corner. The default volume unit is microliters if left unspecified. Figure 12: CSV Volume Array File To change the volume unit to nanoliter, specify [nL] instead [uL] in the A1 field.
- Page 16 The CSV Volume List File’s details: • Target Plate: Define the target plate name • Target Plate Type: Define the Target plate MVP type • Target Well: Define the target will which the source liquid prints on. • Source Well: Define the source well number •...
- Page 17 Figure 15: CSV Volume List File without column headers Without headers, the system will read volumes in default unit which is microliter. www.dispendix.com...
-
Page 18: Settings
4.3. Settings Settings include pre-dispenses by entering values for Priming Volume and Priming Cycles. These settings can be Set as Default for all upcoming dispensing runs. All settings until this step can be saved as a protocol. Figure 16: Protocol Settings defining Priming Volume and Priming Cycles. www.dispendix.com... -
Page 19: Loading Trays
4.4. Loading Trays Next the device can be loaded with the source well and the target plate. Open / close Source and Target Tray can by clicking on the corresponding button. The minimum volume to be filled into the Source Well is shown. Figure 17: Loading Source and Target Tray. -
Page 20: Dispensing
4.5. Dispensing Before Start Dispensing, experiment name can be defined, and automatic eject options can be set. Start the dispensing run by clicking Start Dispensing. Figure 18: Start Dispensing The software records the dispensing performance by highlighting wells, which were already dispensed. -
Page 21: Results
Figure 19: Dispensing 4.6. Results After the dispensing is finished a screen opens, showing the dispensing performance of the run. Green highlighted wells indicate that all expected droplets per target well were detected. highlighted wells indicate that less droplets than defined in the Threshold were detected. -
Page 22: Advanced User Protocol
Figure 20: Dispense Result Performance results are automatically saved in Experiments in the software menu. If no experiment name was defined in the Dispensing tab, the experiment name will be date and time by default. 5. Advanced User Protocol The I-DOT Mini software enables the following: •... - Page 23 Figure 21: Plus Button To Create Custom Plate Format Figure 23: Custom Plate – Row and Column setup Figure 22: Custom Plate - Plate Format Name configuration Figure 24: Custom Plate setup – Offset X and Y Figure 25: Custom Plate setup – Pitch X and Y configuration configuration.
-
Page 24: Creating Csv Protocols
Click Finish. The new labware can now be used for the current experiment. And the new format will be automatically saved to the Plate Format library for future usage. Please go and check the Plate Format Library. 5.2. Creating CSV Protocols The header of a CSV Protocols includes all information necessary to perform a dispensing run, such as target plate layout, liquid class parameter. -
Page 25: Software Menu Options
6. Software menu options This chapter describes the different options available in the software menu. Figure 27: I-DOT Mini Menu 6.1. Protocols Select Protocols: all saved protocols are shown. Protocols can be selected here to start a dispensing run. Whenever Save as Protocol was selected in the Settings screen, the I-DOT Mini software creates a protocol file with the defined name in XML Liquid Class (.libx) or CSV Liquid Class (. -
Page 26: Experiments
Figure 28: Protocol’s list – View mode 6.2. Experiments The I-DOT Mini software automatically creates and saves the experiment file with the defined or default name. In Experiment either Edit or View mode can be chosen. View mode shows available finished dispensing runs (Figure 29). - Page 27 Figure 29: Experiment – View mode. By selecting one dispensing run of the list and clicking on Show Results, its performance results are shown in detail (Figure 30). Performance results are exported either as HTML-, PDF, and XML-file by clicking on Create Report. Figure 30: Experiment –...
- Page 28 Selecting the pencil icon opens Edit mode, which allows selecting specific dispensing runs to delete them from the list (Figure 31). Figure 31: Experiment – Edit mode. To turn back the View mode, use Done button in the bottom right. www.dispendix.com...
-
Page 29: Liquid Classes
6.3. Liquid Classes Liquid classes for H2O, DMSO and Glycerol 10 % are saved as default. Further liquid classes are imported via Import Liquid Classes. Import is used to quickly create liquid class which is defined in XML Liquid Class (.libx) or CSV Liquid Class (. -
Page 30: Plate Formats
Liquid Class parameters can be visualized with Show Details after selecting the liquid class. And selected liquid class parameters can be exported via Export within the Liquid Class Details (Figure 33). Figure 33: Liquid Classes Details. 6.4. Plate Formats Plate Formats for sizes 24, 96, 384, 1536 are saved as default. Further Plate Formats are imported via Import Plate Formats. - Page 31 Figure 34: Plate formats overview. Plate Formats can be deleted by clicking on the Delete Selected in the Edit mode. Figure 35: Plate formats- Delete www.dispendix.com...
-
Page 32: Settings
Plate Formats parameters can be visualized with Show Details after selecting the Plate Formats. And selected plate format parameters can be exported via Export within the Plate Format Details (Figure 36). Figure 36: Plate formats Details 6.5. Settings Device settings are adjusted in the Settings section in the software menu. 6.5.1. -
Page 33: Expert Settings
Figure 37: General Settings. 6.5.2. Expert Settings Expert enables advanced device settings, including device position adjustment, device calibration, system update and system backup. These settings can only be accessed with a password. To unlock use the Password “dispendix” or reach out to support@dispendix.com. DO NOT change any value within Expert mode without instructions and advice from CELLINK/Dispendix staff. - Page 34 Figure 38: Expert Settings – Expert mode locked view. The expert settings below can be edit: • Positioning of the Target tray using coordinates and volume calibration are adjusted in the Expert mode. • The System Update setting performs software updates. Perform software updates with mender file.
- Page 35 Figure 39: Expert Settings – Expert mode unlocked view. Click on License Management in Expert Settings (Figure 39) to see the available licenses on the device or import a license key using a file. Import of License Files must be in. lic format. Attention to the date of the available license.
-
Page 36: About
Figure 40: License Management Overview 7. About In the About screen, Dispendix’ contact details, the edition type, the licensed feature, the software and firmware version, and the system’s serial number can be viewed. (Figure 41). Figure 41: About screen. www.dispendix.com... -
Page 37: Licenses
7.1. Licenses By clicking on “Licenses”, the end user license agreement and third-party licenses are displayed. (Figure 42) Figure 42: Licenses. www.dispendix.com...
Need help?
Do you have a question about the DISPENDIX I-DOT Mini and is the answer not in the manual?
Questions and answers