Advertisement
Available languages
Available languages
Table of Contents
Advertisement
Table of Contents

Related Manuals for Ameriwood HOME Mr.Kate 8961319COM


Summary of Contents for Ameriwood HOME Mr.Kate 8961319COM
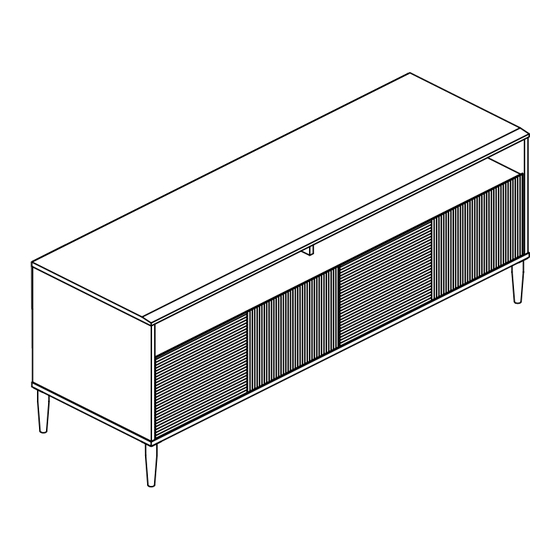
- Page 1 8961319COM TV Console-Sharkey gray Date of Purchase ___ / ___ / ___ Lot Number: Do Not Return This Product! Contact our customer service team for help first. Call: 1-800-489-3351 (toll free) Monday-Friday 9am - 5pm CST Easy Tough Visit: www.ameriwoodhome.com Assembly Difficulty Meter WARNING...
- Page 2 Contact Us! Helpful Hints PEOPLE NEEDED FOR ASSEMBLY: 2 ESTIMATED ASSEMBLY TIME: 2 HOUR ameriwoodhome.com...
-
Page 3: Before You Start
Before You Start Read through each step carefully and follow the proper order Separate and count all your parts and hardware Give yourself enough room for the assembly process Have the following tools: Flat Head Screwdriver, #2 Phillips Head Screwdriver and Hammer Caution: If using a power drill or power screwdriver for screwing, please be aware to slow down and stop when screw is tight. -
Page 4: Board Identification
Board Identification Not Actual Size Top panel Bottom panel T8961319010KX T8961319020KX Fixed shelf Left side panel T8961319030KX T8961319040KX Right side panel Upper partition Lower partition T8961319050KX T8961319060KX T8961319070KX ameriwoodhome.com... - Page 5 Board Identification Not Actual Size Upper back panel Left back panel Right back panel T8961319080KX T8961319090KX T8961319100KX Left door Right door Right door T8961319110KX T8961319120KX T8961319130KX QTY:2 PCS Center leg T8961319140KX T8961319150KX QTY:4 PCS Preassembled parts Center leg T8961319151KX Adjustable foot Ø19 TKX1130 ameriwoodhome.com...
- Page 6 Board Identification Not Actual Size ameriwoodhome.com...
-
Page 7: Part List
Hardware Bag Reference Number: 28961319COM0KX Part List Actual Size Ø8X30 mm Ø4X14 mm Ø4X30 mm Ø3.5X12 mm × 28 × 48 × 17 × 24 Wood dowel Screw Screw Screw TKX1005 TKX1374 TKX1378 TKX1175 Ø1/4"X12 mm M8X20mm × 20 × 23 Bolt Cam bolt TKX1051... - Page 8 STEP 1 Ø8X30 mm M8X20mm × 4 × 12 1.1 Attach (6) to (A) & (C) as illustrated. 1.2 Attach (1) to (C) as illustrated. ameriwoodhome.com...
- Page 9 STEP2 Ø8X30 mm M8X20mm × 16 × 8 2.1 Attach (1) to (D),(E),(I) & (J) as illustrated. 2.2 Attach (6) to (D) & (E) as illustrated. ameriwoodhome.com...
- Page 10 STEP 3 Ø8X30 mm M8X20mm × 8 × 3 3.1 Attach (1) to (F) & (G) as illustrated. 3.2 Attach (6) to (G) as illustrated. ameriwoodhome.com...
- Page 11 STEP 4 Ø15X12 mm × 3 Proper orientation of CAM LOCK 4.1 Attach (G) to (I), (J) with (7) as illustrated. ameriwoodhome.com...
- Page 12 STEP 5 Ø4X30 mm × 2 5.1 Attach (F) to (C) with (3) as illustrated. ameriwoodhome.com...
- Page 13 STEP 6 Ø15X12 mm × 6 × 2 6.1 Attach (C) to (I), (J) & (G) with (7) as illustrated. 6.2 Use (8) to cover cam lock hole. Proper orientation of CAM LOCK ameriwoodhome.com...
- Page 14 STEP 7 Ø15X12 mm × 8 × 4 7.1 Attach (D),(E) to (C), (I) & (J) with (7) as illustrated. 7.2 Use (8) to cover cam lock hole. Proper orientation of CAM LOCK ameriwoodhome.com...
- Page 15 STEP 8 Ø15X12 mm × 6 × 6 8.1 Attach (A) to (D), (E) & (F) with (7) as illustrated. 8.2 Use (8) to cover cam lock hole. Proper orientation of CAM LOCK ameriwoodhome.com...
- Page 16 STEP 9 Ø4X30 mm × 15 9.1 Attach (B) to (D), (E) & (G) with (3) as illustrated. ameriwoodhome.com...
- Page 17 STEP 10 Ø1/4"X12 mm × 20 10.1 Attach (N), (O) to (B) with (5) as illustrated. ameriwoodhome.com...
- Page 18 STEP 11 Ø3.5X12 mm × 24 11.1 Attach (H) to sample as illustrated. WARNING Please make sure that the backs are attached securely. Before attaching the back panel All screws must be driven into the parts straight and tightened firmly. Failure to do so could cause instability, product be sure that the unit is at 90°.
- Page 19 STEP 12 Ø4X14 mm × 8 × 4 12.1 Attach (10) to (K) & (M) with (2) as illustrated. Important: It is recommended to note correct position for Part (K) and (M) assembled at this step as shown in below illustration. ameriwoodhome.com...
- Page 20 STEP 13 Ø4X14 mm × 8 × 4 13.1 Attach (11) to (K) & (L) with (2) as illustrated. Important: It is recommended to note correct position for Part (K) and (L) assembled at this step as shown in below illustration. ameriwoodhome.com...
- Page 21 STEP 14 Ø4X14 mm × 32 14.1 Attach (K) to (D) & (G) with (2) as illustrated. 14.2 Attach (L) to (G) with (2) as illustrated. 14.3 Attach (M) to (E) with (2) as illustrated. * Use (K) from step 12 * Use (K) from step 13 ameriwoodhome.com...
- Page 22 STEP 15 To adjust the vertical height. Loosen the four screws "A" on both hinges. Two of them are usually in slotted holes which allows you to adjust up or down by a few mm. Then tighten back To adjust side ways. Turning the screw "C"...
-
Page 23: Maximum Loads
Maximum Loads This unit has been designed to support the maximum loads shown. Exceeding these load limits could cause sagging, instability, product collapse, and/or serious injury. Notice: Please apply the TV warning label to your unit so you'll always have the model's weight and TV size limits. - Page 24 Visit your local retailer's website, rate your purchased product and leave us some feedback! We would like to extend a big "Thank You" to all of our customers for taking the time to assemble this Ameriwood Home product, and to give us your valuable feedback. ameriwoodhome.com...
- Page 25 Español ameriwoodhome.com...
- Page 26 Español Identificación de los Paneles (Página 4-6) Este no es el tamaño real PANEL SUPERIOR PANEL INFERIOR ESTANTE FIJO PANEL LATERAL IZQUIERDO PANEL LATERAL DERECHO PARICIÓN SUPERIOR PARTICIÓN INFERIOR PANEL TRASERO SUPERIOR PANEL TRASERO IZQUIERDO PANEL TRASERO DERECHO PUERTA IZQUIERDA PUERTA DERECHA PUERTA DERECHA PIERNA...
- Page 27 Visite el sitio web de su distribuidor local, califique el producto que compró y déjenos sus comentarios. Nos gustaría enviar un gran "Agradecimiento" a todos nuestros clientes por tomarse el tiempo de ensamblar este producto de Ameriwood Home, y por darnos sus valiosos comentarios. Gracias...
- Page 28 Français ameriwoodhome.com...
- Page 29 Français Identification des matériaux (Page 4-6) Pas de taille réelle PANNEAU SUPÉRIEUR PANNEAU INFÉRIEUR ÉTAGÈRE FIXE PANNEAU LATÉRAL GAUCHE PANNEAU CTÉ DROIT PARITITION SUPERIEURE CLOISON INFÉRIEURE PANNEAU SUPÉRIEUR ARRIÈRE PANNEAU ARRIÈRE GAUCHE PANNEAU ARRIÈRE DROIT PORTE GAUCHE PORTE DROITE PORTE DROITE JAMBE JAMBE CENTRALE Page 8...
- Page 30 Visitez le site Web de votre détaillant local, évaluez votre produit acheté et laissez-nous quelques commentaires ! Nous tenons à offrir un grand "Merci" à tous nos clients pour avoir pris le temps d'assembler ce produit "Ameriwood Home", et de nous donner vos commentaires précieux. Merci ameriwoodhome.com...
Need help?
Do you have a question about the Mr.Kate 8961319COM and is the answer not in the manual?
Questions and answers