Table of Contents
Advertisement
Quick Links
User Manual of Product 1:
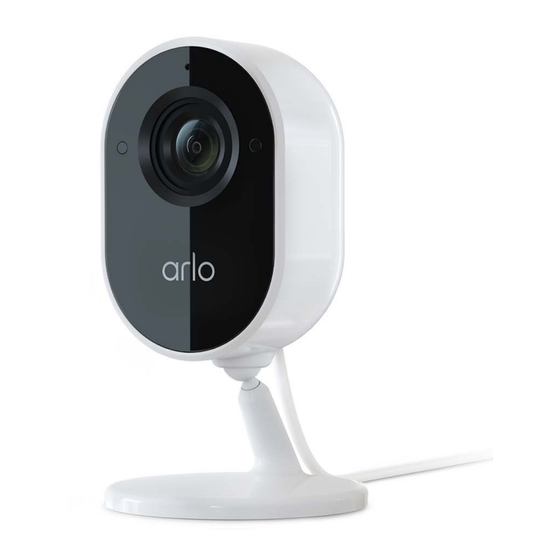
Arlo Essential Indoor Camera - 1080p Video with Privacy
Shield, Plug-in, Night Vision, 2-Way Audio, Siren, Direct to WiFi
No Hub Needed, Surveillance Security, White - VMC2040
User Manual of Product 2:
Arlo Essential Wired Video Doorbell - HD Video, 180° View,
Night Vision, 2 Way Audio, DIY Installation (wiring required),
Security Camera, Doorbell Camera, Home Security Cameras,
White - AVD1001
Advertisement
Chapters
Table of Contents
Troubleshooting

Related Manuals for Arlo VMC2040


Summary of Contents for Arlo VMC2040
- Page 1 Shield, Plug-in, Night Vision, 2-Way Audio, Siren, Direct to WiFi No Hub Needed, Surveillance Security, White - VMC2040 User Manual of Product 2: Arlo Essential Wired Video Doorbell - HD Video, 180° View, Night Vision, 2 Way Audio, DIY Installation (wiring required), Security Camera, Doorbell Camera, Home Security Cameras,...
- Page 2 Essential Indoor Camera User Manual...
-
Page 3: Table Of Contents
Get the Arlo Secure App ........................6 Do more with Arlo ..........................6 Get Started Use the Arlo Secure App for setup ....................7 Find a good location for your camera ..................... 7 Plug in your camera indoors ......................8 Check the LED ............................ - Page 4 Adjust the audio settings ........................46 Adjust the flicker setting ........................46 Turn the Essential Indoor Camera on and off ................46 Restart the camera from the Arlo Secure App ................47 View device information ........................47 Remove a device from your account ..................... 47 Optional SmartHub and Base Station settings ................
- Page 5 Reset the camera to its factory settings ..................62 11. Arlo Connect Use Arlo with Amazon Alexa ......................63 Add Arlo devices to the Apple Home app ..................64 Add your camera to the Google Assistant app ................66 Use Arlo with IFTTT ........................... 66...
-
Page 6: Get To Know Your Camera
1. Get to Know Your Camera Protect your home while away, without compromising your privacy when at home. Your Arlo Essential Indoor Camera captures 1080p video and offers a way to reassure your privacy with an automated privacy shield, controllable through the Arlo Secure app. Receive motion alerts and use 2-Way Audio to hear and speak to visitors. -
Page 7: Get The Arlo Secure App
Arlo Essential Indoor Camera Get the Arlo Secure App Download the Arlo Secure app. This app lets you create an Arlo account in the cloud and set up and manage all your Arlo devices. Note: If you already use the Arlo Secure app, make sure that you’re using the latest version. -
Page 8: Get Started
If you don’t have the app, you can download it and create your Arlo account. Once you set up your Arlo account, you can access it from the Arlo Secure App on a smartphone or tablet, or from a computer using a web browser. If you’re using a computer, enter https://my.arlo.com/#/login... -
Page 9: Plug In Your Camera Indoors
Arlo Essential Indoor Camera Plug in your camera indoors Your Essential Indoor Camera is a wired product powered by a USB cable and a 5V 2A power adapter. A micro USB cable and power adapter came in the box with your camera. The cable and power adapter are for indoor use only. -
Page 10: Wall Mount Your Camera
Your camera comes with a mount and a screw kit. Note: You must follow the instructions in the Arlo Secure App when you first install your camera. Do not begin mounting your camera before the Arlo Secure App instructs you to during the installation process. -
Page 11: Test Motion Detection
Test motion detection You can use the motion detection test to find the right motion sensitivity setting for your camera. 1. Open the Arlo Secure App. 2. Tap Settings > My Devices. 3. Select your camera. 4. Tap Device Utilities > Motion Detection Test. - Page 12 Arlo Essential Indoor Camera 6. Move the slider to adjust the motion sensitivity level as needed. This motion sensitivity setting is used during the motion detection test. It is not automatically applied to the camera rules used by modes to arm your camera. When you are satisfied with a particular motion sensitivity level in the test, note the setting so that you can add it to your rules.
-
Page 13: Wifi Setup And Connections
3. WiFi Setup and Connections When you install and set up your camera, the Arlo Secure App guides you through the process of connecting the camera to your router’s 2.4 GHz WiFi network or to an optional Arlo SmartHub or base station. -
Page 14: Connect Your Mobile Device To A 2.4 Ghz Wifi Network During Setup
If you have a mesh WiFi network, it uses only one WiFi network name for both WiFi bands. The camera finds and connects to the 2.4 GHz WiFi band. As long as you connect your phone to the same mesh network, Arlo can discover the camera. WiFi Setup and Connections... -
Page 15: Move Your Camera's Wifi Connection To A Smarthub Or Base Station
To add a SmartHub or base station and connect your camera: 1. Open the Arlo Secure App. 2. Add the SmartHub or base station to the same Arlo account that your camera was originally connected to. If you’re using a trial Arlo subscription associated with this account, doing this keeps the trial active. -
Page 16: Move Your Camera's Wifi Connection To A Direct Router Connection
WiFi network. To move your camera’s WiFi connection directly to your router: 1. Open the Arlo Secure App and log into the same Arlo account that your camera is connected to. If you’re using a trial Arlo subscription associated with this account, doing this keeps the trial active so you don’t lose it. -
Page 17: Use Your Essential Indoor Camera
4. Use Your Essential Indoor Camera When you open the Arlo Secure App, the Devices page displays your camera feeds. Tap to turn the siren on and off manually Tap Play to stream the camera feed Tap to view device settings... -
Page 18: The Privacy Shield
Close the Privacy Shield The Arlo Secure App lets you open and close the Privacy Shield by using modes, or by turning the camera on and off. Do not use your fingers to physically open and close the Privacy Shield. -
Page 19: View Your Camera Feeds
When you connect a camera directly to a WiFi router, you can’t save that camera’s videos to a USB storage device that’s inserted in a SmartHub or base station. Turn off your Essential Indoor Camera. Turning off your camera in the Arlo Secure App •... -
Page 20: Record Clips From Live Video
3. To stop viewing and listening to the live feed, tap Stop Pan and zoom video You can pan and zoom your video feed. 1. Open the Arlo Secure App. 2. Tap Play on the camera feed. On a mobile device, use the pinch gesture to zoom, and touch and drag to move around the zoomed-in frame. -
Page 21: Motion Detection Activity Zones
If you’re using an Android device, tap the slider to OFF and then rotate the image. Motion detection activity zones You can designate zones within the camera view where you want the camera to detect and record motion. An Arlo Secure subscription is required. Add an activity zone 1. Open the Arlo Secure App. - Page 22 If you’re using a web browser, click > next to the zone name. 9. Tap Save. Change an activity zone 1. Open the Arlo Secure App. 2. Tap Settings > My Devices. 3. Select the camera. 4. Under VIDEO, tap Activity Zones.
-
Page 23: 2-Way Audio
1. Open the Arlo Secure App. 2. Tap the camera feed image. 3. Tap the microphone icon . 4. The first time you use 2-Way Audio, allow Arlo to use your phone’s microphone. 5. Tap the microphone button. 2-Way Audio is activated. - Page 24 Arlo Essential Indoor Camera Access cloud recordings cameras record when they are in an armed mode and they detect motion or sound. Your Arlo recordings are sent to your Arlo account in the cloud and stored in your library. Recordings are encrypted with your user name and password.
- Page 25 3. Tap a recording. 4. Tap Share. 5. Share the file. Donate recordings for research You can donate video or snapshot files to Arlo to use for research and development of Arlo products. 1. Open the Arlo Secure App. 2. Tap Library.
- Page 26 Arlo Essential Indoor Camera Delete recordings 1. Open the Arlo Secure App. 2. Tap Library. 3. Tap a recording. 4. Tap Delete. 5. Tap OK to confirm. Use Your Essential Indoor Camera User Manual...
-
Page 27: Access Your Arlo Account
5. Access Your Arlo Account Once you set up your Arlo account, you can access it by using the Arlo Secure App on a smartphone or tablet, or from a computer using a web browser. If you’re using a computer, enter https://my.arlo.com/#/login... -
Page 28: Use Face Or Fingerprint Authentication
4. Tap the switch next to Enable. 5. Select your verification method. Note: Your Arlo account email is an automatic back-up option. 6. Follow the instructions in the app to complete your two-step verification setup. Add a phone number or device to two-step verification 1. -
Page 29: Customize Your Profile
5. Slide the toggle Face ID to the right (on) or left (off). Customize your profile You can enter your name, add a profile photo and home address, and opt-in or opt-out of Arlo news and support updates. Add a profile picture 1. -
Page 30: Change Your Arlo Password
7. Tap Save at the bottom of the page. Edit profile settings You can enter your name, add a profile photo and home address, and opt-in or opt-out of Arlo news and support updates. 1. Open the Arlo Secure App. -
Page 31: Grant Access To Friends
Your password is reset. Grant access to friends You can add friends to your Arlo account. Friends can view live streams from your cameras; record video clips; view, share, mark as favorite, and delete clips from your library; and take snapshots. - Page 32 Selecting Allow Access Rights allows this friend to change your account and camera settings. 8. Tap Send Invite. An email message is sent inviting your friend to create an Arlo account. This friend’s name is displayed with the status Pending. When the friend accepts your invitation, the status changes to Accepted.
- Page 33 Arlo Essential Indoor Camera 3. Under ACCOUNT, tap Grant Access. 4. Select the friend, and tap Edit 5. Tap Delete Friend. 6. Tap Yes. Access Your Arlo Account User Manual...
-
Page 34: Modes, Rules, And Alerts
6. Modes, Rules, and Alerts You can arm or disarm your Arlo cameras and devices, and you can set up a schedule to automatically arm each device. When your camera is armed, it detects motion. Modes and rules let you tell your Arlo system what to do automatically in different situations. For example, you can set your Arlo system to record a video when it detects motion and send you an email alert. -
Page 35: Arm Or Disarm All Devices
Rules for modes Each mode uses one or more rules to control your Arlo system. You can set these options. Trigger device. The trigger device is the camera that detects motion. You can adjust the •... -
Page 36: Change Motion Sensitivity
You can edit a rule to change the motion sensitivity level for your cameras. 1. Open the Arlo Secure App. 2. Tap Mode. 3. Select your camera or your optional Arlo SmartHub or base station, if you use one. A list of modes displays. 4. Tap Edit next to the mode. -
Page 37: Add A Rule With An Optional Base Station Siren Trigger
This rule isn’t active until you activate the mode to which you added the siren trigger. Add a custom mode You can create modes in addition to the modes that come with the Arlo Secure App and give the new modes custom names, such as Vacation. You can create one rule for each mode. -
Page 38: Arm Only Outdoor Cameras Connected To An Optional Smarthub Or Base Station
Your Essential Indoor Camera doesn’t require an Arlo SmartHub or base station. If you use an optional SmartHub or base station with your Arlo cameras, you can add a mode to arm only your outdoor cameras and disarm your indoor cameras. This is useful if you want Arlo to monitor outside activity, but you don’t want to record yourself while you’re indoors. -
Page 39: Manage Alerts
Arlo notifications on your phone, you must install the Arlo Secure App on your phone. Note: If you log out of the Arlo Secure App on your smartphone or mobile device, you will stop receiving push notifications. 1. Open the Arlo Secure App. -
Page 40: Mute Notifications
This is great for a party when you don’t need to be notified of friends in your backyard. You can mute notifications from the Arlo Secure App. If you use Arlo Secure, you can also activate Mute Notifications directly from push notifications. -
Page 41: Set Up Arlo Geofencing
Geofencing is a virtual fence around a location called a zone. You can use Arlo Geofencing to arm, disarm, or resume schedule modes when your mobile device is in zone or out of zone. To set up geofencing, you must use your mobile device and allow the Arlo Secure App to use your location. - Page 42 1. Enable GPS or location services so that Arlo can locate your device. 2. Enable WiFi. 3. Download the Arlo Secure App and log in on each mobile device that you plan to enable for geofencing. For Arlo Geofencing to work on your device, you must adjust the settings on your Android or...
-
Page 43: Geofencing With Multiple Mobile Devices
Your camera uses this mode when your mobile device is within the radius of your camera’s location. Most people select Disarmed while they’re home. If you use more than one enabled mobile device, you might be asked to select an Arlo device to connect it to. - Page 44 • (Required when your friend wants to participate in geofencing.) Your friend is logged in to the Arlo Secure App on his or her mobile device and the GPS or location service is enabled on your friend’s mobile device. Enable or disable geofencing for friends’ mobile devices 1.
-
Page 45: Change Your Settings
Tap Menu or the Device Settings icon • below the camera feed. Change the camera name 1. Open the Arlo Secure App. 2. Tap Settings > My Devices. 3. Tap the camera. 4. Tap Edit next to the camera name. -
Page 46: Change The Time Zone
If you’re using a mobile device, your settings are saved. 6. If you’re using a computer, click Save. Change the time zone 1. Open the Arlo Secure App. 2. Tap Settings > My Devices. 3. Tap the camera or the optional SmartHub or base station if you use one. -
Page 47: Adjust The Audio Settings
1. Open the Arlo Secure App. 2. Tap Settings > My Devices. 3. Select your camera or your optional Arlo SmartHub or base station, if you use one. 4. Tap Flicker Adjustment. 5. Tap a setting. Turn the Essential Indoor Camera on and off Once you power on your Essential Indoor Camera and set it up, you can leave it on for normal use. -
Page 48: Restart The Camera From The Arlo Secure App
Arlo Essential Indoor Camera The Essential Indoor Camera doesn’t have an on/off switch, but you can use the Arlo Secure App to turn it on and off from the Device Settings page. To turn the camera on and off: 1. Open the Arlo Secure App. -
Page 49: Optional Smarthub And Base Station Settings
Arlo Essential Indoor Camera Optional SmartHub and Base Station settings You can pair your camera to an optional Arlo SmartHub model VMB5000 or VMB4540 or Base Station with Siren model VMB4500 or VMB4000. The Arlo Secure App lets you specify SmartHub or base station settings. - Page 50 Arlo Essential Indoor Camera Base station siren button The Base Station with Siren model VMB4000 has a button located on the top. WARNING: The loudest siren setting, which is the default for the siren, is more than 100 decibels. Do not test the siren while people or pets are close to the base station.
-
Page 51: Smarthub Sd Card Storage
If you have an active live stream connection between an Arlo Ultra camera and a SmartHub, you can record to a microSD card. Your Arlo Secure App notifies you when the SD card is low on storage space or is full. -
Page 52: View The Sd Card Status
The Arlo Secure App also notifies you if this occurs. View available SD card storage The Arlo Secure App notifies you if the SD card is getting full, but you can also view the available storage. 1. Open the Arlo Secure App. -
Page 53: Change The Sd Card Overwrite Setting
Change the SD card overwrite setting By default, if the SD card fills up, the oldest Arlo recording is erased to make room for new recordings. Files on the SD card that aren’t in the Arlo folder aren’t deleted to make room for Arlo recordings. -
Page 54: View Videos On A Microsd Card
Arlo SD card recording is disabled until you insert another SD card. View videos on a microSD card To view Arlo videos saved on a microSD card, you must remove the microSD card from your SmartHub and use a microSD card reader. -
Page 55: Smarthub Or Base Station Usb Storage
Base station VMB4500 SmartHub VMB4540 You can connect a USB storage device to the USB port and store your Arlo recordings both in the cloud and on the USB device. If the SmartHub or Base Station with Siren isn’t connected to the internet, recordings continue to be saved on your USB storage device. -
Page 56: View The Usb Storage Device Status
Essential Indoor Camera USB storage device format The SmartHub supports these file formats for local storage: • FAT16 • FAT32 • ExFAT • ext2FAT • ext3FAT • ext4FAT • HFS+ The minimum USB drive size is 16 GB and the maximum-size drive that those file systems support is 2 TB. -
Page 57: Turn Usb Recording Off And On
Change the USB device overwrite setting By default, if the USB storage device fills up, the oldest Arlo recording is erased to make room for new recordings. Files on the USB device that aren’t in the Arlo folder aren’t deleted to make room for Arlo recordings. -
Page 58: Safely Eject A Usb Storage Device
3. Wait for the USB storage device to appear in the list of available drives on your computer, and then open the drive folder to view the files on your USB storage device. 4. Open the Arlo folder. Recorded videos are saved in this folder in MP4 format. Video files are named according to this system: camera serial number_video number_date_video clip tag. -
Page 59: 10. Troubleshooting
Scan a QR code during setup During setup, the camera must scan a QR code from the Arlo Secure App when you’re adding the camera to your 2.4 GHz WiFi network. If your camera doesn’t emit a chime sound after scanning the QR code, then the QR code wasn’t successfully scanned. -
Page 60: Arlo Doesn't Discover Your Camera During Setup
Arlo Essential Indoor Camera Arlo doesn’t discover your camera during setup If you’re trying to set up and connect your Arlo camera directly to your WiFi router—without an Arlo SmartHub or base station—and Arlo doesn’t discover your camera, here are some things to check to identify and correct the problem. -
Page 61: Can't See Video Streams In A Browser
We recommend that you place your camera at least 1 to 3 feet (30 to 100 centimeters) from your router or Arlo SmartHub or base station if you use one. Allow at least 6½ feet (2 meters) between each camera to prevent WiFi signals between the devices from interfering with each other. -
Page 62: Not Receiving Push Notifications
Not receiving push notifications You must be logged in to the Arlo Secure App to receive Arlo alerts on your smartphone or mobile device. Arlo registers your device for push notification when you log in. If you used the logout option instead of simply exiting the app, you must log back in to the app. -
Page 63: Reset The Camera To Its Factory Settings
If you said no to push notifications at installation When you install the Arlo Secure App for the first time, to receive alerts, you must select Allow when asked if you want Arlo to send you push notifications. For iOS apps, after you respond to this alert, it isn’t presented again unless the device is restored to factory settings or the app... -
Page 64: 11. Arlo Connect
Tell Amazon Alexa, “Alexa, enable Arlo skill” to receive instructions in your Alexa app to link your Arlo account with your Alexa account. In the Alexa app, search for the Arlo Skill and select Enable Skill to link your Arlo account •... -
Page 65: Add Arlo Devices To The Apple Home App
Add Arlo devices to the Apple Home app For the best experience, add your Arlo devices to your Arlo account before you add them to the Apple Home app. When you add your SmartHub to the Apple Home app, all Arlo devices that are paired to the SmartHub are available in the Home app. - Page 66 If you have trouble scanning the code, tap Don’t Have a Code or Can’t Scan? and then enter the code. 5. Tap Done on the top right. After you add the SmartHub, all Arlo devices that are paired with the SmartHub are available in HomeKit. For live video, tap the camera screen shot.
-
Page 67: Add Your Camera To The Google Assistant App
For more information, see Google Assistant Help: Control smart home devices. Use Arlo with IFTTT You can use the Arlo Secure App with IFTTT (If This Then That), a free cloud-based service that connects smart home devices and applications. To add Arlo to your IFTTT app, visit ifttt.com/arlo. - Page 68 PN 202-50040-01 Trademarks © Arlo Technologies, Inc. Arlo, Arlo logo, and Every Angle Covered are trademarks of Arlo Technologies, Inc. Apple is a trademark of Apple Inc., registered in the US and other countries. App Store is a service mark of Apple Inc. Google Play and the Google Play logo are trademarks of Google LLC.
- Page 69 Arlo Essential Indoor Camera • Connect the equipment into an outlet on a circuit different from that to which the receiver is connected. • Consult the dealer or an experienced radio/TV technician for help. This device complies with part 15 of the FCC Rules. Operation is subject to the following two conditions: (1) This device may not cause harmful interference, and (2) this device must accept any interference received, including interference that may cause undesired operation.
- Page 70 Arlo Essential Indoor Camera Radiation Exposure Statement: This equipment complies with IC radiation exposure limits set forth for an uncontrolled environment. This equipment should be installed and operated with minimum distance 20cm between the radiator and your body. Déclaration d’exposition aux radiations: Cet équipement est conforme aux limites d’exposition aux rayonnements IC établies pour un...
- Page 71 Essential Video Doorbell Wired User Manual...
- Page 72 FAQs ................................ 9 Get Started Voltage requirements ........................10 Use the Arlo app for installation and setup .................. 12 Install the Power Kit in your chime box ..................12 Install your wired Arlo Essential Video Doorbell ................13 Use the optional wire extensions ....................14 LED ................................
- Page 73 Use silent mode to stop the Chime 2 from ringing ..............28 Use Your Doorbell Answer your wired Arlo Essential Video Doorbell from your smartphone ......29 Accept a call from your Video Doorbell ..................29 Respond to a visitor with a Quick Reply ..................30 Play a message from a visitor ......................
- Page 74 Essential Video Doorbell Wired Restart the doorbell from the Arlo app ..................52 Modes, Rules, and Alerts Arm or disarm all your Arlo devices ....................53 Modes ..............................53 Select a mode ............................. 54 Mute Notifications ..........................54 Rules for modes ..........................55 Trigger a Chime 2 when the doorbell is pressed .................
- Page 75 Use Arlo with IFTTT ........................... 74 12. Troubleshooting The doorbell doesn’t scan the QR code in the Arlo app during setup ........75 Arlo doesn’t discover your doorbell during setup ..............76 Use Bypass mode for the Power Kit ....................77 Traditional chime doesn’t ring when I press the doorbell............
-
Page 76: Get To Know Your Doorbell
1. Get to Know Your Doorbell The wired Arlo Essential Video Doorbell lets you get notifications when motion is detected and view live video on your phone. Get the bigger picture of what’s at your door, from head to toe or a package on the ground. -
Page 77: Rear View
If you need further help, contact a local electrician or professional to assist you. Get the Arlo app Download the Arlo app. The Arlo app lets you create an Arlo account in the cloud and set up and manage all your Arlo devices. Note: If you already use the Arlo app, make sure that you’re using the latest version. -
Page 78: Optional Arlo Smarthub Or Base Station
You can connect your wired Arlo Essential Video Doorbell directly to your home router’s 2.4 GHz WiFi network, or you can connect your doorbell to an Arlo SmartHub or Base Station with siren. Your doorbell is compatible with any of the models described in this section. -
Page 79: Faqs
VMB5000 and VMB4540 and with Base Station with Siren models VBM4500 and VMB4000. • Is leaving a message on the wired Arlo Essential Video Doorbell the same as leaving a message on the Arlo Audio Doorbell? Yes. If no action has been taken 20 seconds after a doorbell press, the visitor is prompted to leave a voicemail. -
Page 80: Get Started
2. Get Started You can install the wired Arlo Essential Video Doorbell yourself, or contact a local electrician or professional to assist you. Note: In some regions, a transformer is included in the package with the wired Arlo Essential Video Doorbell. It is recommended that the transformer be installed by a professional electrician. - Page 81 3. Connect the two probes from the multimeter to the wires from your doorbell. 4. Read the voltage level on your multimeter’s display. If the voltage level is between 16-24 VAC, you can use the wired Arlo Essential Video Doorbell with your current doorbell transformer.
-
Page 82: Use The Arlo App For Installation And Setup
2. Follow the instructions in the Arlo app to install and set up your wired Arlo Essential Video Doorbell. Once you set up your Arlo account, you can access it by using the Arlo app on a smartphone or tablet, or from a computer using a web browser. If you’re using a computer, enter https:// my.arlo.com/#/login... -
Page 83: Install Your Wired Arlo Essential Video Doorbell
Phillips screwdriver • (Optional) power drill After installing the Power Kit in your chime box, follow the steps in the Arlo app to install your doorbell. The Arlo app guides you through installation in this order: 1. Turn off your power at the breaker. -
Page 84: Use The Optional Wire Extensions
Fastener Wire extension If the existing wires for your doorbell are too short to connect your wired Arlo Essential Video Doorbell you can use the wire extensions and fasteners to lengthen the wires. To connect wire extensions to your wired Arlo Essential Video Doorbell: 1. -
Page 85: Led
You are ready to use the Arlo app to continue the setup process for your Video Doorbell. The LED is on the outside of your wired Arlo Essential Video Doorbell and indicates how the doorbell is operating. The following sections describe how the LED works if you didn’t change the default LED settings. -
Page 86: Test Motion Detection
Flashing white. Your Video Doorbell is scanning for a QR code, attempting to connect to WiFi, or attempting to connect to the Arlo network. If your doorbell LED continues to flash white for more than a few minutes, change the WiFi settings in your phone to connect to the same 2.4 GHz WiFi network as the doorbell. -
Page 87: Control When Your Doorbell Detects Motion
Control when your doorbell detects motion You control when your wired Arlo Essential Video Doorbell detects motion and the rules it uses to record and alert you by selecting a mode. The Arlo app comes with four modes: • Armed •... -
Page 88: Wifi Setup And Connections
Use local storage on an SD card in a VMB5000 SmartHub or on a USB storage device connected to the SmartHub VMB4540 or base station VMB4500 or VMB4000. • You can set up rules so that your doorbell triggers the Arlo Chime to play a tone when the Arlo Video Doorbell button is pressed. •... -
Page 89: Connect Your Mobile Device To A 2.4 Ghz Wifi Network During Setup
WiFi network as the doorbell during setup. Your Arlo Video Doorbell can only connect to a 2.4 GHz WiFi network. Many routers broadcast WiFi networks in both 2.4 GHz and 5 GHz bands, so your phone might connect to the 5 GHz WiFi band. -
Page 90: Connect An Optional Arlo Smarthub
Ethernet cable to connect to your router. Connect a SmartHub The Arlo app guides you through the steps to install and set up your Arlo SmartHub. 1. Connect the SmartHub to your router with an Ethernet cable. -
Page 91: Connect An Optional Arlo Base Station With Siren
Connect an optional Arlo Base Station with Siren You can connect your Arlo Video Doorbell directly to your home router’s 2.4 GHz WiFi network, or you can connect your doorbell to an Arlo SmartHub or Base Station with siren. Your doorbell is compatible Base Station with Siren model VMB4500 and VMB4000. - Page 92 The LED located on the front indicates the status of the base station. The LED lights as follows: • Solid blue. The base station is connected to the Internet and to an Arlo camera. Slow blinking blue. The base station is ready to sync with a camera. •...
-
Page 93: Move Your Doorbell's Wifi Connection To A Smarthub Or Base Station
If you’re using an Arlo Smart trial associated with this account, doing this keeps the Arlo Smart trial active so you don’t lose it. 3. Follow the Arlo app instructions to set up your SmartHub or base station and connect it to the Internet. -
Page 94: Move Your Doorbell's Wifi Connection To A Direct Router Connection
SmartHub or base station. To move your Arlo Video Doorbell’s WiFi connection directly to your router: 1. Open the Arlo app and log into the same Arlo account that your Arlo Video Doorbell is connected to. -
Page 95: Optional Arlo Chime
4. Optional Arlo Chime 2 The Arlo Chime 2 lets you receive instant alerts from your Arlo doorbell and your Arlo cameras. Meet your Chime 2 Speaker Front view, integrated items and features: • Speaker: The speaker rings or plays a melody when someone presses your doorbell. -
Page 96: Do More With Your Chime 2
Arlo Smart subscription. You can pair more than one Arlo doorbell with your Chime 2. For example, if you have two Arlo Essential Video Doorbells (Wired or Wire-Free), you can set both to trigger your Arlo Chime. -
Page 97: Chime 2 Led
Essential Video Doorbell Wire-Free Chime 2 LED The Arlo Chime 2 LED indicates the chime status and activity. When the chime first powers on, the LED lights solid white for a brief period. During regular operation, the LED is off except when the Chime 2 is making a sound. -
Page 98: Use Silent Mode To Stop The Chime 2 From Ringing
To select a melody for your Arlo Chime 2: 1. Open the Arlo app. 2. Tap Settings > My Devices. 3. Select an Arlo doorbell that is paired with your Arlo Chime 2. 4. Tap Melody > Chime Melody. 5. Select a melody. -
Page 99: Use Your Doorbell
If the visitor leaves a message, it is saved as a Doorbell recording in your Arlo library. If you want to receive the call on a different phone, you can log out of the Arlo app on the first smartphone and log into the Arlo app on another smartphone or tablet. -
Page 100: Respond To A Visitor With A Quick Reply
3. Scroll down and tap Language. 4. Select a language. Play a message from a visitor If a visitor leaves a message after pressing your doorbell, the message is saved in your Arlo library. 1. Open the Arlo app. Use Your Doorbell... -
Page 101: Use Silent Mode For The Doorbell
• Incoming Call. Your mobile device receives a call when someone presses your Arlo doorbell. Arlo Chime 2 or Arlo Chime. If you have an optional Arlo Chime 2 or Chime (sold • separately), you can select it. •... -
Page 102: Change The Call Settings
You can turn the siren on and off from the Arlo app. Note: With an Arlo Smart plan, you can also activate the siren from the push notification sent on motion detection. To turn the doorbell siren on or off from the Arlo app: 1. - Page 103 Essential Video Doorbell Wired If you have multiple Arlo devices with sirens, you’re prompted to select a device. 4. Swipe the Siren icon to the right. The siren remains active for five minutes or until you turn it off. 5. To turn off the siren, tap the slider at the top of the Devices page.
-
Page 104: View And Record Videos
6. View and Record Videos When you open the Arlo app, the Devices page displays your video doorbell feed. Tap to turn the siren on and off. Live camera feed from the doorbell Tap Play to begin streaming or Stop to stop. -
Page 105: View Your Doorbell's Camera Feed
Video Settings. 1. Open the Arlo app. 2. Tap Library. 3. Tap any live video or prerecorded video from your Arlo library. A full screen view displays. 4. To pan and zoom using a mobile device: •... -
Page 106: Take A Snapshot From Live Video
1. Open the Arlo app. 2. Tap the camera feed image. 3. Tap the microhone icon . 4. The first time you use 2-way audio, allow Arlo to use your phone’s microphone. 5. Tap the microphone button. Two-way audio is activated. -
Page 107: Motion Detection Activity Zones
Essential Video Doorbell Wired Motion detection activity zones With an Arlo Smart subscription, you can designate zones within the doorbell camera view where you want the camera to detect and record motion. Add an activity zone 1. Open the Arlo app. -
Page 108: View Recordings And Snapshots
Arlo account in the cloud and stored in your library. Recordings are encrypted with your user name and password. You can access your recordings from the Arlo app on your mobile device or by using a web browser to visit https://my.arlo.com/#/login. You can download recordings from the cloud and save them. -
Page 109: Download Recordings
Essential Video Doorbell Wired Use the filter You can use the filter to find and view recordings based on criteria that you select. 1. Open the Arlo app. 2. Tap Library. 3. Tap Filter in the upper left corner of the page. - Page 110 3. Tap a recording. 4. Tap Share. 5. Share the file. Donate recordings for research You can donate video or snapshot files to Arlo to use for research and development of Arlo products. 1. Open the Arlo app. 2. Tap Library.
-
Page 111: Change Your Settings
7. Change Your Settings Once you set up your Arlo account, you can access it by using the Arlo app on a smartphone or tablet, or from a computer using a web browser. If you’re using a computer, enter https:// my.arlo.com/#/login... -
Page 112: Use Face Or Fingerprint Authentication
4. Tap the switch next to Enable. 5. Select your verification method. Note: Your Arlo account email is an automatic back-up option. 6. Follow the instructions in the app to complete your two-step verification setup. Add a phone number or device to two-step verification 1. -
Page 113: Customize Your Profile
5. Slide the toggle Face ID to the right (on) or left (off). Customize your profile You can enter your name, add a profile photo and home address, and opt-in or opt-out of Arlo news and support updates. Add a profile picture 1. -
Page 114: Change Your Arlo Password
6. Upload your preferred profile picture. 7. Tap Save at the bottom of the page. Edit profile settings You can enter your name, add a profile photo and home address, and opt-in or opt-out of Arlo news and support updates. 1. Open the Arlo app. -
Page 115: Grant Access To Friends
Your password is reset. Grant access to friends You can add friends to your Arlo account. Friends can view live streams from your cameras; record video clips; view, share, mark as favorite, and delete clips from your library; and take snapshots. - Page 116 Selecting Allow Access Rights allows this friend to change your account and camera settings. 8. Tap Send Invite. An email message is sent inviting your friend to create an Arlo account. This friend’s name is displayed with the status Pending. When the friend accepts your invitation, the status changes to Accepted.
-
Page 117: Change The Time Zone
5. Tap Save. Change the type of traditional chime the doorbell triggers You can set your wired Arlo Essential Video Doorbell to trigger a mechanical, digital, or no chime when someone presses the doorbell button. Before changing the chime settings in the Arlo app, you must wire your wired Arlo Essential Video Doorbell and Power Kit to the correct chime configuration. - Page 118 Essential Video Doorbell Wired To change the type of chime that your wired Arlo Essential Video Doorbell triggers: 1. Open the Arlo app. 2. Tap the gear icon next to the wired doorbell. 3. Tap Traditional Chime. 4. Select Mechanical, Digital, or None.
- Page 119 High dyanmic range (HDR) solves the problem with over- or under-exposed images of scenes with both bright and dark areas in the same picture. Your wired Arlo Essential Video Doorbell automatically determines when to use HDR. HDR is optimized for outdoor environments. Your camera comes set to use HDR automatically, but you can turn it on and off.
-
Page 120: Adjust The Flicker Setting
4. Tap a setting. Optional SmartHub and Base Station settings You can connect your Arlo Video Doorbell directly to the 2.4 GHz WiFi network of your router. If you prefer, you can connect your doorbell with a SmartHub model VMB5000 or VMB4540 or Base Station with Siren model VMB4500 or VMB4000. -
Page 121: View Device Information
Do not test the siren while people or pets are close to the base station. Prolonged exposure to the siren might cause hearing damage. To turn the base station siren on and off using the Arlo app 1. Open the Arlo app. -
Page 122: Remove A Device From Your Account
Restart the doorbell from the Arlo app 1. Open the Arlo app. 2. Tap Settings > My Devices. 3. Tap the wired Arlo Essential Video Doorbell. 4. Scroll down to the bottom of the page and tap Restart. Change Your Settings... -
Page 123: Modes, Rules, And Alerts
8. Modes, Rules, and Alerts You can arm or disarm Arlo devices that detect motion or audio, either individually or all at the same time. You can also set up a schedule to automatically arm each device. Your doorbell always detects motion. When it is armed, it alerts you when motion is detected, and can be set... -
Page 124: Select A Mode
This is great for a party when you don’t want to be disturbed. You can mute notifications from the Arlo app. If you use Arlo Smart, you can also activate Mute Notifications directly from push notifications. -
Page 125: Rules For Modes
Essential Video Doorbell Wired Rules for modes Each mode uses one or more rules to control your Arlo system. You can set these options. Trigger device. If your doorbell is your only Arlo device, it is the trigger device that detects •... -
Page 126: Change Motion Sensitivity
7. Select your Chime 2 on the Action Device page, and tap Save. 8. Select Activate Siren. Change motion sensitivity You can edit a rule to change the motion sensitivity level for your cameras. 1. Open the Arlo app. 2. Tap Mode. 3. Tap the doorbell. 4. Tap Edit next to the mode. -
Page 127: Manage Alerts
Arlo notifications on your phone, you must install the Arlo app on your phone. Note: If you log out of the Arlo app on your smartphone or mobile device, you will stop receiving push notifications. 1. Open the Arlo app. -
Page 128: Set Up Arlo Geofencing
Geofencing is a virtual fence around a location called a zone. You can use Arlo Geofencing to arm, disarm, or resume schedule modes when your mobile device is in zone or out of zone. To set up geofencing, you must use your mobile device and allow the Arlo app to use your location. - Page 129 1. Enable GPS or location services so that Arlo can locate your device. 2. Enable WiFi. 3. Download the Arlo app and log in on each mobile device that you plan to enable for geofencing. For Arlo Geofencing to work on your device, you must adjust the settings on your Android or...
-
Page 130: Geofencing With Multiple Mobile Devices
Your camera uses this mode when your mobile device is within the radius of your camera’s location. Most people select Disarmed while they’re home. If you use more than one enabled mobile device, you might be asked to select an Arlo device to connect it to. - Page 131 • (Required when your friend wants to participate in geofencing) Your friend is logged in to the Arlo app on his or her mobile device and the GPS or location service is enabled on your friend’s mobile device. Enable or disable geofencing for friends’ mobile devices 1.
-
Page 132: Custom Modes
58. Custom modes You can add modes in addition to the modes that come with the Arlo app and give the new modes custom names, such as Vacation. You can create one rule for each mode. You can create multiple rules within the same mode so that each camera performs different actions and sends different alerts. -
Page 133: Use Your Doorbell To Trigger A Camera To Record
Use your doorbell to trigger a camera to record You can set up a rule so that your wired Essential Video Doorbell triggers an Arlo camera to start recording when the doorbell detects motion. For example, you can trigger an Arlo wire- free camera overlooking your front entry to record, even if the camera doesn’t detect motion. -
Page 134: Smarthub Sd Card Local Storage
Internet, recordings continue to be saved on the microSD card. If you have an active live stream connection between an Arlo Ultra camera and a SmartHub, you can record to a microSD card. Your Arlo app notifies you when the SD card is low on storage space or is full. MicroSD card format Your SmartHub accepts SDHC or SDXC microSD cards. -
Page 135: View The Sd Card Status
The Arlo app also notifies you if this occurs. View available SD card storage The Arlo app notifies you if the SD card is getting full, but you can also view the available storage: 1. Open the Arlo app. -
Page 136: Change The Sd Card Overwrite Setting
Change the SD card overwrite setting By default, if the SD card fills up, the oldest Arlo recording is erased to make room for new recordings. Files on the SD card that aren’t in the Arlo folder aren’t deleted to make room for Arlo recordings. -
Page 137: View Videos On A Microsd Card
Arlo SD card recording is disabled until you insert another SD card. View videos on a microSD card To view Arlo videos saved on a microSD card, you must remove the microSD card from your SmartHub and use a microSD card reader. -
Page 138: Smarthub Or Base Station Usb Local Storage
SmartHub VMB4540 Base station VMB400 You can connect a USB storage device to the USB port and store your Arlo recordings both in the cloud and on the USB device. If the SmartHub or Base Station with Siren isn’t connected to the Internet, recordings continue to be saved on your USB storage device. -
Page 139: View The Usb Storage Device Status
The Arlo app also notifies you if this occurs. View available USB device storage The Arlo app notifies you if the USB device is getting full, but you can also view the available storage. 1. Open the Arlo app. -
Page 140: Turn Usb Recording Off And On
The overwrite setting toggles off and on. Format a USB device The Arlo app displays a pop-up message to let you know if it is necessary to format the USB storage device. The SmartHub can format the USB storage device. -
Page 141: Safely Eject A Usb Storage Device
USB recording is disabled until you connect another USB device. View videos on a USB device Video clips on USB storage devices don’t display in the Arlo app, but you can use a Windows- based or Mac computer to view the clips. -
Page 142: 11. Arlo Connect
Echo Show, Fire TV, or Fire tablet. Alexa can also notify you when motion is detected by your Arlo cameras. To use the Arlo Skill, you need a connected wired Arlo Essential Video Doorbell and one of these Amazon devices: •... -
Page 143: Add Your Doorbell To The Google Assistant App
Ask Amazon Alexa “Alexa, enable Arlo skill” to receive instructions in your Alexa app to link your Arlo account with your Alexa account. • In the Alexa app, search for the Arlo Skill and select Enable Skill to link your Arlo account with your Alexa account. Use the Arlo Skill After you enable the Arlo Alexa Skill, you can try using these commands: “Alexa, show me <camera name>.”... -
Page 144: Use Arlo With Ifttt
For more information, see Google Assistant Help: Control smart home devices. Use Arlo with IFTTT You can use the Arlo app with IFTTT (If This Then That), a free cloud-based service that connects smart home devices and applications. To add Arlo to your IFTTT app, visit ifttt.com/arlo. -
Page 145: 12. Troubleshooting
(not Dark) under Settings > Display & Brightness. • If your phone is small, consider using the Arlo app on a tablet to set up your doorbell. • If the infrared (IR) LED on the doorbell is lit red while you are scanning the QR code, cover the LED with your thumb. -
Page 146: Arlo Doesn't Discover Your Doorbell During Setup
Arlo doesn’t discover your doorbell during setup After your doorbell scans the QR code in the Arlo app during setup, the Arlo app attempts to discover your wired Arlo Essential Video Doorbell on the same WiFi network that your phone is connected to. -
Page 147: Use Bypass Mode For The Power Kit
16-24 VAC, you might need to activate Bypass mode on your Power Kit. When Bypass mode is turned on, your wired Arlo Essential Video Doorbell isn’t electrically connected to your doorbell chime. This prevents your doorbell chime from ringing when you use your doorbell. -
Page 148: Doorbell Led Doesn't Light
78. • Check the chime setting in the Arlo app. For your chime to ring, the chime setting in the Arlo app must be set to Mechanical or Digital, depending on the type of doorbell chime you have. See Change the type of chime the doorbell triggers on page 47. -
Page 149: Power Interruption Notification
WiFi and Internet connection are still working. If you have an Arlo Smart subscription, you can tap the notification to activate an alarm, call a friend, or call e911. -
Page 150: Reset The Doorbell
2. Use a paperclip or the release pin to press and hold the reset button on the back of the doorbell for about 10 seconds. The doorbell LED flashes white. 3. To add the doorbell to your Arlo account and set it up, open the Arlo app and tap Add New Device. Troubleshooting... -
Page 151: Can't See Video Streams In A Browser
Can’t see video streams in a browser Your router might be blocking the ports to which Arlo sends data. To make sure that Arlo can stay connected, you must keep ports 443 and 80 open on your router. Also see the following sections WiFi signal interference and Out of range. -
Page 152: Troubleshoot Arlo Geofencing
If you said no to push notifications at installation When you install the Arlo app for the first time, to receive alerts, you must select Allow when asked if you want Arlo to send you push notifications. For iOS apps, after you respond to this alert, it isn’t presented again unless the device is restored to factory settings or the app is... -
Page 153: Scan The Qr Code During Chime 2 Setup
Scan the QR code during Chime 2 setup The Arlo Chime 2 is optional. When you use the Arlo app to set up your Chime 2, you’re prompted to use your mobile device to scan the QR code located on the chime. If the Arlo app doesn’t read this QR code, try the following:... -
Page 154: Arlo Doesn't Discover Chime 2 During Setup
QR code on your chime. Arlo doesn’t discover Chime 2 during setup The Arlo Chime 2 is optional. If the Arlo app cannot discover your Arlo Chime 2, check the following: 1. An internet connection is available. Check the status of the internet on your WiFi router. If your router isn’t connected to the internet, contact your internet service provider (ISP) or... -
Page 155: Reset Your Arlo Chime 2
The Chime 2 must be plugged in to an indoor power outlet that supplies continuous power AC power. If your Arlo Chime 2 still doesn’t ring, reset it and add it back to your Arlo account. For more information, see the following section, Reset the Chime www.arlo.com/en-us/support/... -
Page 156: Verify That An Optional Smarthub Or Base Station Is Online
If the Internet LED is amber, the base station is connected to your router, but it isn’t connected to the Internet. Check the router’s Internet connection. If you’re not at the same location as your SmartHub or base station, open the Arlo app or log in to your Arlo account at my.arlo.com: •... -
Page 157: The Smarthub Or Base Station Is Offline
You can connect your wired Arlo Essential Video Doorbell directly to your home router’s 2.4 GHz WiFi network, or you can connect your doorbell to an Arlo SmartHub or Base Station with siren. Your doorbell is compatible with SmartHub model VMB5000 and VMB4540 and Base Station with Siren model VMB4500 and VMB4000. -
Page 158: Reset A Smarthub To Factory Settings
You can connect your wired Arlo Essential Video Doorbell directly to your home router’s 2.4 GHz WiFi network, or you can connect your doorbell to an Arlo SmartHub or Base Station with siren. Your doorbell is compatible with SmartHub model VMB5000 and VMB4540 and Base Station with Siren model VMB4500 and VMB4000. -
Page 159: Reset A Base Station To Factory Settings
Arlo app. 3. Tap New to Arlo?. 4. Follow the setup instructions. If your Arlo cameras were paired to the SmartHub, you might need to pair the cameras to the SmartHub again. Reset a Base Station to factory settings You can connect your wired Arlo Essential Video Doorbell directly to your home router’s 2.4... - Page 160 The Base Station VMB4000 has three LEDs on the front. The LEDs blink amber. The base station reboots. 2. Wait for the base station to finish rebooting before you unplug it, turn it off, or use the Arlo app to set it up.
- Page 161 PN 202-50004-05 Trademarks © Arlo Technologies, Inc. Arlo, Arlo logo, and Every Angle Covered are trademarks of Arlo Technologies, Inc. App Store is a service mark of Apple Inc. Google Play and the Google Play logo are trademarks of Google LLC. Amazon and all related logos are trademarks of Amazon.
Need help?
Do you have a question about the VMC2040 and is the answer not in the manual?
Questions and answers