Table of Contents
Advertisement
Advertisement
Table of Contents

Related Manuals for Baofeng k6 Series


Summary of Contents for Baofeng k6 Series
- Page 1 Amateur Radio...
- Page 2 PREFACE Thank you for purchasing this product. which is a dual band/dual display/dual watch. This easy-to-use radio will deliver you secure, instant and reliable communications at peak efficiency. Please read this manual carefully before use. The information presented herein will help you to derive maximum performance from your radio. WARNING!...
-
Page 3: Table Of Contents
Table of Contents Chapter1. Getting Started 5.3 Main Band/Sub Band Select 1.1 Regulations and Safety Warnings 5.4 VFO/Channel Switch 1.2 Content of the packaging 5.5 Frequency (VFO) mode 1.3 Main features 5.6 Channel (MR) mode and Channel selection Chapter2. Charging the Battery 5.7 Making a call 2.1 Charging the Battery Pack 5.8 Using the Flashlight... -
Page 4: Chapter1. Getting Started
Chapter1. Getting Started 1.1 Regulations and Safety Warnings ■ FCC Part15/IC Compliance FCC Part 15 Compliance This device complies with Part 15 of the FCC rules. Operation is subjected to the following two conditions: (1) this device may not cause harmful interference, and (2) this device must accept any interference received, including interference that may cause undesired operation. - Page 5 ■ FCC RF Exposure WARNING! It is up to the user to properly operate this radio transmitter to insure safe operation. Please adhere to the following: Do not use the radio with a damaged antenna. If a damaged antenna comes into contact with the skin, a minor burn may result.
-
Page 6: Important Tips
2. Do not operate the product near or in any blasting area. 3. Do not operate the product near any medical or electronic equipment that is vulnerable to RF signals. 4. Do not hold the product while driving. 5. Do not operate the product in any area where use of wireless communication equipment is completely prohibited. Important Tips To help you make better use of the product, be sure to observe the following instructions: 1. -
Page 7: Maintenance
1. Accumulated dust on charging connector may affect normal charging. Please use a clean and dry cloth to wipe it on a regular basis. 2. It is recommended to charge the battery under 5℃~40℃. Violation of the said limit may cause battery life reduction or even battery leakage. -
Page 8: Content Of The Packaging
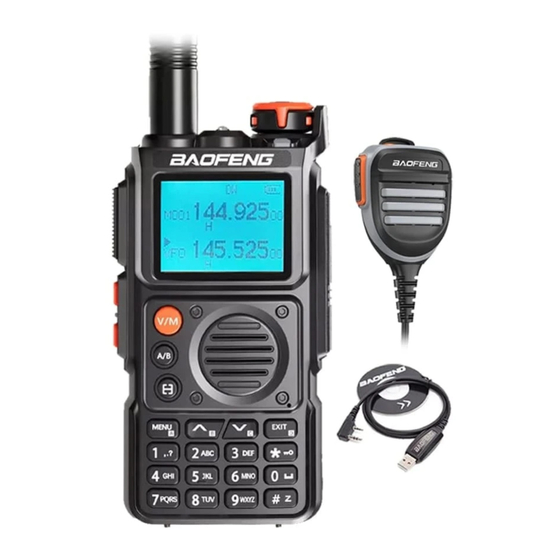
1.2 Content of the packaging • 1 Radio • 1 Li-Ion battery pack • 1 Fast desktop charger • 1 Belt clip • 1 Antenna If any item is missing, please verify with your dealer. 1.3 Main features • Scanning receiver frequency range: FM 65-108 MHz; AM 108-136MHz, VHF 136-174MHz, 200-260MHz ,UHF350-390MHz, 400-600MHz Transmission Frequency 144-148 &... -
Page 9: Chapter2. Battery Information
Chapter2. Battery Information 2.1 Charging the Battery Pack The Li-ion battery pack is not charged at the factory; please charge it before use. Charging the battery pack for the first time after purchase or extended storage (more than 2 months) may not bring the battery pack to its normal maximum operating capacity. Best operation will require fully charging/ discharging the battery two or three times before the operating capacity will reach its best performance. -
Page 10: How To Charge
2.4 How to Charge a. Plug the AC adaptor into the AC outlet, and then plug the cable of the AC adaptor into the DC jack located on the back of the charger. The indicator light blinks orange and is then ready to charge a battery. b. - Page 11 2.7 Using the Type-C USB Charger The micro-USB charger is a handy port that allows you to conveniently charge your Li-ion battery pack. 1. Make sure your radio is turned OFF. 2. Plug the Type-C USB cable into the Type-C USB charging port on your battery. Connect the other end of the micro-USB charger to wall power outlet.
-
Page 12: Chapter3. Installation Of Accessories
Chapter3. Installation of Accessories Before the radio is ready for use we need to attach the antenna and battery pack, as well as charge the battery. 3.1 Installing/ Removing the Antenna a. Slide the battery into the radio frame until the latch which is at the bottom of the radio clicks into place. b. -
Page 13: Chapter4. Radio Overview
Chapter4. Radio Overview 4.1 Buttons and controls of the radio Antenna 2. LED flashlight 3. Status LED 4. Power / Volume knob 5. Battery release latch PTT - Push to talk 7. SK1-Programmable key (flashlight/alarm switch) 8. SK2-Programmable Key (Radio/Monitor) 9. -
Page 14: Status Indications
4.2 LCD Display Icon Description Icon Description Mxxx Memory channel Dual watch enabled Frequency Mode Transmitting VOX enabled Receiving CTCSS enabled Reverse function enabled DCS enabled Indicates active band or channel Narrowband enabled Frequency shift direction if enabled in VFO Battery level indicator Transmit power level indicator According to Power (High/Low) - Page 15 • [MENU] key: Use to activate the MENU, select options, and confirm parameters. • key: Press and hold for more than 2 seconds to rapidly move the channel and frequency upwards. In SCAN mode, use this control to move the scanning upwards. •...
-
Page 16: Chapter5. Basic Operations
Chapter5. Basic Operations 5.1 Power On the Radio To turn the unit on, simply rotate the Volume/Power knob clockwise until you hear a "click". If your radio powers on correctly there should be an audible double beep after about one second and the display will show a message or flash the LCD depending on settings for about one second. -
Page 17: Frequency (Vfo) Mode
5.5 Frequency (VFO) Mode In frequency (VFO) mode you can navigate up and down the band by using the keys. Each press will increment or decrement your frequency according to the frequency step you've set your transceiver to. You can also input frequencies directly on your numeric keypad with kilohertz accuracy. The following example assumes the use of a 12.5 kHz frequency step. -
Page 18: Making A Call
5.7 Making a Call NOTE: PPress the [A/B] key to switch the main channel to the other channel if two channels are shown on the display. In standby mode, press the [V/M] key to switch between frequency (VFO) mode and channel (MR) mode. •... -
Page 19: Monitor
The frequency range of the FM radio is 65-108MHz. (1) In frequency or channel mode, press the [SK2] key to turn on the FM radio. (2) Select the desired radio frequency with keys or input the frequency. Or Press to automatically search a radio station. (3) Press the [SK2] key again to exit FM radio. -
Page 20: One Touch Frequency Search
5.15 One Touch F requency Search (1) The r adio will act as a receiver. Press and hold the key, and the screen will display “SEARCH SWEEK..." (2) If the transmitter continues to transmit and the unit detects a strong and stable signal, the received frequency will be displayed. -
Page 21: Chapter6. Advanced Features
Chapter6. Advanced Features 6.1 Working the Menu System 6.1.1 Basic Use Using the menu with arrow keys 1. Press the [MENU] key to enter the menu. 2. Press the keys to navigate between menu items. 3. Once you find the desired menu item, press [MENU] again to select it. 4. -
Page 22: Scanning
b. To cancel your changes, press the [EXIT] key and it will reset the menu item and exit the menu. 6. Press the [EXIT] key to exit the menu at any time. 7. All further examples and procedures in this manual will use the numerical menu shortcuts. Scanning The Radios features a built in scanner for the VHF and UHF bands. -
Page 23: Channel Scanning
a. In frequency mode, press the key for more than 2 seconds. The radio will start scanning the frequency according to the set frequency step. b. You can change the scanning direction with the keys. c. Press the key to stop the scanning. Note: for Scan mode, see Menu No.19. - Page 24 In standby mode, press [V/M] key to switch between frequency (VFO) mode and channel (MR) mode. These two modes have different functions and are often confused. Frequency Mode (VFO): Used for a temporary frequency assignment, such as a test frequency or quick field programming, if permitted. Channel Mode (MR): Used for selecting preprogrammed channels.
-
Page 25: Repeaters Programming
d. [MENU] [0][5] [MENU] 123.0 [MENU] [EXIT] Select desired TX encode tone (Ex 123 CTCSS) -->>Use [EXIT] to select Upper display e. Enter RX frequency (Ex. 43266250) f. [MENU] [1][3] [MENU] [1][0] [MENU] Enter the desired channel (Ex 10) -->> [EXIT] Channel has been added g. -
Page 26: Vox
This is indicated in the LCD on the radio with an R in the top row, next to the + and - for the offset direction. This function allows hands-free conversations: just speak in the direction of the microphone and the communication will be automatically activated. -
Page 27: Dtmf
Press the [MENU] key to enter this function. Press the keys to enable (ON) it, then press the [MENU] key again to confirm. Press the [EXIT] key to return to the standby mode. Using the stopwatch timer: When this function is ON, press the [MENU] key to start counting;... - Page 28 Press the [MENU] key to enter this function. Press the keys to select the backlight mode: always on/required delay time (ON/5sec/10sec/15sec /20sec) , then press the [MENU] key to confirm your selection. To return to the standby mode, press the [EXIT] key. 6.9.2 Beep PROMPT (BEEP) - MENU If you enable this function, every time a key is pressed, you will hear a Beep tone.
- Page 29 • BEEP: Roger Beep tone at the end of transmission In standby mode, press the [MENU] key, then press numeric keypad [3][3]; the screen will display “ROGER”. Press [MENU] to enter this function. Press keys to select OFF/ON. Press the [MENU] key again to confirm your selection.
-
Page 30: Appendix A. - Trouble Shooting Guide
Press [MENU] to enter this function. Press the keys to select VFO, then press the [MENU] key to confirm. The display will show “Sure to reset?”. Press [MENU] again to confirm and the screen will display “Wait…”. Then, the transceiver will turn off and reboot again. -
Page 31: Appendix B. - Technical Specification
Appendix B. - Technical Specification Scan Receiver: FM 65-108 MHz; AM 108-136MHz, VHF 136- 174MHz, Frequency band 220-260MHz, UHF 350-390MHz, 400-520MHz Transmission: 144-148 & 420-450MHz (America version) 144-148 & 430-450MHz ( Canadian version) Memory channels Power supply batteria Li-Ion da 7.4V/2600 mAh Operating temperature -10°C to + 45°C Working mode... -
Page 32: Appendix C. - Shortcut Menu Operations
Appendix C. - Shortcut Menu operations Name MENU Settings Description (Full Name) Set the alias of the channel. 1 to 16 characters (one Chinese CHL Name CH-1 character takes up two characters) Displays the current received frequency and allows the RX Frequency 430.00000 frequency to be reset... - Page 33 •- [2]: TX will be shifted lower in frequency than RX OFFSET 00.000,…,99.999 Specifies the difference between the TX and RX frequencies This menu is used to either create new or modify existing channels (001 through 999) so that they can be accessed from MEMCH 001,…,999 MR/Channel Mode.
- Page 34 •OFF: No ID is sent When to Send PTT-ID •BOT: The selected S-CODE is sent at the beginning •EOT: The selected S-CODE is sent at the ending PTT ID Codes are sent during either the beginning or ending of a •BOTH: The selected S-CODE is sent at the beginning transmission.
- Page 35 Defines the time between entry and exit of the menu. counter is activated after the radio enters menu operation. If Menu HangTim 5,10,15……50Sec there is no physical operation of the radio until the counter expires, the radio will exit the menu. BEEP PROMPT OFF | ON Allows audible confirmation of a key press...
- Page 36 Busy Lockout •ON: the radio can transmit only if the channel is free. that are already in use. This function is used eliminate squelch tail noise between BaoFeng handhelds that are communicating directly (no repeater). Side Tone OFF|ON Reception of a 55 Hz or 134.4 Hz tone burst mutes the audio long enough to prevent hearing any squelch tail noise.
- Page 37 •None:No Function •Torch On/Off •Power Select PF1 LongPre •Scan On/Off You can program these keys for different functions •VOX On/Off •Alarm on/off •Radio on/off •None:No Function •Torch On/Off •Power Select PF2 Press •Scan On/Off You can program these keys for different functions •VOX On/Off •Alarm on/off •Radio on/off...
- Page 38 Made in China...
Need help?
Do you have a question about the k6 Series and is the answer not in the manual?
Questions and answers