
Related Manuals for Thermoscreens PHVX Series


Summary of Contents for Thermoscreens PHVX Series
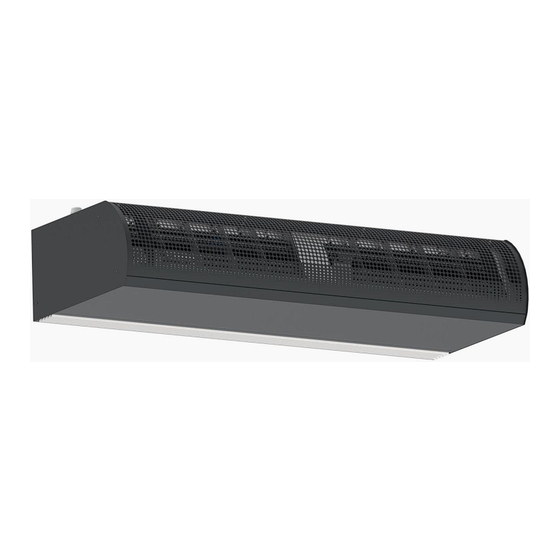
- Page 1 PHVX Series Surface mounted INSTALLATION, OPERATION & MAINTAINANCE ORIGINAL INSTRUCTIONS N. America English T5562001-5 CAN-USA-ENG Page | 1...
- Page 2 IMPORTANT INFORMATION Electrical Supply and Wiring to the Air Curtain All electrical wiring and connections MUST be carried out by a competent qualified electrician in accordance with the latest edition of IET wiring regulations and local statutory regulations if applicable. •...
-
Page 3: Warranty
Canada Established in the 1960s, Thermoscreens is a leading air curtain manufacturer that exports to over 60 countries worldwide. As with all our products, the PHVX range of air curtains is designed with energy efficiency in mind. The units are designed to be surface mounted inside a building and located horizontally over a doorway. - Page 4 SIGN OFF Complete the following once commissioning is completed: Installer signature Customer signature Installer name Customer name Installer company Customer company Date Date Instruct customer and hand over Before leaving site, hand over the installation to the customer/end user or their representative. Explain that any person operating the air curtain must be given supervision and instruction by the person responsible for their safety, concerning the safe use of the unit and to understand any hazards involved.
-
Page 5: Delivery Contents
DELIVERY CONTENTS The following items are supplied in the box at delivery. Any missing or damaged parts should be reported to the place of purchase: • PHVX Surface Mounted Air Curtain • Ecopower Remote Control Supplied with 6m [20 ft] RJ Control Cable) •... -
Page 6: Installation
INSTALLATION The air curtain is designed to be located horizontally over a doorway. It must not be installed outside of the building. Location Mount the air curtain above and as close to the doorway as possible, with: • the discharge grille not more than 4.75m [15ft 10 in] or less than 1.8m [6 ft] above floor level. - Page 7 Figure 3a Fig 3b Ceiling Suspension Suspend the unit from the ceiling as follows: Step 1. Fix four threaded rods M8 or 5/16-18 (not supplied) according to the dimensions in the table 1 below. Make sure the threaded rods are perpendicular. Note: Units of type PHVX-5ft and PHVX-6ft have three suspension Figure 4 brackets.
- Page 8 Step 2. Fit a lock nut (fig 4, element 1) to each threaded rod. Step 3. Fit drop rods through the mounting holes found in the suspension brackets (fig 4), and secure each drop rod by fitting the nuts on the underside of the suspension bracket (fig 4, element 3).
- Page 9 EAT= 21°C [70°F] and 50 % humidity. NOTE: Water Pressure Drop is across the flow and return pipework to the air curtain and includes for the coil fitted inside the unit and the valve fitted in the heating pipework to the unit. The installer must connect the 3-port valve in the heating pipework as shown in Figure 6 below: 22mm pipe 22mm pipe...
-
Page 10: Access For Electrical Connection
ACCESS FOR ELECTRICAL CONNECTION Power Supply Connection The unit is designed to have all electrical connections made by removing both the inlet plenum and the inspection panel. After removing both, run a suitable sized power supply cable into the unit via the cable gland at the back of the unit and connect the cables to the terminal connectors to L1, L2, Earth for single phase connections and to L1, L2, L3 and Earth for 3 phase connections. -
Page 11: Commissioning The System
COMMISSIONING THE SYSTEM Verify system operation To commission the system, verify the following conditions are met: • All fans are working. • Fans operate at Low, Medium and High speeds. • There is no excessive mechanical noise coming from the fans. •... -
Page 12: Using The System
Setting up Wifi connectivity 1. Download and install the Thermoscreens air curtain app from the Apple App Store or Google Play Store 2. Follow on screen instructions to link the device to your app. - Page 13 FAULT CONDITIONS Overheat Safety cut-out An overheat fault in electric heated units may cause the overheat safety cut-out(s) to operate. This is indicated by flashing LEDs on the Remote Control and a red status LED on the Ecopower PCB inside the air curtain. Before resetting ensure there is adequate air flow from the air curtain and the unit has been commissioned as per section “COMMISSIONING THE SYSTEM”.
- Page 14 Ecopower PCB status indication There is a status LED on the Ecopower PCB inside the air curtain (See LED shown on Wiring Diagrams in the Appendix). This indicates the status of the Ecopower Control system as follows: 1. LED flashing green – operation normal. 2.
-
Page 15: Service And Maintenance
Before servicing, isolate and disconnect the air curtain from the electrical power. The following servicing and maintenance must be carried out by a competent electrician WARNING: or a Thermoscreens appointed technician. Clean and inspect the inside of the air curtain as follows: Step 1 Remove inlet plenum by unscrewing M4 screws (3, 4 or 5 off depending on the size of the unit) at the top of the unit. - Page 16 Step 2 By using 8mm nut runner remove M5x20 head set screws at the top of the inspection panel. When they are removed, pull upwards the panel to unclick it from the casing and slide out carefully. Ensure the panel is supported with one of the hands, while the other is pulling the panel out as when the panel is unclicked from its position, the panel is not held by any other fastening method.
-
Page 17: Technical Specifications
TECHNICAL SPECIFICATIONS Table 3 Electrical Data Max Rated Max Rated Heat Electrical Air Curtain Model Electrical Current Output Weight Supply Power per phase [Low/High] (kg [lb]) (V/ph/Hz) Input (kW) (kW) – PHVX3A 208/1/60 82 [181] – PHVX4A 208/1/60 92 [203] PHVX5A 208/1/60 114 [251]... - Page 18 Product Performance Maximum air Maximum air Air Volume Sound Pressure velocity at curtain mounting Flow Rate Fan Speed Level of air curtain outlet grille height /h [cfm]) [dB(A) at 3m/9ft 10 in] (m/s) [ft/min] (m [ft]) 10.6 [2086] PHVX3 E/A/W– 69.0 2600 [1530] PHVX4 E/A/W –...
- Page 19 T5562001-5 CAN-USA-ENG Page | 19...
- Page 20 T5562001-5 CAN-USA-ENG Page | 20...
- Page 21 T5562001-5 CAN-USA-ENG Page | 21...
- Page 22 T5562001-5 CAN-USA-ENG Page | 22...
- Page 23 T5562001-5 CAN-USA-ENG Page | 23...
Need help?
Do you have a question about the PHVX Series and is the answer not in the manual?
Questions and answers