Advertisement
Quick Links
HOME,SMART MOES HOME
Smart Splicing and Adjustable Curtain Motor Track
Specifications
Working temp:
Rated Voltage:
AC90-240V 50/60Hz
-5℃~45℃
Bitte scannen Sie den QR-Code, um das deutsche Handbuch, das Installationsvideo und die Funktion
seinführung zu erhalten
Escanee el código QR para obtener el manual en español, el video de instalación y la introducción de la función
Veuillez scanner le code QR pour obtenir le manuel en français, la vidéo d'installation et l'introduction des
fonctions
Отсканируйте QR-код, чтобы получить руководство на русском языке, видео по установке и описание
функций
Scansionare il codice QR per ottenere il manuale in italiano, il video di installazione e la guida alle funzionalita.
Video di installazione e funzionalita
Leia o código QR para obter o manual em português, o vídeo de instalação e a introdução das funções
Zeskanuj kod QR, aby uzyskać instrukcje, filmy instalacyjne i funkcje
Product description
Curtain splicing track is a track system that splices two or more tracks together, and is
often used for hanging long or wide curtains. By splicing the tracks, the curtain tracks
can be extended to the entire length of the window, achieving full coverage and
shading effect of the curtains.
Safety Information
Do not disassemble, reassemble, modify, or attempt to repair the product by yourself.
Such products may cause electric shock, which may cause serious injury or death.
Rail assembling
Rail
Belt clamp
Power cable
Gearbox
Runner
Ceiling bracket
Expansion tube,Screw,Hex key,Extend plate
1.Open the box,check all the accessories is all in.
Connect the rails one by one after confirming the total length
For example:1 meter *3 pcs and 0.5 meters *1 pcs for the 3.5 meters rail
A.Connect rails by rail connector
B.Fasten the screw on rail connector
2.Confirm the total length of the rail and connect the rails.
Align the rail and gearbox,
Show
6 teeth
at the both ends
but do not insert the rail to
of the belt,cut after alignment
main gearbox
Pass the belt through main gearbox,then go back,
exposing 6 teeth at both ends and cut the belt.
3.Cut the belt
User Manual
Rated
Overtime
Protection
Rated torque:
Power:
protection:
grade:
18W
4min
IP41
1.8N·m
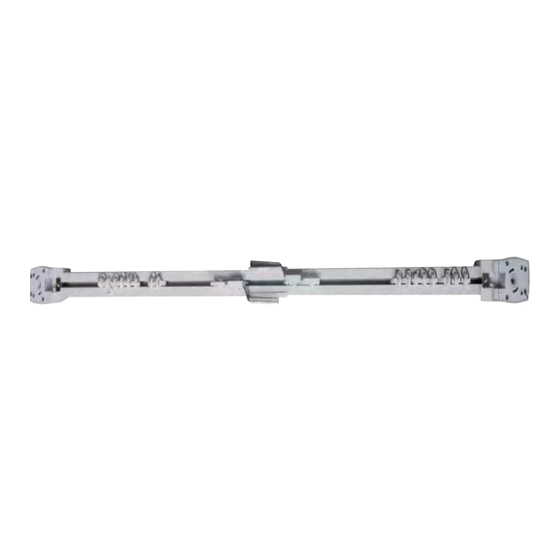
Finished rail
Motor
Rail Connector
Cr2032 battery
Clamp End hook
Remote
Wheel
Belt(under the packing)
1st mark
Hold the shaft Move away the rail 2nd mark
11 teeth
A.Make the first mark on the
B .Space 11 teeth away
belt near the edge of gearbox
first mark,make the
Second mark on the belt
C.Put in the belt clamp and runner subassembly
4.Mark on the belt and install the
runner subassembly
Insulation
Remote:
Frequency Band:
class:
E
433.92Mhz
2.400~2.4835GHz
Rail exploded view
End hook
Clamp
Wheel
Runner
Main gearbox
Put in two clamps beside the 2nd mark.
Keep 3 teeth space between them
1st mark
3 teeth
2nd mark
A. Install the runner on the belt clamps
To balance the forces,please buckle
one clamp up another down.
B. Make the belt pass trough the vice gearbox,buckle one
pair of belt clamp,put on another part of runner subassembly,
then slide to the rail.
5.Install the runners
End hook
Ceiling bracket
Extend plate
End hook:fix end hook on the gearbox to hidden the motor behind
the fabircs.
Extend plate:fix extend plate on the edge of gear box to extend the
rail 2-4cm if necessary.
Ceiling bracket:fix ceiling brackets on the back of rails,2 pcs/meter.
7.Install end hook,extend plate,ceiling bracket
Installation video
For specific installation steps, you can scan the code and refer to the video
Maximum Radio
RoHS Standard (RoHS)
Transmit Power:
<+20dBm
2011/65/EU, (EU) 2015/683
请扫描二维码获取中文的说
明书、安装视频及功能介绍
WC-PJ-DC19
Runner
Wheel
Clamp
Belt
Rail
Rail Connector
Vice gearbox
Ceiling bracket
A.Place wheels and clamp in the rail
Wheel
Note:The quantity of wheels is 8 pcs/meter
B.Connect two parts of runner subassemblies by bolt
Connect by bolt
Fasten the clamp on main gearbox and vice gearbox
6.Install the wheels and clamps
Front view of the finished rail
Top view of the finished rail
8.Assembly complete!
End hook
Clamp
Advertisement

Related Manuals for Moes WC-PJ


Summary of Contents for Moes WC-PJ
- Page 1 HOME,SMART MOES HOME Smart Splicing and Adjustable Curtain Motor Track User Manual Specifications Rated Overtime Protection Insulation Maximum Radio Working temp: Rated Voltage: Rated torque: Remote: Frequency Band: RoHS Standard (RoHS) Power: protection: grade: class: Transmit Power: AC90-240V 50/60Hz -5℃~45℃ 4min IP41 1.8N·m...
- Page 2 “Set password”. Choose “Log in” if you (Note: Tuya Smart/Smart Life App still works, but MOES App is highly already have a MOES account.
- Page 3 Hereby,WENZHOU NOVA NEW ENERGY CO.,LTD declares that the radio equipment type WC-PJ is in compliance with Directive 2014/53/EU,2014/35/EU, 2014/30/EU, 2011/65/EU. The full text of the EU declaration of conformity is available at the following internet address:https://www.moestech.com/blogs/news/wc-pj Subscribe here Thank you for your support and purchase at we Moes, we are always here for your E‐CrossStu‐GmbH Mainzer Landstr. 69 ,60329 Frankfurt am Main complete satisfaction, just feel free to share your great shopping experience with us.
Need help?
Do you have a question about the WC-PJ and is the answer not in the manual?
Questions and answers