
Related Manuals for D-Link DI-784

Summary of Contents for D-Link DI-784
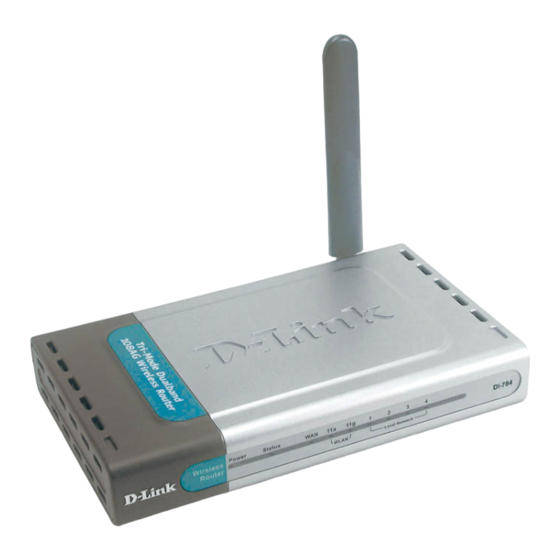
- Page 1 D-Link Air Premier AG DI-784 11a/11g Dualband Wireless 108Mbps Router Manual Building Networks for People...
-
Page 2: Table Of Contents
Contents Package Contents ................3 Introduction....................4 Connections ..................5 Features ....................6 LEDs ....................7 Wireless Basics ..................8 Getting Started ..................10 Using the Configuration Menu.............. 11 Networking Basics ................44 Troubleshooting ...................59 Technical Specifications ..............65 Frequently Asked Questions ..............68 Contacting Technical Support ..............96 Warranty....................97 Registration ..................100... -
Page 3: Package Contents
Ethernet Cable Note: Using a power supply with a different voltage rating than the one included with the DI-784 will cause damage and void the warranty for this product. If any of the above items are missing, please contact your reseller. -
Page 4: Introduction
With the DI-784 you can securely connect to wireless clients on the network using 802.1x for wireless user authentication, as well as WPA (Wi-Fi Protected Access ) providing you a much higher level of security for your data and communications than has previously been available. -
Page 5: Connections
Connections - Back Panel of Unit All Ethernet Ports (WAN and LAN) are auto MDI/MDIX, meaning you can use either a straight-through or a crossover Ethernet cable. Pressing the Reset Button restores the router to its original factory default settings. The Auto MDI/MDIX Receptor Auto MDI/MDIX... -
Page 6: Features
Features Fully compatible with the 802.11a and 802.11g standards to provide a wire- less data rate of up to 54Mbps Backwards compatible with the 802.11b standard to provide a wireless data rate of up to 11Mbps WPA (Wi Fi Protected Access ) authorizes and identifies users based on a secret key that changes automatically at a regular interval, for example: TKIP (Temporal Key Integrity Protocol), in conjunction with a RADIUS server, changes the temporal key every 10,000 packets, ensuring greater... -
Page 7: Leds
Power A solid light indicates a proper connection to the power supply. Status A blinking light indicates that the DI-784 is ready. WLAN LEDs for 11g WAN LED and 11a wireless net- A solid light Local work segments. indicates connec-... -
Page 8: Wireless Basics
D-Link wireless products will allow you access to the data you want, when and where you want it. You will be able to enjoy the freedom that wireless networking brings. -
Page 9: Installation Considerations
(interference) in signal transmissions. Installation Considerations The D-Link Air Premier AG DI-784 lets you access your network, using a wireless connection, from virtually anywhere within its operating range. Keep in mind, however, that the number, thickness and location of walls, ceilings, or other objects that the wireless signals must pass through, may limit the range. -
Page 10: Getting Started
(See the printed Quick Installation Guide included with the DWL-AG660.) Install the D-Link DFE-530TX+ wireless Cardbus adapter into a desktop com- puter. The four Ethernet LAN ports of the DI-784 are Auto MDI/MDIX and will work with both Straight-through and Crossover cable. -
Page 11: Using The Configuration Menu
Using the Configuration Menu Whenever you want to configure your network or the DI-784, you can access the Configuration Menu by opening the web-browser and typing in the IP Address of the DI-784. The DI-784 default IP Address is shown here:... - Page 12 Using the Configuration Menu (continued) Home > Wireless > Open or Shared Wireless Settings- Choose 802.11a or 802.11g. Here, 802.11a is selected. 802.11a uses the 5GHz frequency range and can support speeds of up to 54Mbps. 802.11g uses the 2.4GHz frequency range and can support speeds of up to 54Mbps. 802.11g is also backwards compatible with 802.11b.
- Page 13 Using the Configuration Menu (continued) Home > Wireless > Open or Shared (continued) Channel- 52 is the default channel for 802.11a. 6 is the default channel for 802.11g. All devices on the network must share the same channel. Authentication- Open System - communicates the key across the network Shared Key - devices must have identical WEP settings in or- der to communicate in the network WPA - Wi-Fi Protected Access authorizes and authenticates...
- Page 14 Using the Configuration Menu (continued) Home > Wireless > WPA Authentication- WPA (Wi-Fi Protected Access) is selected. Wi-Fi Protected Access authorizes and authenticates users onto the wireless network. WPA uses stronger security than WEP and is based on a key that changes automatically at a regular interval.This mode requires the inclusion of a RADIUS server in your network.
- Page 15 Using the Configuration Menu (continued) Home > Wireless > WPA-PSK Authentication- WPA-PSK - Pre-Shared Key mode means that the wireless cli- ent and the router must have the same passphrase in order to establish the wireless connection. A RADIUS server is not re- quired with PSK.
- Page 16 Using the Configuration Menu (continued) Home > WAN > Dynamic IP Address Dynamic Most Cable modem users will select this option to obtain an IP IP Address- Address automatically from their ISP (Internet Service Provider). Host Name- This is optional, but may be required by some ISPs. The host name is the device name of the Router.
- Page 17 Using the Configuration Menu (continued) Home > WAN > Static IP Address Static IP Address- Select this option to set static IP information provided to you by your ISP. IP Address- Input the IP Address provided by your ISP Input your Subnet mask. (All devices in the network must Subnet Mask- have the same subnet mask.) Input the Gateway address...
- Page 18 Using the Configuration Menu (continued) Home > WAN > PPPoE Please be sure to remove any existing PPPoE client software installed on your computers. PPPoE- Choose this option if your ISP uses PPPoE. (Most DSL users will select this option). Dynamic PPPoE- receive an IP Address automaticsally from your ISP.
- Page 19 Maximum Transmission Unit-1472 is default-you may need to MTU- change the MTU to conform with your ISP. If enabled, the DI-784 will automatically connect to your ISP af- Auto-reconnect- ter your system is restarted or if the connection is dropped.
- Page 20 Using the Configuration Menu (continued) Home > DHCP DHCP stands for Dynamic Host Control Protocol. The DI-784 has a built-in DHCP server. The DHCP Server will automatically assign an IP Address to the computers on the LAN/private network. Be sure to set your...
- Page 21 Using the Configuration Menu (continued) Advanced > Virtual Server The DI-784 can be configured as a virtual server so that remote users accessing Web or FTP services via the public IP Address can be automatically redirected to local servers in the LAN (Local Area Network).
- Page 22 Using the Configuration Menu (continued) Advanced > Virtual Server continued The DI-784 is also capable of port-redirection meaning incoming traffic to a particular port may be redirected to a different port on the server computer. Each virtual service that is created will be listed at the bottom of the screen in the Virtual Servers List.
- Page 23 Using the Configuration Menu (continued) Advanced > Virtual Server continued Click on this icon to edit the virtual service Click on this icon to delete the virtual service Example #2: If you have an FTP server that you wanted Internet users to access by WAN port 2100 and only during the weekends, you would need to enable it as such.
- Page 24 Internet telephony and others. These applications have difficulties working through NAT (Network Address Translation). Special Applications makes some of these applications work with the DI-784. If you need to run applications that require multiple connections, specify the port normally associated with an application in the “Trigger Port”...
- Page 25 Filters are used to deny or allow LAN (Local Area Network) computers from accessing the Internet. The DI-784 can be setup to deny internal computers by their IP or MAC addresses. The DI-784 can also block users from accessing restricted web sites.
- Page 26 Using the Configuration Menu Advanced > Filters > URL Blocking URL Blocking is used to deny LAN computers from accessing specific web sites. URL is a specially formatted text string that defines a location on the Internet. If any part of the URL contains the blocked word, the site will not be accessible and the web page will not display.
- Page 27 Using the Configuration Menu Advanced > Filters > MAC Filters Use MAC (Media Access Control) Filters to allow or deny LAN (Local Area Network) computers by their MAC addresses from accessing the Internet. You can either manually add a MAC address or select the MAC address from the list of clients that are currently connected to the Broadband Router.
- Page 28 Using the Configuration Menu (continued) Advanced > Filters > Domain Blocking Domain Blocking is used to allow or deny LAN (Local Area Network) computers from accessing specific domains on the Internet. Domain blocking will deny all requests to a specific domain such as http and ftp. It can also allow computers to access specific sites and deny all other sites.
- Page 29 Firewall Rules is an advanced feature used to deny or allow traffic from passing through the DI-784. It works in the same way as IP Filters with additional settings. You can create more detailed access rules for the DI-784. When virtual services are created and enabled, it will also display in Firewall Rules.
- Page 30 If you have a client PC that cannot run Internet applications properly from behind the DI-784, then you can set the client up to unrestricted Internet access. It allows a computer to be exposed to the Internet. This feature is useful for gaming purposes.
- Page 31 Authentication- Select Open system or Shared Key Open System - The DI-784 will be visible to all devices on the network. This is the default setting In this mode, in order to access the DI-784 on the network, the Shared Key -...
- Page 32 Full is the default selection. Select from the drop down menu for Transmit Power- your selection. Beacons are packets sent by the DI-784 to synchronize a wire- Beacon interval- less network. Specify a value. 100 is the default setting and is...
- Page 33 Authentication- Select Open system or Shared Key Open System - The DI-784 will be visible to all devices on the network. This is the default setting In this mode, in order to access the DI-784 on the network, the Shared Key -...
- Page 34 Using the Configuration Menu (continued) Advanced > Performance > 802.11g (continued) CTS (Clear To Send) is a function used to minimize collisions CTS Mode- among wireless devices on a wireless local area network (LAN). CTS will make sure the wireless network is clear before a wire- less client attempts to send wireless data.
- Page 35 Tools> Admin (continued) Remote Management Remote Management allows the DI-784 to be configured from the Internet by a web browser. A username and password is still required to access the Web-Management interface. In general, only a member of your network can browse the built-in web pages to perform “Administrator”...
- Page 36 Using the Configuration Menu (continued) Tools > System System Settings Save Settings to Local Hard Drive- Click Save to save the current settings to the local Hard Drive. Load Settings from Local Hard Drive- Click Browse to find the settings, then click Load. Restore to Factory Click Restore to restore the factory default settings.
- Page 37 Using the Configuration Menu (continued) Tools > Firmware Firmware Upgrade- Click on the link in this screen to find out if there is an updated firmware; if so, download the new firmware to your hard drive. Browse- After you have downloaded the new firmware, click Browse in this window to locate the firmware update on your hard drive.
- Page 38 PPTP (Point-to-Point Tunneling Protocol) and IPSec (IP Security). Once VPN pass-through is enabled, there is no need to open up virtual services. Multiple VPN connections can be made through the DI-784. This is useful when you have many VPN clients on the LAN network. PPTP-...
- Page 39 Using the Configuration Menu (continued) Tools > Cable Test Cable T Cable T Cable Test Cable Test Cable T Cable T Cable Test is an advanced feature that integrates a LAN cable tester on every Ethernet port on the router. Through the graphical user interface (GUI), Cable Test can be used to remotely diagnose and report cable faults such as opens, shorts, swaps, and impedance mismatch.
- Page 40 Using the Configuration Menu (continued) Status > Device Info Device Information- This screen displays information about the DI-784. Status > Log View Log- This screen displays the activity on the DI-784. For advanced features, click on Log Settings. Log Settings-...
- Page 41 Using the Configuration Menu (continued) Status > Log > Log Settings SMTP Server/ IP Address- Enter the proper SMTP Server information or the IP Address. Enter the email address of the recipient who will receive the Email Address- email logs. Log Type- The administrator can specify which surveillance they want to log.
- Page 42 Using the Configuration Menu (continued) Status > Stats Traffic Statistics- Displays the receive and transmit packets that are passing through the DI-784. Click on Refresh, for the most recent information. Click Reset to reset the counters back to zero. Status > Wireless Connected...
- Page 43 Using the Configuration Menu (continued) Help Help- Displays the complete Help menu. For help at anytime, click the Help tab in the Configuration menu.
-
Page 44: Networking Basics
Networking Basics Using the Network Setup Wizard in Windows XP In this section you will learn how to establish a network at home or work, using Microsoft Windows XP. Note: Please refer to websites such as http://www.homenethelp.com http://www.microsoft.com/windows2000 for information about networking computers using Windows 2000, ME or 98. - Page 45 Networking Basics Please follow all the instructions in this window: Click Next In the following window, select the best description of your computer. If your computer connects to the internet through a gateway/router, select the second option as shown. Click Next...
- Page 46 Networking Basics Enter a Computer description and a Computer name (optional.) Click Next Enter a Workgroup name. All computers on your network should have the same Workgroup name. Click Next...
- Page 47 Networking Basics Please wait while the Network Setup Wizard applies the changes. When the changes are complete, click Next. Please wait while the Network Setup Wizard configures the computer. This may take a few minutes.
- Page 48 Networking Basics In the window below, select the option that fits your needs. In this example, Create a Network Setup Disk has been selected. You will run this disk on each of the computers on your network. Click Next. Insert a disk into the Floppy Disk drive, in this case drive A. Format the disk if you wish, and click Next.
- Page 49 Networking Basics Please wait while the Network Setup Wizard copies the files. Please read the information under Here’s how in the screen below. After you com- plete the Network Setup Wizard you will use the Network Setup Disk to run the Network Setup Wizard once on each of the computers on your network.
- Page 50 Networking Basics Please read the information on this screen, then click Finish to complete the Network Setup Wizard. The new settings will take effect when you restart the computer. Click Yes to restart the computer. You have completed configuring this computer. Next, you will need to run the Network Setup Disk on all the other computers on your network.
- Page 51 Networking Basics Naming your Computer To name your computer, please follow these directions:In Windows XP: Click Start (in the lower left corner of the screen) Right-click on My Computer Select Properties and click Select the Computer Name Tab in the System Properties window.
- Page 52 Networking Basics Naming your Computer In this window, enter the Computer name Select Workgroup and enter the name of the Workgroup All computers on your network must have the same Workgroup name. Click OK Checking the IP Address in Windows XP The wireless adapter-equipped computers in your network must be in the same IP Ad- dress range (see Getting Started in this manual for a definition of IP Address Range.) To check on the IP Address of the adapter, please do the following:...
- Page 53 Networking Basics Checking the IP Address in Windows XP This window will appear. Click the Support tab Click Close Assigning a Static IP Address in Windows XP/2000 Note: Residential Gateways/Broadband Routers will automatically assign IP Ad- dresses to the computers on the network, using DHCP (Dynamic Host Configura- tion Protocol) technology.
- Page 54 Networking Basics Assigning a Static IP Address in Windows XP/2000 Double-click on Network Connections Right-click on Local Area Connections Double-click on Properties...
- Page 55 Default Gateway (in this case 192 168 it is 192.168.0.1 for the DI-784) Input your DNS server address. The DNS server address will be supplied by your ISP (Internet Service Provider). If the DNS Server address is not available from your ISP, you may input 192.168.0.1 in this field.
- Page 56 Networking Basics Assigning a Static IP Address with Macintosh OSX Go to the Apple Menu and se- lect System Preferences cClick on Network Select Built-in Ethernet in the Show pull-down menu Select Manually in the Configure pull-down menu Input the Static IP Address, the Subnet Mask and the Router IP Address in the appropriate fields...
- Page 57 Networking Basics Selecting a Dynamic IP Address with Macintosh OSX Go to the Apple Menu and select System Preferences Click on Network Select Built-in Ethernet in the Show pull-down menu Select Using DHCP in the Configure pull-down menu Click Apply Now The IP Address, Subnet mask, and the Router’s IP Address will appear in a few...
- Page 58 Networking Basics Checking the Wireless Connection by Pinging in Windows XP and 2000 Go to Start > Run > type cmd. A window similar to this one will appear. Type ping xxx.xxx.xxx.xxx, where xxx is the IP Address of the Wireless Router or Access Point.
-
Page 59: Troubleshooting
DI-784 Wireless Broadband Router. 1.The computer used to configure the DI-784 cannot access the Configuration menu. Check that the Ethernet LED on the DI-784 is ON. If the LED is not ON, check that the cable for the Ethernet connection is securely inserted. -
Page 60: Infrastructure Mode
Troubleshooting 2. The wireless client cannot access the Internet in the Infrastructure mode. Make sure the wireless client is associated and joined with the correct Access Point. To check this connection: Right-click on the Local Area Connection icon in the taskbar> select View Available Wireless Networks. The Connect to Wireless Network screen will appear. - Page 61 Troubleshooting 3. Check that the drivers for the network adapters are installed properly. You may be using different network adapters than those illustrated here, but this procedure will remain the same, regardless of the type of network adapters you are using.
- Page 62 Troubleshooting Double-click on Network Adapters Right-click on D-Link AirPro DWL-A650 Wireless Cardbus Adapter (In this example, the DWL-A650 is used; you may be using another network adapter, but the procedure will remain the same.) Select Properties to check that the...
- Page 63 RF noise, like microwaves, Monitors, electric motors, etc. 6. Why can’t I get a wireless connection? To establish a wireless connection, while enabling Encryption on the DI-784, you must also enable encryption on the wireless client. For 802.11a, the Encryption settings are: 64, 128 or 152 bit. Make sure that the encryption bit level is the same on the Router and the Wireless Client.
- Page 64 Air Premier AG products network together, out of the box, at the factory default settings. To hard-reset the D-Link Air Premier AG DI-784 to Factory Default Settings, please do the following: Locate the Reset button on the back of the DI-784.
-
Page 65: Technical Specifications
Domain Blocking Scheduling Device Management: Web-based -Internet Explorer v6 or later; Netscape Navigator v6 or later; or other Java-enabled browsers DHCP Server and Client Wireless Data Rates* with Automatic Fallback: D-Link 108 AG 108Mbps 54Mbps 48Mbps 36Mbps 24Mbps 18Mbps 12Mbps... - Page 66 Technical Specifications (continued) Security: 64-, 128-, 152-WEP WPA -Wi-Fi Protected Access (WEP with TKIP, MIC, IV Expansion, Shared Key Authentication) Media Access Control: CSMA/CA with ACK Wireless Frequency Range: 2.400GHz to 2.500GHz 5.150GHz to 5.850GHz Wireless Operating Range: Indoors: Up to 328 feet (100 meters) Modulation Technology: Orthogonal Frequency Division Multiplexing (OFDM) Complementary Code Keying (CCK)
- Page 67 Technical Specifications (continued) Wireless Transmit Power: ± 15dBm LEDs: Power Status WLAN (Wireless Connection) - 802.11a, 802.11g Local Network (Ports 1-4) External Antenna Type: Single Non-Detachable Antenna Operating Temperature: ° ° ° ° F to 131 F (0 C to 55 Humidity: 95% maximum (non-condensing) Power Input:...
-
Page 68: Frequently Asked Questions
Frequently Asked Questions Why can´t I access the web based configuration? When entering the IP Address of the DI-784 (192.168.0.1), you are not connecting to the Internet or have to be connected to the Internet. The device has the utility built-in to a ROM chip in the device itself. - Page 69 Frequently Asked Questions (continued) Why can´t I access the web based configuration? (continued) What type of cable should I be using? (continued) What´s the difference between a crossover cable and a straight-through cable? The wiring in crossover and straight-through cables are different. The two types of cable have different purposes for different LAN configurations.
- Page 70 Frequently Asked Questions (continued) Why can´t I access the web based configuration? (continued) Step 2 Disable any internet security software running on the computer. Software firewalls like Zone Alarm, Black Ice, Sygate, Norton Personal Firewall, etc. might block access to the configuration pages. Check the help files included with your firewall software for more information on disabling or configuring it.
- Page 71 Step 4 Check your IP Address. Your computer must have an IP Address in the same range as the device you are attempting to configure. Most D-Link devices use the 192.168.0.X range. How can I find my IP Address in Windows 95, 98, or Step 1 Click on Start, then click on Run.
- Page 72 Step 4 (continued) Check your IP Address. Your computer must have an IP Address in the same range of the device you are attempting to configure. Most D-Link devices use the 192.168.0.X range. How can I find my IP Address in Windows 2000/XP? Step 1 Click on Start and select Run.
- Page 73 Step 4 (continued) Check your IP Address. Your computer must have an IP Address in the same range of the device you are attempting to configure. Most D-Link devices use the 192.168.0.X range. How can I assign a Static IP Address in Windows XP? Step 1 Click on Start >...
- Page 74 Frequently Asked Questions (continued) Why can´t I access the web based configuration? (continued) How can I assign a Static IP Address in Windows 2000? (continued) Click Use the following IP Address and enter an IP Address that is on the same subnet as the LAN IP Address on your router.
- Page 75 Step 5 Access the web management. Open your web browser and enter the IP Address of your D-Link device in the address bar. This should open the login page for the web management. Follow instructions to login and complete the configuration.
- Page 76 Step 2 Click the Home tab and click the WAN button. Dynamic IP Address is the DI-784 default value, however, if Dynamic IP Address is not selected as the WAN type, select Dynamic IP Address by clicking on the radio button.
- Page 77 Log into the web based configuration by typing in the IP Address of the router (default:192.168.0.1) in your web browser. The username is admin (all lowercase) and the password DI-784 is blank (nothing). Step 2 Click the Home tab and click the WAN button.
- Page 78 Make sure you disable or uninstall any PPPoE software such as WinPoet or Enternet 300 from your computer or you will not be able to connect to the Internet. Step 1 Upgrade Firmware if needed. (Please visit the D-Link tech support website at: http://support.dlink.com for the latest firmware upgrade information.) Step 2 Take a paperclip and perform a hard reset.
- Page 79 Step 9 Turn off your DSL modem for 2-3 minutes. Turn back on. Once the modem has established a link to your ISP, plug the power back into the D-Link router. Wait about 30 seconds and log back into the router.
- Page 80 To allow traffic from the internet to enter your local network, you will need to open up ports or the router will block the request. Step 1 Open your web browser and enter the IP Address of your D-Link router (192.168.0.1). Enter username (admin) and your password (blank by default). Step 2...
- Page 81 DMZ hosts security, the Web pages might be corrupted but no other company information would be exposed. D-Link, a leading maker of routers, is one company that sells products designed for setting up...
- Page 82 Frequently Asked Questions (continued) How do I configure the DMZ Host? (continued) Step 2 Log into the web based DI-784 DI-784 DI-784 DI-784 DI-784 configuration of the router by typing in the IP Address of the router (default:192.168.0.1) in your web browser. The username is admin...
- Page 83 Frequently Asked Questions (continued) How do I open a range of ports on my router using Firewall rules? Step 1 Access the router’s web configuration by entering the router’s IP Address in your web browser. The default IP Address is 192.168.0.1. Login using your password. The default username is “admin”...
- Page 84 192.168.0.7 How do I use PC Anywhere with my router? You will need to open 3 ports in the Virtual Server section of your D-Link router. Step 1 Open your web browser and enter the IP Address of the router (192.168.0.1).
- Page 85 Frequently Asked Questions (continued) How do I use PC Anywhere with my router? (continued) Step 6 Create a second entry as shown here: Step 7 Click Apply and then click Continue. Step 8 Create a third and final entry as shown here: Step 9 Click Apply and then click Continue.
- Page 86 Frequently Asked Questions (continued) How can I use eDonkey behind my D-Link router? You must open ports on your router to allow incoming traffic while using eDonkey. eDonkey uses three ports (4 if using CLI): 4661 (TCP) To connect with a server 4662 (TCP) To connect with other clients 4665 (UDP) To communicate with servers other than the one you are connected to.
- Page 87 Frequently Asked Questions (continued) How do I set up my router for SOCOM on my Playstation 2? To allow you to play SOCOM and hear audio, you must download the latest firmware for the router (if needed), enable Game Mode, and open port 6869 to the IP Address of your Playstation.
- Page 88 Frequently Asked Questions (continued) How can I use Gamespy behind my D-Link router? Step 1 Open your web browser and enter the IP Address of the router (192.168.0.1). Enter admin for the username and your password (blank by default). Step 2...
- Page 89 Frequently Asked Questions (continued) How do I configure my router for KaZaA and Grokster? The following is for KaZaA, Grokster, and others using the FastTrack P2P file sharing system. In most cases, you do not have to configure anything on the router or on the Kazaa software.
- Page 90 You must open ports on your router to allow incoming traffic while hosting a game in Warcraft 3. To play a game, you do not have to configure your router. Warcraft 3 (Battlenet) uses port 6112. For the DI-604, DI-614+. DI-624, DI-754, DI-764, or DI-784: Step 1 Open your web browser and enter the IP Address of your router (192.168.0.1).
- Page 91 Frequently Asked Questions (continued) How do I use NetMeeting with my D-Link router? Unlike most TCP/IP applications, NetMeeting uses DYNAMIC PORTS instead of STATIC PORTS. That means that each NetMeeting connection is somewhat different than the last. For instance, the HTTP web site application uses port 80. NetMeeting can use any of over 60,000 different ports.
- Page 92 Frequently Asked Questions (continued) How do I set up my router to use iChat? -for Macintosh users- (continued) Step 3 Create a new firewall rule: Click Enabled. Enter a name (ichat1). Click Allow..Next to Source, ichat1 .
- Page 93 Frequently Asked Questions (continued) How do I set up my router to use iChat? -for Macintosh users- (continued) For File Sharing: Step 1 Click on Advanced and then Virtual Server. Step 2 Check Enabled to activate entry. Step 3 Enter a name for your ichat3 virtual server entry (ichat3).
- Page 94 Frequently Asked Questions (continued) How do I send or receive a file via iChat when the Mac OSX firewall is active? -for Macintosh users- Mac OS X 10.2 and later The following information is from the online Macintosh AppleCare knowledge base: “iChat cannot send or receive a file when the Mac OS X firewall is active in its default state.
- Page 95 Simply put, it is a method of connecting multiple computers to the Internet (or any other IP network) using one IP Address. D-Link´s broadband routers support NAT. With proper configuration, multiple users can access the Internet using a single account via the NAT device.
-
Page 96: Contacting Technical Support
Technical Support You can find software updates and user documentation on the D-Link website. D-Link provides free technical support for customers within the United States and within Canada for the duration of the warranty period on this product. U.S. and Canadian customers can contact D-Link technical support through our web site, or by phone. -
Page 97: Warranty
D-Link’s sole obligation shall be to repair or replace the defective Hardware during the Warranty Period at no charge to the original owner or to refund at D-Link’s sole discretion. Such repair or replacement will be rendered by D-Link at an Authorized D-Link Service Office. The replacement Hardware need not be new or have an identical make, model or part. - Page 98 Canada) D-Link may reject or return any product that is not packaged and shipped in strict compliance with the foregoing requirements, or for which an RMA number is not visible from the outside of the package. The product owner agrees to pay D-Link’s reasonable handling and return shipping charges for any product...
- Page 99 LIABILITY OF D-LINK UNDER THIS WARRANTY IS LIMITED TO THE PURCHASE PRICE OF THE PRODUCT COVERED BY THE WARRANTY. THE FOREGOING EXPRESS WRITTEN WARRANTIES AND REMEDIES ARE EXCLUSIVE AND ARE IN LIEU OF ANY OTHER WARRANTIES OR REMEDIES, EXPRESS, IMPLIED OR STATUTORY.
-
Page 100: Registration
Registration Register your D-Link product online at http://support.dlink.com/register/ (10/11/04)
Need help?
Do you have a question about the DI-784 and is the answer not in the manual?
Questions and answers