Table of Contents

Subscribe to Our Youtube Channel
Related Manuals for Ryobi RPP254FEJSN


Summary of Contents for Ryobi RPP254FEJSN
- Page 1 RPP254FEJSN 25.4cc POLE PRUNER OPERATOR’S MANUAL (Original Instructions) Important! It is essential you read the instructions in this manual before assembling, maintaining and operating this machine. Subject to technical modifications.
-
Page 2: General Safety Rules
English GENERAL SAFETY RULES ■ Do not operate in poor lighting. ■ Do not operate in rain or use in damp or wet environments. WARNING ■ Keep firm footing and balance. Do not overreach. Read and understand all instructions. Failure to follow Overreaching can result in loss of balance or exposure all instructions listed below, may result in electric shock, to hot surfaces. -
Page 3: Specific Safety Rules
English Save these instructions. Refer to them frequently and ■ Do not use on a ladder or unstable support. Always use them to instruct others who may use this power tool. cut with both feet on solid ground to prevent being If you loan someone this power tool, loan them these pulled off balance. - Page 4 English been specifically trained to do so. Do not expose machine to rain or wet conditions. REFUELLING ■ FUEL IS HIGHLY FLAMMABLE. Take precautions Use unleaded petrol intended for motor when using to reduce the chance of serious personal vehicle use with an octane rating of 91 [(R injury.
- Page 5 21. Bolt understand completely the operator’s manual. If you do not understand the warnings and instructions in the FIGURE 4 operator’s manual, do not use this product. Call Ryobi 5. Coupler customer service for assistance. 6. Extension shaft 13. Knob WARNING 23.
-
Page 6: Product Specifications
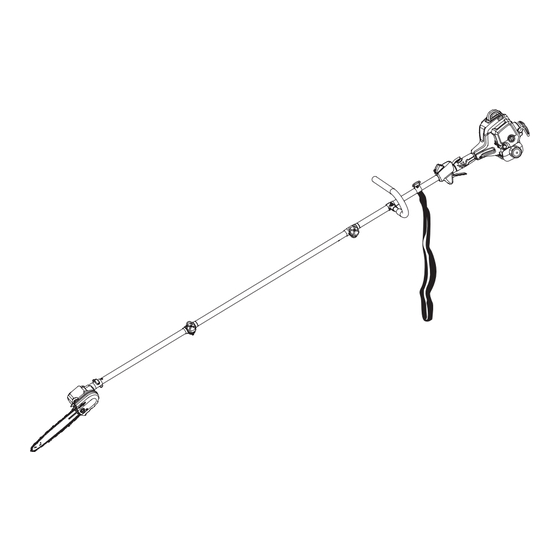
English 39. Bar nut FIGURE 28 40. Drivecase cover 61. Foam air filter 62. Air filter cover FIGURE 16 63. Cover securing knob 39. Bar nut 40. Drivecase cover FIGURE 30 64. Spark plug boot FIGURE 17 65. Spark plug 41. - Page 7 English Carlton 1010N4MH- 10" bar, laminated A-weight emission sound pressure level at the CUNBBTTI operator's position Thickness 3.33 mm Guide Oregon 534652 10" bar, laminated - Idle 76.8 dB(A) Thickness 3.33 mm - Racing 100.3 dB(A) KNOW YOUR PRUNER - Equivalent 95.6 dB(A) See figure 1.
- Page 8 English ■ Scabbard INSTALLING THE SHOULDER STRAP, HANGER AND ATTACHMENT ■ Combination wrench (5/8 in. X 3/4 in.) See figures 2 - 4. ■ 230 ml bar and chain lubricant When operating this unit, you must wear a shoulder strap ■...
-
Page 9: Operation
English To remove: FUEL AND REFUELLING ■ Loosen the knob. HANDLING THE FUEL SAFELY ■ Push in the button and twist the shafts to remove and Always handle fuel with care, it is highly flammable. separate ends. ■ Always refuel outdoors where there are no sparks and AUTOMATIC BAR AND CHAIN LUBRICATION flames. -
Page 10: Filling The Tank
English FILLING THE TANK ■ Never stand directly under the limb you are cutting. ■ Clean surface around fuel prevent ■ Always wear shoulder strap for increased safety and contamination. to support the pruner. ■ Loosen fuel cap slowly to release pressure and to ■... -
Page 11: Limbing And Pruning
English 3. Ensure the choke lever is set to the Run position LIMBING AND PRUNING See figures 7 - 8. (Choke Open). 4. Hold down the throttle lock-off button (item 32) and This unit is designed for trimming small branches and squeeze the throttle trigger (item 11). -
Page 12: General Maintenance
English out of the bar groove, as shown in figure 14 (item 38). WARNING NOTE: New chain tends to stretch; check chain tension Before inspecting, cleaning or servicing the unit (except frequently and tension as required. for choke adjustments), shut off engine, wait for all moving parts to stop, and disconnect spark plug wire CAUTION and move it away from spark plug. -
Page 13: Idle Speed Adjustment
English IDLE SPEED ADJUSTMENT the height the cutter enters the wood and the size of the wood chip that is removed. Too much clearance See figure 21. increases the potential for kickback. Too little If the chain turns at idle, the idle speed screw (item 47) clearance decreases the size of the wood chip thus needs adjusting on the engine. - Page 14 English CLEANING AIR FILTER CAUTION See figure 28. Be careful not to cross-thread the spark plug. Cross- A dirty air filter will cause starting difficulty, loss of threading will seriously damage the engine. performance, and shorten the life span of the engine. Check the air filter monthly.
-
Page 15: Troubleshooting
English TROUBLE SHOOTING PROBLEM POSSIBLE CAUSE SOLUTION 1. Switch set to the O (OFF) position. 1. Set switch to the I (ON) position. 2. No spark. 2. Remove the spark plug. Reattach the spark plug cap and lay the spark plug on the metal cylinder. - Page 16 Techtronic Industries (Australia) Pty. Ltd. Level 1, 660 Doncaster Road Doncaster, VIC 3108, Australia Techtronic Industries New Zealand Ltd. 18-26 Amelia Earhart Avenue Mangere, Auckland 2022, New Zealand 960709005-02...
Need help?
Do you have a question about the RPP254FEJSN and is the answer not in the manual?
Questions and answers