Table of Contents
Advertisement
Quick Links
Calibre
White Series.
CHS09FX/DAW
CHS12FX/DAW
CHS18FX/DAW
CHS24FX/DAW
Caution: This product installation requires
the expertise of a certified HVAC
technician to maintain the warranty.
Please ensure thorough reading of the manual before operation and retain it for
future reference. Note that this manual serves as a reference guide only. It is
essential to adhere to the specifications of the actual appliances selected.
Additionally, be aware that the manufacturer reserves the right to redesign or
modify its products as needed.
www.sirair.co.za
Advertisement
Table of Contents

Related Manuals for SIRAIR Calibre CHS09FX/DAW


Summary of Contents for SIRAIR Calibre CHS09FX/DAW
- Page 1 Note that this manual serves as a reference guide only. It is essential to adhere to the specifications of the actual appliances selected. Additionally, be aware that the manufacturer reserves the right to redesign or modify its products as needed. www.sirair.co.za...
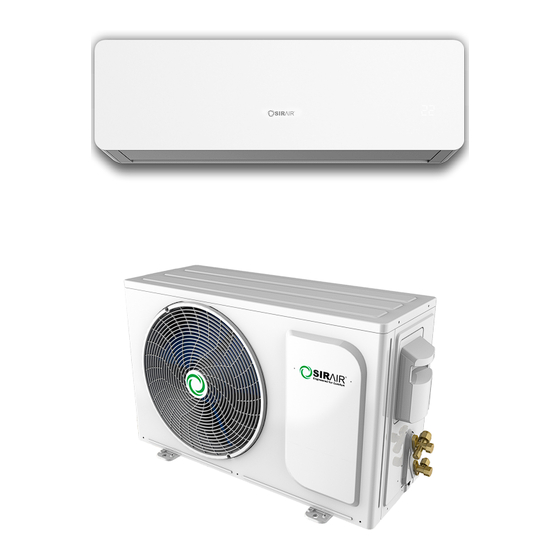
- Page 2 Indoor Unit. Outdoor Unit.
-
Page 3: Safety Precautions
SAFETY PRECAUTIONS! Warning: Adhering to these special installation precautions is paramount. Doing so significantly lowers the likelihood of encountering fire hazards, electrical shocks, injuries, or any potential loss of life arising from oversight or failure to adhere to installation instructions. 1. -
Page 4: Table Of Contents
USER MANUAL. CONTENTS. 1. SAFETY INSTRUCTIONS Symbol Description…………………………………………………..……….………..….2 Installation Instruction…………………………………………………..…….……….…. 2 Operating Instruction………………………………………………………….……….…..3 Safety Instruction… …………………………………………………………..……….… 6 2. PRODUCT INTRODUCTION Protect Functions………………………………………………….. …….….………….…7 3. DESCRIPTION OF COMPONENTS View of Unit……………………………………………………………….……..…………8 Display screen……………………………………………………………….……..……...9 Remote Controller ……………………………………………………….……..…….10 Remote Controller Display ……………………………………………….……..…….11 4. SERVICE AND MAINTENANCE Clean the Front Panel and Re mote Controller………………………….……………….13 Clean Air Filter…………………..………………………………………….………….……13 No Use for Long Time…………………..…………………………………….…………..14... -
Page 5: Safety Instructions
SAFETY INSTRUCTIONS. Symbol Description. A symbol indicating an operational error Warning: that may cause personnel casualties or serious damages. A symbol indicating an operational error Ca ution: that may cause personnel casualties or serious damages. Installation Instruction. Warning. Never Install Unit Yourself. A split-type air conditioner will maintain effective operation over extended periods if installed correctly. -
Page 6: Operating Instruction
Operating Instruction. WARNINGS Please adhere to these installation precautions diligently to minimize the risk of fires, electric shocks, injuries, or loss of life. Your attention to detail ensures a secure environment for you and your loved ones. Thank you for your conscientiousness in following these instructions. -
Page 7: Energy Saving Guide
Tips: For optimal operation, consider the following guidelines: - Install the unit on the north side, typically in shaded areas, for optimal performance. - Ensure correct electric voltage and appropriate amperage to facilitate efficient functioning. - Modifications to electrical outlets or breakers should only be performed by certified electricians. - Page 8 Operating Instructions. Use the specified power cord provided Use only single-phase AC power. and do not replace it with another. Refer to the nameplate for specific details. Avoid inserting fingers or objects Avoid placing anything into the air conditioner's inlet or outlet as the on the outdoor unit.
-
Page 9: Safety Instruction
Safety Instructions. Warning: The appliance is not designed for use by young children or individuals with disabilities without supervision. It's crucial to supervise young children to prevent them from playing with the appliance, minimizing the risk of accidents or injuries. In the event of damage to the supply cord, it should be replaced by the manufacturer, its service agent, or a similarly qualified individual to mitigate any potential hazards. -
Page 10: Product Introduction
PRODUCT INTRODUCTION Protect Functions. 1.Delay-starting protection for the compressor: The compressor restarts operation after being turned off, maintaining pressure balance in the cooling system. It waits at least 3 minutes (5 minutes in heating mode) to resume operation. Remarks: Upon initial electrification, there will be a 1-minute compressor operation. 2.Defrosting (not available for cooling-only type air conditioner): In low outdoor temperature and high humidity conditions, auto-defrosting operates for 3-10 minutes to remove frost from the outdoor heat exchanger. -
Page 11: Description Of Components
During cooling operation, if the temperature of the outdoor heat exchanger rises excessively, the indoor fan speed will automatically adjust to a lower setting, and the compressor may stop to prevent overheating. Additionally, for added functionality, a drip-proof feature (optional) is available. In cooling and dehumidification modes, the louver blades can automatically change position to prevent dripping, enhancing the overall performance and efficiency of the air conditioning unit. -
Page 12: Display Screen
Display Screen Health indicator: The health indicator light illuminates when either the UVC , function or the Cold Plasma Generator is operational. Timer indicator: The signal indicator light illuminates when the unit is in timer mode. Compressor indicator: The signal indicator light is illuminated when the, compressor is running. -
Page 13: Remote Controller
Remote Controller. Display Screen Display Screen HEALTH Button For setting display For setting display Press this button to trun on fresh air function. SWING Button SWING Button SWING Button For changing horizontal horizont For changing For changing vertical blades position and blades position blades... -
Page 14: Remote Controller Display
Remote Controller Display: Operating Mode Selection Display Turbo Display AUTO It appears when turbo function is set in COOLING or HEAT. HEAT mode, and will flash. Signal Emission Symbol COOL It appears when control signal is emitted. Wind Speed Selection Setting temp Display Display Displayed the setting... -
Page 15: Sleep Operation
Here are the instructions for Emergency Run with a cautious tone: In case the remote controller is missing or the batteries are depleted, you can utilize the Emergency Button. Operation Method: 1. With the air conditioner in the "OFF" state, open the front board. 2. -
Page 16: Service And Maintenance
SER VICE AND MAINTENANCE. Careful maintenance and regular servicing can prolong the service life of the air conditioner and reduce electricity costs. Caution: 1. Always stop the air conditioner using the remote controller and unplug it before performing any service or maintenance. 2. -
Page 17: No Use For Long Time
No Use for Long T ime? 2. Stop the operation using the remote 1. Allow swing 3-4 hours for the controller, then turn off the air internal components to dry. conditioner and disconnect its power source. 4. Remove the batteries 3. -
Page 18: Recommendations For Energy Saving
Recommendations for Energy Saving. Appropriate Te mp Setting. Avoid Direct Sunlight. Exposing oneself to overly cold temperatures When using the air conditioner for cooling, please use curtains or blinds to block direct sunlight. can be detrimental to health. Avoid Heat Sources. Close Doors and Wi n dows. -
Page 19: Trouble Shooting
TROUBLE SHOOTING Air Conditioner is in Error Here's a checklist you can follow before calling for service or repairs: Phenomenon. Checking The Following: 1. Check whether the power is disconnected. Air-con ditioner does 2. Check whether the breaker is switched on or the fuse is burnt. not operate at all. -
Page 20: Normal Phenomenons
NORMAL PHENOMENONS. When the air conditioner is heating or cooling, If the indoor humidity is too high, plastic components may water drops may form on the front grill emit sounds due to temperature changes. of the indoor unit. This is a normal phenomenon. There may be a gentle "rustle"... -
Page 21: Installation Accessories
Installation Manual. Installation Guide: This air conditioner complies with national safety and operational standards. It's important to hire professional air conditioning service and maintenance personnel for installations or removals to avoid potential problems or losses due to unprofessional handling. Ensure that the power supply meets installation and operation requirements. Refer to the nameplate for details about the voltage required for this product. -
Page 22: Tubing Selection
Position for Outdoor Unit. - Avoid positioning the air conditioner in direct sunlight. - Place the air conditioner away from heat sources, steam sources, flammable gas leaks, smoke, and dust. - Choose a location sheltered from rain and snow, with good ventilation. - Ensure that the airflow, noise, or discharged water from the air conditioner will not disturb neighbors. -
Page 23: Right Side
Table 1 Tubing size(mm/inch) Height Standard Tubing Max Tubing Additional Difference (m) refrigerants (g/.m) Length (m) Length (m) Liquid Tube Gas Tube The above dimensions are for preference only, the actual product shall prevail. Fixing Installation Panel. - Disassemble the metal installation board of the indoor unit and adjust it to a horizontal position. -
Page 24: Cover Plate
Attachment: Installation Instructions for Decorative Cover Plate. outlet drainage Cover Plate. Step 1: Wrap PVC protective tape around the drainage pipe, copper pipe, and cable. Adjust the copper pipe tube to a suitable shape. Step 2: Install the cover plate. Step 3: Finish... - Page 25 Indoor Unit Installation. 1. Connecting the right back tube (similar to the right lower tube), (optional) as shown in Fig.6: - Pull out the tubing from the bottom of the chassis and connect the drainpipe. Ensure to securely strap the joint of the tubing. - Lead the connecting wire to the indoor unit (do not connect to the power).
-
Page 26: Outdoor Unit Installation
Outdoor Unit Installation. - If installation brackets for installing the outdoor unit are needed, users can purchase them from our company or agents (refer to Fig.10). - Assemble the mounting frame and supports using the 6 screws, plain washers, spring washers, and nuts provided. - Drill 6 or more holes on the wall according to the feet size of the air- conditioner. -
Page 27: Connection Of Wires
Connection of Wires. 1. Indoor unit. Here are the steps to connect the power and signal control wires to the unit: Electric cover 1. Extend the inlet grid to its furthest extent. 2. Remove the electric cover from the unit. 3. - Page 28 Connection diagram for 9k,12k,18,24k. Connection diagram for 9k,12k,18,24k. Connection diagram for 9k,12k,18,24k. ¢Ù ¢Ú Connection diagram for 9k,12k,18,24k. Connection diagram for 9k,12k,18,24k. ④ ¢Û Fig.14...
- Page 29 Notes: Here are some guidelines for tube strapping and grounding: 1. Use a special screw for grounding, such as stainless machining screws or copper screws (M4). 2. Ensure all wires are securely connected and will not loosen or separate. 3. Wire connections should follow the wiring diagram of the air- conditioner.
- Page 30 Pumping Type. Here's a breakdown of the steps for installation: - Ensure that all tubes of the indoor and outdoor units are properly connected. - Use a spanner to remove the valve bonnet from two-way and three-way valves, then connect the vacuum pump and compound valve to the service valve bonnet.
- Page 31 Chassis (outdoor) Drain Pipe Elbow Joint (Buy it from Sirair) Fig.17 Installation for the cover of Valve: For units with individual valve covers, follow these steps for installation: 1. After connecting the connection pipes between the indoor and outdoor units as per the installation method mentioned earlier.
- Page 32 | 011 315 1246 | www.sirair.co.za Units 11, 12, 13, 14 Kingston Park | Old Pretoria Main Road 687 Halfway House | Midrand. 1685...
Need help?
Do you have a question about the Calibre CHS09FX/DAW and is the answer not in the manual?
Questions and answers