Table of Contents
Advertisement
Quick Links
Advertisement
Table of Contents

Related Manuals for Prism Healthcare smirthwaite Brookfield


Summary of Contents for Prism Healthcare smirthwaite Brookfield
- Page 1 User Manual Brookfield Doc Ref 999-1-02 – en-gb -REV 3 24-09-24 P a g e...
-
Page 2: Table Of Contents
Contents Introduction ........................................4 Manufacture ..........................................4 European Authorised Representative ............................... 4 Symbols Used .......................................... 5 Contraindications/Limitations ................................6 Intended Purpose ......................................6 1.5.1 Indications ........................................6 1.5.2 Intended User ......................................6 Safety Instructions and Warnings ................................. 7 Components/Key Parts ....................................9 Compatible Accessory List ................................... - Page 3 4.3.15 Pommel ........................................22 Technical Specifications ..................................23 Brookfield Chair Dimensions.................................. 23 Standards Applied ......................................23 Environmental Conditions ..................................24 Normal operating conditions ................................. 24 Shipping and storage conditions ................................ 24 Daily Checks ....................................... 25 Cleaning ......................................... 27 Frame Cleaning ......................................27 Fabric Cleaning.......................................
-
Page 4: Introduction
Introduction This user manual should be kept safe for future reference. Please read and understand this manual in its entirety before using your Brookfield Chair. The information in this manual is important for the safety of anyone near the chair and must be read and understood to help prevent injuries. -
Page 5: Symbols Used
Symbols Used The Table below includes all Symbols from BS EN ISO 15223-1:2021 that can be found in this Manual and on the Product and what they represent. Refer to this Table when you are unsure of what a symbol represents. Catalogue number Place of Manufacture Serial number... -
Page 6: Contraindications/Limitations
Contraindications/Limitations Contraindications of the chair include: There are no known “contraindications” associated with the usage of the Brookfield chair and its accessories, provided they are used as per manufacturer’s recommendations and guidelines. It is recommended that a client specific assessment is completed by a trained and knowledgeable health care professional to determine the best method of transfer and use. -
Page 7: Safety Instructions And Warnings
Safety Instructions and Warnings Ensure to read and understand all the statements below, for the safety of the caregivers and users, along with warranty requirements. • The user should NOT be left unattended whilst in the chair. Always ensure a responsible therapist or carer is in attendance. - Page 8 • All chairs are less stable when the load is moving. • The chair must be installed only by persons authorized by Smirthwaite or who have the rights to install and commission the chair safe for use. • Under no circumstance should the chair be put in control of a person who has not been properly trained in the use and care of this equipment.
-
Page 9: Components/Key Parts
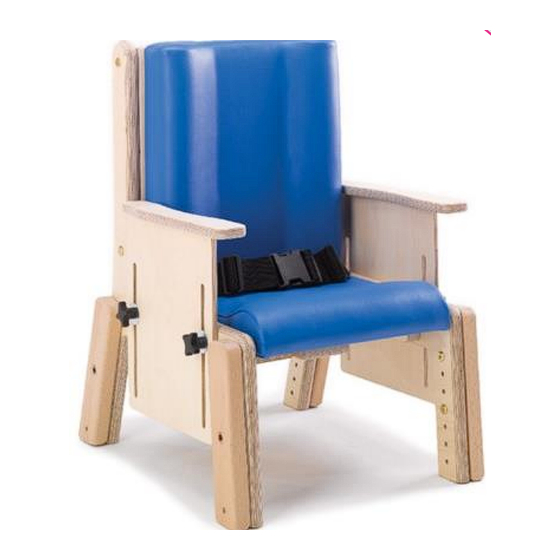
Components/Key Parts When delivered, the chair comes complete with moulded back, contoured seat, buckle pelvic strap and height adjustable armrests. It will be supplied fully assembled except for the attachment of any special accessories ordered. Please see below to familiarise yourself with the components of the Brookfield chair. If you have not received all the components listed below, contact your local Smirthwaite dealer immediately –... -
Page 10: Compatible Accessory List
Compatible Accessory List The Brookfield chair comes with a variety of compatible accessories. These accessories and part codes are listed below. Approved Accessories Size 0 Size 1 Size 2 Size 3 Size 4 Size 5 Chair Code Code Code Code Code Code Ski &... - Page 11 Low Flat T-Shaped Back BK067 BK069 BK071 BK073 BK475 available High Flat T-Shaped Back BK068 BK070 BK072 BK074 BK476 available Low Fully Adjustable Back BK083 BK085 BK087 BK089 BK491 available High Fully Adjustable Back BK084 BK086 BK088 BK090 BK492 available 25mm Spacers to Reduced Depth.
-
Page 12: Attaching Accessories
Attaching accessories The following sections provide detailed instructions on how to install, remove, and adjust the accessories of your chair. For a successful and safe assembly, please follow these instructions carefully. If you are unsure about any steps, seek advice. 3.1.1 Wooden Tray To fit the Tray, follow these steps:... -
Page 13: Tray Full And Half Handrail
3.1.3 Tray Full and Half Handrail 3.1.3.1 Attaching Loosen the handwheel on the side clamp/s of the handrail (see Fig. 3.1.3.1-1 Ref 1). Slide the clamps onto the side of the tray from the front, ref to see Fig. 3.1.3.1-1 Ref 2 for full handrail, and Fig. -
Page 14: Reversible Footboard
Fig. 3.1.4-2 Fig. 3.1.4-1 3.1.5 Reversible Footboard To fit the Reversible Footboard, follow these steps: Using the four screws provided, attach the footboard to the legs’ outriggers on each side of the chair (see Figure 3.1.2-1,). Ensure the screws are tightly fitted to ensure secure attachment. To reverse the footboard, remove the four screws (see Figure 3.1.1-1), rotate the entire board. -
Page 15: Minimum Raise Mobile Base
3.1.8 Minimum Raise Mobile Base To fit and adjust the minimum raised mobile base, follow these steps: Place the chair into the mobile base. (See Fig. 3.1.5-1) Using the 4 bolts provided with the mobile base accessory pack, secure to the leg’s outriggers. -
Page 16: Operating
Operating 4.1.1 Manoeuvring the Chair The Brookfield size 4 and 5 are designed with castors, allowing transfer and manoeuvrability of the chair, to manoeuvre correctly, follow the guidance below. To manoeuvre the chair, hold onto the handles and push forward, the designated handle is located behind the backrest and can be held at the comfiest location. -
Page 17: Adjustments
Fig. 4.1.4-1 Adjustments The Brookfield has components that are adjustable to your requirements. See the instructions below on how to adjust these components correctly. If you are unsure of any process, do not continue and seek advice. 4.2.1 Seat Dept The following steps apply to all seat options, including the split seat: Loosen the handwheels located on the underside of the seat (see Fig. -
Page 18: Armrest Height (Size 1-4)
Fig. 4.2.3-1 Fig. 4.2.3-2 4.2.4 Armrest Height (Size 1-4) To assist with side transfer onto the seat, the armrest can be lowered to the minimum setting. Loosen the handwheels located on side of the armrests (see Fig. 4.2.4-1 Ref 1). Slide the armrest up or down to the desired position. -
Page 19: Folding Footrest
The straps can be fitted to any of the available slots in the footplate by unfastening the hook and loop attachments and threading them through the appropriate slot in the footplate (see 4.2.6.1 Ref 1). The distance between the chair and the footplate can be adjusted by loosening the two bolts on either side of the footplate with a hex key (see Fig. -
Page 20: Headrest
Located the flap on the side of the Lateral/Pelvic Support. Gently peel it back to expose the internal mechanism (see Fig 4.2.10-1 Ref 1) Locate the lever inside the exposed area and firmly pull the lever to release the support from its locked position (see Fig. -
Page 21: Pelvic Lap Staps
Position the handle at the desired height by aligning it with the corresponding hole on each side of the chair (see Fig. 4.2.12-1 Ref 2). Re-insert the handwheels and tighten to secure into position. Fig. 4.2.12-1 4.2.13 Pelvic Lap Staps. To fit, remove and adjust the pelvic strap, follow the steps set out below: Use the tri-glide to set the strap to your desired length as shown below in Fig. -
Page 22: Pommel
Use the tri-glide to set the strap to your desired length (see Fig. 4.2.14-1). Fig. 4.2.14-1 If further adjustment is needed, feed more or less of the strap through the cam-lock fasteners (1) located at on the underside of the seat (see Fig. 4.2.14-2). Fig. -
Page 23: Technical Specifications
Technical Specifications Brookfield Chair Dimensions The diagram above includes the relevant dimensions of the chair, for further details on the chair specification, see the table below. All dimensions are in millimetres unless otherwise stated. Table – 5-1-1 Seat Seat Seat Back Max User Product... -
Page 24: Environmental Conditions
Environmental Conditions The chair is intended to be used in dry environments. The chair is intended to be used within a professional healthcare facility or home healthcare environment. The chair is not suitable for any other environment. The chair is not intended to be used in environments where there are rapid changes in the environmental temperature and humidity. -
Page 25: Daily Checks
Daily Checks Inspection is to be completed prior to each use by the user of the Brookfield chair. Should any of the components in the table below fail the inspection, DO NOT use the chair. Contact your local authorised dealer for service – contact details are on the last page of this manual. Ensure all component inspections in the Table below are completed prior to each use of the chair. - Page 26 Inspect the seat pad for damage including cuts and breaks. Ensure that all the nuts and bolts that secure the seat pad are secure. Inspect the seat pad for any deformation due to fatigue. A badly deformed Seat Pad seat pad must be replaced. Inspect the arm rests for damage including cuts and breaks.
-
Page 27: Cleaning
Cleaning To reduce the risk of cross-contamination it is recommended to clean the chair and accessories before use by a different person. Please follow the recommended cleaning guidelines below on cleaning and disinfecting the chair. Frame Cleaning For mild cleaning the frames can be cleaned using a damp cloth, soap and water, or an antibacterial spray. Avoid the use industrial bleaches, abrasive cleaners, or organic solvents and refrain from immersing the chair in water. -
Page 28: Dilution Chart
Dilution chart Product Concentration Tablets per Contact time Product used as Dilution qty* (l) condition (ppm) 1l (0.26gal) (minutes) Clean 5 (1.32gal) Bactericidal Dirty 1000 1 (0.26gal) Clean 5 (1.32gal) Yeasticidal Dirty 1000 1 (0.26gal) Clean 2000 1 (0.26gal) Fungicidal Dirty 5000 1 (0.26gal) -
Page 29: Servicing
Servicing No service is to be carried out on the Brookfield chair while transferring a person to reduce the risk of injury. Service must be completed by a Smirthwaite authorised service engineer, or by as Smirthwaite Ltd trained representative. Do not attempt to service the product yourself, or warranty is void. To ensure the safety and optimal performance of your Brookfield chair, it is essential to perform routine maintenance. -
Page 30: User Serviceable Parts
User Serviceable Parts Please contact Smirthwaite Ltd. or your local dealer for information to assist service requirements on the Brookfield – e.g. to ascertain the necessary information for replacement parts and components. Contact details are shown on the last page of this manual. Contact your local authorised Smirthwaite Ltd. -
Page 31: Disposal
11.0 Disposal When the chair has completed its life cycle and can no longer perform to its intended use safely the chair must be decommissioned by an approved service engineer. The following specifies the importance of correct disposal procedure including local laws and being environmentally friendly. Please observe the local laws on recycling and respect the current laws for disposal within the community the device is being used within. -
Page 32: Service Record History
13.0 Service Record History Complete this record after each service, repair inspection and/or maintenance. * Photocopy additional pages as required * 13.1.1 Product Information Model Size Date of Manufacture Serial Number 13.1.2 Service & inspection record for Date Procedure Service Personnel... - Page 33 Date Procedure Service Personnel...
- Page 34 Date Procedure Service Personnel...
- Page 35 Date Procedure Service Personnel...
- Page 36 Dealer/service contact details: Manufacturer contact details: Smirthwaite Ltd, 16 Wentworth Road Heathfield Newton Abbot Devon TQ12 6TL Telephone Number: 01626 835552 Disclaimer While every effort has been made to ensure the accuracy of information contained in this user manual, no liability can be accepted by Smirthwaite Ltd for any errors or omissions.
Need help?
Do you have a question about the smirthwaite Brookfield and is the answer not in the manual?
Questions and answers