Table of Contents
Advertisement
Quick Links
Read all instructions
before assembly and use.
KEEP INSTRUCTIONS FOR
FUTURE USE.
EN
Style #:
___________
Lot:
___________
D
REV
Date:
___________
Before contacting Delta Consumer
Experience Center please ensure this
information matches the information
matches the information found on the
label on the
Left Crib End.
To Make Assembly Even
Easier Watch Video Here!
ADULT ASSEMBLY REQUIRED
Due to the presence of small parts during assembly,
keep out of reach of children until assembly is complete.
This product is not intended for institutional or commercial use.
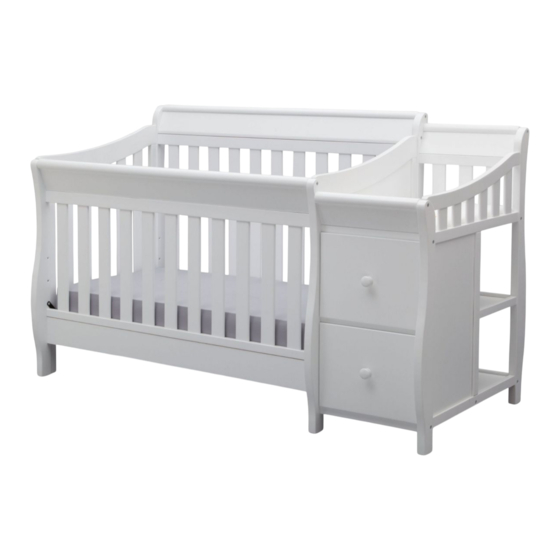
Crib N Changer
For Questions or
to Contact Us:
DeltaChildren.com/Help
If unable to access website, please email
wcs@DeltaChildren.com
Expect longer response times via email.
March 01, 2023, 43792, R0
Advertisement
Table of Contents

Related Manuals for Delta Children Crib N Changer


Summary of Contents for Delta Children Crib N Changer
- Page 1 Crib N Changer Read all instructions For Questions or To Make Assembly Even before assembly and use. to Contact Us: Easier Watch Video Here! DeltaChildren.com/Help KEEP INSTRUCTIONS FOR FUTURE USE. If unable to access website, please email wcs@DeltaChildren.com Expect longer response times via email.
- Page 2 Cuna y cambiador Para facilitar más aun el Lea todas las instrucciones Para preguntar o para ensamblaje ver el video aquí contactarnos : antes de ensamblar y usar. DeltaChildren.com/Help MANTENGA LAS Si no puede acceder el sitio web, por INSTRUCCIONES PARA SU favor envíenos un email a USO FUTURO.
- Page 4 B A B Y S A F E S L E E P T I P S Visit for more information Read all warnings and place any follow all instructions. items in the crib. The safest place for your Pillows and blankets have baby to sleep is in a caused infants to suffocate, NEVER use in a crib.
- Page 5 F U R N I T U R E S A F E T Y T I P S Visit for more information SERIOUS OR FATAL CRUSHING INJURIES CAN OCCUR FROM FURNITURE TIP-OVER. NEVER open more than Read all warnings and one drawer at a time.
- Page 6 C O N S E J O S P A R A U N S U E Ñ O S E G U R O P A R A L O S B E B É S Visite para obtener más información Lea todas las NO coloque artículos advertencias y siga...
- Page 7 C O N S E J O S D E S E G U R I D A D S O B R E M U E B L E S Visite para obtener más información PUEDEN PRODUCIRSE LESIONES GRAVES O MORTALES POR APLASTAMIENTO AL VOLCARSE MUEBLES.
- Page 8 SAVE BIG WITH Visit To Start Shopping Welcome to the Here's a Gift From Us To You Your Next Purchase From *Exclusions Apply *Subject to Change REVIEW TO R U L E S T O E N T E R “We LOVE, LOVE, LOVE this crib”...
- Page 9 AHORRE MUCHO CON Visita Para Comenzar A Comprar Bienvenido a la Aquí Está Nuestro Regalo Para Usted Su Próxima Compra En *Exclusions Apply *Subject to Change CALIFIQUE EL PRODUCTO PARA REGLAS PARA PARTICIPAR en la página web de la tienda donde haya sido comprado www.DeltaChildren.com/Review En cuanto lo envíe ya estará...
-
Page 10: Changer Top Rail X 2
PARTS: MAKE SURE THAT ALL PRE-ASSEMBLED PARTS ARE TIGHT PIEZAS: ASEGÚRESE DE QUE TODAS LAS PIEZAS PRE-ENSAMBLADAS ESTÁN BIEN APRETADAS. Changer Top Rail x 2 Barandilla superior del cambiador x 2 43776 Changer Back Top Rail x 1 Barandilla posterior superior del cambiador x 1 43777 Common Side Changer End... - Page 11 Changer Front Top Rail Changer Pad Barandilla frontal superior del cambiador x 1 43781 25083 Changer Front Middle Rail Barandilla frontal intermedia del cambiador x 1 43782 Crib Back Left Post Poste posterior izquierdo de la cuna x 1 43764 Crib Back Right Post Poste posterior derecho de la cuna x 1 Changer Bottom Front Rail...
- Page 12 Crib Top Rail x 2 Crib Front Rail barandilla superior de la cuna x 2 barandilla frontal de la cuna x 1 43762 43763 Left Crib Side Lado izquierdo de la cuna x 1 Stabilizer bar 43769 barra estabilizadora x 1 43768 Crib Back Rail barandilla posterior de la cuna x 1...
-
Page 13: Yy 4X30 Mm Metal Pin X
PARTS: HARDWARE KITS PART#43791 PIEZAS: EL KIT DE HERRAMIENTAS - PIEZA #43791 M6 x 75 mm Bolt x 2 Perno M6 x 75mm x 2 No drills necessary. 5472 Do not use power screwdriver. No hace falta taladrar. No utilice destornilladores eléctricos M6 x 55 mm Bolt x 20 Perno M6 x 55mm x 20 5468... -
Page 14: Assembly, Step
SECTION 1: CHANGING TABLE ASSEMBLY, STEP 1 SECCIÓN 1: ARMADO DEL CAMBIADOR, PASO 1 Parts and tools required to complete step Piezas y herramientas necesarias para completar este paso M4 Allen Wrench (included) Llave Allen M4 (incluido) M6 x 75 mm Bolt x 1 Perno M6 x 75mm x 1 M6 x 55 mm Bolt x 2 Crib Back Right Post... -
Page 16: Table Of Contents
SECTION 1: CHANGING TABLE ASSEMBLY, STEP 2 SECCIÓN 1: ARMADO DEL CAMBIADOR, PASO 2 Parts and tools required to complete step Piezas y herramientas necesarias para completar este paso Changer Back Top Rail x 1 Barandilla posterior superior del cambiador x 1 Changer Top Rail x 2 Barandilla superior del cambiador x 2 From Step 1... - Page 17 Attach (2) Changer Top Rails (Part C), (1) Fije (2) barandilla superior del cambiador Changer Back Top Rail (Part D), (1) Changer (Pieza C), (1) Barandilla posterior superior del Back Bottom Rail (Part F), (1) Changer Center cambiador (Pieza D), ), (1) Barandilla Bottom Rail (Part H), (1) Changer Front Top posterior inferior del cambiador (Pieza F), (1) Rail (Part J) and (1) Changer Front Bottom...
-
Page 18: H Changer Bottom Center Rail X
SECTION 1: CHANGING TABLE ASSEMBLY, STEP 3 SECCIÓN 1: ARMADO DEL CAMBIADOR, PASO 3 Parts and tools required to complete step Piezas y herramientas necesarias para completar este paso Changer Back Middle Rail x 1 Barandilla posterior intermedia del cambiador x 1 From Step 2 Desde el paso 2 Changer Center Rail x 1... - Page 20 SECTION 1: CHANGING TABLE ASSEMBLY, STEP 4 SECCIÓN 1: ARMADO DEL CAMBIADOR, PASO 4 Parts and tools required to complete step Piezas y herramientas necesarias para completar este paso Changer Middle Top Panel Panel central superior del cambiador x 1 From Step 3 Desde el paso 3 Changer Middle Shelf...
- Page 22 SECTION 1: CHANGING TABLE ASSEMBLY, STEP 5 SECCIÓN 1: ARMADO DEL CAMBIADOR, PASO 5 Parts and tools required to complete step Piezas y herramientas necesarias para completar este paso M6 x 35 mm Bolt x 2 Perno M6 x 35mm x 2 M6 x 55 mm Bolt x 5 Perno M6 x 55mm x 5 From Step 4...
- Page 24 SECTION 2: CRIB ASSEMBLY, STEP 1 SECCIÓN 2: MONTAJE DE LA CUNA, PASO 1 Parts and tools required to complete step Piezas y herramientas necesarias para completar este paso Left Crib Side Lado izquierdo de la cuna x 1 M4 Allen Wrench (included) Llave Allen M4 (incluido) M6 x 45 mm Bolt x 3 Perno M6 x 45mm x 3...
- Page 26 SECTION 2: CRIB ASSEMBLY, STEP 2 SECCIÓN 2: MONTAJE DE LA CUNA, PASO 2 Parts and tools required to complete step Piezas y herramientas necesarias para completar este paso Crib Front Rail barandilla frontal de la cuna x 1 M4 Allen Wrench (included) Llave Allen M4 (incluido) From Section 1: Step 5 Desde el Sección 1: paso 5...
- Page 27 Both ends Ambos extremos...
- Page 28 SECTION 2: CRIB ASSEMBLY, STEP 3 SECCIÓN 2: MONTAJE DE LA CUNA, PASO 3 Parts and tools required to complete step Piezas y herramientas necesarias para completar este paso M4 Allen Wrench (included) Llave Allen M4 (incluido) From Section 2: Step 2 M6 x 35 mm Bolt x 4 Desde el Sección 2: paso 2 Perno M6 x 35mm x 4...
- Page 30 SECTION 2: CRIB ASSEMBLY, STEP 4 SECCIÓN 2: MONTAJE DE LA CUNA, PASO 4 Parts and tools required to complete step Piezas y herramientas necesarias para completar este paso M4 Allen Wrench (Supplied) Llave Allen M4 (se Incluye) Mattress Support x 1 M6 x 18 mm Bolt x 4 From Section 2: Step 3 Soporte para el Colchón x 1...
- Page 31 Fall Hazard: When child is able to Riesgo de Caída: Cuando el niño pull to a standing position, set pueda ponerse de pie, ponga la cuna mattress to lowest position and en la posición más baja y saque las remove bumper pads, large toys almohadillas de protección, juguetes and other objects.
- Page 32 SECTION 2: CRIB ASSEMBLY, STEP 5 SECCIÓN 2: MONTAJE DE LA CUNA, PASO 5 Parts and tools required to complete step Piezas y herramientas necesarias para completar este paso M4 Allen Wrench (included) Llave Allen M4 (incluido) M6x17mm Barrel Nut x 2 From Section 2: Step 4 Tuerca Cilíndrica M6x17mm x 2 Desde el Sección 2: paso 4...
- Page 34 SECTION 2: CRIB ASSEMBLY, STEP 6 SECCIÓN 2: MONTAJE DE LA CUNA, PASO 6 Parts and tools required to complete step Piezas y herramientas necesarias para completar este paso M4 Allen Wrench (included) Llave Allen M4 (incluido) From Section 2: Step 5 Desde el Sección 2: paso 5 M6 x 35 mm Bolt x 4 Perno M6 x 35mm x 4...
- Page 35 CHECK TO ENSURE THAT ALL BOLTS ARE TIGHT.
- Page 36 SECTION 3: DRAWER ASSEMBLY, STEP 1 SECCIÓN 3: ARMADO DE LA GAVETA, PASO 1 Parts and tools required to complete step Piezas y herramientas necesarias para completar este paso Phillips Screwdriver (Not Provided) Destornillardor’Phillips’(No siempre) Left Drawer Side x 2 Right Drawer Side x 2 Lado izquierdo de la gaveta x 2 Lado derecho de la gaveta x 2...
- Page 37 UU x 4 Note: Grooves Must Align. Remarque: Les rainures doivent être alignées. Nota: Las ranuras deben alinearse.
- Page 38 SECTION 3: DRAWER ASSEMBLY, STEP 2 SECCIÓN 3: ARMADO DE LA GAVETA, PASO 2 Parts and tools required to complete step Piezas y herramientas necesarias para completar este paso Phillips Screwdriver (Not Provided) Destornillardor’Phillips’(No siempre) 40 mm Screw x 8 Tornillo de 40 mm x 8 From Section 3: Step 1 (x 2)
- Page 39 XX x 4 WW x 4...
- Page 40 SECTION 3: DRAWER ASSEMBLY, STEP 3 SECCIÓN 3: ARMADO DE LA GAVETA, PASO 3 Parts and tools required to complete step Piezas y herramientas necesarias para completar este paso Phillips Screwdriver (Not Provided) Destornillardor’Phillips’(No siempre) Knob x 2 Knob Bolt x 2 Perilla x 2 Tornillo para Perilla x 2 From Section 3: Step 2...
- Page 42 SECTION 3: DRAWER ASSEMBLY, STEP 4 SECCIÓN 3: ARMADO DE LA GAVETA, PASO 4 Parts and tools required to complete step Piezas y herramientas necesarias para completar este paso From Section 3: Step 3 Desde el Sección 3: paso 3 Insert the Drawers as shown.
- Page 44 SECTION 4: CHANGING PAD ATTACHMENT AND USE, STEP 1 SECCIÓN 4: FIJACIÓN Y USO ALMOHADILLA PARA MUDAR, PASO 1 Parts and tools required to complete step Piezas y herramientas necesarias para completar este paso M4 Allen Wrench (included) Llave Allen M4 (incluido) Changer Pad 1.
- Page 45 TO FASTEN STRAP - PUSH BUCKLE SIDE TOGETHER BE SURE To release, press both tabs and pull apart. BUCKLE IS FULLY FASTENED TO SECURE CHILD SAFELY. Para soltar, presione ambas lengüetas y jale. Para apretar la correa: una los lados del pasador y seguro ajustado para así...
- Page 46 Store all parts and tools colchón. Guarde todas las piezas separately, in a safe place. y herramientas por separado, en un lugar seguro. AI BAG ©2021 Delta Children’s Products Corp. See page 52 for information Vea la página 53 para obtener información...
- Page 47 SECTION 5: HOW TO ADJUST THE MATTRESS SUPPORT SECCIÓN 5: CÓMO AJUSTAR EL SOPORTE DEL COLCHÓN Parts and tools required to complete step Piezas y herramientas necesarias para completar este paso M4 Allen Wrench (Supplied) Llave Allen M4 (se Incluye) To adjust the mattress support to 1 of the Para ajustar el Soporte del Colchón a 3 height positions remove the 18mm bolts...
- Page 48 The maximum recommended weight of the child is 30lbs for the changing table. Use only the pad provided by Delta Children’s Products. Always secure the pad to the changing surface by inserting the strap through the hole in the middle of the pad.
- Page 49 SECTION 6: TIPOVER RESTRAINT SECCIÓN 6: PROTECCIÓN CONTRA VOLCAMIENTO Parts and tools required to complete step Piezas y herramientas necesarias para completar este paso Washer Arandela Phillips Screwdriver (Not Provided) Destornillardor’Phillips’(No siempre) Wall Strap Abrazadera Short Screw Long Screw Tornillo corto Tornillo Largo Install the Tipover restraint here, see page 50 and 51.
- Page 50 Tipover Restraint Protección contra volcamiento WARNING ADVERTENCIA Use of tip-over restraints may only El uso de herramientas de contención reduce, but not eliminate, the risk de vuelcos tan solo puede reducir, pero of tip-over. no eliminar, el riesgo de vuelco. Do not attempt to screw into the No intente atornillar a paredes hechas wallboard only.
- Page 51 NOTE: Be sure to attach any accessory items to case before completing this step. 6)Feed the Tipover Restarint through the hole as you place the dresser in it’s final position. NOTA: Asegúrese de fijar todos los accesorios a la carcasa antes de completar este paso. 6) Pase el elemento de retención a través del orificio, a medida que posiciona el mueble en su posición final.
- Page 52 Securely tighten loose bolts and other fasteners. crib if any parts are missing, damaged or broken. Contact Delta Children's Products for replacement parts and instructional literature if needed. Do not substitute parts.
- Page 53 Apriete firmemente los pernos sueltos y otros elementos de sujeción. No utilice la cuna si le falta alguna pieza, o alguna está dañada o rota.Póngase en contacto con Delta Children's Products si necesita recambios o instrucciones escritas. No sustituya ninguna pieza.
- Page 54 GROW WITH US Find The Right One For Your Crib At DON’T FORGET TO BUY YOUR TO CONVERT YOUR CRIB TO A TODDLER & FULLSIZE BED CRIB CONVERT TO SAVE 10% WHEN YOU PURCHASE YOUR CONVERSION KITS NOW! When You Purchase Your Guardrail &...
- Page 55 CRECE CON NOSOTROS Consiga La Correcta Para Su Cuna En NO TE OLVIDES DE COMPRAR TU PARA CONVERTIR SU CUNA EN UNA CAMA DE BEBÉ Y CAMA TAMAÑO NORMAL CAMA CUNA CONVIERTE EN CAMA TAMAÑO NORMAL AHORRE UN 10% CUANDO COMPRE SU KIT DE CONVERSIÓN AHORA! Cama Ahora *Existen exclusiones *Sujeto a cambios...
- Page 56 STEP 1 SECTION 7: TODDLER BED CONVERSION, PASO 1 SECCIÓN 7: CONVERSIÓN EN CAMA DE BEBÉ, Parts and tools required to complete step Piezas y herramientas necesarias para completar este paso M4 Allen Wrench (included) Llave Allen M4 (incluido) Remove the Crib Top Rail, Crib Front Saque la barandilla superior de la Rail and Stabilizer Bar installed in cuna, barandilla frontal de la cuna...
- Page 58 STEP 2 SECTION 7: TODDLER BED CONVERSION, PASO 2 SECCIÓN 7: CONVERSIÓN EN CAMA DE BEBÉ, Parts and tools required to complete step Piezas y herramientas necesarias para completar este paso M4 Allen Wrench (included) Llave Allen M4 (incluido) M6x17mm Barrel Nut x 4 Tuerca Cilíndrica M6x17mm x 4 From Section 7: Step 1 Desde el Sección 7: paso 1...
- Page 59 Both ends Ambos extremos...
- Page 60 STEP 3 SECTION 7: TODDLER BED CONVERSION, PASO 3 SECCIÓN 7: CONVERSIÓN EN CAMA DE BEBÉ, See page 62 for toddler bed warnings Vea la página 63 para conocer las advertencias para la cama del niño The mattress support must be in the El soporte del colchón debe estar en lowest positions.
- Page 61 A toddler bed guardrail is available for Hay una barandilla de seguridad this crib. disponible para esta cuna. Please see your crib retailer, visit Consulte a su proveedor de cunas, www.DeltaChildren.com or contact visite www.DeltaChildren.com o Delta contacte a la atención al cliente Consumer Care for more information.
- Page 62 NOTES ON CARE AND MAINTENANCE: - Do not - Inspect the product periodically, contact Delta Children's Products for replacement parts or questions. - Do not store the product or any parts in extreme temperatures and conditions such as a hot attic or a damp, cold basement.
- Page 63 NOTAS SOBRE SU CUIDADO Y MANTENIMIENTO: - No arañe ni desconche el acabado. - Inspeccione el producto con regularidad, póngase en contacto con Delta Children’s Products para el recambio de partes o para formular preguntas. - No guarde el producto ni ninguna de sus partes a temperaturas ni en condiciones extremas como un ático caluroso o un sótano húmedo y frío.
- Page 64 STEP 1 SECTION 8: FULL SIZE BED CONVERSION, PASO 1 SECCIÓN 8: CONVERSIÓN EN CAMA TAMAÑO NORMAL, Parts and tools required to complete step Piezas y herramientas necesarias para completar este paso M4 Allen Wrench (included) Llave Allen M4 (incluido) Disassemble the Changer unit by Rangez toutes les pièces et le matériel reversing all steps in section 1:...
- Page 66 STEP 2 SECTION 8: FULL SIZE BED CONVERSION, PASO 2 SECCIÓN 8: CONVERSIÓN EN CAMA TAMAÑO NORMAL, Parts and tools required to complete step Piezas y herramientas necesarias para completar este paso M4 Allen Wrench (included) Llave Allen M4 (incluido) Disassemble the Crib End by removing Desarme el Costado izquierdo de the preassembled bolts with the M4...
- Page 67 From Section 8: Step 1 Desde el Sección 8: paso 1...
- Page 68 STEP 3 SECTION 8: FULL SIZE BED CONVERSION, PASO 3 SECCIÓN 8: CONVERSIÓN EN CAMA TAMAÑO NORMAL, Parts and tools required to complete step Piezas y herramientas necesarias para completar este paso M4 Allen Wrench (included) Footboard Right Post Llave Allen M4 (incluido) Poste frontal derecho de Los Pies x 1 To create the Footboard, Assemble the Para crear los pies, arme Poste...
- Page 69 Footboad Los Pies...
- Page 70 (indicada a see your furniture or mattress retailer. continuación). Nota: El sistema de barandilla para Contact Delta Children’s Products for information or with questions. camas no está incluido, consulte a su vendedor de muebles o colchones. Contacte a Delta Children’s Products para obtener información o plantear sus...
- Page 71 NOTE: SHOWN AS A FULL SIZE NOTA: CORRESPONDE A PIES Y HEADBOARD AND FOOTBOARD, NOT CABECERA DE TAMAÑO COMPLETO; ALL BED RAIL SYSTEMS ALLOW USE OF NO TODOS LOS SISTEMAS DE A FOOTBOARD. BARANDILLA PARA CAMAS UTILIZAN PIES.
- Page 72 SAFETY LEADERS Visit Deltachildren.Com/Pages/Leaders-In-Safety for more information SAFE MATERIALS PRODUCTS YOU CAN TRUST WE GO ABOVE SLEEP SOUNDLY WITH & BEYOND DELTA CHILDREN...
- Page 73 LÍDERES EN LA SEGURIDAD Visite Deltachildren.Com/Pages/Leaders-In-Safety para más información MATERIALES SEGUROS PRODUCTOS CONFIABLES ESTAMOS POR ENCIMA DUERME PROFUNDAMENTE Y MÁS ALLÁ CON DELTA CHILDREN...
-
Page 74: Limited Warranty
Para reportarcualquier problema por favor entre a www.DeltaChildren.com/help Fecha de Compra: _____________ (debe además mantener su recibo) Delta Children’s Products Corp |114 West 26th Street New York, NY 10001... -
Page 75: Para Más Información
POR QUÉ ELEGIR A Visita para más información LE IMPORTA 1 de cada 2 10% de nuestros niños en los ingresos está Hacemos pruebas Tenemos productos Nuestra empresa Estilo E EE.UU duerme en destinado a mejorar por encima de los para cada edad familiar ha estado Innovación... - Page 76 WHY CHOOSE Visit for more information Over CARES GIVES WITH YOU Our Family-Run 1 Out Of 2 Children We Test Above & We Have Products Safety, Style Company Has Been In The U.S. Sleep In Go Toward Improving Beyond Industry For Every Age &...
Need help?
Do you have a question about the Crib N Changer and is the answer not in the manual?
Questions and answers
CAN I BUY THE TOTAL INSTALLATION HARDWARE FOR THIS ITEM?