Table of Contents
Advertisement
Quick Links
Advertisement
Table of Contents

Related Manuals for ARCTIC WIND 3AW8000A


Summary of Contents for ARCTIC WIND 3AW8000A
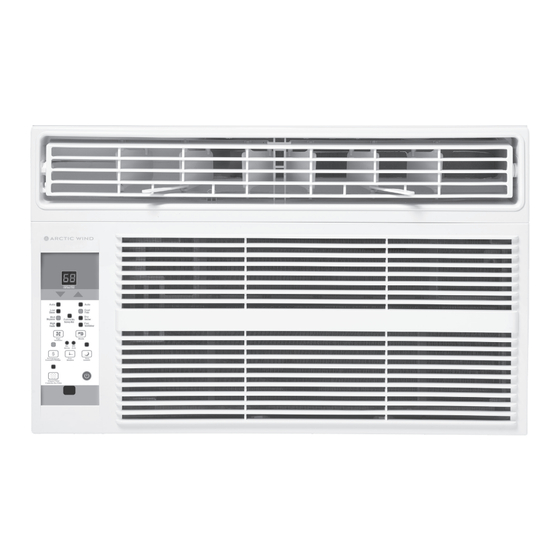
- Page 1 OWNER’S MANUAL WINDOW AIR CONDITIONER MODELS 3AW8000A, 4AW10000A, 4AW12000A...
-
Page 3: Table Of Contents
TABLE OF CONTENTS IMPORTANT SAFETY INSTRUCTION ......................4 INSTALLATION INSTRUCTIONS ........................13 WHAT IS IN THE PACKAGE ..............................13 WINDOW REQUIREMENTS ..............................14 INSTALLATION OVERVIEW ..............................14 IF AC IS BLOCKED BY A STORM WINDOW ........................18 REMOVING AC FROM WINDOW............................19 NORMAL SOUNDS ..................................19 OPERATION INSTRUCTIONS ........................20 GET TO KNOW THE FEATURES .............................20 ADJUST YOUR AC DIRECTION ..............................23 CARE &... -
Page 4: Important Safety Instruction
IMPORTANT SAFETY INSTRUCTION READ THESE SAFETY PRECAUTIONS BEFORE INSTALLATION AND OPERATION. For your safety, it is important that you read and follow the instructions in this manual to minimize the risk of personal injury, fire or electrical shock. To prevent injury to the user or other people and property damage, the following instructions must be followed. - Page 5 IMPORTANT SAFETY INSTRUCTION CAUTION When removing air filter, DO NOT touch metal parts of the unit. Doing so may cause an injury. Water may enter the unit and degrade the insulation DO NOT clean with water. causing an electric shock. Ensure proper ventilation, especially in rooms with a stove or Failure to do so may result in an oxygen shortage.
-
Page 6: Operation Of Current Device
IMPORTANT SAFETY INSTRUCTION (Continued) OPERATION OF CURRENT DEVICE WARNING The power supply cord contains a current device ELECTRICAL INFORMATION that senses damage to the power cord. To test your power supply cord do the following: The complete electrical rating of your new room air conditioner is stated on the serial plate. - Page 7 IMPORTANT SAFETY INSTRUCTION (Continued) • Be sure the air conditioner has been securely • Appliance shall be installed, operated and and correctly installed according to the stored in a room with a floor area larger than installation instructions in this manual. 43 sq.
-
Page 8: Transport Of Equipment Containing Flammable Refrigerants
IMPORTANT SAFETY INSTRUCTION (Continued) CAUTION: Risk of fire flammable materials Explanation of symbols displayed on the unit This symbol shows that the operation manual should be read carefully. CAUTION This symbol shows that a service professional should be handling this equipment CAUTION with reference to the installation manual. - Page 9 IMPORTANT SAFETY INSTRUCTION (Continued) • Marking to the equipment continues to be WARNING visible and legible. Markings and signs that are illegible should be corrected. For using R32 refrigerant • Refrigeration pipe or components are shall be available to hand. Have a dry powder installed in a position where they are unlikely or CO2 fire extinguisher adjacent to the to be exposed to any substance which may...
-
Page 10: Detection Of Flammable Refrigerants
IMPORTANT SAFETY INSTRUCTION (Continued) • The following leak detection methods are WARNING deemed acceptable for systems containing flammable refrigerants. Electronic leak detectors For using R32 refrigerant shall be used to detect flammable refrigerants, damage to cables, excessive number of but the sensitivity may not be adequate, or connections, terminals not made to original may need re-calibration. -
Page 11: Charging Procedures
IMPORTANT SAFETY INSTRUCTION (Continued) DECOMMISSIONING WARNING • Before carrying out this procedure, it is essential For using R32 refrigerant that the technician is completely familiar with the equipment and all its detail. It is recommended appliances containing flammable refrigerants, good practice that all refrigerants are recovered the system shall be purged with oxygen-free safely. - Page 12 IMPORTANT SAFETY INSTRUCTION (Continued) • The recovered refrigerant shall be processed WARNING according to local legislation in the correct recovery cylinder, and the relevant waste For using R32 refrigerant transfer note arranged. Do not mix refrigerants LABELLING in recovery units and especially not in cylinders. If compressors or compressor oils are to be •...
-
Page 13: Installation Instructions
INSTALLATION INSTRUCTIONS WHAT IS IN THE PACKAGE PREPARE THE FOLLOWING TOOLS *Tools not included Gloves Scissors Pencil Drill Screwdriver Window Type Room Air Conditioner unit Level Ruler or tape measure 3/4" (or 1/2") 3/8" Screws Screws BEFORE THE INSTALLATION Sash Lock Lock Frame The installation must be carried out in M a n... -
Page 14: Window Requirements
INSTALLATION INSTRUCTIONS (Continued) WINDOW REQUIREMENTS INSTALLATION OVERVIEW Listed in chart below LEFT RIGHT Your air conditioner is designed to install in Sash Lock and 5/8in Screws standard double hung windows with opening Top Rail and 3/8in Screws widths of 23 to 36 inches (584mm to 914mm) Frame Assembly (Left) and a minimum height in chart. - Page 15 INSTALLATION INSTRUCTIONS (Continued) STEP 1 C. Align the hole in the top rail with those in the top of the unit as shown in Fig. B. PREPARE THE WINDOW Lower sash must open sufficiently to allow a clear Fig. B vertical opening of 13 inches (330 mm).
- Page 16 INSTALLATION INSTRUCTIONS (Continued) STEP 3 side of the cabinet, make sure it sits securely inside the frame channel by making slight INSTALLING THE WINDOW AIR CONDITIONER adjustments. Slide the top and bottom ends of NOTE: Top rail and sliding panels on each the frame into the top and bottom rails of the side are offset to provide the proper pitch of cabinet.
- Page 17 INSTALLATION INSTRUCTIONS (Continued) SECURE THE ACCORDION PANELS INSTALL SUPPORT BRACKET A. Keeping a firm grip on the air conditioner, A. Place the frame lock between the frame carefully place the unit into the window extensions and the window sill as shown in opening so the bottom of the air conditioner Fig.
-
Page 18: If Ac Is Blocked By A Storm Window
INSTALLATION INSTRUCTIONS (Continued) sash lock with 3/4" (19 mm) or 1/2" (12.7 mm) IF AC IS BLOCKED BY A STORM screw as shown Fig. 9. WINDOW Add wood as shown in Fig.11, or remove storm Fig. 9 window before air conditioner is installed. If storm window frame must remain, be sure the drain holes or slots are not caulked or painted shut. -
Page 19: Removing Ac From Window
INSTALLATION INSTRUCTIONS (Continued) REMOVING AC FROM WINDOW NORMAL SOUNDS • Turn AC off, and disconnect power cord. • Remove sash seal from between windows, and unscrew safety sash lock. • Remove screws installed through frame and frame-lock. • Close (slide) side accordion panels into frame. •... -
Page 20: Operation Instructions
OPERATION INSTRUCTIONS TO TURN UNIT ON OR OFF GET TO KNOW THE FEATURES Press POWER button to turn unit on or off. WARNING • To reduce the risk of fire, electric shock, NOTE: The unit will initiate automatically the or injury to persons, read the IMPORTANT Energy Saver function under COOL, DRY and SAFETY INSTRUCTIONS before operating this AUTO modes. -
Page 21: Check Filter Feature
OPERATION INSTRUCTIONS (Continued) CHECK FILTER FEATURE TO SELECT THE OPERATING MODE Press Check filter button to initiate this feature. To choose operating mode, pressthe Mode This feature is a reminder to clean the Air Filter button. Each time you press the button, a mode for more efficient operation. -
Page 22: Additional Things You Should Know
OPERATION INSTRUCTIONS (Continued) TIMER: AUTO START/STOP FEATURE DISPLAY • Press button, the TIMER ON or TIMER OFF Shows the set temperature in ”°F" or ”°C" and the indicator light illuminates. It indicates the Auto Auto-timer settings. While on FAN only mode, it Start or Auto Stop program is initiated. -
Page 23: Adjust Your Ac Direction
OPERATION INSTRUCTIONS (Continued) FRESH AIR VENT CONTROL ADJUST YOUR AC DIRECTION 4AW10000A & 4AW12000A only CAUTION The Fresh Air Vent allows the air conditioner to: Do not stick your fingers in the air outlet, it may cause an injury. 1. Recirculate inside air - Vent Closed (See Fig.A) 2. -
Page 24: Care & Maintenance
CARE & MAINTENANCE CHECK THE AIR FILTER ONCE A MONTH TO SEE IF CLEANING IS NECESSARY The air filter should be checked at least once a month to see if cleaning is necessary. Trapped particles in the filter can build up and cause an accumulation of frost on the cooling coils. - Page 25 CARE & MAINTENANCE (Continued) 5. Store the Remote Control: INSTRUCTIONS FOR WINTER STORAGE If your air conditioner has a remote control, Choose the Storage Location remove the batteries before storage to Select a dry, cool, and indoor location for prevent potential corrosion. Always use storage.
-
Page 26: Troubleshooting
TROUBLESHOOTING Before calling for service, review this list. It may save your time and expense. This list includes common occurrences that are not the result of defective workman-ship or materials in this appliance. Problem Solution Be sure unit is not too large or too small for the area of the room. Verify that all doors, windows, curtains and any other openings are closed. - Page 27 5 minutes. It is also recommended to try another wall outlet. For further assistance, contact customer service at 855-663-9463. The design and specifications are subject to change without prior notice for product improvement. Any updates to the manual will be uploaded to the Arctic Wind website (www.arcticwindac.com), please check for the current version.
- Page 28 5401 Dansher Road Countryside, IL 60525 855-663-9463 support@arcticwindac.com www.arcticwindac.com Printed in China 0224_M084...
Need help?
Do you have a question about the 3AW8000A and is the answer not in the manual?
Questions and answers