Advertisement
Quick Links
Advertisement

Subscribe to Our Youtube Channel
Related Manuals for ARCTIC WIND 2AW8000DA


Summary of Contents for ARCTIC WIND 2AW8000DA
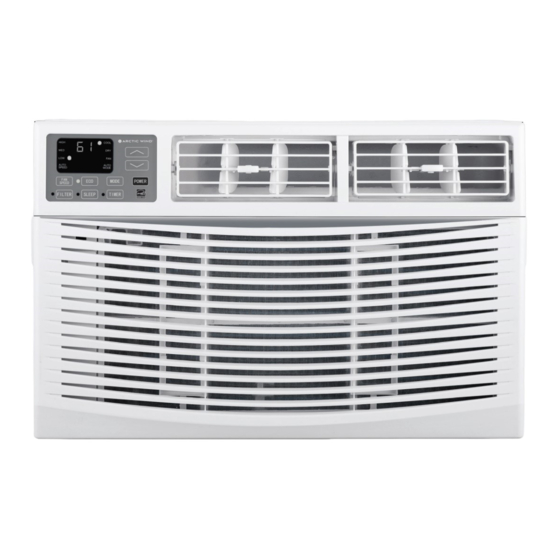
- Page 1 OWNER’S MANUAL WINDOW AIR CONDITIONER MODEL 2AW8000DA...
- Page 2 C C ON ONS S U U M M E E R R P PR R OD ODUC UCT T I IN N F F ORM ORMA A T T I I ON For your own r For your own recor ecords, please attach a copy of your sales r ds, please attach a copy of your sales receipt to this manual and complete the following: eceipt to this manual and complete the following:...
- Page 3 TABLE OF CONTENTS INTRODUCTION TO REFRIGERANTS R32 ..............IMPORTANT SAFETY INSTRUCTIONS ................. ELECTRICAL REQUIREMENTS ................... INSTALLATION HARDWARE ..................INSTALLATION & ASSEMBLY INSTRUCTIONS ............USING YOUR AIR CONDITIONER ................................ CARE AND MAINTENANCE ..................TROUBLESHOOTING ....................
- Page 4 INTRODUCTION TO REFRIGERANTS R32 The refrigerants used for air conditioners are environmentally friendly hydrocarbons R32. This kind of erant is combustible and odorless. Moreover, it can burn and explode under certain condition. However, there will be no risk of burning and explosion if you comply with the following table to install your air conditioner in a room with an appropriate area and use it correctly.
- Page 5 (CONT.) • Do Not use an extension cord. • Plug into a ground 3 prong outlet. • Unplug the air conditioner before serving. • Do Not remove the ground prong. • Use two or more people to move and install the air •...
- Page 6 Electrical Shock Hazard (8K) 0-8 amps Plug into a grounded 3 prong outlet. Do Not remove the ground prong. (8K) 10-amp time-delay fuse or Do Not use an adapter. Do Not use an extension cord. Failure to follow these instructions can result in death, fire, or electrical shock.
- Page 7 INSTALLATION HARDWARE INCLUDED TOOLS NEEDED QTY. Remote Control < (With 2 AAA Batteries) Phillips Head Screwdriver Top Mounting Rail (With foam) Lock Frame Flat Head Screwdriver Accordion Panels (With "Left" & "Right" remark on the front face) Sash Lock Drill & 3/16ʺ Drill Bit (Two holes) Window Sash Seal (Foam)
- Page 8 FIG. 1 EXTERIOR STOOL WALL OFFSET SILL INTERIOR WALL NOTE: Save the product packaging and installation instructions for future reference. Store the air conditioner in the product box when not in use for an extended period of time. (Only used for 8K)
- Page 9 (CONT.) Place the unit on the floor, a bench or a table. There is a Left and Right Accordion Panel — be sure to use the proper panel for each side. When installed, the flange for securing the panel in place to the window will be facing into the room.
- Page 10 (CONT.) FIG. 10 (Suggest to keep a downward oblique, to let accumulated rain water to drain out, from back side of the unit bottom.) FIG. 6 FIG. 11 FIG. 7 FIG. 12 FIG. 8 FIG. 13 FIG. 9...
- Page 11 (CONT.) FIG. 14...
- Page 12 INSTALLATION & ASSEMBLY INSTRUCTIONS Introduction to Refrigerants R32 Before installing the appliance, you must read the manual carefully to get the safety information and notes. When filling the combustible refrigerant, any of your rude operations may cause serious injury or injuries to human body or bodies and object or objects. A leak test must be done after the installation is completed.
- Page 13 INSTALLATION & ASSEMBLY INSTRUCTIONS Introduction to Refrigerants R32 1. Site Safety Open Flames Prohibited Ventilation Necessary 2. Operation Safety Open Flames Prohibited Mind Static Electricity Must Wear Protective Clothing and anti-static gloves Don't use mobile phone 3. Installation Safety Refrigerant Leak Detector Appropriate Installation Location The left picture is the schematic diagram of a refrigerant leak detector.
- Page 14 Cool Mode: The cooling function allows the air conditioner to cool the room and at the same time reduces humidity. Press the MODE button to activate the cooling function. To optimize this function, adjust the temperature by pressing the up and down arrows and the speed by pressing the Fan Speed button.
- Page 15 Press the SLEEP button, all of the dis-play lights will turn off after a while, but the sleeplight is always on. In the mode, the airconditioner will automatically adjust the temperature and fan speed to make the room more comfortable during the night. The set temperature will automatically change every 30-60 minutes and at most change six times until the set temperature is 81 or 82 F.
- Page 16 USING YOUR REMOTE CONTROL DISPLAY: POWER: MODE: Press the button to select the mode of operation, AUTO, COOL, DRY, FAN and HEAT Note: The HEAT mode is inactive for COOL ONLY models. Press and hold the MODE button for more than 5 seconds to delete or add the HEAT mode on remote.
- Page 17 CARE AND MAINTENANCE Clean your air conditioner to keep it looking new, minimize dust build up and for optimal performance. Power off an unplug the air conditioner to prevent shock or fire hazard. The cabinet and front panel of the air conditioner may be dusted The air filter should be checked at least once a with an oil-free cloth or wiped down with a month to see if it needs cleaning.
- Page 18 The temperature setting may not be set correctly. Battery Size: AAA - NOTE: Do not mix old and new batteries or different types of AAA batteries.
- Page 19 NOTE A highly recommended troubleshoot for any issue in general consists of turning off unit and unplugging for 5 minutes. It is also recommended to try another wall outlet. For further assistance, contact Consumer Services at 855-663-9463.
- Page 20 5401 Dansher Road Countryside, IL 60525 855-663-9463 support@arcticwindac.com www.arcticwindac.com Printed in China 0121_M528...
Need help?
Do you have a question about the 2AW8000DA and is the answer not in the manual?
Questions and answers