Table of Contents
Advertisement
Quick Links
Advertisement
Table of Contents

Summary of Contents for Tower Hobbies VL20PERFORMANCE
- Page 1 MODEL: T513006 CORDED 3-IN-1 VACUUM CLEANER USER MANUAL...
-
Page 2: Table Of Contents
TABLE OF CONTENTS THIS BOX CONTAINS SPECIFICATIONS IMPORTANT SAFETY INFORMATION • Key safety points • General safety • Whilst using the vacuum • Plug and cord WIRING SAFETY STRUCTURE OF YOUR APPLIANCE • Features & functions BEFORE FIRST USE • Setting up •... -
Page 3: This Box Contains
THIS BOX CONTAINS Instruction manual 3-in-1 vacuum cleaner Filter Brush tool Crevice tool Wall mounting kit SPECIFICATIONS RATED VOLTAGE AC 220 - 240V~ FREQUENCY 50/60Hz POWER CONSUMPTION 150W DIMENSIONS (CM) H: 1080 x W: 260 x D: 210mm WEIGHT 1.3Kg... -
Page 4: Important Safety Information
IMPORTANT SAFETY INFORMATION Please read these safety NOTES carefully • Switch off and unplug before fitting BEFORE using your Tower appliance. or removing tools/ attachments, once charged and before cleaning. These warnings have been provided in the interest of safety. Basic safety precautions •... -
Page 5: Whilst Using The Vacuum
WHILST USING THE VACUUM PLUG AND CORD • Not suitable for carpets with long fibres • Check that the voltage of the main as the bristles will damage the fibres. circuit corresponds with the rating of the appliance before operating. •... -
Page 6: Wiring Safety
WIRING SAFETY FOR UK USE ONLY • On no account must either the brown or the blue wire be connected to the Earth Fuse (Green/Yellow) [EARTH] terminal. • Always ensure that the cord grip is Neutral Live fastened correctly. (Blue) (Brown) •... -
Page 7: Structure Of Your Appliance
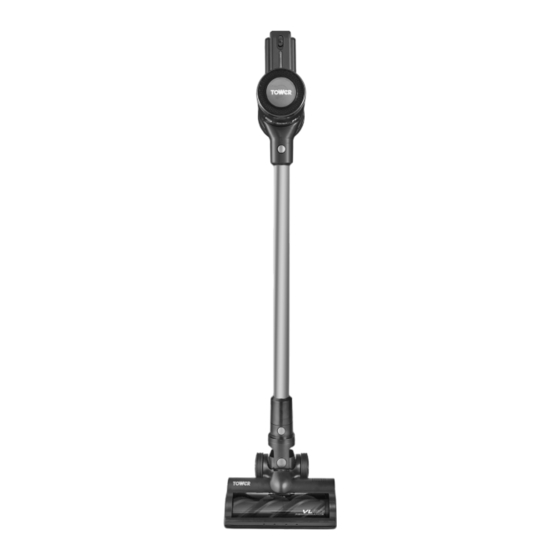
STRUCTURE OF YOUR APPLIANCE Power ON/OFF Dust Tank 2 Speed Release Button Settings Dust Tank Anti-Allergy HEPA 13 Filtration Detachable Lightweight Handheld Tube Floor Head Release Button Motorised Floor Head... -
Page 8: Before First Use
BEFORE FIRST USE SETTING UP 1. To connect the pole to the vacuum cleaner, push it into the corresponding 1. Remove your appliance from the slot on the main body of the unit until it packaging. locks into place. 2. Check that there is no visible damage to 2. -
Page 9: Attaching & Removing The Accessories
ATTACHING AND REMOVING ACCESSORIES This vacuum cleaner comes complete with a 2 in 1 Crevice and Brush Tool, for vacuuming corners and cleaning delicate surfaces, and a stand-alone crevice tool, for corners and hard-to-reach areas. Either accessory can be attached to either the flexi aluminium pole, or the handheld unit directly. -
Page 10: Installing The Wall Mount
INSTALLING THE WALL MOUNT 4. Once the two holes have been appropriately drilled, insert one of the 1. To wall-mount the appliance, begin by included wall plugs into each hole. affixing the included wall mount to the Ensure each wall plug is firmly secured wall. -
Page 11: Cleaning And Care
CLEANING AND CARE EMPTYING THE DUST TANK WARNING! DO NOT allow any liquids into the unit, as this could cause damage to Hold the unit over a bin and press the the electrical components and cause it to dust tank quick release button. Empty the malfunction. -
Page 12: Troubleshooting
TROUBLESHOOTING PROBLEM POSSIBLE CAUSE POSSIBLE SOLUTION Ensure the vacuum cleaner is The battery is low. fully charged. Check that there are no The vacuum will not Blockage to the dust tank blockages to the dust tank work. or filter. or filter and remove as necessary. -
Page 13: Disposal Of The Unit
DISPOSAL OF THE UNIT Appliances bearing the symbol shown The WEEE directive, introduced in August here may not be disposed of in domestic 2006, states that all electrical items must rubbish. You are required to dispose of old be recycled, rather than taken to landfill. electrical and electronic appliances like Please arrange to take this appliance to this separately. - Page 14 NOTES...
- Page 15 NOTES...
- Page 16 We hope you enjoy your appliance for many years... This product is guaranteed for 12 months 28 days of purchase. If you do not register from the date of original purchase. the product with us within the 28 day period, your product is guaranteed for If any defect arises due to faulty 1 year only.


Need help?
Do you have a question about the VL20PERFORMANCE and is the answer not in the manual?
Questions and answers